Configuring Deposits
For more information about deposits, see Deposits. For information about managing deposit profiles, see Managing Deposit Profiles. For an overview of working with digital resources, see Working with Digital Resources - Overview.
Configuring Deposit Return Reasons
To configure deposit return reasons, you must have one of the following roles:
- Deposit Manager
- General System Administrator
You can configure the reasons available to return a deposit for corrections. See Approving Deposits.
You configure deposit return reasons on the Deposit Return Reasons code table (Configuration > Resources > Deposit > Deposit Return Reasons). For more information about code tables, see Code Tables.

Deposit Return Reason
You can add, edit, and delete deposit return reasons. The reason you select as the default appears in the email sent to the depositor when you return a deposit. When you are finished, select Save.
Configuring Deposit Decline Reasons
To configure deposit decline reasons, you must have one of the following roles:
- Deposit Manager
- General System Administrator
You can configure the reasons available to decline a deposit. See Approving Deposits.
You configure deposit decline reasons on the Deposit Decline Reasons code table (Configuration > Resources > Deposit > Deposit Decline Reasons). For more information about code tables, see Code Tables.

Deposit Decline Reason
You can add, edit, and delete deposit decline reasons. The reason you select as the default appears in the email sent to the depositor when you decline a deposit. When you are finished, select Save.
Configuring Patron Deposit Templates
To configure patron deposit templates, you must have one of the following roles:
- Deposit Manager
- General System Administrator
You can configure the template of the Deposit Status Update Letter, which is sent to depositors when their deposit is submitted, approved, declined, returned, or withdrawn. See Approving Deposits.
The configuration for this letter uses the same workflow as other Alma letters from Configuration > General > Letters > Letters Configuration. For more information, see Configuring Alma Letters.
Configuring Terms and Conditions
To configure terms and conditions, you must have one of the following roles:
- Deposit Manager
- General System Administrator
You can configure terms and conditions for patron deposits. These statements can be displayed to patrons before they can make deposits to the Alma repository.

You configure terms and conditions on the Terms and Conditions Configuration Files page (Configuration > Resources > Deposit > Terms and Conditions).

Terms and Conditions
To configure terms and conditions:
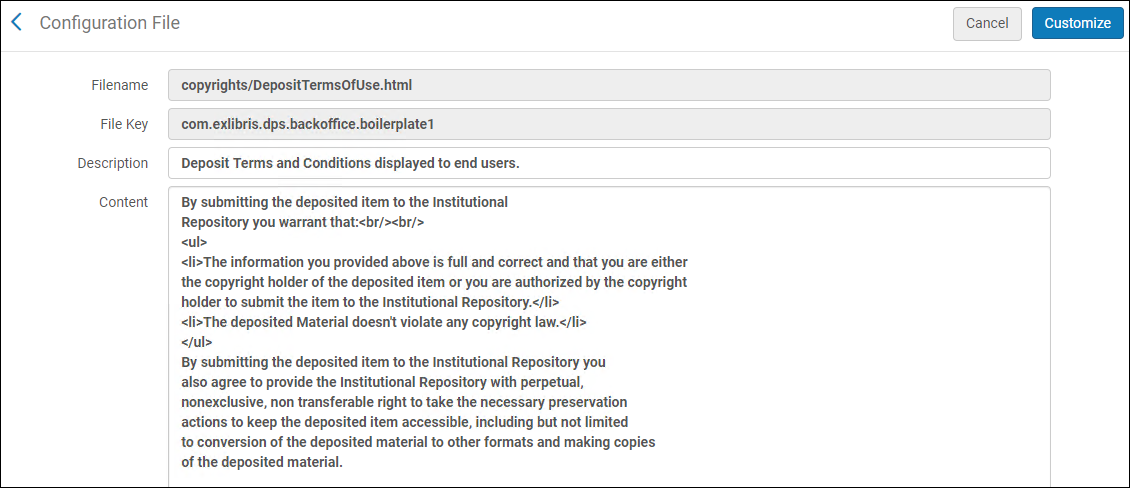
- On the Terms and Conditions Files page, select Customize for a terms and conditions. The following, for example, appears:
 Configure Terms and Conditions
 - Edit the terms and conditions, and select Customize.
After you edit a terms and conditions, the following actions are available:
- Edit – Edit the terms and conditions
- Restore – Restore the terms and conditions to the default
- View Default – View the default terms and conditions
It is possible to create terms and conditions in different languages. A language should be preceded by the following syntax: --<language code>--- For example: --fr--
Configuring Patron Deposit Labels
To configure patron deposit labels, you must have one of the following roles:
- Deposit Manager
- General System Administrator
You can configure how labels appear in the patron deposit interface for multiple languages. See Deposits.
You configure patron deposit labels on the Patron Deposit Labels code table (Configuration > Resources > Deposit > Patron Deposit Labels). Select the language from the Filter drop-down list for the language whose labels you want to configure. For more information about code tables, see Code Tables.

Patron Deposit Labels
Configuring Patron Deposit Customizations
To configure patron deposit customizations, you must have one of the following roles:
- Deposit Manager
- General System Administrator
You can use Primo Studio to configure the Patron Deposit interface.
You must have a deposit profile configured to customize the interface with Primo Studio.
To customize the Deposit Interface using Primo Studio:
- Select Patron Deposit Customization (Configuration > Resources > Deposit).
- Select a Primo view.
- Select Generate Link. The Open Primo Studio link appears.
 Patron Deposit Customization
 - Click the Open Primo Studio link.
Primo Studio opens, allowing you to customize the Deposit Interface.
For more information on using Primo Studio, see Using Primo Studio.

