
Searching Resources
To search resources, you must have one of the following roles:
- Arranging Manager
- Assessing Manager
- Cataloger
- Catalog Administrator
- Catalog Manager
- Depositing Administrator
- Editor Full
- General System Administrator
- Preservation Analyst
- Producer Manager
- Repository Manager
- Technical Analyst
With Search Resources (Resources > Cataloging > Search Resources), you can search within local resources such as the Institution Zone, Network Zone (where applicable), and the Community Zone, plus any external databases supported by Ex Libris Data Services.
To support copy cataloging, the search and import of records located in external databases is integrated directly into the MD Editor. You can perform resource searches within any search target/database that is supported by Ex Libris Data Services and that has been enabled by your institution.
If your institution is a member of a collaborative network, the list of available search resources is determined by the configurations and settings described in the External System Search in a Collaborative Network section.
When you can search external databases from within the MD Editor interface, you can import records displayed in the results of the searches directly into Alma. In addition, when configured, Alma can search your repository for records that match the imported record, merge the variant records into a single record, or overlay the existing record with the imported record (see Configuring External Search Resources).
Note also that in addition to the MD Editor, the search resources function is available from the Alma menu (Resources > Cataloging > Search Resources).
For information, watch Search and Browse in the Medatada Editor (5:50).
Working with Search Resources in the MD Editor
This section describes working with Search Resources in the MD Editor.
To search local/external resources:
-
You can search for resources from either of the below locations:
-
Open Search Resources (Resources > Cataloging > Search Resources).
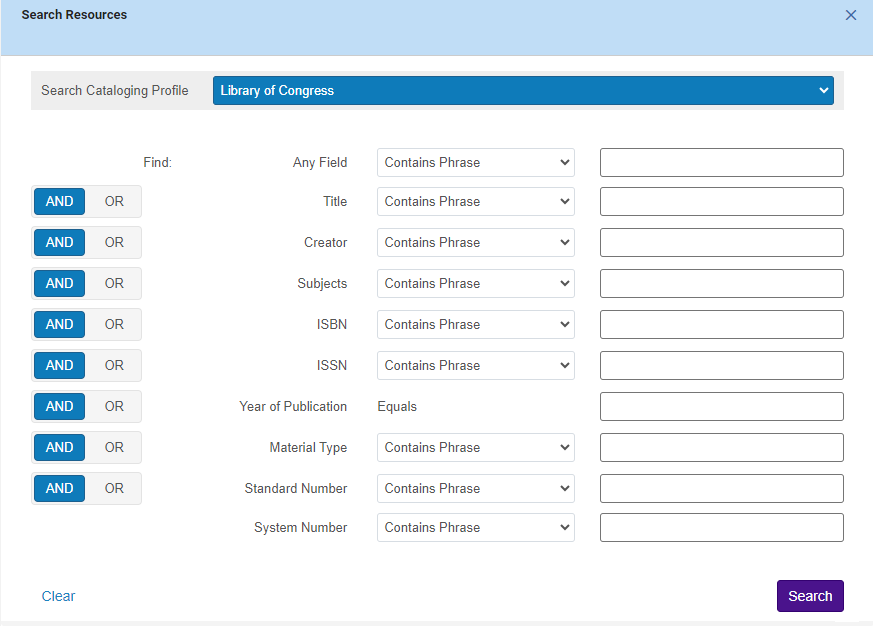 Search Resources screen
 -
If you are in the MD Editor, use the Search & Browse > Search Resources option. The Search Resources Results pane opens. If a record is already open in the MD Editor, the search fields in the Search Resources Results pane are automatically populated with search terms from this open record, as shown below.The Search Resources option is disabled when the record opened in the MD Editor is linked to the Community Zone. If you select Copy to catalog Record Actions > Copy to Catalog, the link becomes broken, and you can select the Search Resources option (Search & Browse > Search Resources).
-
When you have a record selected in the MD Editor and perform a search of local/external resources, the
 Split Editor option is automatically activated, and the relevant search fields are automatically populated with information from the current record in view.If a search in external sources shows the error "Search request not supported", it might be necessary to add the source again, as the link or name has been changed and the old source is no longer working.
-
- From the Search Cataloging Profile dropdown, select one of the predefined search profiles. For details on defining a search profile, see Configuring Search Profiles.
- Enter the search values in any of the available fields.
- The Year of Publication field must contain four digits.
- Searching by Standard Number in External Search Resources depends on whether the Standard Number field is supported by the system that manages the search target.
- Select the required input expectation for the fields that you enter:
The condition Tag Suppressed (Title) with a value No is automatically added as part of your search criteria.
- Contains Phrase
- Contains Keywords
- Select whether you want to have And/Or options between the search fields.
- Select Search. Your search results open on a left pane.
The results from the search resources are displayed in the tabs determined by your Search Configuration (see Configuring Search Profiles). The Search Configuration also determines the order in which the tabs appear. Note that you can have search results for local resources and external resources.The Held by indication is displayed for OCLC (WorldCat) records only.

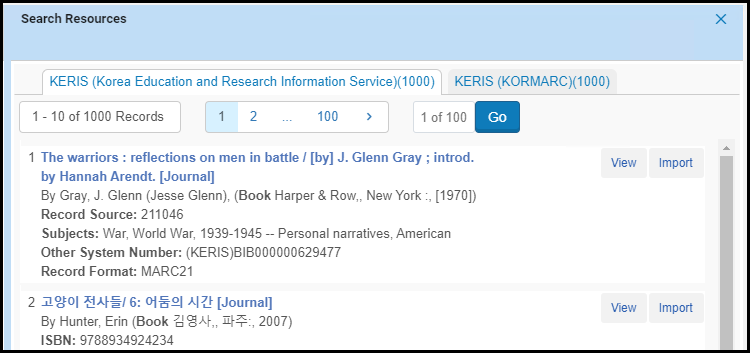 Search Resources Results Page
 - You can do the following with the search results:
- To view the record details of an item, select View. To return to the Search Resources Results page, select Back to Results. Note that for local resources, you can select the Edit action.
- To import the record of an item from an external source to Alma, select Import. The record is imported into the Drafts folder of the MD Editor (and has a Drafts icon
 next to it) where you can manipulate it like any other record. This includes the ability to create a PO line (see To create a PO line).
When you have a record selected in the MD Editor and perform a search of local/external resources (working in Split Editor mode), you have the following options when you select the "..." (row actions) button:
next to it) where you can manipulate it like any other record. This includes the ability to create a PO line (see To create a PO line).
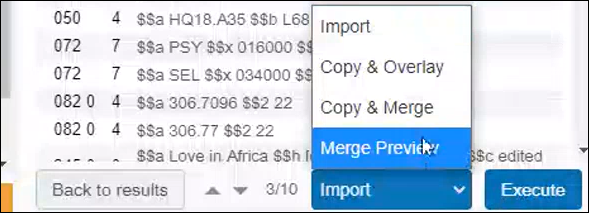
When you have a record selected in the MD Editor and perform a search of local/external resources (working in Split Editor mode), you have the following options when you select the "..." (row actions) button:- Copy and Overlay: Select to completely replace your original record with the imported record. Note that if local fields were defined on your record, this option deletes them.
- Copy and Merge: Select to merge your original record and the imported record into a single record according to the merge routine configured in the system (see Configuring External Search Resources.). During the merge, the external record serves as the primary record, meaning that its data takes precedence.
- Merge Preview: If you selected to copy and merge the records, select this option to preview how the record will look after the merge.
Working with Search Resources in the MD Editor and Using KERIS
Using Search Resources, you can access the following KERIS options (when they are configured for your system; see Configuring External Search Resources):
- KERIS (Korea Education and Research Information Service)
- KERIS (KORMARC)
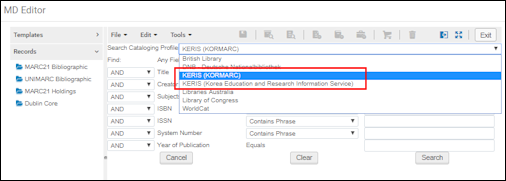
Search Resources in the MD Editor
These resources predominantly contain more records in either the KORMARC record format or the MARC 21 record format. However, it is possible that both KORMARC-formatted and MARC 21-formatted records may appear in the results when using either of these external search resources. When importing records using search resources, the following methods are used to determine which record format to use when importing the record:
- Default Implementation
With this method when you import records from KERIS using Search Resources and the KERIS resource contains records in both the KORMARC record format and the MARC 21 record format, the KERIS KORMARC records are stored in the KORMARC Bibliographic folder as shown below when you use a profile configured for KERIS KORMARC.
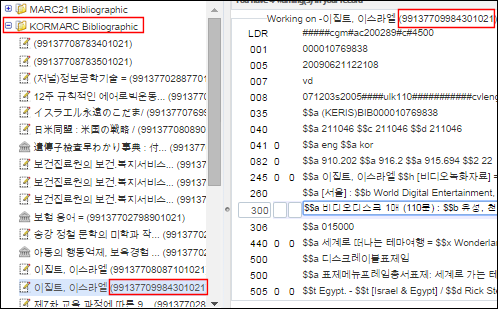 Record Imported in KORMARC Format When Using KERIS KORMARCWhen you import KERIS records using the KERIS (Korea Education and Research Information Service) profile, the records are stored in the MARC 21 Bibliographic folder, since using the KERIS (Korea Education and Research Information Service) profile indicates to Alma that you are importing a record in the MARC 21 record format.
 - Customized Customer Parameter (set by Ex Libris)
With this method, Alma determines the record format by the contents in position 10 of the LDR. MARC 21 is identified by u or 2, and KORMARC is identified by c or k. The results for your resource searches appear with MARC 21 and KORMARC specified as determined by these characteristics. This indicates the record format that will be used when importing the record.
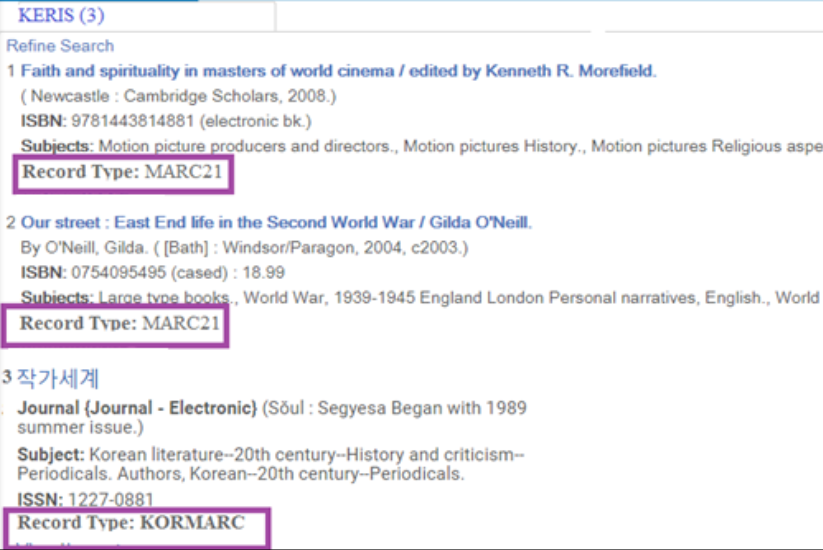 MARC 21 and KORMARC Record Formats Identified in Search Resources Results
Importing Records with Search Resources in the MD Editor and Viewing the UNIMARC Crosswalk
See the following procedure for the steps to view the UNIMARC crosswalk when importing records with Search Resources.
To configure external search for import, overly or merge, see Configuring External Search Resources.
To view the UNIMARC crosswalk when you search resources/copy cataloging:
- Open the MD Editor (Resources > Cataloging > Open Metadata Editor).
- Create a new UNIMARC record (New > UNIMARC Bibliographic).
- Open the resources search tool (Search&Browse > Search Resources).
- Complete a resources search in a MARC 21 database (such as OCLC).
- When the search results appear, select the arrow by the Import button for the bibliographic record that you prefer and select Merge Preview.
 Merge Preview Link
 - View the appropriate fields in the preview content to confirm that the preview record has been converted to UNIMARC format. For example, the 700 field should display the author information.
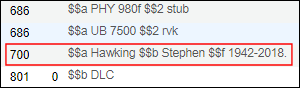 UNIMARC 700 Field Example
 - Select Copy and Merge and finish cataloging your record as usual.
Configuring External Resources for Searching
To configure external resources for searching including import, merge, and overlay, see Configuring External Search Resources. After you have defined/configured the external resources that you want to be able to search, you can create a search profile that identifies these resources for searching. For creating a search profile, see Configuring Search Profiles. Note that in the search profile, you can identify both external and local resources for searching.
To define the correct match profile to be used, you must include the appropriate file key in the serial_match_profile and non_serial_match_profile Parameter Value column (Configuration > Resources > General > Other Settings). For detailed information on these file keys, see the table in Configuring Other Settings.