Adding Output to a Profile
This page describes how a researcher can add assets to their profile via the portal. The researcher needs to be logged into the profile in order to see the options described below.
Once the researcher submits an asset, it must be approved by an administrator before it can be accessed by other users from the portal. Researchers can add files and links to assets after they are submitted, and even after the assets have been approved, but they cannot edit assets that have already been submitted.
For general information on adding content to a profile, see Adding and Editing Content on a Profile.
Submitting Output to a Profile
Researchers can submit their work through their profiles, by means of an Add Output wizard.
- There are two places from which you can open the Add Output wizard in order to begin adding an asset:
The first one is the top right: select the ADD CONTENT button, and then select Output.The second is in the Output tab of the profile: select the ADD WORK button.
When you select one of these options, the Add Output wizard opens.
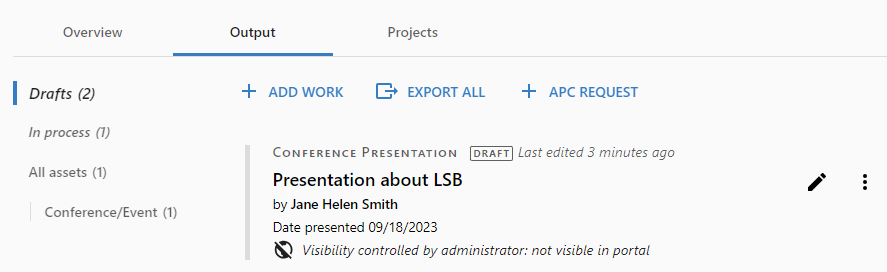
At any point in the process of entering information into this wizard, you can save the asset as a draft and continue working working on it later. To do so, select the X at the top left of the wizard. The wizard then closes, and the draft appears in the Output tab of the profile, under Drafts.
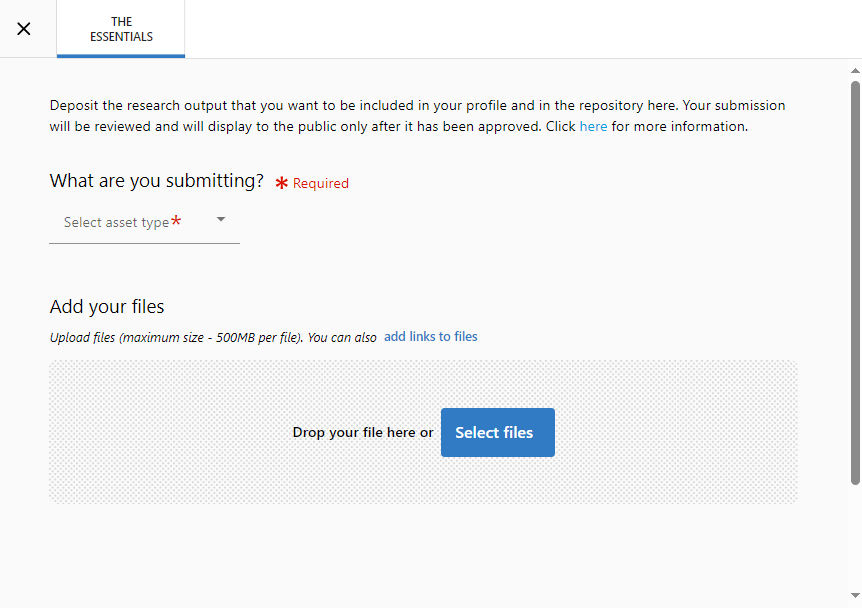
- In the THE ESSENTIALS tab, select the asset type. A search field is added to the tab.
- If a record of the asset may already be in the Esploro repository or in CDI, enter its title, DOI, or PMID, and Esploro will automatically search for it.
If a DOI exists for the asset, we recommend using it to search for the asset, rather than the title. A title search only searches among the approved assets in the system; using a DOI extends the search to include all assets in CDI (see CDI).
If Esploro succeeds in finding an asset based on the information you enter in this wizard, information about it appears in a pop-up.
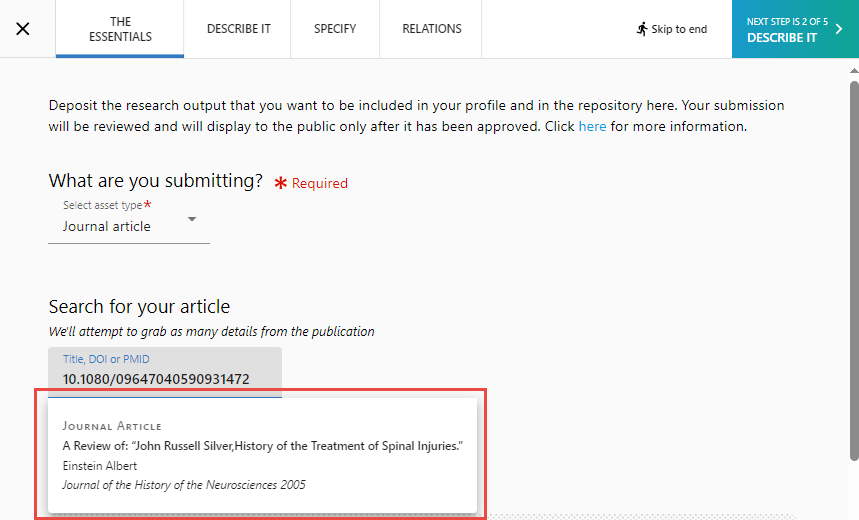
- If the information in the pop-up appears to be the record of the correct asset, select the pop-up.
- If a record of this asset is not yet in the Esploro repository, all of the asset's available metadata is automatically added to the relevant fields of the wizard. Automatically filled metadata is indicated by a lightning-bolt icon
 .
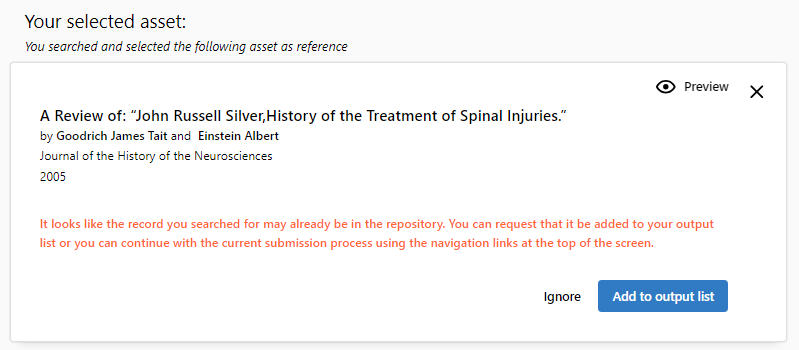
. - If a record of the asset is already in the Esploro repository, Esploro cannot add it to the repository again, because it does not store duplicates. In this case, a message appears, offering you two options:
- Ignore – Select this option if this is not the correct asset. The message closes. No metadata is copied from the asset record, the contents of the search field are cleared, and you can either enter alternative search criteria, or simply begin filling in the fields of the wizard manually.
- Add to output list – Select this option if this is the correct asset, and you want it to be added to the list of your works. A request to add the asset to your output list is sent to the Esploro administrators for approval. Once approved, the asset metadata will include your name, and the asset will appear in your profile.
This message appears if the asset is already in the Esploro repository, but your name is not associated with it. If your name is already included in the metadata of the asset, a similar-looking message appears, but it says:
It looks like the record you searched for may already be in the repository and on your output list. Use the navigation links at the top of the screen to continue with the submission process or use cancel to end it.In this case, the two options offered are:
- Ignore – Select this option if this is not the correct asset. The message closes. No metadata is copied from the asset record, the contents of the search field are cleared, and you can either enter alternative search criteria, or simply begin filling in the fields of the wizard manually.
- End process – Select this option to cancel the submission process and close the wizard.
- If a record of this asset is not yet in the Esploro repository, all of the asset's available metadata is automatically added to the relevant fields of the wizard. Automatically filled metadata is indicated by a lightning-bolt icon
- If you have files to upload, do so under Add your files. To add metadata to uploaded files, select Edit metadata to expand each file listing and display the options.
- When you finished adding files, select the NEXT STEP button or the next tab.
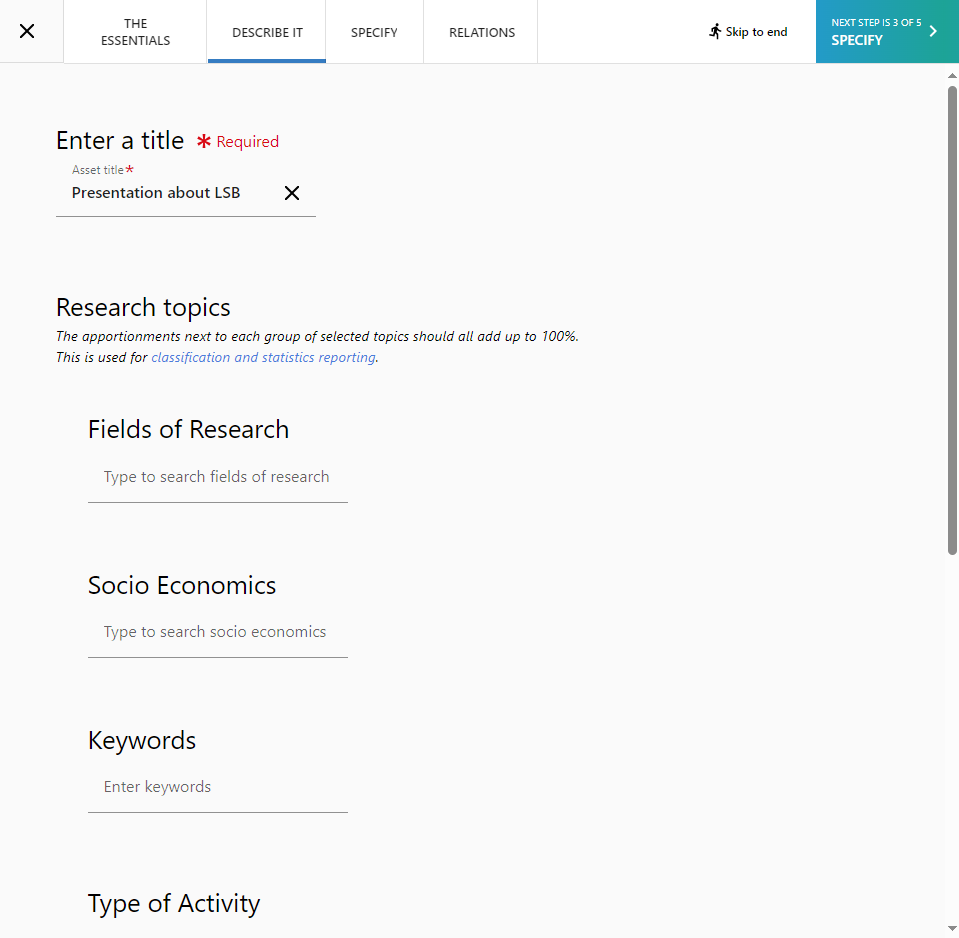
- In the DESCRIBE IT and SPECIFY tabs, enter the title and other asset details. When you are finished with each tab, select the NEXT STEP button or the next tab.
- In the RELATIONS tab, you can search for related grants or add a new grant.
- When you have finished filling in the information about the asset, and are ready to submit it, on the RELATIONS tab, select REVIEW (or, on any other tab, select Skip to end). The Asset summary is displayed. On this page, you can also add a message to the Esploro administrator and a copyright notice.
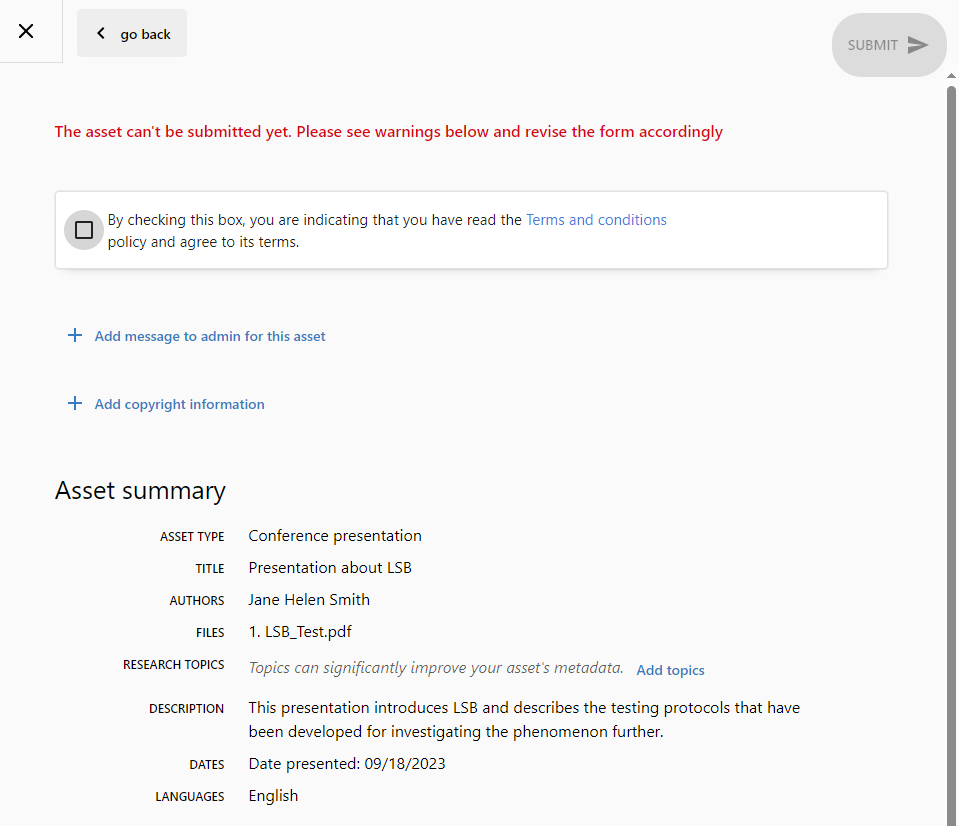
- Read the Terms and conditions, and then indicate that you agree to the terms. The Submit button becomes active.
- Select the Submit button. A message appears, letting you know that the asset was successfully submitted for approval by an administrator.

Processing of a Submission
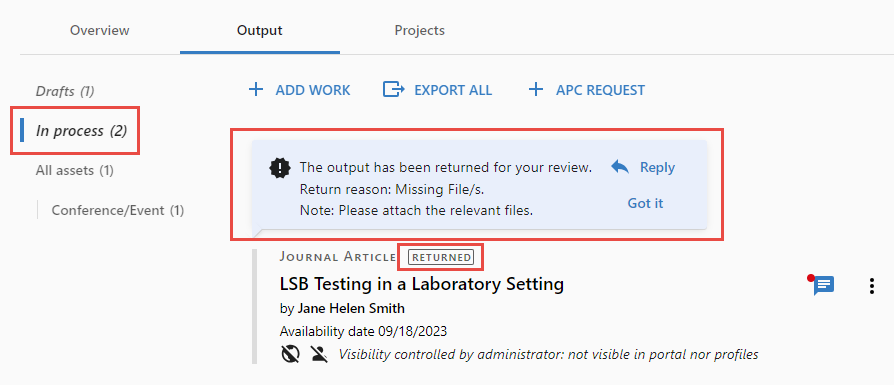
Once works are submitted as described above, they must be approved by an administrator before they can appear in the public portal. Until the submission is approved, it is displayed in the profile in the In process area of the Output tab.
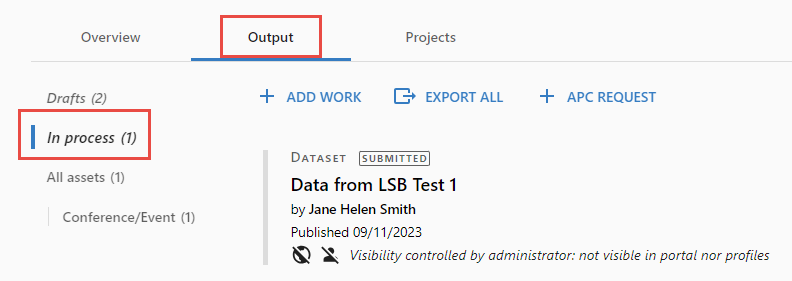
The In process area includes all assets that were submitted but not yet approved by an administrator. This includes assets returned by an administrator as needing more information. These assets are labeled RETURNED and include a reason for the return. Returned assets can be edited by the researcher, but submitted assets cannot be edited by researchers. Depending on the system configuration, letters may be sent to the researcher informing them of changes in the status of their submission, such as asset approval or asset returned.
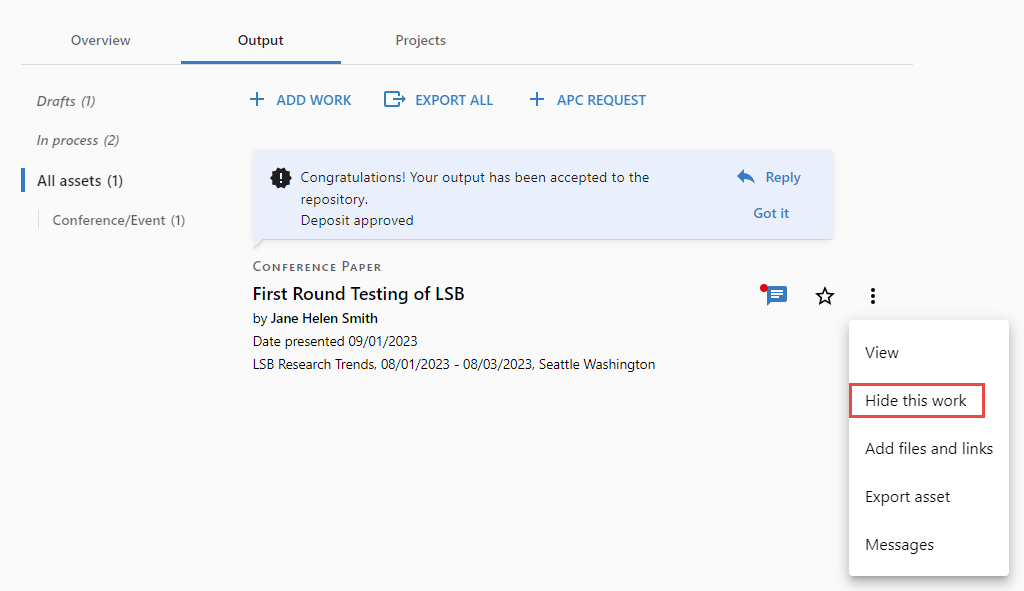
After approval, the asset moves to the All assets area.
Assets already submitted on the profile cannot be edited on the profile.
Once an asset has been approved, you can hide it from the public profile if you wish. To do so, select Hide this work from the actions menu. Hidden assets remain visible on the researcher profile with a HIDDEN indicator, but are not visible on public profiles. (Whether or not hidden assets are published to ORCID depends on the value of the esploro_ORCID_check_profile_visibility parameter; see Configuring Institution Settings.)
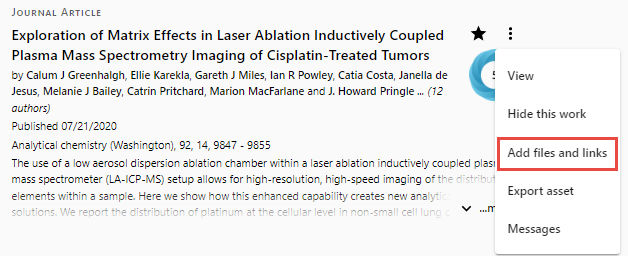
Adding Files and Links to Output
After an asset has been submitted, whether it is approved or not, the researcher can add files and links to it. To do so, select Add files and links option from the actions menu of the asset.