Adding and Editing Content on a Profile
This page describes how a researcher can add content such as assets and projects, directly from their profile.Content can be added to a profile from many sources, for example by an Administrator, Smart Harvesting, etc. For related information see Additional References.
Adding Assets to a Profile
The researcher needs to be logged into the profile in order to see the options below.
- There are 2 places to add content:
The first one is the top right using the Add Content button.
The second is from the ADD WORK button in the Works tab in the profile.
- On the first page enter the essential information for the asset. Note that when searching for an asset title, the title needs to belong to the logged in researcher and match the asset type. When you are done, select the NEXT STEP button.
- Enter the asset details. The form is divided into tabs where each tab covers a different area of the asset details.
- If Esploro manges to find an asset based on the information you entered, it automatically enters all related metadata for that asset. The automatically filled metadata is indicated by a lightning bolt icon.
- On the RELATIONS tab you can search for related grants or add a new grant.
- When selecting REVIEW on the RELATIONS tab (or when clicking on Skip to end) the Asset summary is displayed. On this page you can also add a message to admin and a copyright notice.
- However before submitting the asset, the user can select the X button at the top left of the form to exit and continue later. In this case the user can save the asset as a draft and continue working working on it later. These assets will have a DRAFT label and appear in the Drafts area of the Works tab.
- Select the Submit button. A message will display to let you know that the asset was sent successfully.
- After submitting an asset from the profile, it needs to be approved by an administrator. It is displayed in the In process area in the Works tab of the profile until it gets approved.
After approval it moves to the All assets area. The In process area includes all assets that were submitted but not yet approved by an administrator. This includes assets returned by the administrator as needing more information. These assets are labeled RETURNED and include a reason for the return.
Assets already submitted on the profile cannot be edited on the profile.
Adding Files and Links to Output
The researcher can add files and links to specific output by selecting the Add files and links option from the actions menu for the output.
Adding Projects to a Profile
The following instructions describe how to add a project directly from the profile. Note that projects can be added to a profile from other sources, for example by an Administrator or another associated researcher/s.
- Make sure that you are logged into the profile.
- Select the Add Content button and then select Project from the drop down list.
If you don't see this option consult your administrator.
- Enter the project details and then select Submit.
The form for adding a project contains only a few fields such as Project Name and Project Type. Additional fields become available on the Project page after submitting the form.
- The full project page is displayed and can be edited. The project page is divided into sections such as Attributes, Files and Links, etc. Each section can be added and edited separately. You can add a section by selecting the + icon and you can edit a section by selecting the edit icon. Empty sections will only display in edit mode and will not display when viewing the project page.
At this stage the project is considered as a draft and appears in the In process area.
- Select the Make public button on the form to make the project publicly visible.
The project is no longer considered a draft and it moves to the All Projects area.
At any point you can edit the project by selecting Edit from the actions menu. You can also hide or delete the project from the profile by selecting the relevant option from the actions menu.
Adding Files and Links to a Project
The researcher can add files and links to projects by selecting Files and links when editing a project.
The file Content type determines where the image will be added to (Image Gallery or Logos). You can drag and drop to determine the order of files - this impacts the order of images displayed in the Gallery and Logos section.
Adding Images and Logos to a Project
You can add an image gallery and logos to a project.

Add the images and logos from the Files and links section when editing a project in the profile.
Set the Content type to Gallery or Logo to determine where the image will be added.
The order of image and logo gallery sections on the project page can be set on the Project Page tab - see here for details.
You should use an image file type such as JPEG, PNG, etc. The file cannot be larger than 1GB in size.
Display Related Assets on a Project Page
You can add related assets to a project page when editing a project.
.png?revision=1)
Adding Activities to a Profile
An activity in Esploro describes something that supports the research process such as supervision of students, service to the profession, etc. The following instructions describe how to add an activity directly from the profile. Note that activities can be added to a profile from other sources, for example by an Administrator.
- Make sure that you are logged into the profile.
- Select the Add Content button and then select Activity from the drop down list.
If you don't see this option consult your administrator.
- Enter the activity details and then select Submit. The form for adding an activity contains only a few fields such as Activity Title and Category. Additional fields become available on the activities page after submitting the form.
- The full activity page is displayed and is publicly visible in the portal.
- The activity page is divided into sections such as Associated Researchers, Files and Links, etc. Each section can be added and edited separately. You can add a section by selecting the + icon and you can edit a section by selecting the edit icon.
Empty sections will only display in edit mode and will not display when viewing the activity page.
- At any point you can edit the activity by selecting Edit from the actions menu. You can also hide or delete the activity from the profile by selecting the relevant option from the actions menu.
(New for July) Adding Information in Multiple Languages on the Portal
You can add information to the title, description and keywords in multiple languages for the following areas:
- Projects
- Activities
This feature works on multilingual environments only. For configuring multilingual environments see here.
-
Select the plus icon at the top of the section.
-
Select the language from the searchable drop down list.
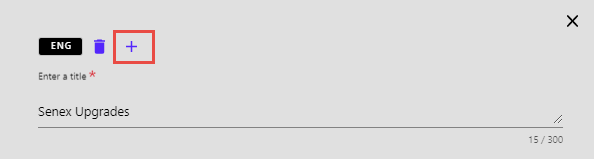
Add Language for Editing Information
- Add the information in the new language.
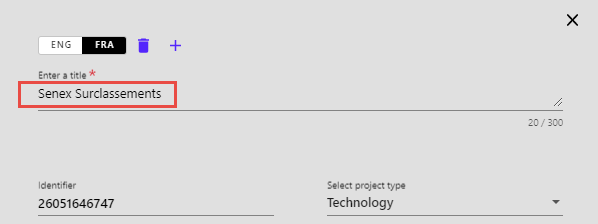
Updated Title
You cannot save a language without adding information to the input field. If you delete a language, information that was added in that language will also be deleted.