
Adding Projects to a Profile
This page describes how to add projects to a profile. For general information on adding content to a profile see here. For configuring the profile see here.
To watch a video showing how to add projects to profiles, see How to Add and Edit Projects and Activities on your Researcher Profile.
Adding Projects to a Profile
Projects allow researchers to store and manage research projects conducted in their institution. Projects are usually ongoing, can be shared with several academic departments, and can be related to other entities in Esploro, such as assets. By adding projects to Esploro, you can enrich the research information available for display and reporting and provide a wider and more comprehensive picture of the research done in the institution.
The following instructions describe how to add a project directly from the profile. Note that projects can be added to a profile from other sources, for example by an Administrator or another associated researcher/s.
- Make sure that you are logged into the profile.
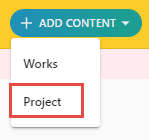
- Select the Add Content button and then select Project from the drop down list.
If you don't see this option, navigate to Configuration > Portal and Profiles > Header and Footer Configuration and make sure that Include add projects option is selected.
- Enter the project details and then select Submit.
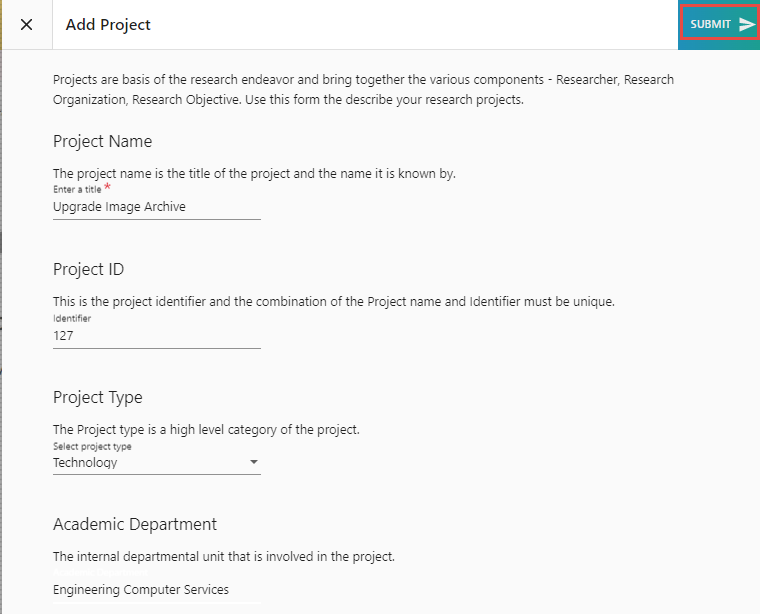
The form for adding a project contains only a few fields such as Project Name and Project Type. Additional fields become available on the Project page after submitting the form.
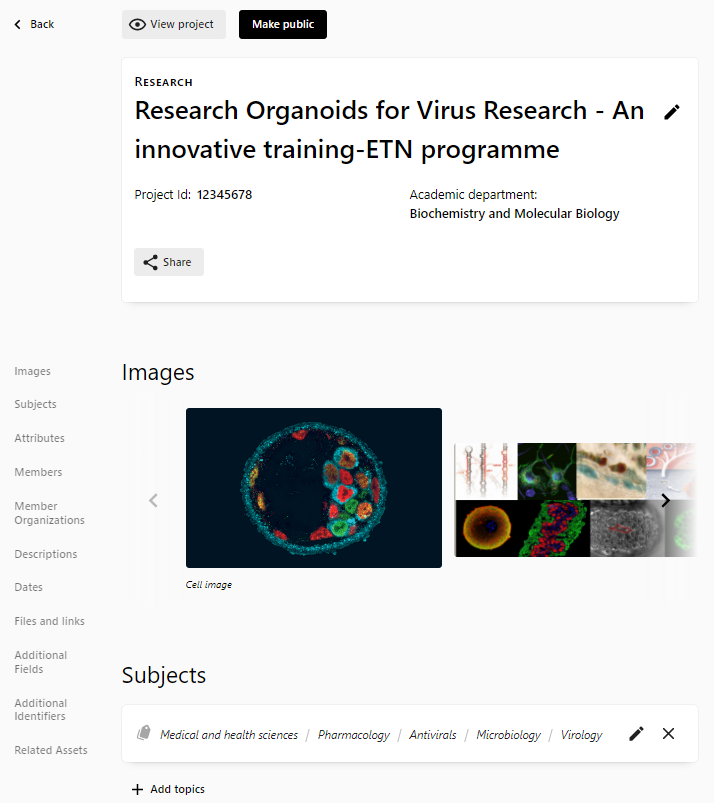
- The full project page is displayed and can be edited by selecting the Edit project button.
The project page is divided into sections such as Attributes, Files and Links, etc. Each section can be added and edited separately. To access a section, select it in the side menu. You can add to a section by selecting the + icon and you can edit existing data in a section by selecting its edit icon. Empty sections only display in edit mode and do not display when viewing the project page.
From edit mode, you can easily switch back to view mode by selecting the View project button.
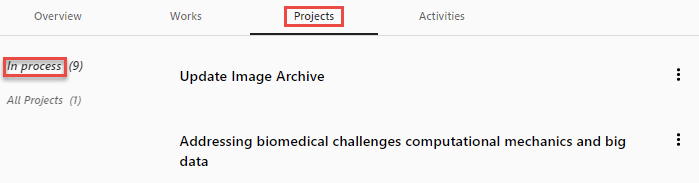
At this stage the project is considered as a draft and appears in the In process area.
- Select the Make public button on the form (in Edit mode) to make the project publicly visible.
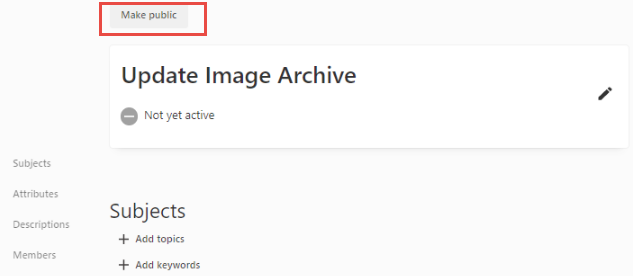
The project is no longer considered a draft and it moves to the All Projects area.

At any point you can edit the project by selecting Edit from the actions menu. You can also hide or delete the project from the profile by selecting the relevant option from the actions menu.
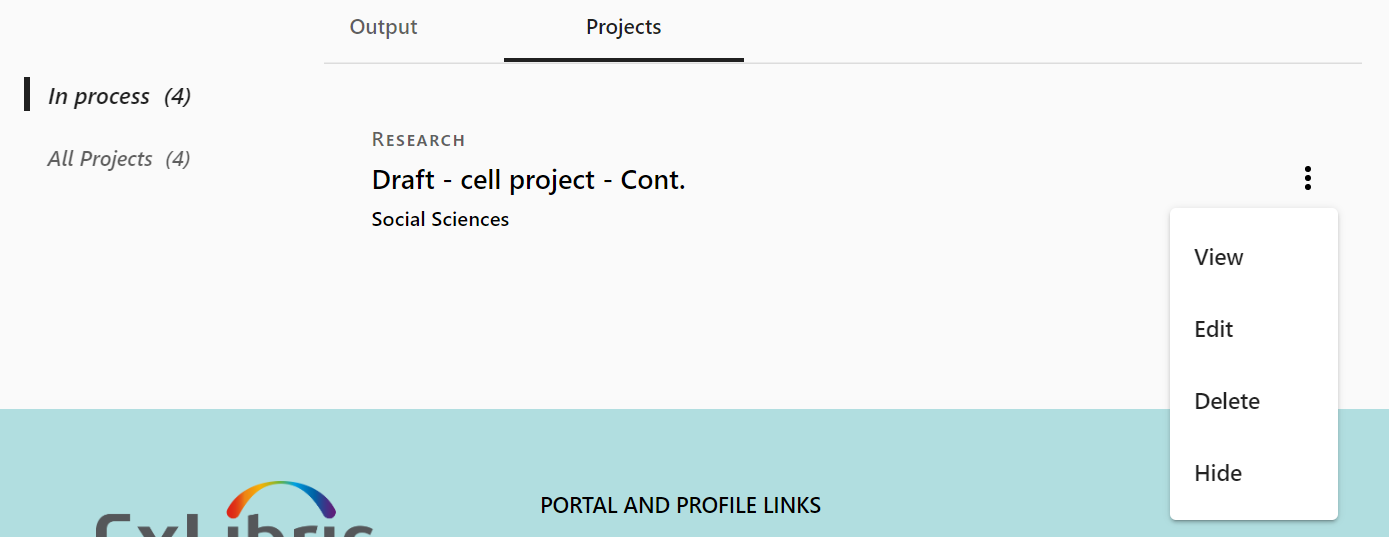
Hidden projects will remain visible on the researcher profile with a HIDDEN indicator. They will not be visible on public profiles.
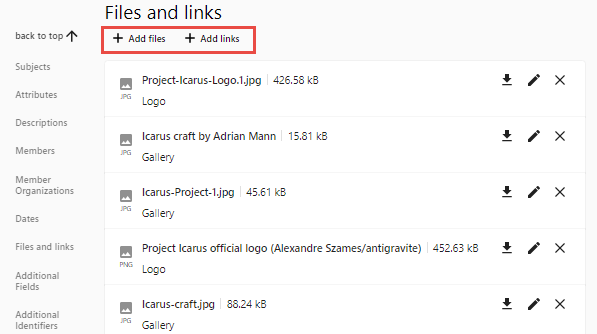
Adding Files and Links to a Project
The researcher can add files and links to projects by selecting Files and links when editing a project.
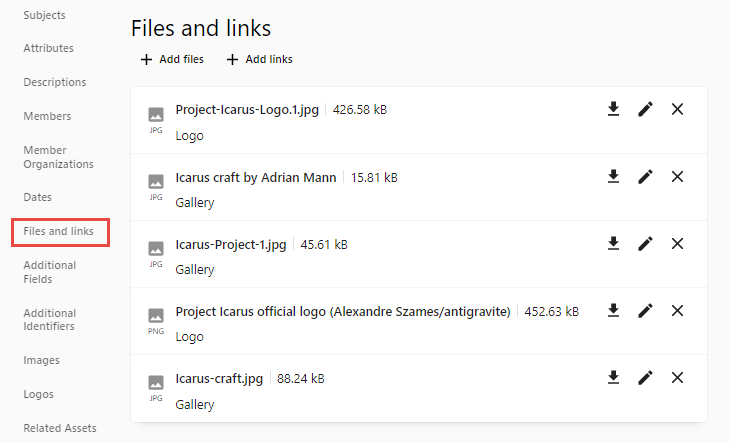
The file Content type determines where the image will be added to (Image Gallery or Logos). You can drag and drop to determine the order of files - this impacts the order of images displayed in the Gallery and Logos section.
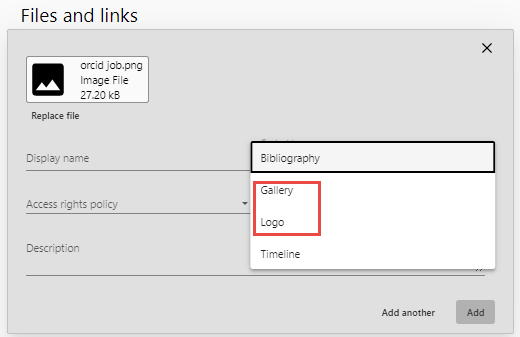
Adding Images and Logos to a Project
You can add an image gallery and logos to a project.
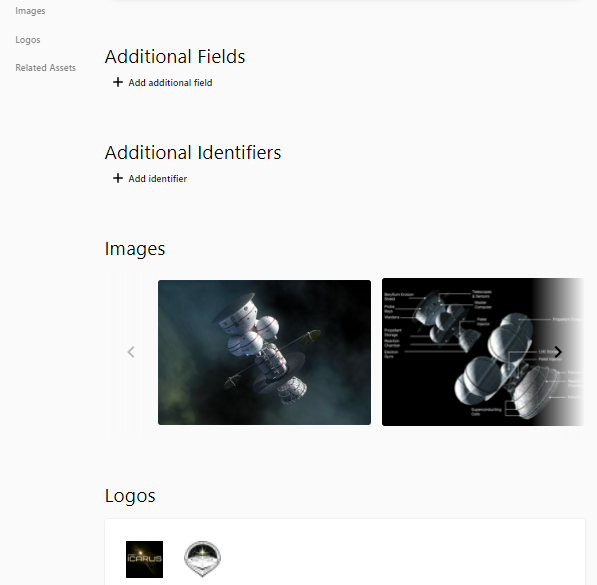
Add the images and logos from the Files and links section when editing a project in the profile.
Set the Content type to Gallery or Logo to determine where the image will be added.
The order of image and logo gallery sections on the project page can be set on the Project Page tab - see here for details.
You should use an image file type such as JPEG, PNG, etc. The file cannot be larger than 1GB in size.
Displaying Related Assets on a Project Page
You can add related assets to a project page when editing a project.
.png?revision=1)
.png?revision=1)
Adding Related Grants to a Project
You can add links ro related grants to a project page when editing a project.
- Under Related Grants, select Add related grant. The Lookup grants by name or ID field is added to the page.


- Select the Lookup grants by name or ID field, and then begin typing a sequence of characters that appear in the name or ID of the grant you want to add. A list of grants that include the sequence appears.
- Select the grant from the list.
- Select Add. A link to the grant is added to the project in the portal.