
Configuring Institution Settings
This page is intended only for users who have administrative permissions.
Customizing the Pivot-RP User Interface
Using the Custom Branding page (see branding guide linked above), you may also add branding for the weekly email alerts that your users see as well as newsletters that you choose to send.
If you may add an additional optional custom logo for weekly email alerts and/or an optional custom logo for newsletters. This would be used if there was a reason you wanted different branding for email alerts and newsletters. If you do not add a custom logo for alerts and newsletters, these emails will automatically use the primary logo and header colors you choose for the home dashboard page. For most cases this will be the best choice.
Configuring Institution Search Settings
On the Search Settings page (Admin > Institutional Settings > Search Settings), you can set the default Applicant/Institution Location, Activity Location and Citizenship settings for all user searches in your institution. When users search for funding opportunities, the locations and citizenship requirements you select on this page are selected by default. Users can still change or clear these selections when performing searches.
In addition, you can set the default currency displayed in the Browse by Keyword wheel on the Funding Discovery page. The default setting is USD.
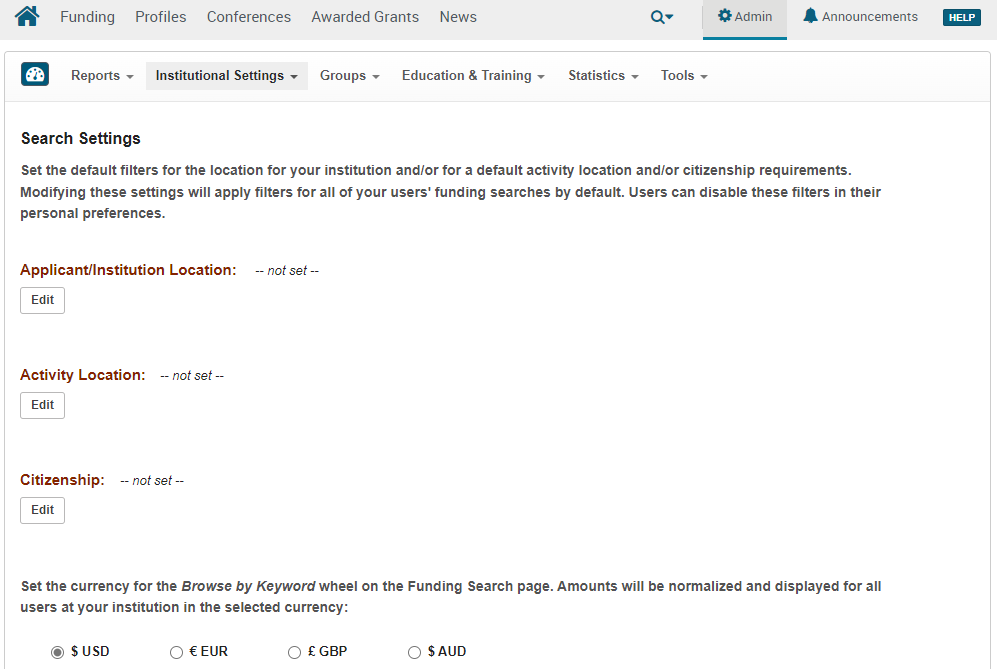
To change a default location or citizenship, select Edit, enter or select/clear the locations, and select Save.
To change the default currency, select one of the following currencies: USD, EUR, GBP, or AUD.
Managing Global Messages
The Global Messages page (Admin > Institutional Settings > Global Message) allows you to create global and limited submission messages.
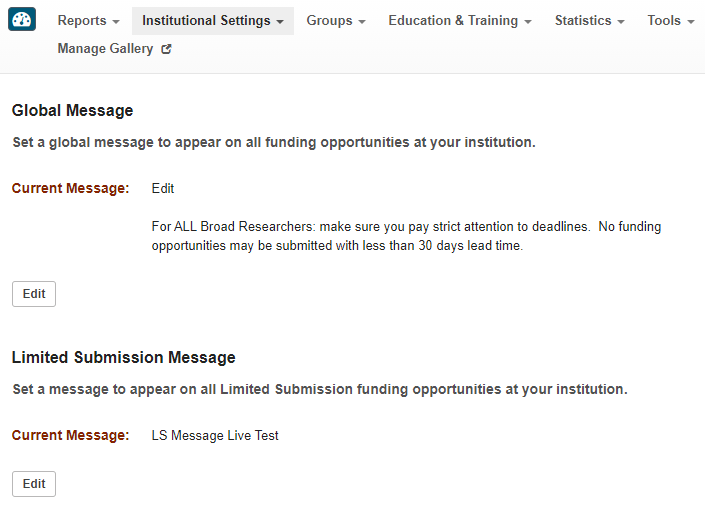
Updating the Global Message
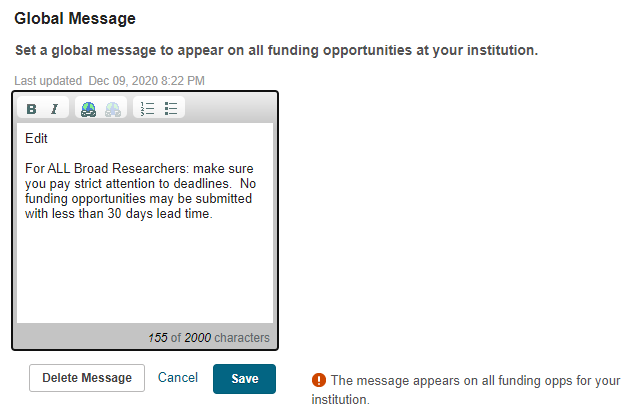
The Global Message section allows you to add, edit, or delete a global message that appears on all funding opportunities for your institution.
-
Open the Global Messages page (Admin > Institutional Settings > Global Message).
-
In the Global Message section, select Edit to open the message editor.
 Global Message Editor
 -
Modify your message. You can use the editor's toolbar to add boldface, italics, links, and bulleted and numbered lists. A maximum of 2000 characters is permitted in the message.
If you want to delete the message entirely, select Delete Message.
-
Select Save to save your changes to the message.
Creating a Limited Submission Message
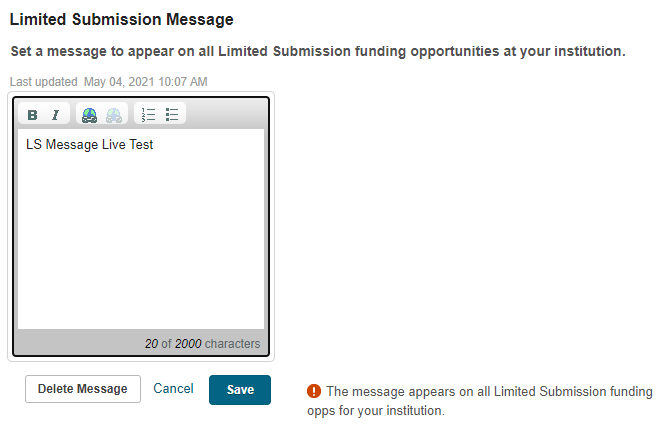
The Limited Submission Message section allows you to add, edit, or delete a message that appears on all limited submission funding opportunities for your institution.
-
Open the Global Messages page (Admin > Institutional Settings > Global Message).
-
In the Limited Submission Message section, select Edit to open the message editor.
 Limited Submission Message Editor
 -
Modify your message. You can use the editor's toolbar to add boldface, italics, links, and bulleted and numbered lists. A maximum of 2000 characters is permitted in the message.
If you want to delete the message entirely, select Delete Message.
-
Select Save to save your changes to the message.
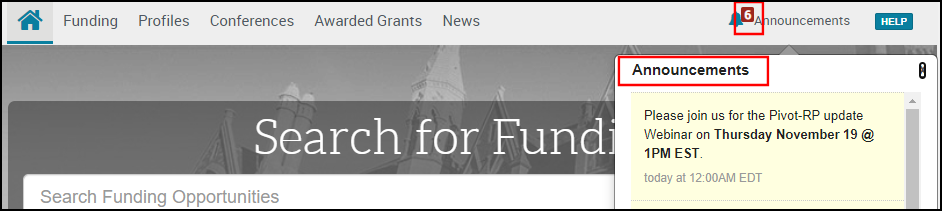
Creating Site Announcements
Announcements are seen by all users at your institution. They can be used to notify users about events or important information such as training or help.
The Pivot-RP development team occasionally adds announcements about new features and release that are visible to all administrators at all institutions. These announcements are not visible to non-administrator users.
You add, edit, or delete announcements on the Manage Announcements page (Admin > Institutional Settings > Announcements).
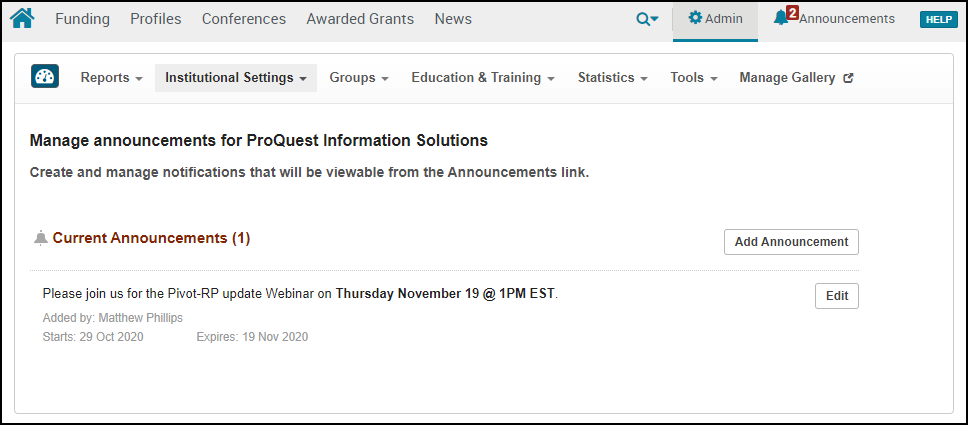
Announcements appear in a popup when a user selects Announcements in the Top Navigation area.
To delete an announcement, select Edit in the announcement's row, select Delete Announcement, and select Save.
Configuring Full Text Linking
Your library can configure a link to appear that must be clicked to access the full text of an article. To configure this, select the Enable linking checkbox and enter your library’s unique OpenURL link resolver base URL. If you do not know this URL, ask your library for assistance.

Configuring full text linking requires the Manage Full Text URLs privilege.
Adding a Funding Opportunity Search Widget to Your Website
You can create a widget to add to your website. The widget displays a search field that your site visitors can use to search Pivot-RP for funding opportunities. After they select Search in the widget, they are directed to a search results page on Pivot.
You create this widget on the Funding Opportunities Search Widget page (Admin > Tools > Widgets > Funding Opportunities Search Widget).
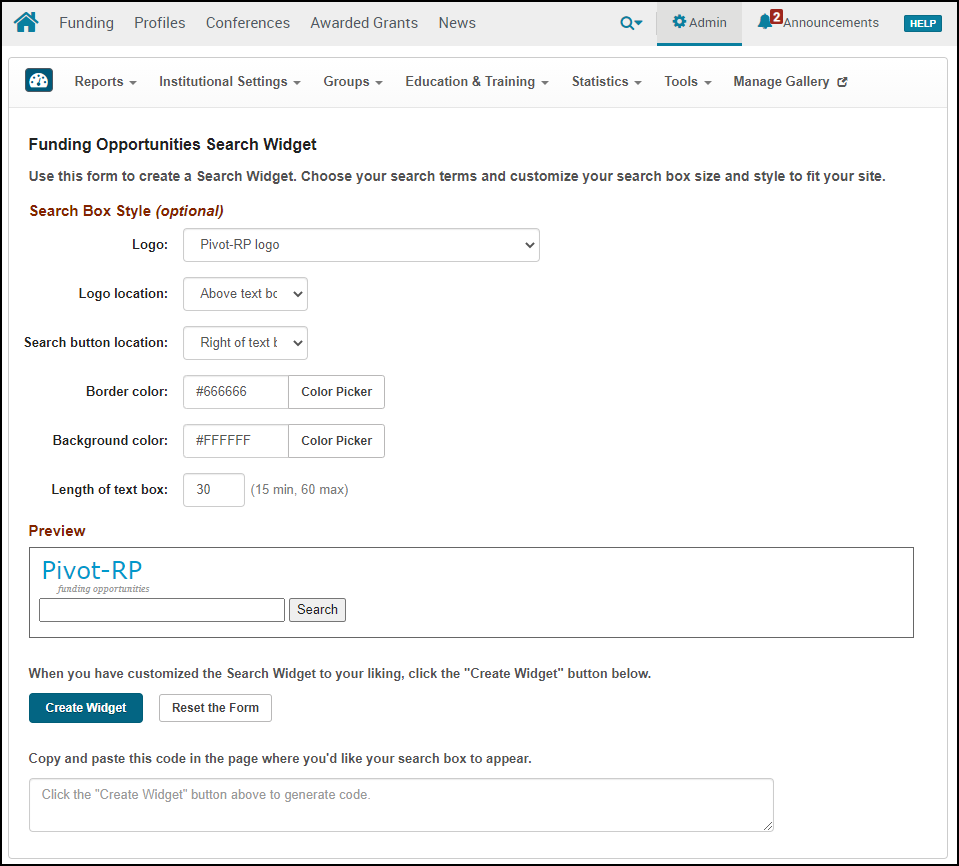
Follow the on-screen text to customize the widget. A preview of the widget appears on the site. When you are finished customizing the widget, select Create Widget and copy the code that appears in the box to your website.
Using the Content Editor
The Content Editor appears on the following pages: Custom Branding (right-column content on Home page) and Newsletters.
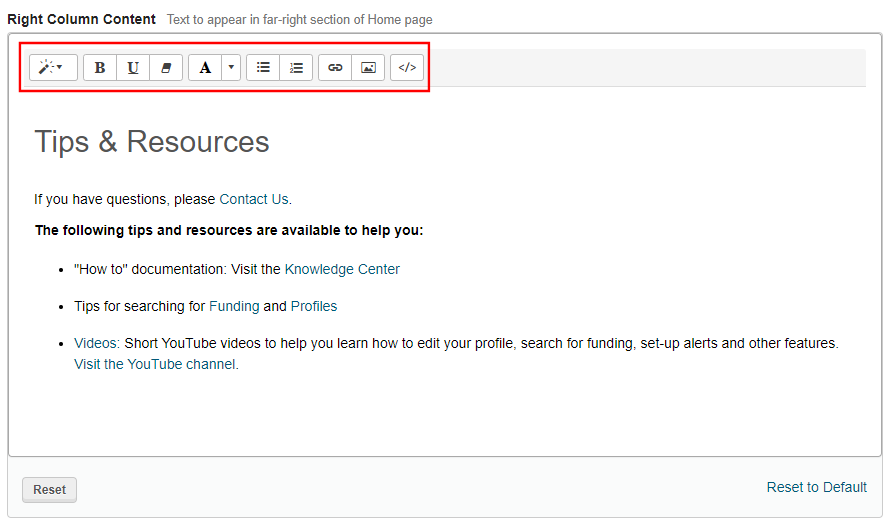
It allows you to update the content of the associated pages using the following editor options:
| Editor Option | Description |
|---|---|
|
|
The Style option allows you to apply an HTML style to a paragraph. |
|
|
The Bold option (CNTL+b) allows you to apply boldface to highlighted text. |
|
|
The Underline option (CNTL+u) allow you to underline highlighted text. |
|
|
The Remove Font Style option (CNTL+\) allows you to remove character styles (such as boldface, underline, and foreground color) applied to highlighted text. |
|
|
The Foreground Color option allows you change the color of highlighted text. |
|
|
The Unordered List option (CNTL+SHIFT+NUM7) allows you to create a bulleted list |
|
|
The Ordered List option (CNTL+SHIFT+NUM8) allows you to create an ordered list. |
|
|
The Link option (CNTL+k) allow you to add a link to the specified paragraph. |
|
|
The Picture option allows you to add an image to the specified paragraph. |
|
|
The Code View option allows you to edit the HTML source of the content that you are editing directly. |


