Sending Newsletters
This page is intended only for users who have administrative permissions.
In addition to:
- Sharing funding opportunities (see Tracking Funding Opportunities),
- Curating lists and searches for funding opportunities (see Recommending and Sharing Funding Opportunities),
- Adding notes and deadlines to funding opportunities (see Viewing Funding Opportunities and Tracking Funding Opportunities), and
- Emailing a user directly (which any Pivot-RP user can do),
an administrator can communicate with multiple users using a newsletter. This is particularly useful for sharing information about important funding opportunities with all or a group of users at your institution. Newsletters can be one time only or sent periodically.
In addition, an administrator can create announcement messages that appear to all users in the Pivot-RP UI.
Sending Newsletters to All/Groups of Users
Newsletters enable you to communicate with all or groups of users. For example, you can create reusable newsletters to share curated lists of funding opportunities with a targeted list of users once or periodically. A periodic newsletter is a particularly useful means of sending updates about a list of funding opportunities. Pivot-RP automatically notes any changes or additions to the list that have occurred in between each of the times that that the newsletter is sent.
You can work on a newsletter in stages before actually publishing it.
To configure groups of users, see User Groups. To configure the logo that appears in all newsletters; see Pivot-RP's User Interface.
You add, edit, publish, un-publish, and delete newsletters on the Manage Newsletters page (Admin > Tools > Newsletters > Manage Newsletters).

Creating and Sending (Publishing) Newsletters
You can create a newsletter from scratch or copy an existing newsletter.
-
If you intend to share a list of funding opportunities in the newsletter, either ensure that another admin has created the list or create the list yourself. See the following sections for more information.
-
Internal funding opportunities – See Managing Internal Funding Opportunities.
-
Curated search (a dynamic list of opportunities) – See Creating Curated Lists of Funding Opportunities.
-
Curated list of opportunities (static) – See Creating Curated Lists of Funding Opportunities.
-
-
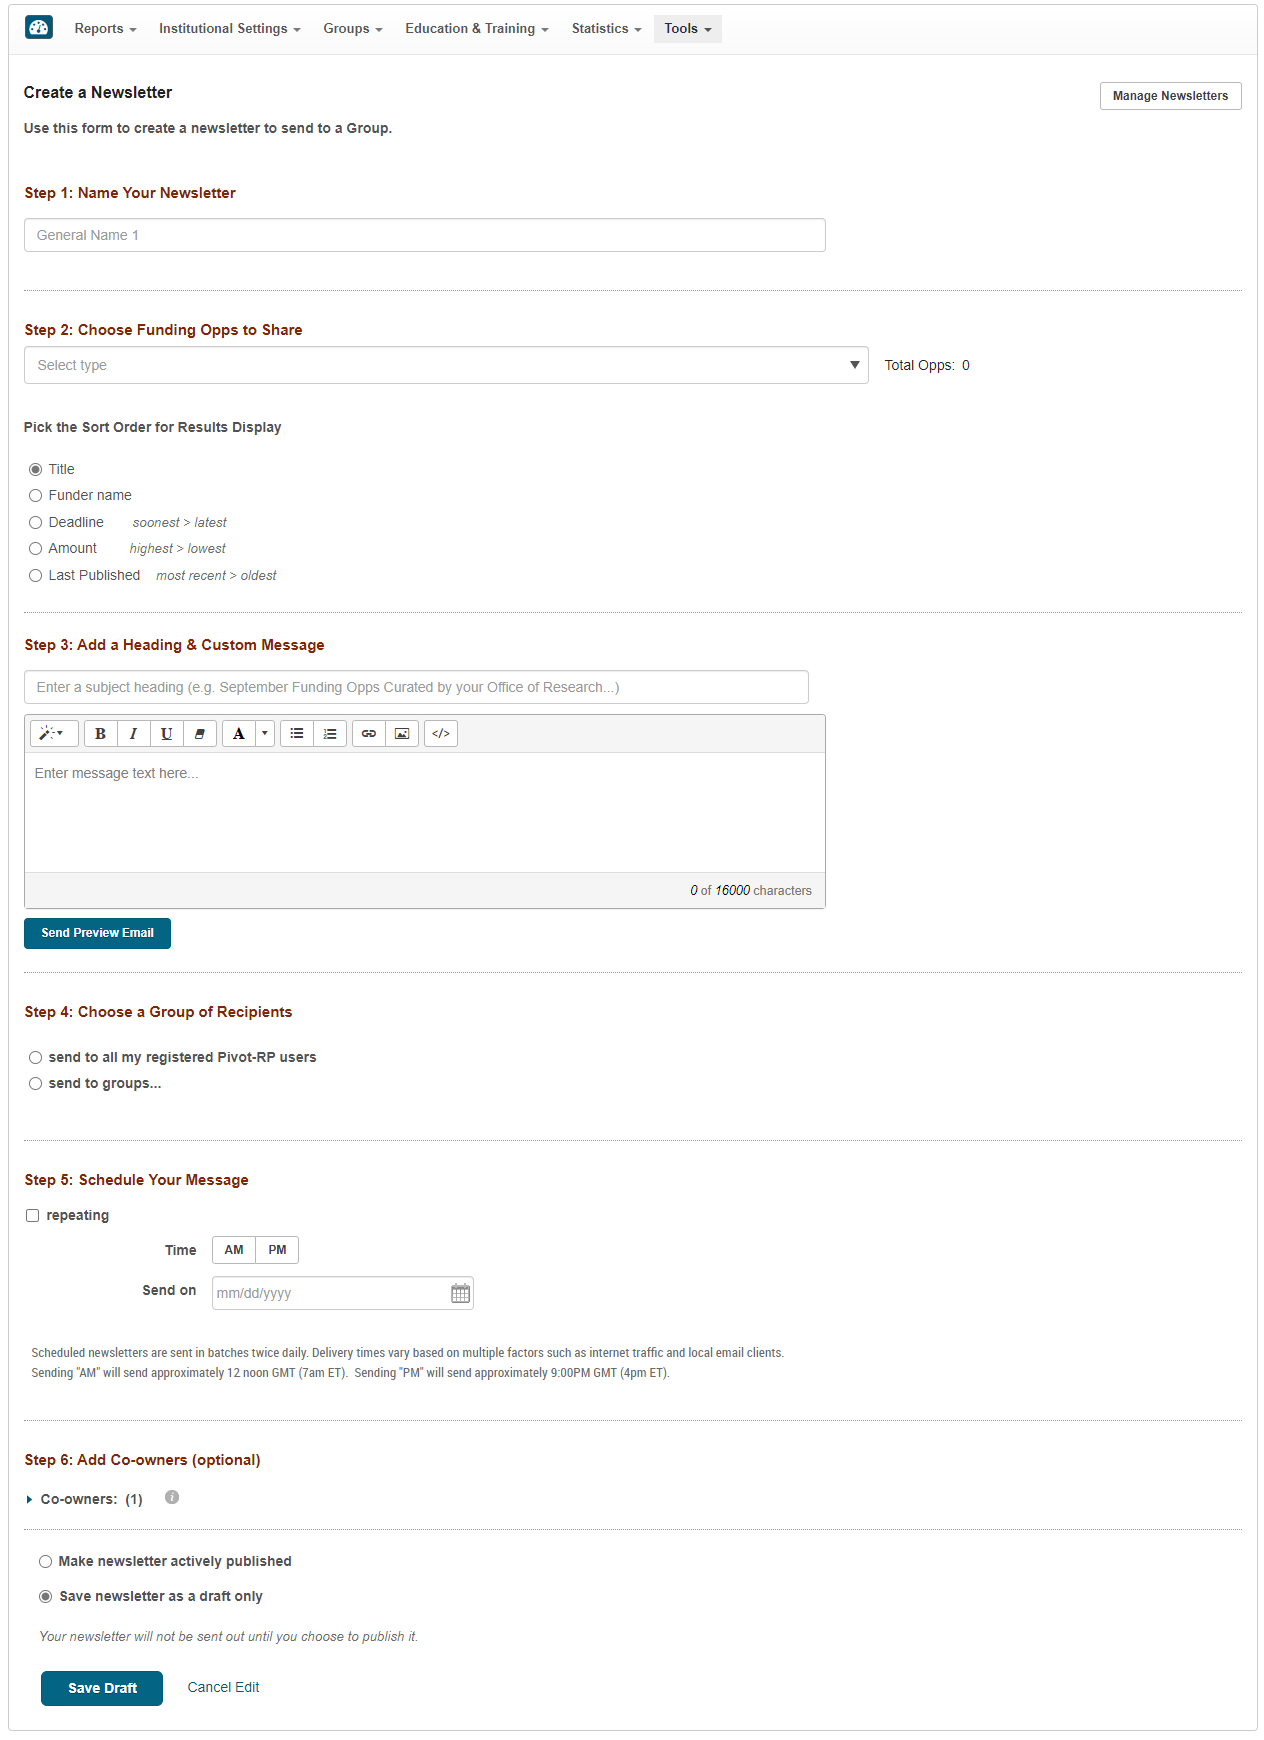
On the Manage Newsletter page, select Create a Newsletter. You can also select Admin > Tools > Newsletters > Create a Newsletter in the Admin dashboard. The Create a Newsletter page appears.
 Create a Newsletter
 - Configure the following fields, following the on-screen direction where available. All fields are optional, except for Name Your Newsletter.
-
Name Your Newsletter (mandatory) – The name does not have to be unique, but it is suggested that you use a unique name for each newsletter.
At any time after entering a newsletter name you can select Send Preview Email to send the newsletter as it currently is directly to your own email address.
-
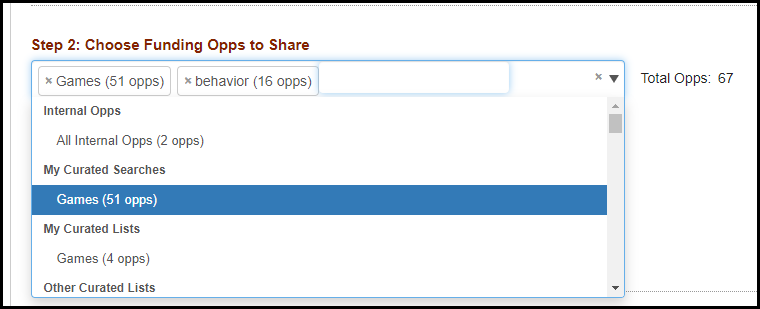
Choose Funding Opps to Share – Select one or more lists of funding opportunities. To remove one of the selected lists, select X in the list name or select the list again in the drop-down menu. When selected, the funding opportunities associated with all of the selected lists appear in the email.
 Choose Funding Opps to Share
In Pick the Sort Order for Results Display, select the order in which you want the funding opportunities to appear in the newsletter: by title, by sponsor name, by deadline, or by funding amount.
-
Add a Heading & Custom Message – For more information, see Using the Content Editor.
-
Choose a Group of Recipients – If you select to send to groups, you can select multiple groups to which to send the newsletter. Groups must already be defined. You can view the list of recipients after selecting the group.
-
Schedule Your Message – Select repeating if you want the newsletter to be sent periodically (more than one time). To send the newsletter only once, leave this field clear.
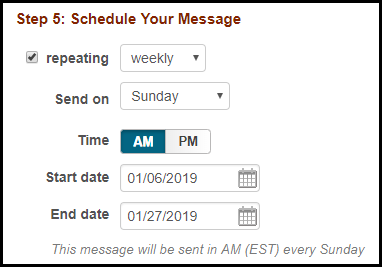
Schedule Your Message – Repeating Weekly-
If you are sending the newsletter only once, leave the Send on field empty to send the newsletter immediately after it is published. To schedule the newsletter to be sent on a specific date, select AM or PM and enter the date in Send on.
-
If you are sending the newsletter periodically, select whether to send it weekly or monthly, the day of the week, and the week of the month (if sending monthly). Select AM or PM for the selected day and enter the start and end dates. Note that you can edit the newsletter in between each of the times that it is sent.
-
-
Add Co-owners – You can add one or more co-owners to a newsletter. Select additional owners from a list of colleagues at your institution, who have the administrative rights to manage newsletters. Co-owners will have the same full editing privileges that you have, including the ability to delete the newsletter or to remove you as an owner.
-
-
When you are done, you can save the newsletter in draft status or publish the newsletter. To save as a draft, select Save newsletter as a draft only and select Save Draft.
To publish the newsletter, select Make newsletter actively published and select Publish. If the newsletter is scheduled for a specific date, or to begin on a specific start date, it will be sent on the data you selected. Otherwise, the newsletter is sent immediately.
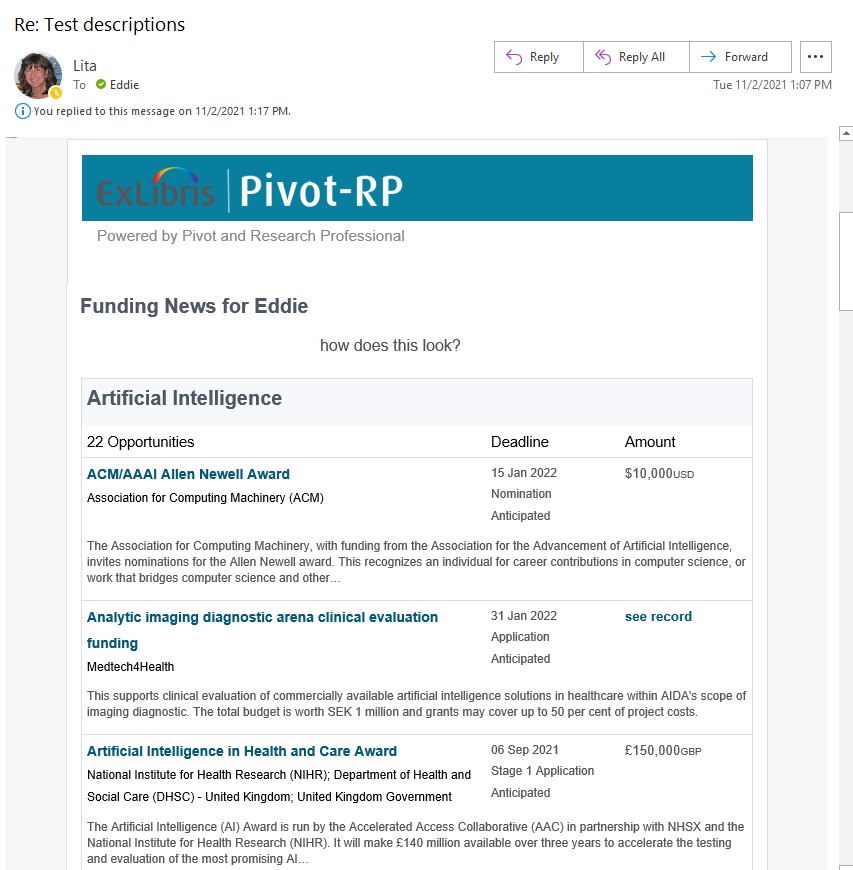
A newsletter looks something like the following to the recipient:

Pivot-RP-RP newsletters are personalized with the recipient's name if the recipient has a Pivot-RP-RP user account. Additional text and images may be included in addition to funding opportunities.
Select Options > Copy in the newsletter's row and select Yes in the confirmation dialog box. You are redirected to the Edit Newsletter page, which is the same as the Create a Newsletter page, described above.
Managing Newsletters
On the Manage Newsletters page, select the small right-pointing arrow to the left of the newsletter's name in the newsletter's row. Additional information about the newsletter appears in the newsletter's row. Note that every time a newsletter is sent you receive an email with this information.

On the Manage Newsletters page, select the newsletter's name in the newsletter's row. The Edit Newsletter page appears. Follow the instructions above for creating a newsletter.
Select Options > Copy in the newsletter's row and select Yes in the confirmation dialog box to edit a copy of the newsletter on the Edit Newsletter page.
Select Options > Unpublish in the newsletter's row and select Yes in the confirmation dialog box.
Select Options > Delete in the newsletter's row and select Yes in the confirmation dialog box.


