
Consortia Union View
What is a Union View?
A consortium using a Discovery Network can create a central union view at the network level. This view can include consortium-specific branding and provide search scopes for the entire network and specific institutions and libraries. From this view, users can select and sign in to their own institution using sign-in options specific to that institution. After selecting and signing in to an institution, the following occurs:
-
Users are affiliated with a specific institution and continue to use the union view.
-
Delivery options for physical and electronic services are now based on the selected institution.
-
The vid param in the URL changes the context of their institution. For example, the following URL:
https://na02.primo.exlibrisgroup.com/discovery/search?vid=EXLDEMO_NETWORK:View_UNIONChanges to:
https://na02.primo.exlibrisgroup.com/discovery/search?vid=EXL_INST:View_UNION
For guest users, the union view enables users to search the defined search scopes and request services (such as electronic and general electronic services) that are permitted at the network level only since Primo does not associate them with an institution until they sign in.
-
Customers that use SAML to authenticate in Primo VE are required to create a second relying party in their IDP for the union view URL. This is in addition to the relying party that was created to enable logging on to their institutional view.
The metadata for the union view can be retrieved with the following procedure:-
Log on to Alma using a URL in the following format:
https://<UNION_VIEW_BASE_URL>/mng/login?institute=<ALMA_INSTITUTION_CODE>
-
Edit your SAML profile from the Integration Profiles page in Alma (Configuration Menu > General > External Systems > Integration Profiles).
-
On the Actions tab, select Generate Metadata File.
-
Upload the Metadata file to the IDP.
-
Make sure to release the same attributes as configured in the first relying party.
-
-
Customers that use CAS to authenticate in Primo VE should configure CAS to trust the Union view URL.
-
For consortia without an NZ, you need to open a Support ticket to create a union view that can be managed by your consortium.
Configuring the Union View
The union view is similar to any view that is created for an institution, but it enables a consortium to manage a "neutral view" and also provide institution-specific delivery options for signed-in users, who will see their home institution preferences such as display field normalization rules and local field contents.
-
When creating local fields and customizing normalization rules for display fields in the union view, parallel changes should be made to each institution to maintain consistency after users sign in to specific institutions with the union view. For example, if the union view has mapped the MARC 950 field to local field 2, each member institution should also map the 950 field to local field 2.
You can use the NZ to manage local fields and to distribute the changes to the member institutions. For more details, see Define Local Fields Centrally.
-
To indicate that a view is a union view, you must select the Union View checkbox on the General tab of the View Configuration page (Configuration Menu > Discovery > Display Configuration > Configure Views) when creating a new view for the Network Zone institution. For more information about views, see Configuring Discovery Views for Primo VE.
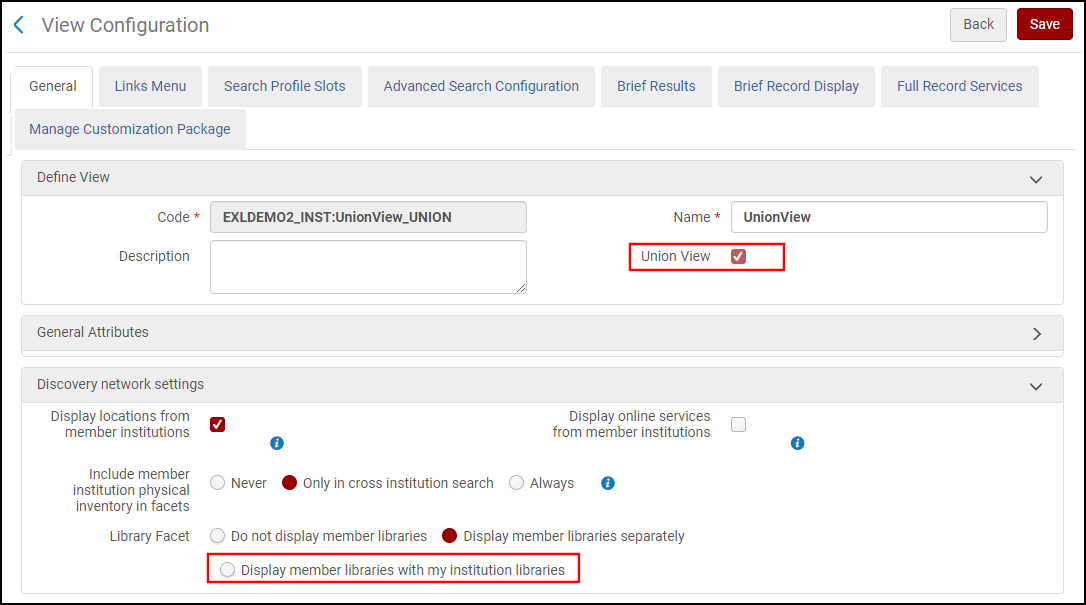 General Tab in View Configuration
 -
You must select the Display member libraries with my institution libraries field on General Tab on the View Configuration page (Configuration Menu > Discovery > Display Configuration > Configure Views) to enable the Library facet to show all libraries.
-
Since the Union View field is active only when creating a new view for the network institution, you cannot modify a view and switch between a view and union view.
-
You may create as many union views as you want. The code for each union view includes the _UNION suffix automatically when the view is saved (for example, EXLDEMO2_INST:MY_NETWORK_UNION).