
Configuring Static Facets
Primo supplies out-of-the-box values for the following static facets:
-
Prefilter
-
Resource type – For more information, see Adding Resource Types.
-
File Size
-
Language
You can define additional static facets using any of the predefined fields in the Facets section of the PNX (such as format or genre) and any of the 50 locally defined facets.
Static facets can be configured at the institution level for institutions in multitenant environments. All other environments must configure static facets at the installation level.
| Table | Description |
|---|---|
|
Static Facets mapping table
|
Defines each static facet and automatically assigns the following tables to each one:
A change to any static facet mapping table requires you deploy of all code and mapping tables from the Deploy All page.
|
|
Mapping tables for the static facet values
|
Each mapping table defines the list of values for a static facet.
A change to any static facet mapping table requires you deploy of all code and mapping tables from the Deploy All page.
When a static facet is defined in the Static Facets mapping table, the system automatically creates a values mapping table for the static facet. For example, the facet_genre_values mapping table defines the list of values used for the Genre static facet.
For the Library facet, the system automatically populates the values table with the library codes that have been defined with the Institution wizard and uses this table for all institutions in your Primo installation.
|
|
Code tables to display values in the Front End UI
|
Each code table defines the labels that display in the Front End for each static facet value. This code table allows you to customize the facet labels per view and language.
When a static facet is defined in the Static Facets mapping table, either a predefined code table is used or a code table is generated when you first synchronize the static facet’s values mapping table. For example, if you define the resource type facet as a static facet, the system uses the predefined Facet Resource Type code table.
|
-
On the Back Office's home page, select Advanced Configuration.
The Advanced Configuration page opens.
-
Select All Mapping Tables.
The Mapping Tables page opens (see Static Facets Subsystem).
-
Select the Static Facets subsystem to display the list of the static facets mapping tables.
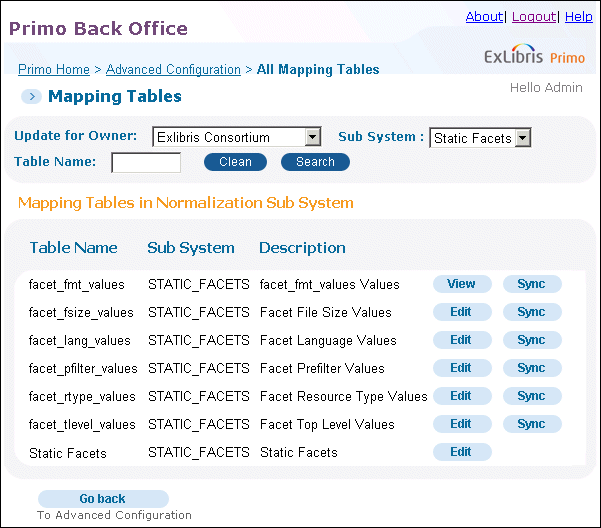 Static Facets Subsystem
 -
Click Edit to select the Static Facets mapping table for editing.
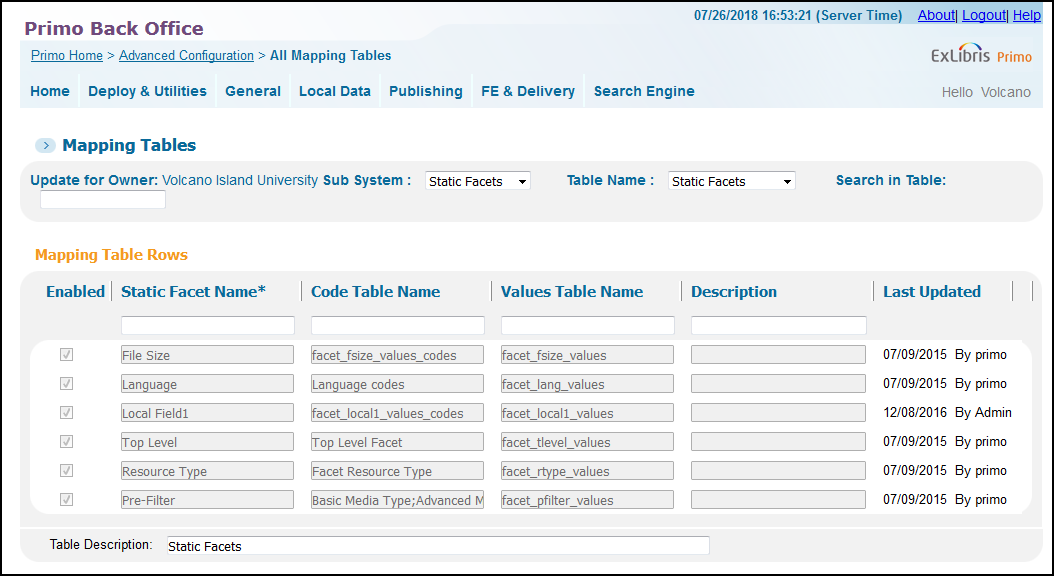 Static Facets Mapping Table
 -
In the Create a New Static Facet section, select a facet in the Choose a Facet drop-down list.
-
Click Create to add the new facet to the mapping table.
For every static facet, the Values Table Name and Code Table Name fields are defined automatically by the system and cannot be modified.
-
Click Save to save your changes and return to the Static Facets Subsystem page (see Static Facets Subsystem).
-
Click Edit to modify the facet values of the facet that you defined – for example, the facet_genre_values table.
The facet_genre_values table opens.
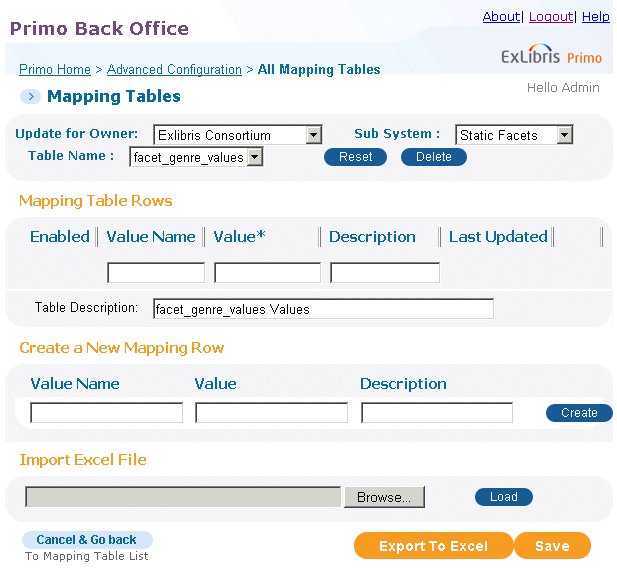 facet_genre_values Mapping Table
 -
Enter values in the fields in the Create a New Mapping Row area to add a new facet value to this table.
-
Click Create to add the new mapping row to the table.
-
Click Save to save your changes and return to the Static Facets Subsystem page (see Static Facets Subsystem).
-
Click Synch to propagate the new values to the associated code table (such as the Basic Media Type code table for prefilter facets).
This operation only adds new values to the code table. To override existing values, you must update the code table manually.
-
To view or update the associated code table, edit the code table on the Primo Home > Advanced Configuration > All Code Tables page.
-
Deploy the code and mapping tables.
Adding Resource Types
Because prefilter and resource type facets are defined as static facets by default, there is no need to define them as static facets.
-
Add the new resource type to the Display/Type field in the normalization rules.
-
Save your changes and then deploy (Primo Home > Deploy All) the changes made to the normalization rules.
-
Rerun the pipe to update the PNX. You can run pipes without re-harvesting from the data source.
-
Update the following mapping tables:
-
facet_pfilter_values in the Static Facets subsystem – Add the new resource type to the prefilter values. Save the values.
-
facet_rtype_values in the Static Facets subsystem – Add the new resource type to the resource type values.
-
-
On the Static Facets subsystem page (see Static Facets Subsystem), click the Sync button in the facet_pfilter_values and facet_rtype_values mapping table rows to propagate the changes to the associated code tables.
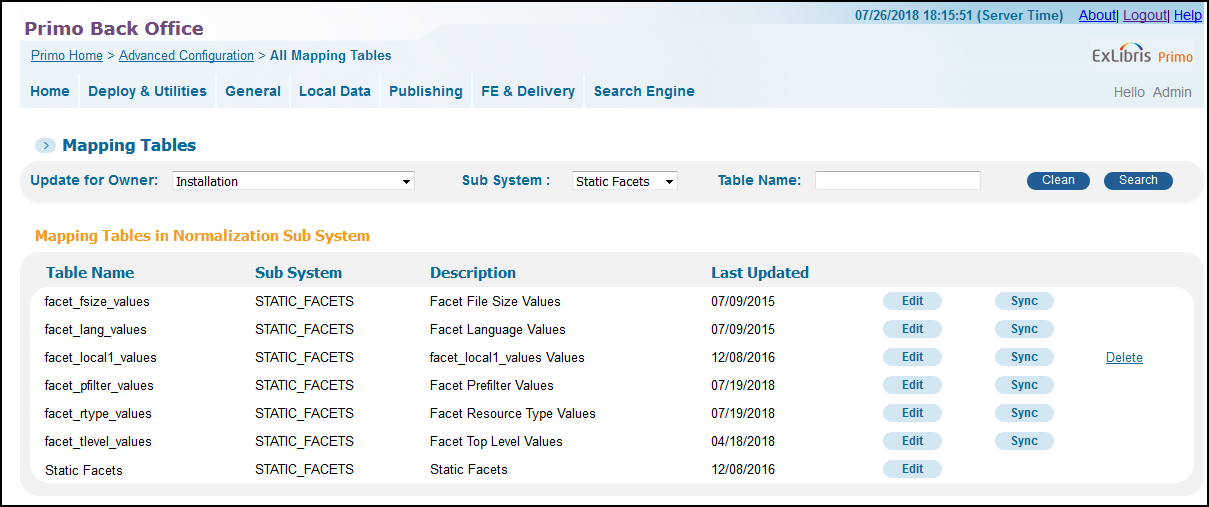 Static Facets Subsystem - All Mapping Tables Page
 -
Update the following mapping tables:
-
pre_filter in the Normalization subsystem – Add the new resource type to the prefilter facet.
-
format_mean in the Normalization subsystem – Add the new resource type to the resource type filter.
-
-
Add the correct labels for the new resource type in the following code tables:
-
Basic Media Type
-
Advanced Media Type
-
Icon Code
-
Facet Resource Type
Include labels for English and any other languages you use in the Front End.
-
-
Deploy (Primo Home > Deploy All) the changes made to the mapping and code tables.
-
Add an icon image for the new resource type to the following directory on the server:
fe_web
cd images
-
Enable the new resource type in the Front End via the Views wizard:
-
In the Basic Search tile, select the new resource type.
-
In the Advanced Search tile, edit the resource type and add the new resource.
-
-
Deploy (Primo Home > Deploy All) the changes made to the views.