
Selection Plan Management
All users can view and edit the Selection Plan feed.
The following roles are required to edit the Selection Plan profile:
- Rialto Administrator
Selection Plans allow you to create a feed of offers to be either purchased or added to your DDA pool at a frequency you choose. This allows Selectors to spend less time on manual selection, and provides a mechanism to have a predictable spend on an ongoing basis.
Selection Plan is an admin-defined automated purchasing plan, consisting of a query, rules, and a ranking profile. Once the plan is fully tested and enabled, Rialto periodically generates a list of best-fit candidate offers, ready to be purchased. Selection staff can refine this list before offers are purchased or added to a DDA pool.
Rialto Selection Plan provides a number of advantages compared to the legacy approaches to automated purchasing:
| Function | Legacy systems | Rialto Selection Plan |
|---|---|---|
| Eligible titles | Only newly published titles | Any title in the Marketplace, excluding titles in your local holdings.
For more information, see Selection Plan - Rules and Offer Processing. |
| Frequency | Upon publication, captures new (profiled) titles | Captures any title based on query |
| Ranking | True or False on match to profile; no ranking | True or False + ranking to assign fitness; boosting offers with preferred criteria to the top of the list |
| Amount purchased | All matches | Best matches up to monetary cap. |
| Managing budget | Restrictive query limits matches per purchase interval |
Monetary cap defines spend per purchase interval. |
| User Autonomy | Updates via customer support of the legacy system following phone and email requests | Full user autonomy - profile changes, spend adjustments, enable/disable profile on your own or with Ex Libris help. |
When an offer is purchased automatically:
- the PO is created in Alma with the relevant PO lines.
- the specific offer is added to the list of institution's holdings.
Selection Plan Workflow
- The Rialto Administrator defines a purchasing plan, consisting of a query that picks up the candidate offers for automatic scheduling / addition to DDA (see Defining a Purchasing Query and Frequency), and the rules according to which the candidate offers are purchased or added to DDA (see Purchasing Rules and Offer Processing).
- The plan runs at the selected timeframe, and a snapshot of candidate offers is created.
- The list of candidate offers is made available for Selection staff, who review it and reject the undesired offers. See Reviewing the Scheduled Purchasing Feed.
- The reviewed plan is run again at the selected timeframe, and the relevant offers are automatically purchased or added to DDA.
If you are not configured to acquire via DDA, then selection plans will not produce results even when including the DDA available parameter within the query. If you would like to enable DDA, please contact Rialto support.
Creating Selection Plan Profiles
Selection Plan profiles are found on the Selection Plans page (Collection Development > Automatic selection > Selection Plans):

From this page, you can do the following:
- Create a Selection Plan profile,
- Edit a Selection Plan profile,
- Delete it when it becomes obsolete.
If at any point you would like help constructing or tuning a profile, reach out to Ex Libris, which has a team of consultants experienced in creating and maintaining profiles for a variety of institutions.
Defining a Query, Ranking, and Frequency for the Selection Plan
- On the Selection Plans page (Collection Development > Automatic selection > Selection Plans), click Add New Plan.
- In the box that opens, provide a name for the plan. The plan page opens.
- In the Query tab, select the conditions for your query. The query allows for combinations of metadata criteria to be included, or excluded, from feed results. If you have previously created a recommendations feed in Rialto, you will find the look and feel are the same for the query builder. For a list of available criteria and detailed instructions, see Criteria Included in the Recommendations Profile. Note, by default, titles identified as owned in your local holdings are suppressed from Selection Plan results. Therefore the "Held in my institution" field is not required for use.
- Once you have created your profile, it may be a good idea to validate that your Selection Plan profile brings the desired results, and if it does not, edit it some more. To see the results, click
 . You can click it for the entire profile or for a single group of criteria within the profile.
The screen splits and the feed resulting from the profile appears on the left. If you like the result, click Save. If not, close the feed by clicking X in the upper-top corner and edit the profile. - Above the query, select a ranking profile. Your Ranking profile will ensure that the most desirable offers are promoted to the top of the list when Rialto comprises your list of offers. You may choose to use an existing ranking, or create a new one specifically for selection plans. For instructions and best practices, see Managing Ranking Profiles.
- In the right-hand panel, provide a description about this profile to the Selectors (optional).
- Select Save to save your selections OR select Save and Create Snapshot to create a one-time snapshot (that can be used to test the resulting feed), without activating the plan or enabling purchasing.
You can save a Selection Plan profile only when all of the below is true:
- A profile contains at least one rule,
- Each rule has:
- A query
- a valid numeric cap
- ordering library
- fund
When any one of the above is missing, a selection plan cannot be saved.
- Click
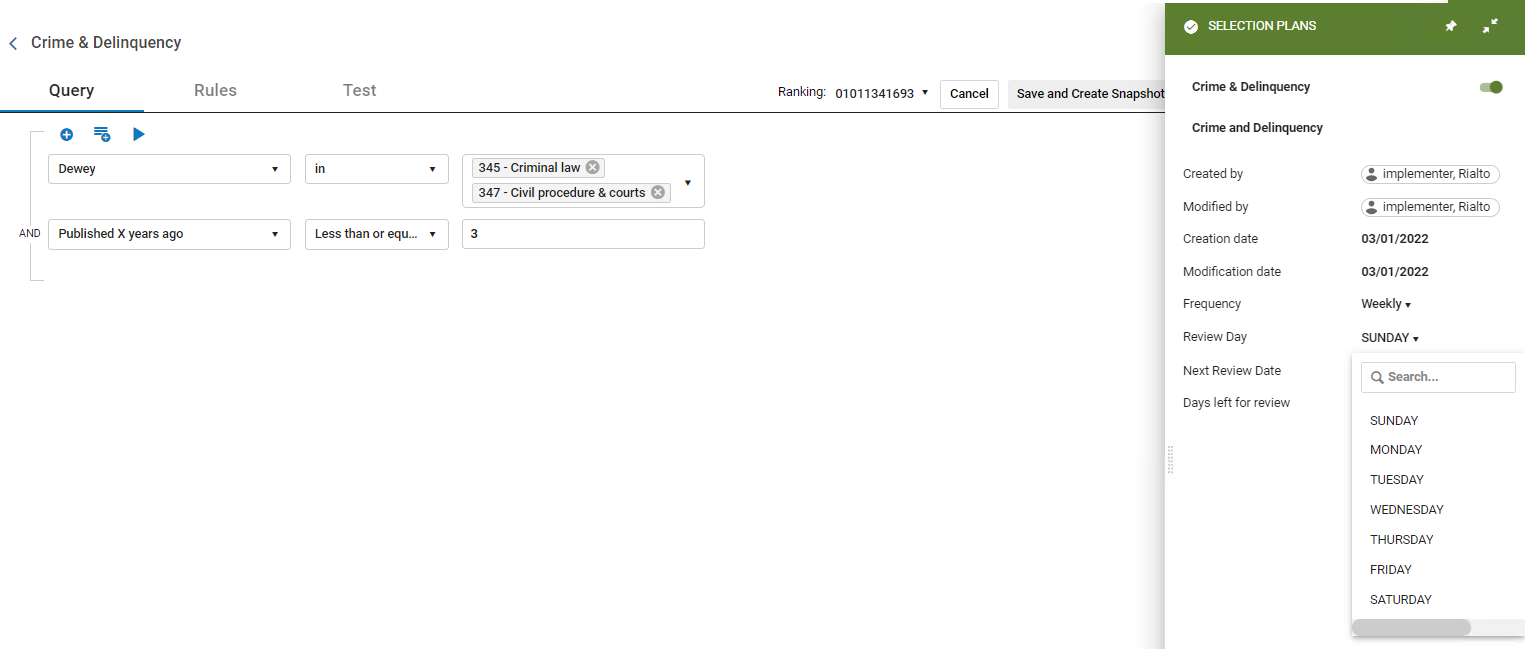
 in the stub of the Selection Plan tab to expand it. Once expanded, select the frequency of the plan's run (weekly, bi-weekly, monthly), and the purchase day, on which the plan will run (any day of the week). On the selected day, the plan runs at midnight.
- At the top of the panel, use the toggle to activate this profile. Then click in the stub to collapse the tab.
You can activate and de-activate the profile at any time.
Selection Plan - Rules and Offer Processing
Once you've created the Selection Plan's query, you can proceed to define action rules with additional conditions. Included in the action rules is the ability to set a monetary cap when purchasing, or to set a limit to the amount of offers to be added to the DDA pool. Whether purchasing or adding to DDA, you can apply bulk-processing instructions to the offers to be added under a given rule.
The rules are processed in sequential order. Each offer is checked against the first rule, and the action is applied if the offer matches the rule condition, and the cap still hasn't been reached. If the first rule does not apply, then the offer is checked against the next rule, and so on. Once any offer from a work group has been selected, Rialto blocks related offers (additional license types, formats, etc. belonging to shared work group) from being selected by any other rule. Once the offer has been checked against all the rules, the resulting set of offers eventually auto-purchased (or added to DDA) when the second phase completes.
Once a snapshot of candidate offers is created in Rialto, Selectors are able to evaluate their offers prior to automatic purchasing/adding to DDA. Within the listed offers for review, users will see the rule that prompted the offer to be added.
You can do the following under the Rules tab:
- Create a rule.
- Test a rule to make sure it retrieves the desired results.
- Change the order of rules within the plan.
- Edit a rule.
- Delete the rule when it becomes obsolete.
- Activate/Deactivate a rule
Creating a Selection Plan Rule
- For an existing plan - on the Selection Plans page (Collection Development > Automatic Selection > Selection Plans), in the actions menu for the desired plan, select Edit. The plan page opens.
OR For a new plan, on the Selection Plans page (Collection Development > Automatic Selection > Selection Plans), click Add New Plan. - In the Rules tab, select Add New Rule. A new rule opens.
Alternatively, you can create a new rule by duplicating an existing rule and editing it. This saves you time and errors when creating a Selection Plan. - Select the new rule. The rule definition opens in the right pane.
- Provide the name and description (optional) for the rule.
- Select the conditions and the operation for your rule. Offers that match the sub-query conditions will be handled as indicated in the operation: either purchased or added to the DDA pool. For instructions on defining conditions, see Configuring the Recommendations Feed Profile.
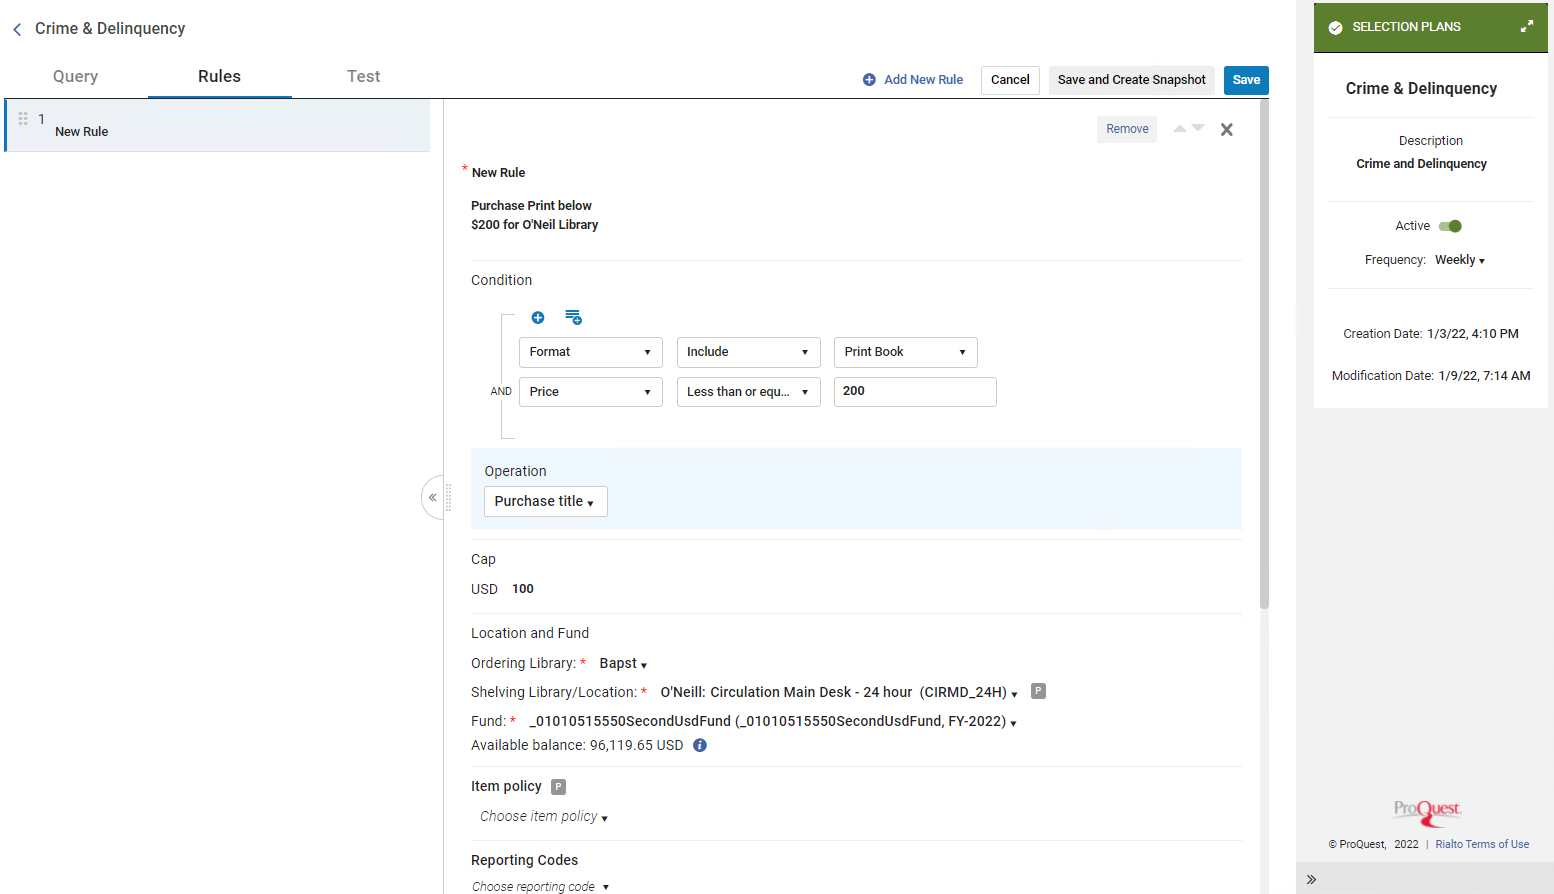
- Set the cap: a monetary cap for purchased offers, or a limit to the amount of offers that can be added to the DDA pool in a single run.
Note that the purchase caps are profile-specific (not institution-wide). - Select the Operation; Purchase title, Add title to DDA pool, or Add to Selection Plan Slip.
- If Add to Selection Plan Slip was selected, continue with the following:
Selection Plan Slip enables Rialto Administrators incorporate results from a selection plan into a title alert list. When this option is selected, complete the following:
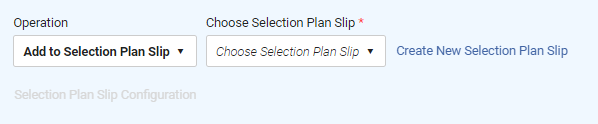
- Select a Selection Plan Slip (if exists). If you previously created a Selection Plan Slip, it will appear in this list. If not, select Create New Selection Plan Slip.
- In the drop menu, enter a Selection Plan Slip Name and select Add.
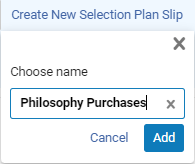 Selection Plan Slip Name
 - In the sliding panel that appears, define the cart value options. For details, see Adding to Shopping Cart and Submitting to Approval.
- You can optionally add a note, interested user or share the slip with another user.
- Select Save.
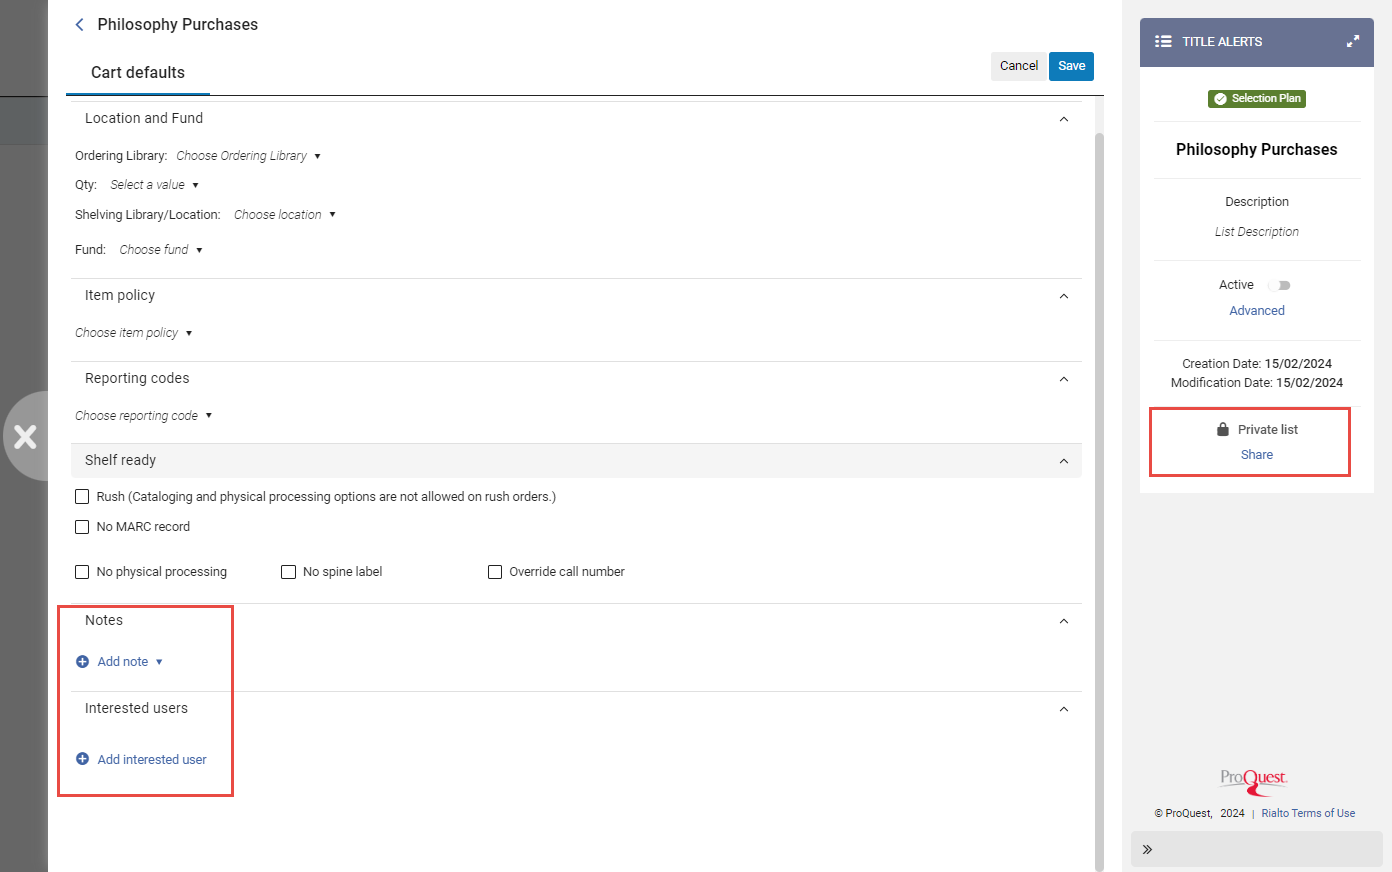 Selection Plan Slip Cart Defaults
- If Add to Selection Plan Slip was selected, continue with the following:
- Select ordering library, fund, and other bulk-processing options (if needed) to be applied to the offers under this rule. These options are the same as in the shopping cart. For details, see Adding to Shopping Cart and Submitting to Approval.
- Select Save to save your selections.
Cart options for print books will appear under purchase title rules at all times, even when your rule query is set to purchase Ebooks. When purchasing Ebooks, Rialto will ignore the value that you set for the mandatory field shelving/library location. Other print fields can be left blank.
Testing a Selection Plan Rule
After you have created a Selection Plan rule, test your base query combined with this rule, in order to check that this combination retrieves results. You can test one rule at a time to ensure that each rule is well-formed.
The test runs the rule disconnected from the other rules, meaning that it does not exclude results from preceding rules.
- Open the Test tab.
- Under Rule, select the rule you would like to test.
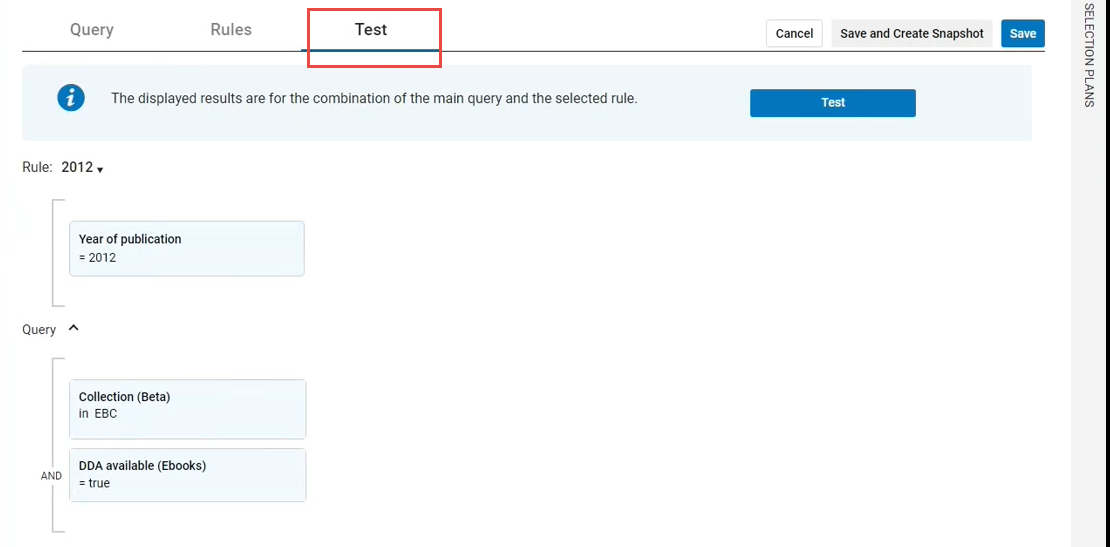
- Select Test. The results panel opens that displays the matching results for the current rule + base query.
Managing Rules
You can do the following with the Selection Plan rules:
| To: | Do: |
|---|---|
| Change the order of the rules |
On the Selection Plans page (Collection Development > Automatic selection > Selection Plans), select the desired plan. Open the Actions menu and select Edit. Open the Rules tab. In the left-hand pane, select a rule and drag-and-drop it as required. Selection Plan rules trigger their selected action (purchasing the title or adding it to DDA) until the rule reaches the rule cap. If the first rule wasn't able to purchase /add to DDA applicable titles because it was out of the cap, then the next rule does not evaluate these titles and will not be able to purchase/add these titles to DDA. |
| Edit a Purchasing rule |
On the Selection Plans page (Collection Development > Automatic selection > Selection Plans), select the desired plan. Open the Actions menu and select Edit. Open the Rules tab and make your changes. |
| Delete a Purchasing rule | On the Selection Plans page (Collection Development > Automatic selection > Selection Plans), select the desired plan. Open the Actions menu and select Delete. Open the Rules tab. Open the rule and select Remove at the top of the right-hand pane. |
|
Activate/Deactivate rule
|
You may want to keep a complicated rule in a plan, but not want the rule's assigned action to take place on subsequent snapshots or runs. All rules are active when created, however you can deactivate a rule to prevent future actions. To deactivate a rule, on the Selection Plans page (Collection Development > Automatic selection > Selection Plans), select the desired plan. Open the Rules tab. Use to the toggle next to the listed rule to switch from active in inactive. |
Editing a Selection Plan Profile
To edit the Selection Plan profile:
- On the Selection Plans page (Collection Development > Automatic selection > Selection Plans), select the desired plan. Open the Actions menu and select Edit. The plan page opens.
- Make your changes and select Save.
Constraints to Editing the Selection Plan Configurations:
Any changes made to the Selection Plan configurations (profile and action rules) for which the feed was already created, will affect the contents of the feed. To avoid inconsistencies between the current plan configurations and the feed contents, each time you edit the plan configuration, the feed will be reset and recalculated according to the new configurations. This might lead to skipping the purchasing date on that week.
When you edit the plan configurations, Rialto displays a warning:

To test the results of any changes to the plan, you can duplicate the current plan, without activating it, and use it for testing.
Deleting a Selection Plan Profile
Deleting a purchasing profile will remove the purchasing feed for all selectors. The next time the selector views their list of Selection Plan feeds, they will no longer see the feed associated with the deleted profile. Any offers that were up for purchasing/adding to DDA in that timeframe will not be processed.
- On the Selection Plan page (Collection Development > Automatic Selection > Selection Plan), select the desired plan. Open the Actions menu and select Edit. The plan page opens.
- Make your changes and select Save.
Viewing Historical Runs of the Plan
You may want to view what was purchased or added to DDA from an earlier Selection Plan run. To do this, you can view historical runs from active plans on the Selection Plan History page.
The Rialto Administrator can see the Selection Plan's query and rules that created a certain snapshot (for historical runs of a plan). This allows you to track how earlier configurations informed the plan's results.
- On the Selection Plans list, select the History action for a particular plan. This opens a list of all the historic plan runs.
- Here you can see the date and the count of titles that were added to DDA, purchased, or skipped. As well as the total amount spent on the plan run.
- Select the ellipses on any given plan run to view additional details about that run, such as the exact titles added, or a read-only view of the profile and rules at the time of the plan's run date.