
Institution-level Cart and Orders Awaiting Approval Customizations
To set institution-level Cart and Orders Awaiting Approval Customization, you must have the following role:
- Rialto Administrator
The Rialto Administrator can now configure Cart and Orders Awaiting Approval fields as mandatory for order submission, to ensure that certain fields are required with orders by selection and acquisition staff.
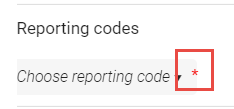
A field set to mandatory appears with a red asterisk to indicate users that it is mandatory:
To configure mandatory fields:
- On the Cart or Orders Awaiting Approval Task List pages, open an offer to display the Details panel.
- At the top of the page, select the
 Customize icon.
 - Select the Mandatory fields customization option.
- EE In the Mandatory fields customization panel that opens, select the options you want to set as mandatory, and then set Apply.
Some options are pre-selected (Ordering Library, Shelving Library/Location, and Fund). They cannot be cleared because the information in these fields is necessary for Rialto to function properly.
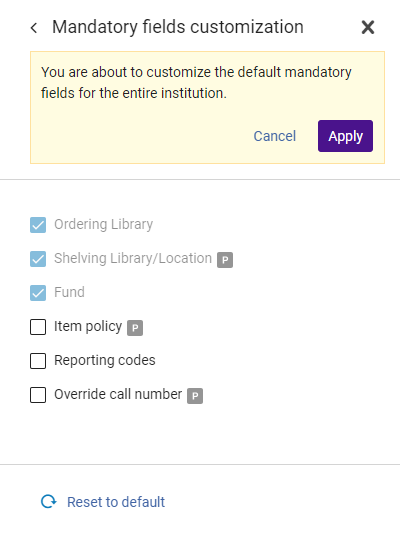 Set Institution Mandatory fields
 - To reset your selections, select Reset to Default.
Application of Ordering Library, Shelving Library/Location, and Fund can be configured to be bypassed by Selection staff. This is a setting that can be enabled by your system administrator from the Configuring Rialto Settings page.