
Set Up SSH Port Forwarding in Putty
- Article Type: General
- Product: Voyager
Question
How to set up SSH port forwarding through PuTTY?
Answer
- This procedure involves making an SSH connection to the Voyager server.
- Setting up SSH Port Forwarding routes Voyager connections over this connection using PuTTY (and not the VPN).
- Setting up SSH Port Forwarding can be a useful step toward confirming whether or not there is an issue with local network infrastructure.
Requirements:
- PuTTY installed on your PC
- Credentials for the Voyager server's voyager user.
- SSH access from your PC to the Voyager server via the voyager user.
Steps:
- Set up PuTTY to access SSH on the Voyager server via the voyager user account.
Example:
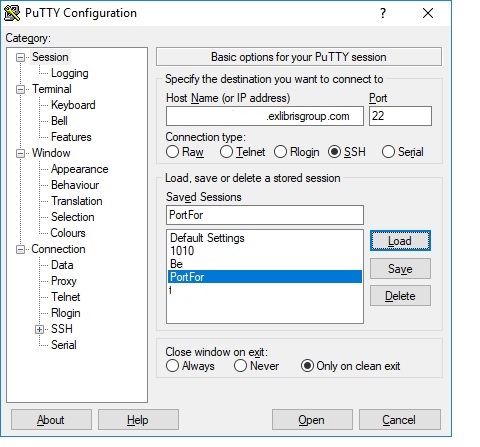
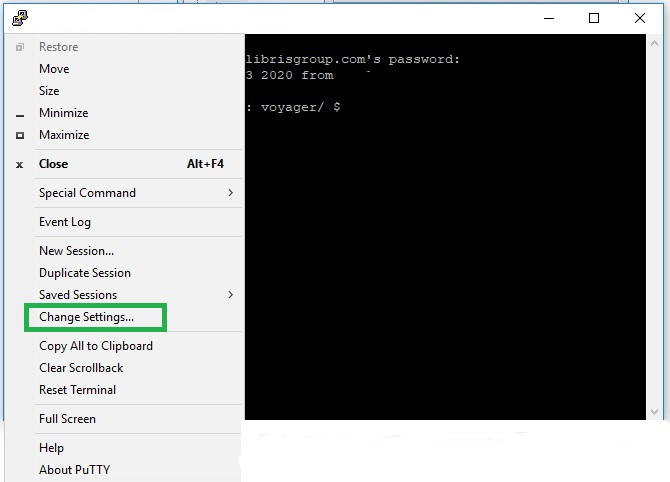
- Log into the Voyager server by clicking the Open button and enter your credentials.
- Click on the small icon in the upper left corner to access the Putty Menu, then click on Change Settings...
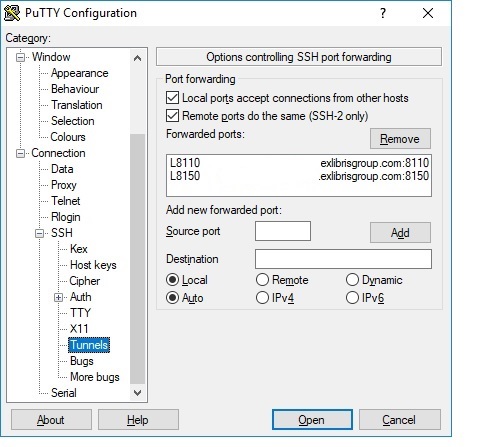
- Click on Connection > SSH > Tunnels
- Enter port number as the Source port and host:port as the Destination, then click Add.
- Example: port forward 7040, host IP 123.45.678.9
- Source Port: 7040
- Destination: 123.45.678.9:7040
- Example: port forward 7040, host IP 123.45.678.9
- Check both boxes at the top: Local ports accept connections... and Remote ports do the same...
- Select the Local & Auto radio buttons at the bottom.
Example:
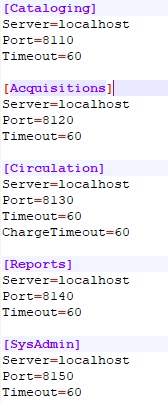
- Repeat step 5 for all Voyager client ports from the Voyager.ini file, including port 25 for Email.
- In the Voyager.ini file, change all instances of the server IP address to localhost (make sure your port series is correct!).
Example:
- Save your settings in PuTTY and double-check them.
- Ensure you are logged into the server via SSH through PuTTY.
- Open client(s) using your PuTTY configuration tunnel settings.
Additional Information
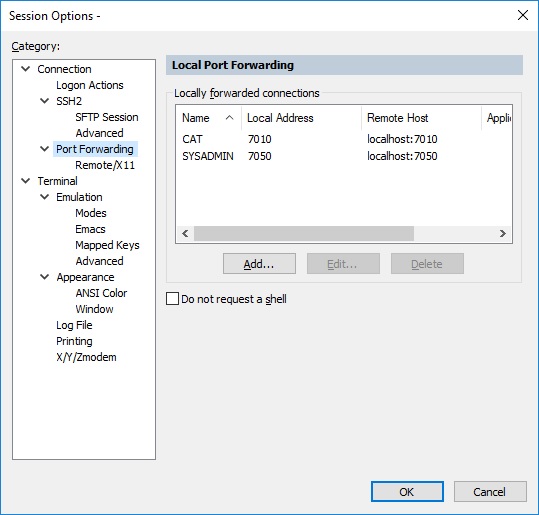
You can also use SecureCRT in a similar fashion to set up Port Forwarding. Add the ports to the Connection > Port Forwarding configuration as shown below:
See also: Port forwarding using plink.exe to run Voyager clients or Prepackaged Access Reports
- Article last edited: 21-May-2020