
Working with the Notification Center
The Notification Center in App Manager (Notifications) enables app administrators to send notifications to one or more end-users.
Recipients of notifications sent from the Notification Center can be specified in a number of ways:
- By selecting individual users as recipients.
- By selecting a notification group – A pre-configured list of recipients. Targeted information can be sent to specific end-users by creating a notification group. End-users may automatically be subscribed to notification groups based on their app roles or they may be able to select which notifications they receive by subscribing to or unsubscribing from notification groups.
- By selecting user roles – Users with the specified roles receive the notifications.
Notifications can either be sent immediately or scheduled to be sent at a later time. Recipients receive the notifications if they are logged into the app at the time the alert is sent.
- You can also send notifications using the Send Alerts/Push Notifications API. For more information, see the Developer Network documentation at https://developers.exlibrisgroup.com/campusm/apis/send-alerts-push-notifications/.
- While alerts appear in the Alerts Screen of the app in all environments, push notifications are not guaranteed to work in Preview apps, due to limitations from Apple and Google. For testing push notifications outside production, we recommend doing so in the Sandbox environment.
For information about the end-user experience when receiving notifications from the Notification Center, see Sending Notifications to End-Users.
Watch the Sending Notifications to Users video (3:43 min).
The Notification Center Dashboard
When you first open the Notification Center in App Manager (Notifications), the Notification Center dashboard opens. The dashboard contains options for creating and managing notifications and the Notification Center, displays the last day's notifications, and shows the number of notifications sent in the last month alongside the percentage of end-users that have read the notifications. A more comprehensive analysis of notifications and how they correlate with other metrics of app usage can be done via campusM Analytics.
The filters and the search function above the list of notifications can be used to locate and display notifications that were sent previously.

Sending Notifications to Individual End-Users
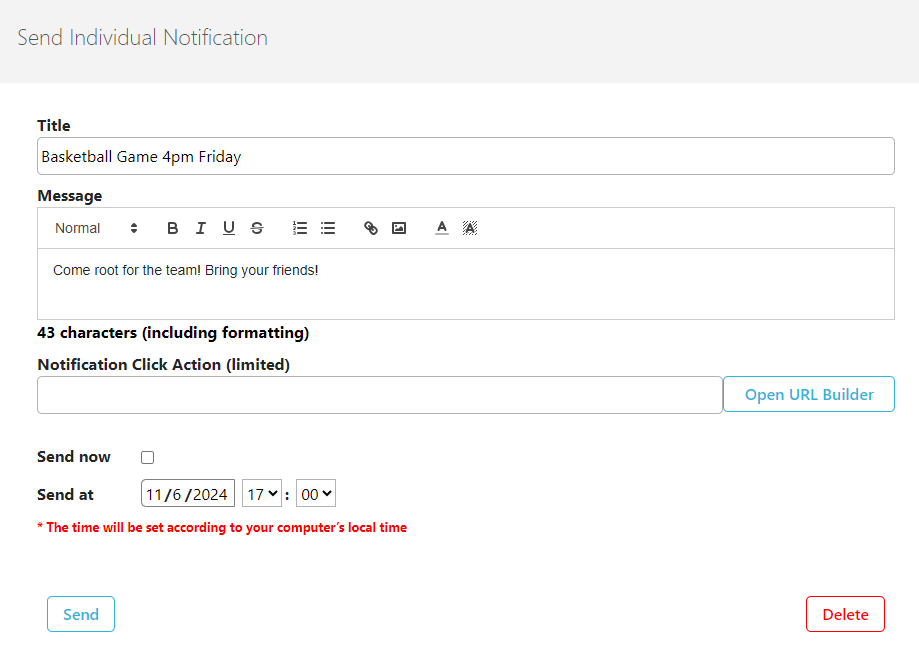
You send notifications to a manually selected list of end-users on the Individual Notification page (Notification Center > Notification actions > Send Individual Notification). Since these notifications are not sent to a notification group, all specified end-users see the notification unless they have turned off all notifications.

- On the Send Individual Notification page, configure the following fields:
- Recipients – Search for the end-users to which to send the notification. Select all matching recipients or select them one by one.
- Title – Enter a subject for the notification (plain text only).
This is a mandatory field whose maximum length cannot exceed 200 characters.
- Message – Enter the notification text. To edit the text, see Working with the Text Editor.
You can create a personalized message by adding one or more of the following codes into the message text:
- {FIRSTNAME} – The end-user's first name. For anonymous users, this code resolves to User.
- {LASTNAME} – The end-user's last name. For anonymous users, this code resolves to Name.
- {EMAIL} – The end-user's email address. If an end-user's email address is not defined, this code resolves to an empty string.
To add a link to a location in the app or to an external location, in the menu bar, select
 . The Add Link dialog box opens. In the text field, enter the URL of the link, or begin typing the name of a location in the app (e.g., "calendar"), and then select the location from the list of search results that opens below the text field. For additional information about adding links to the app, see Working with App URLs.
- By default, when a recipient taps the pop-up notification that they receive when the notification is sent, the app opens and displays the home page. If you want it to open to a different location in the app, under Notification Click Action, select Open URL Builder. The Add Link dialog box opens (see above). In the text field, enter the URL of the link, or begin typing the name of a location in the app, and then select the location from the list of search results that opens below the text field. For additional information about adding links to the app, see Working with App URLs.
At present, only Map links are supported. Additional link options will be supported in the future.
If the user does not have permissions or access to the link target, the home page of the app opens.
- Select when to send the notification:
- Leave Send now to send the notification immediately after selecting Send.
- If you clear Send now, select the date and time to send the notification. The date and time you select are for your current time zone.
- In the Expire on field, select when you want the notification to expire. The notification will no longer be visible to end-users on the date you select. (Default and maximum are 90 days.)
- Select Submit to send the notification. You may have to confirm the notification if sending to more than one end-user.
Sending Notifications to a Group
You can send notifications to a pre-configured group of end-users from the Group Notification page (Notification Center > Notification actions > Send Group Notification). This page is the same as the Individual Notification page described above, except that you select a pre-configured notification group instead of selecting recipients one-by-one. In addition, end-users who have unsubscribed from a notification group do not receive notifications sent to the group. The notification group ALL includes all end-users; all end-users are automatically added to this group when they register. For information about managing notification groups, see Configuring Notification Groups, below.
Watch the How to Send a Group Notification video (2:55).

Sending Notifications to Users with Specific Roles
You can send notifications to a group of end-users who all have specified user roles from the Send Advanced-role Notification page (Notification Center > Notification actions > Send Advanced Role Notification). This page is the same as the Individual Notification page described above, except that you specify user roles instead of selecting recipients one-by-one. You can select a single role, or you can select two roles and specify the logical relationship between them. The notification is sent to those users whose roles meet the specified conditions at the time the notification is sent.
If you have only one role for a profile, and you want to use advanced notifications, you should create an alert group tied to the role. This will will enable you to send an alert to that group of users. If you have multiple roles for a profile, this is not required and you can send advanced-role notifications as described below.

- Open the Send Advanced-role Notification page (Notification Center > Notification actions > Send Advanced Role Notification).
- Under Profile, select the profile in which the role(s) are defined.
- Under First Role, select the first role to use.
- If you do not want to add a second role, select Only.
If you want to add a second role, select the logical relationship between the two roles, as follows:- AND – The notification is only sent to end-users with both roles. For example, specifying the roles Physics Student AND First Year means the notification will be sent only to students who are in both groups - first-year physics students.
- NOT – The notification is only sent to end-users who have the first role but not the second role. For example, specifying the roles Physics Student NOT First Year means the notification will be sent only to physics students who are not first-year students.
- If you selected AND or NOT, under Second Role, select the second role to use.
- Fill in the rest of the fields, and then select Submit to send the notification, as described under Sending Notifications to Individual End-Users, above.
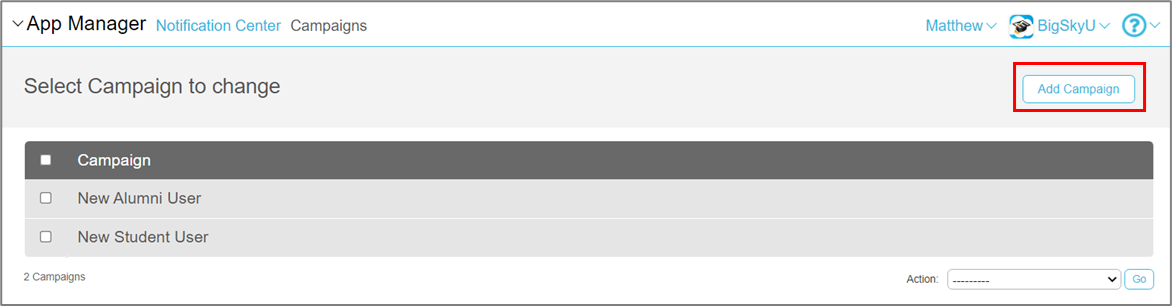
New User Registration Notification Campaign
This option enables you to configure a series of notifications that are sent to a new user upon first registration into a particular profile. The timing and content of these notifications can be configured to facilitate the creation of a communication campaign to introduce the app and prompt engagement. You can configure the notifications to encourage usage or point out useful features through a series of information app notifications.
Configure this feature from the App Manager > Notification Center:

Multiple campaigns can be created and configured:
Additionally, multiple notifications can be configured for one or more profiles when a user first registers for or accesses a profile:

The number of days after the registration that the notification is sent, the timing of the notification (based on the time zone set for the profile in the profile settings), and the content (title and body) of the notification are configurable.
Viewing and Managing Sent Notifications
You can view a list of sent notifications on the Notification Center page (Notification Center). You can also open notifications from the list in order to view their contents, resend them, duplicate them, or delete them from the list.

This page displays:
- Number of notification messages sent in the last 30 days
- Percentage of notification messages with which end-users engaged in the last 30 days
- A list of notifications that match the criteria specified above the list, showing the number of recipients, how many of these read the notification, and the percentage of read/recipients (Engage). The criteria are defined in the following fields:
- Notification Source – The system or process that sent the message (App Manager, API, Polls, etc.)
- Date – The date on which the message was sent. Select the field to open a date selector. You can select any day in the past or present, or select All future notifications (below the calendar) in order to see messages that are scheduled to be sent in the future.

- Search – Enter a string of text to find all messages whose titles contain the string. The search proceeds as you type the string. The current selection in the Date field is ignored when a search string is entered into this field, but the currently selected Notification Source is taken into account.
Resending Notifications
- Click anywhere in a notification from the Notification Dashboard. The Resend Notification page displays:
 Resend Notification
 - Edit the message details, if desired.
- Select a button to resend the notification:
- Send to all – the notification is resent to all recipients of the original notification.
- Send to read – the notification is resent to only those recipients that read the original notification.
- Send to unread – the notification is sent to only those recipients that did not read the original notification.
- Duplicate – Create a new notification with the same title and message content, that can be edited and/or sent to other recipients.
Deleting Notifications from the List
After notifications are sent, you can remove them from the list of notifications in the Notification Dashboard. (This does not cancel the sending of the notification.) To delete a notification from the list of notifications after it was sent, select it in the dashboard to open it, and then, in the Resend Notification page, select Delete. If you delete a notification that has already been sent, it is removed from all the original recipients' devices and apps, whether they have already read it or not.
Scheduling Notifications
Scheduling notifications from the app manager enables you to create notifications in advance of their sending and define a date and time for their release.
To schedule a notification to be sent at a defined time, clear the Send Now checkbox, and then set a date and time for the notification to be sent. Notifications can be scheduled to be sent up to 90 days from the day on which they are created.
Viewing Scheduled Notifications
To display a list of scheduled notifications that have yet to be sent, under Date, select All future notifications.

Managing Scheduled Notifications
You can edit or delete scheduled notifications before they are sent. To open a scheduled notification for editing or deletion, select it.
To edit the notification, modify the fields as required, and then select Send. Note that the recipients of future messages cannot be modified.
To delete the notification, select Delete. A confirmation message appears. Select OK to delete the notification.

Configuring Notification Groups
Configuring Notification Group Categories
- Description - The name of the category. This will appear in the app as a notification type that the end-user can enable or disable.
- Image - An image for the category, as it will appear beside the notification type in the app. Select the image from the Asset Manager; see Uploading Files.
- Profile owner - Optionally select a profile. When selected, only App administrators associated with the selected profile can send notifications to notification groups associated with this category.
- Roles - Associate the category with the required app roles. For more information, see Customizing End-User Access to Services. If an end-user is not associated with one of the app roles for this category, the end-user cannot be assigned to a notification group in this category.
A role must also be selected for the notification to display for the end-user.
Configuring Notification Groups
- Description - The name of the group. This will appear in the app as a notification type that the end-user can enable or disable.
- Category - The notification group category (see Configuring Notification Group Categories).
- User subscribe - Whether the end-user can subscribe to the notifications for this notification group. If you select No, end-users cannot opt in or out from these notifications (unless they disable all notifications); see .
- Sort order - The place in the order in which groups appear in the drop-down list when sending a notification. Groups without a number appear last. Lowest numbered groups display first. If more than one group is assigned the same number, the first group with that number in this list appears first.
End-User Subscriptions to Notification Groups
- When the end-user logs into their profile, they are automatically subscribed to the notification group if they have the assigned app role for the notification group category. Assigning app roles to a notification group category enables end-users with the associated app role to receive the notifications. For further information on Notification Group configuration, see Configuring Notification Group Categories, above.
App roles can also be associated with notification groups from within the app role record (See Managing App Roles). Select the notification groups to which the app role is associated using Standard alert groups.
-
End-users can choose to subscribe to or unsubscribe from available notification groups from the Settings menu on their mobile device, under Notifications > Channels Subscription. Turning on the toggle subscribes the end-user to the notification group so that they will receive notifications sent to that group. End-users can unsubscribe by turning off the toggle.
The User subscribe option in the notification group's settings must be set to Yes for the end-user to be able to subscribe to or unsubscribe from the notification group; see Configuring Notification Groups.
 End-User Subscription Settings
- Admins can manually add or remove individual end-users from notification groups, as explained under Manually Managing the Subscribers of Notification Groups, below.
Manually Managing the Subscribers of Notification Groups

- To add a subscriber, select their checkbox. Use filters to search for users based on their email address or name. To remove a subscriber, clear their checkbox.
- To add or remove all subscribers, select one of the following options: Subscribe all shown on page, Subscribe Everyone, Unsubscribe all shown on page, or Unsubscribe Everyone.
- To add email addresses, upload the CSV file by selecting Upload File. The structure in the file should follow this template:
Example File for Adding Email Addresses.
Your changes are saved automatically.