Overview
|
About this Guide
- How to use the App Manager to configure and publish your app
- How to access and manage the App Manager
- Initial installation and configuration of the campusM software. This is performed in coordination with Ex Libris. Any changes to the software must be made in consultation with Ex Libris. Examples include changing the name and other text elements of the software, installing language packs for your apps, and creating an interface between the App Manager and your existing backend servers. See also Changing App Manager Installation Settings.
- How to use Web services. For help using Web services, open a support ticket. Contact Ex Libris customer support for more information.
- Anything covered in other documentation guides, such as branding guidelines, how to use the Application Extension Kit to create integration services, and the campusM Scheme.
Services and Other App Elements
- Basic – A non-functional tile, or one that links to another service or URL.
A basic service is a tile with text or a tile that the end-user selects to open a link.
- Static Content – A service that presents a page of information, or a menu of information pages. Each option in the menu is a) a sub-menu, b) a link to another service or URL, or c) a static page of information. These are also known as pocket guides.
A static content service tile is text, a picture, or both. The end-user selects the tile and sees the page with HTML, pictures, text, and so forth. Alternately, the end-user sees a menu with options to view pages (with HTML and so forth), open other services, or open a sub-menu.
- Feed – A service that provides dynamic syndicated content from one or more RSS feeds.
Unlike a basic or static content service, a feed tile presents dynamic information on the tile itself. The end-user can view dynamic information without selecting the tile. The end-user can select a link on the tile to open other content (such as in a web browser).
- Banner – A service that presents an image marquee. The images can link to another service or URL.
Like a feed service, a banner tile presets dynamic contents even before the end-user selects the tile. When configured, the end-user can select one of the rotating images to open some other service or content.
- Integration – A service that provides other dynamic content, built using the Application Extension Kit (AEK).
Integration services can present almost anything since they are mini-programs that operate within the application. Typical services could be available parking spaces, weather, class status, and so forth.
- Calendar – Menu option (tile) that links to the campusM Calendar/Timetable function.
- Product Integration – An out-of-the-box integration that can include dynamic content whether on the home screen as a live tile or as dynamic content received from different vendors.
- Product Feature – out-of-the box functionality
- Quick Polls – Create short, single choice, multiple choice, or free text polls to distribute to your users to answer
- Attendance Student – Used to deploy the student check-in attendance tile to your homescreen
- Attendance Lecturer – Used to deploy the Lecturer check-in attendance tile to your homescreen
- Attendance Transaction Viewer Tile – Used to deploy the Transaction Viewer for attendance administrators
- Tile Container – A fully customizable container for tiles that allows better organization of homepage content
- A hierarchy of profiles and roles to hide/display services, in whole or in part, to specific users or types of users (see Customizing Access to Services, below).
- Configurable layouts based on the OS environment and device rotation.
- A name, icon, and description.
- An authentication method that provides user authentication for the app.
- Information screens, such as a splash screen, an About screen, and a Terms of Use screen.
- A configuration menu that enables the user to switch profiles, edit personal details, search for a service, share the app or a service on social networking, or submit feedback to your institution.
- Emails and notifications that are sent to the end-user, as required.
Users
- End-users refers to the people who use the app, including students, visiting parents, instructors, and staff.
- Users refers to the users of the App Manager and does not include end-users.
- Administrators refers to the users of the App Manager who manage other App Manager users (can add/change/delete user permissions). Administrators also work together with Ex Libris to create the initial campusM installation and link the App Manager to existing institution backend servers, such as LDAP.
Customizing End-User Access to Services
- Multiple apps are typically not necessary but are sometimes used for branding or marketing purposes. You can create one app for students and one app for alumni, for example, or one app for registration day and another for year-round usage. The services provided by each app can be tailored to the end-users of that app.
- Several options are provided for end-user authentication to the app itself, including requiring registration, creating lists of authorized end-users, and authentication by LDAP or another backend server. Authentication types are assigned to a profile group. When registration is required, end-users register for the app on their first use.
- Profiles (also known as app profiles) provide a means of grouping end-users into types, such as first-year or graduate students, staff, and so forth. You can tailor the app interface and enable services for specific profiles. An end-user associated with multiple profiles in a profile group can switch between them in the app, seeing different services based on the selected profile. Profiles are grouped into profile groups. When the end-user accesses the app, he or she selects the relevant profile group. After logging in, the end-user has access to only the profiles in that profile group (that are authorized for that end-user).
You can configure entirely different branding for each profile so that the app looks and feels different for end-users logged in to that profile.You can create an unlimited number of profiles.
- App roles are assigned to end-users. A service, or in some cases part of a service, can be configured for certain app roles, in which case the service only appears to end-users who have at least one of these app roles.
While an end-user can switch between profiles in the app, end-users cannot switch their app roles. For example, the end-user can view the app as a graduate student and also as a faculty member, but the app roles assigned to the end-user apply in each profile.For example: If a service is associated with the app role First Year Students, an end-user associated with the app roles First Year Student and Physics Student sees the service in the app, while an end-user associated only with the app roles Graduate Student and Physics Student does not.App roles are initially assigned to end-users by means of a backend service that Ex Libris builds together with your institution. The service uses a mapping feature called customer roles, which maps codes returned from your backend service during end-user registration to the app roles assigned to the end-user. These codes are returned by a custom-designed API call from the App Manager to your backend service. In the App Manager, you can also add or remove app roles from specific end-users.
End-User Communication
Communication to End-Users
Communication from End-Users
- Problems - Problems with the app. You configure a list of problem categories for the end-user to select along with his or her feedback.
- Ideas – Ideas for the app.
- Feedback – Any other feedback.
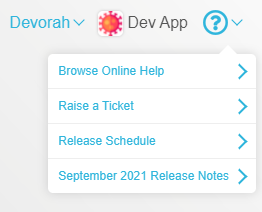
Getting Help
To get to these help pages, select Browse Online Help.
To open a SalesForce case, select Raise a Ticket.