
Primo November 2016 Highlights
Introduction
This guide summarizes the various enhancements and changes that are new for the November 2016 release of Primo. For information regarding defect fixes, see Release Notes.
Primo November Release Highlights – Webinar
To download the Webinar, click the following link: Primo November Release
Social Login for Alma
This enhancement enables Alma environments to utilize patrons' social network logins to use as a single-sign-on login to access library services from Primo. For more information, see Using Social Networks for User Authentication.
Enhancements to New UI
The following sections describe the enhancements made to the new UI. In most cases, the configuration for the new UI is the same as for the previous UI. For details specific to the new UI, see Back Office Configuration for the New UI.
bX Recommendations
For the new UI, bX Recommendations display in the Related Reading section of a record's full display. For additional information, see bX Recommendations.
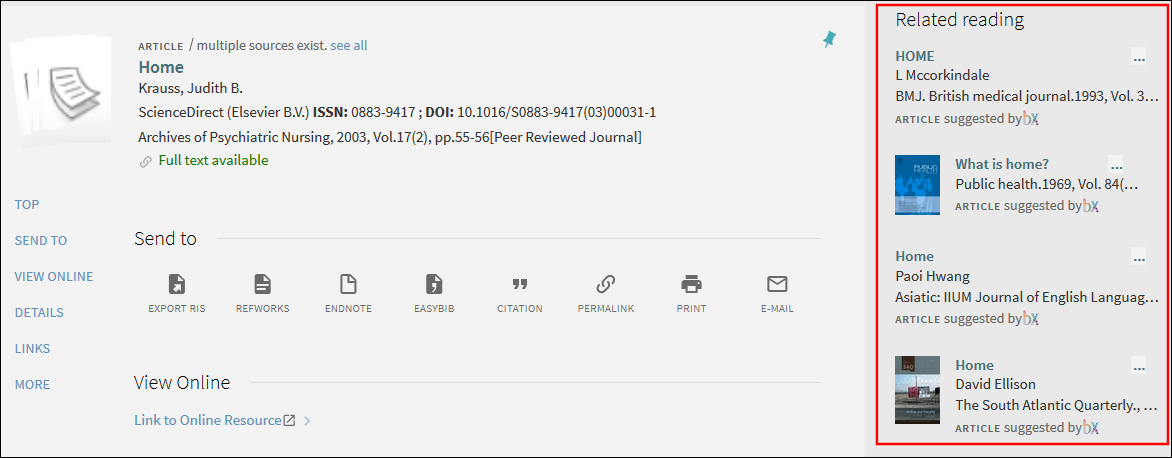
Related Reading Section in Full Display
For Alma customers who are receiving bX recommendations and want to switch to the new UI, it is necessary to set the New UI Enabled field and populate the Alma Services Page URL field. This allows the system to display the full record for titles that users click in the Related Reading section.
Export to RIS Format
The ability to convert a record's citation to RIS format has been added to the new UI on the Full Display page of a record.
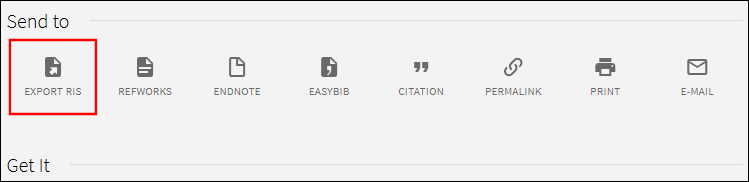
Send To Options in New Primo UI
To export a citation to RIS format:
-
Perform a search in the new Primo UI.
-
Access the record's full display by clicking the title of the record.
-
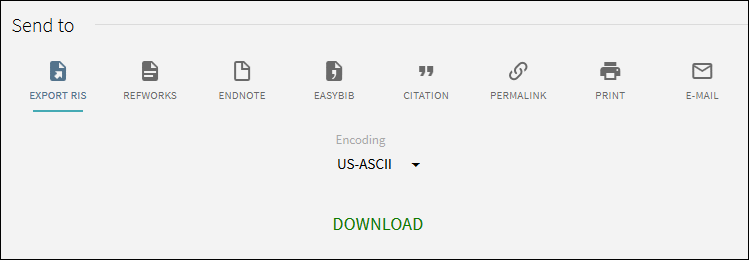
In the Send to section, click EXPORT RIS to display the output options.
 Export RIS Options
 -
Select the encoding for the output file.
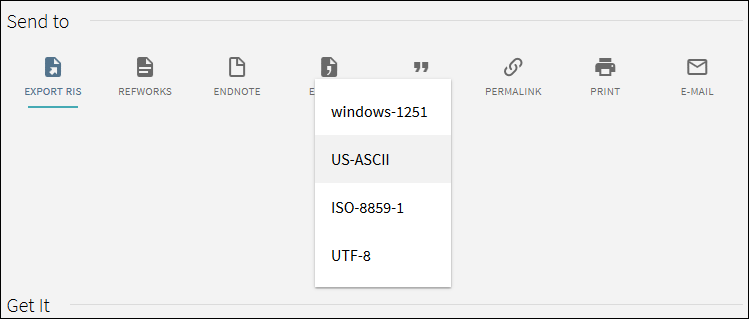 Encoding Options
 -
Click DOWNLOAD. You may either view the output with a specified application or save the output to a specified file.The following figure shows an example of a record's output:
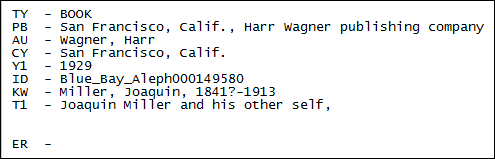 Example Output
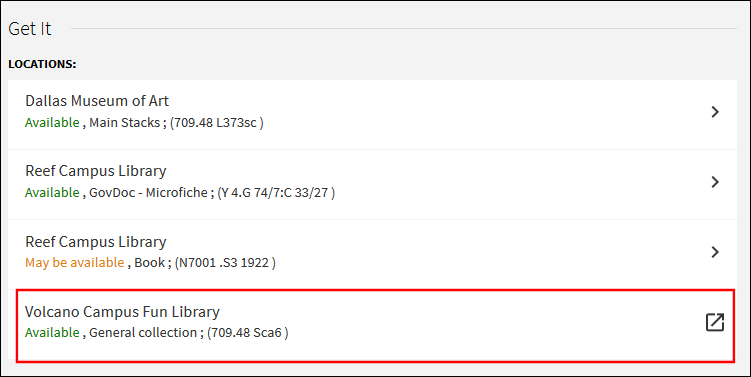
Support Locations Service
The information that displays in the Locations tab in the Front End UI will now display in the new Primo UI under the Get It section of the record's full display.
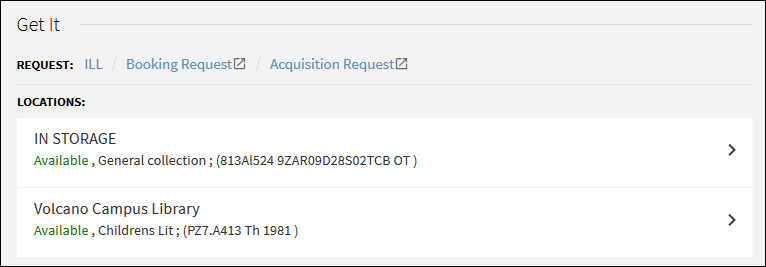
Get It > Locations Section New Primo UI
From the Locations subsection, users can perform the following operations:
-
Click the right arrow
 to display a location's items.
 Displaying a Location's Items
 -
Click the down arrow
 to display more information for an item.
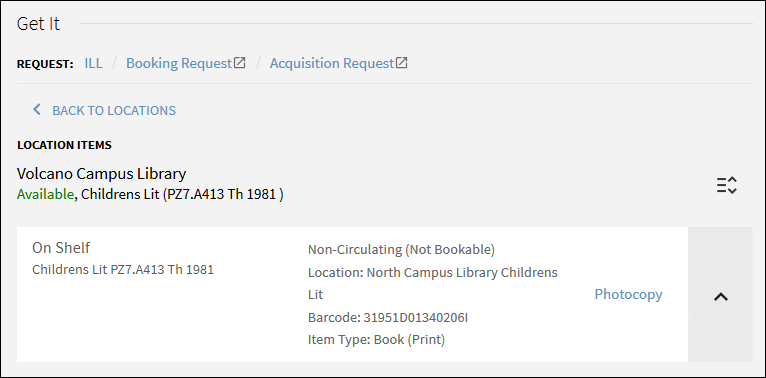 Expanding an Item's Details
 -
Click the up arrow
 to display less information for an item.
 -
Click the expand/collapse icon
 to display either more or less information for all of a location's items.
 -
Click the BACK TO LOCATIONS link to return to the list of locations.
Support for OPAC Via Link
Suport for OPAC via Link (OvL) has been added to the new Primo UI. When OvL is active for an institution, fulfillment requests are handled by the ILS's OPAC instead of Primo's UI.
Get It Service
In the Get It section, the systems displays the following subsections for OvL environments:
-
Requests – This section displays sign-in information if needed for the institution.
-
Locations – This section displays a list of locations. When an OvL location is clicked, the OPAC opens on a new tab or page.
Get It Service (OvL)
My Library Card
In OvL environments, the My Library Card link opens a new tab or page, which enables users to view their library cards from the ILS's OPAC. An additional link called Settings allows users to view or configure a limited number of settings (such as email, SMS number, and language) within Primo.
The label for the new Settings link is configured with the following code in the Library Card Labels code table:
default.nui.details.header.ovl > Settings
Records Opened in New Tab or Window
This enhancement allows users to open the full page of a record using the following options after right-clicking a link in the results:
-
Open link in new tab
-
Open link in new window
-
Open link in new private window

New Right-Click Options
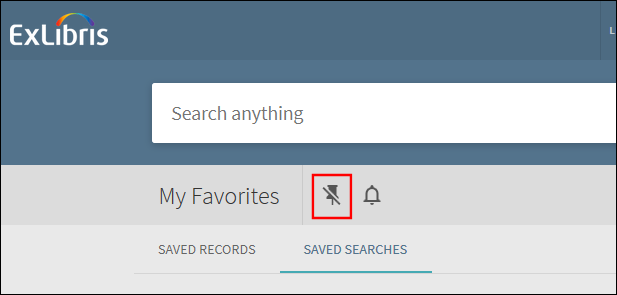
Enhanced Favorites Indicator
The new Primo UI has been enhanced to provide visual indication when users save records to My Favorites. This indication provides confirmation and highlights the location of the My Favorites button to users. After the record has been saved, the color of the My Favorites button returns to its normal color.
Record Saved to My Favorites Indicator
In addition, the My Favorites button will now float so that it always appears at the top of the screen when scrolling.
Floating My Favorites Button
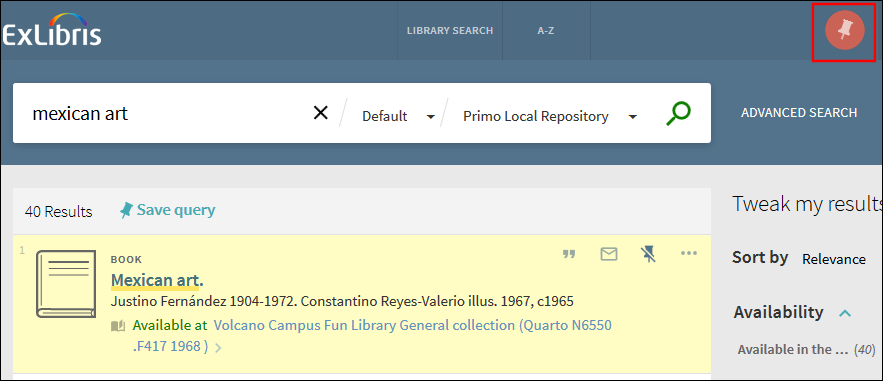
Saving Searches and Alerts
This enhancement enables signed-in users to save searches between sessions and receive email alerts when there is an update to the saved search query. After a query has been saved, the My Favorites > Saved Searches pages allows users to perform the following operations on saved searches: view, delete, and set/clear an alert.
My Favorites - Saved Searches Page
To save a query:
-
Perform a search that you want to save.
-
Click Save Query, which appears above the search results.
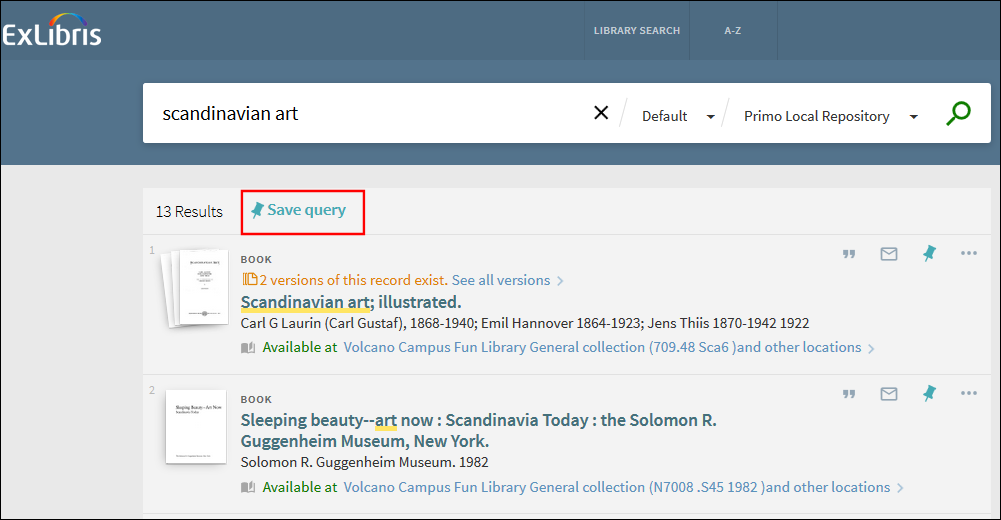 Save Query LinkIn addition, you will have an opportunity to set an alert for this query by clicking the notification link that appears above the search box (see Setting an Alert for more details):
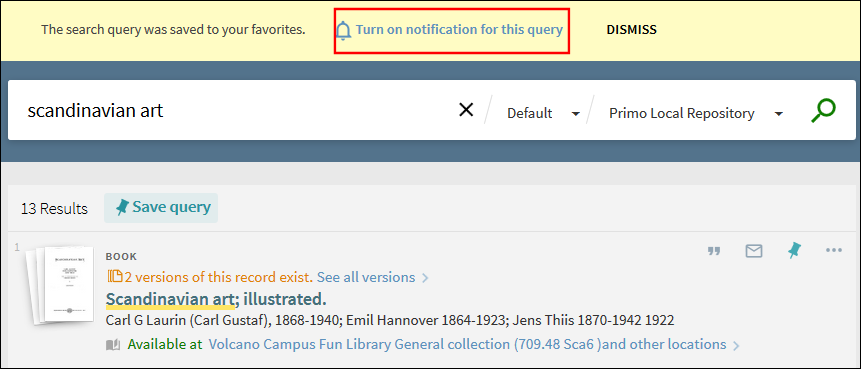 Set Alert Notification Link
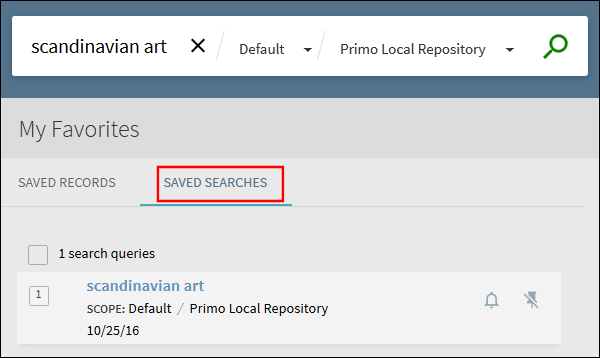
To delete a query:
-
Click the My Favorites button at the top of the page.
-
Click the Saved Searches tab to display all of your saved searches.
-
Click the Unpin button that appears next to the query that you want to remove from the list.
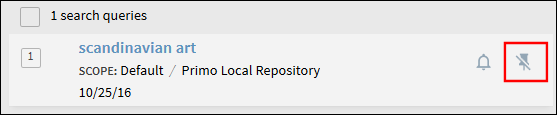 Deleting a Query
To delete a group of queries:
-
Click the My Favorites button at the top of the page.
-
Click the Saved Searches tab to display all of your saved searches.
-
Select the check boxes of the queries that you want to delete.
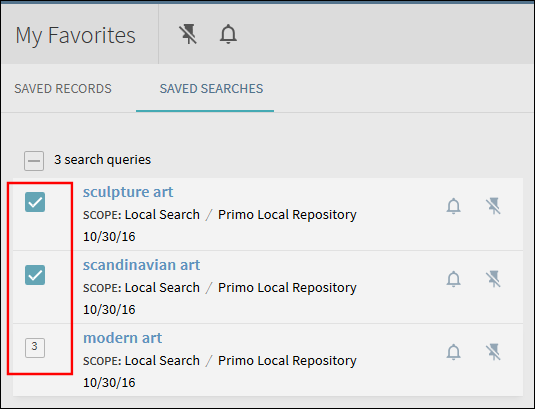 Selected QueriesTo select all queries, click the check box above the list.
 -
Click the Unpin button that appears above the list.
 Deleting a Group of Queries
-
Click the My Favorites button at the top of the page.
-
Click the Saved Searches tab to display all of your saved searches.
-
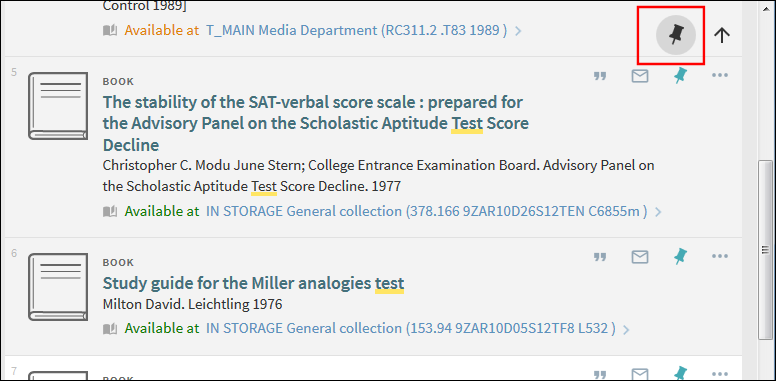
Click the Set Alert button
 that appears next to the query to set the alert.
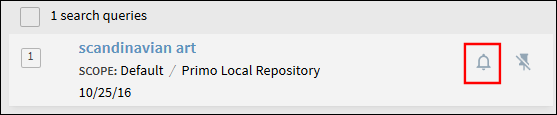 Set Alert Button
 - If necessary, update the email address to which the alert is sent. If the alert had not been previously set, the address defaults to the value stored in the user's personal settings.
-
Click the Change email address link above the search box.
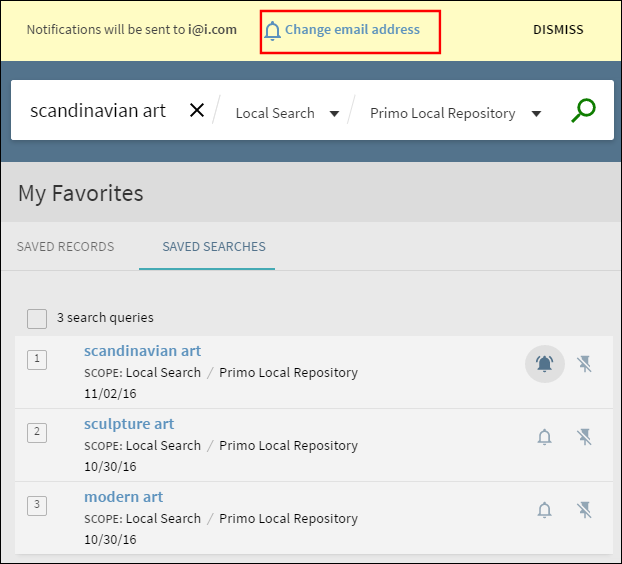 Change Email Address Link
 -
Modify the email address and then click SAVE.
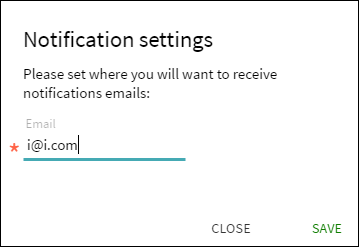 Notification Settings Dialog Box
-
To clear an alert:
-
Click the My Favorites button at the top of the page.
-
Click the Saved Searches tab to display all of your saved searches.
-
Click the Clear Alert button
 that appears next to the query to clear the alert.
 Clear Alert Button
To set alerts for a group of queries:
-
Click the My Favorites button at the top of the page.
-
Click the Saved Searches tab to display all of your saved searches.
-
Select the check boxes of the queries for which you want to receive an alert.Selected QueriesTo select all queries, click the check box above the list.
-
Click the Set Alert button that appears above the list.
 Setting Alerts for a Group of Queries
Back Office Configuration
This functionality is enabled by default. You can use the Favorites Labels code table to modify the labels that appear in the new Primo UI.
Displaying Snippets
This enhancement extends the Snippets functionality to the new Primo UI and does not require additional configuration in the Views Wizard. For more information, see Snippet Display Options.
Static Help File
The New Primo UI now allows you to create a help file for each language that your institution supports. These help files can be created and managed with the Customization Package Manager (Primo Home > Primo Utilities > UI Customization Package Manager). For more information on configuring the help link and files, see New UI Customization - Best Practices.
Did You Mean
The Did You Mean (DYM) feature has been added to the new UI to offer suggestions to users if their search does not return a specified number of results. For more details on how DYM works, see Did You Mean.
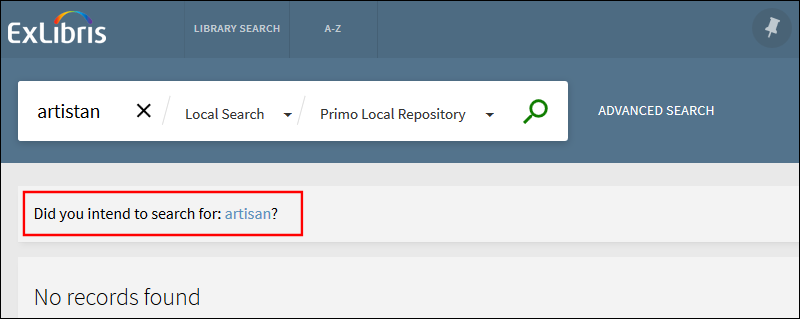
DYM in New UI
Virtual Browse
The Virtual Browse capability has been added to the new UI on the Full Display page. It allows users to browse items based on the location of an item in the search results. The user will be able to navigate through items on the shelf, starting at the selected item’s browse/callnumber value in the PNX. For more details, see Virtual Shelf Tab.
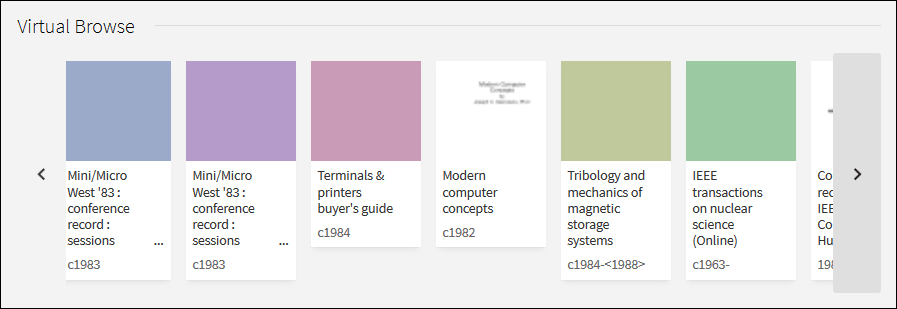
Virtual Browse in New UI
Redirection of Permalinks and Deep Links
This enhancement allows official deep links (which are links that use the dlDisplay or dlSearch actions in the URL) in the classic UI to be redirected to the new UI after making the new UI the primary interface. To support this functionality, the New UI Enable field has been added to the Institution Wizard to indicate that the new Primo UI is now the primary UI. The system will check this new field to determine whether to redirect the link to the new Primo UI.
For redirections involving the dlDisplay action, the view ID is taken from the Select View field if it has been configured in the Institution Wizard.
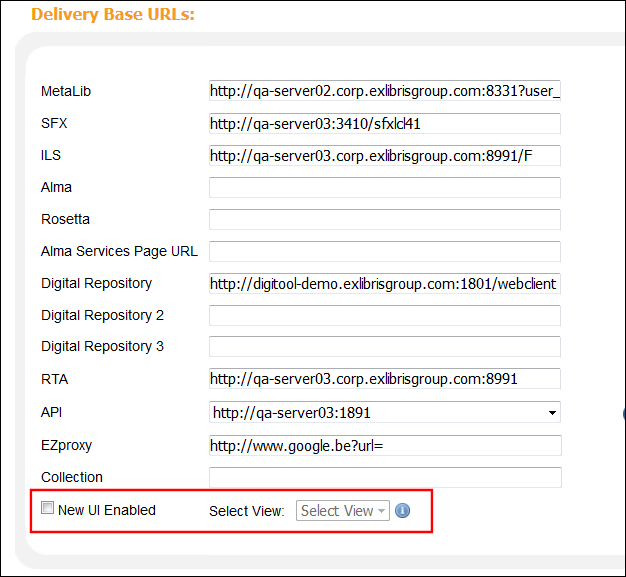
Institution Wizard - Delivery Base URLs Section
New Alma Dublin Core Template
The Alma Dublin Core normalization rules template has been rebuilt to include additional Alma parameters, which require the format of this template to be changed to complex XML. For more details on this template, see Alma Dublin Core. For information regarding the configuration of the publishing profile in Alma, see Publishing Alma Records to Primo.
To use the Alma Dublin Core template:
-
Define the data source for the Alma Dublin Core records (Primo Home > Ongoing Configuration Wizards > Pipe Configuration Wizard > Data sources Configuration). Make sure that you set the Source format field to XML.
-
Create a normalization rules set from the Alma Dublin Core template (Primo Home > Ongoing Configuration Wizards > Pipe Configuration Wizard > Normalization Rules Configuration).
-
Define a regular pipe for the Alma Dublin Core records and make sure that you specify the normalization rules set that you created to normalize the Alma Dublin Core records (Primo Home > Ongoing Configuration Wizards > Pipe Configuration Wizard > Pipes Configuration > Define Pipe).
New Records Facet
The New Records facet has been added to the Primo search results to allow users to display records that have been added recently over the following intervals:
-
New last week - displays only records that have been added in the last seven days.
-
New last month - displays only records that have been added in the last 30 days.
-
New last 3 months - displays only records that have been added in the last 90 days.
The following types of records are not considered new:
-
Records that were not added to a PC group first.
-
Records that were added to a dedup-merged group.
-
Records that were updated.
-
Records that were deleted and then reloaded using a Delete Data Source and Reload pipe.
-
Records that were re-indexed.
-
Records from Summons collections that replaced existing PC collections.
In a blended scope the New Records facet will display records from Primo Central and your local database. The new records facet functionality will be added to the December Primo Central release. If you have blended scopes it may be better to wait until after December 6th to implement this new feature.
Back Office Configuration
Out of the box, the New Records facet is disabled. The following table describes the configurations that are associated with the New Records facet.
| Component | Description |
|---|---|
|
Views Wizard (Primo Home > Ongoing Configuration Wizards > Views Wizard)
|
To enable the new facet:
In the Brief Display > Refine My Results (Facets) tile, add the New Records facet to the list of facets in the Facets to Display section.
|
|
Facet Labels code table (modified)
|
The following codes were added to support the display of the new facet in the Primo Front End:
|
|
Facets Code Fields code table (modified)
|
The following value was added to support the display of the new facet in the Primo Back Office:
facet_newrecords > New Records
|
|
New Records Type code table (new)
|
This table defines the following static facet values that display for the New Records facet:
|
EBSCO Improvements
The following enhancements have been made to improve EBSCO searches:
-
Keyword searches are now supported for EBSCO.
-
Boolean operators are supported as long as the search does not include a specific field.
-
The system adds the AND operator between two keywords if the following is true:
-
The keywords do not already have an OR, AND, or NOT operator between them.
-
The keywords are not enclosed by quotation marks, which indicates an exact search of the keywords.
-
Support RTL Languages
This enhancement adds the infrastructure to support CSS for right-to-left (RTL) languages and includes the CSS for Hebrew. When switching to an RTL language (currently only Hebrew) the following adjustment will now occur:
-
The text is is aligned on the right.
-
The search box and user area appears on the opposite side.
-
Facets remain on the right side of the page, but the text is aligned on the right.
-
The thumbnails appear on the right side, and the actions on the left side.