360 Resource Manager and 360 Counter: Manually Adding Cost Information
- Product: 360 Counter
How do we manually add cost information to a resource?
As part of working with costs for your resources working with costs for your resources, you can manually add cost information to a resource using the following process.
There are other ways to add cost information to resources, including using the import tool.
If your library is a member of a consortium, you can add cost information to inherited databases using the same procedure shown below.
1. Click on the name of the collection, provider, or database to which you want to attach payment information from the Data Management page in the Client Center:

If you are attaching a cost or payment to a holding (title), click on the link that is the number of subscribed titles to navigate to the holdings from the Data Management page:

Note that for the purposes of 360 Counter Consolidated Reports, database and title costs are the two costs that are uploaded into the reports. Collection and provider costs can be entered and stored in 360 Counter, but they will not upload into consolidated reports.
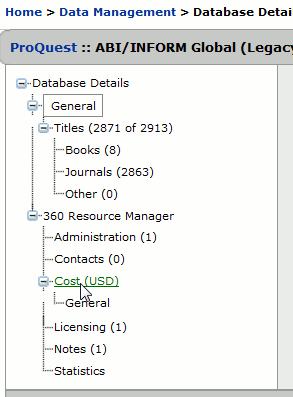
2. On the resource's Details page, click Cost on the left side:

3. Click Add Payment on the upper-right side:

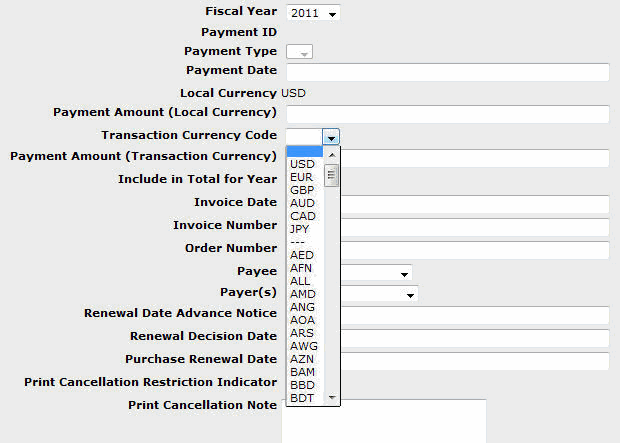
4. You must assign a fiscal year to the payment information. This is the only required field. If your fiscal year does not begin in January, choose the year of the last month in the fiscal year. For instance, if your fiscal year runs from July 2012 - June 2013, fiscal year will be 2013.
5. Enter payment information in the fields provided:

- The payment ID will be automatically generated by the system when you save.
- Your library's Local Currency will display as it was set in Library Settings; you may select a transactional currency for each payment. Do not include a currency indicator. (For example, do not use $5,000.00; instead, use 5,000.00 or 5000.) You may key in negative amounts to indicate a credit; for example, -5000.00.
- Payment information that has been entered in the Payment Amount (Local Currency) field will appear on the left side of the resource's Details page; payment information that has been added to the Payment Amount (Transactional Currency) field will not appear on the left side of the resource's Details page.
- See Cost Management Fields in the Glossary for a complete explanation of the payment information fields.
6. By default, the Include Total in Year box will be checked. Read more about including payments in the yearly totals.
See also information about itemized costs, especially the effects that occur when Use Itemized Total is not checked.
7. Click Save.
8. You may assign multiple fund codes to a single payment by Adding Fund Code information to a payment
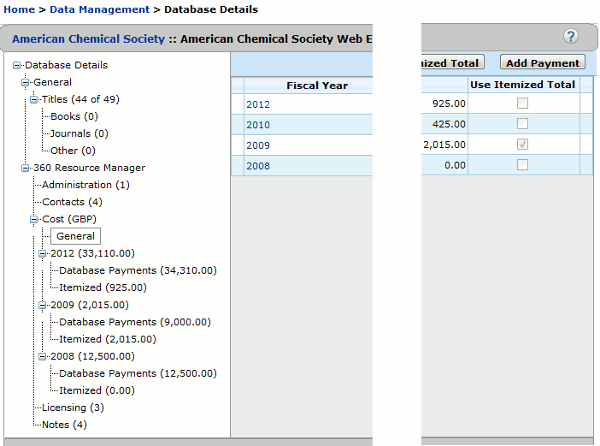
9. Once you've added cost data, you'll be able to look at a general overview of yearly data ...

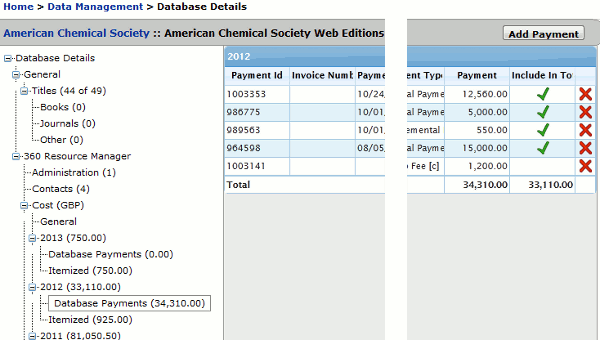
...and a detailed view of each year's data:

- Date Created: 9-Feb-2014
- Last Edited Date: 31-May-2015
- Old Article Number: 7334

