360 Link: Administration Console -- Advanced Options
- Product: 360 Link
How do I configure the advanced options in the 360 Link Administration Console?
This page is part of a larger set of documentation about using the Administration Console to configure your 360 Link.
The customization options on this page are for libraries using legacy 360 Link. The options do not pertain to libraries using 360 Link with Index-Enhanced Direct Linking (IEDL). If you are not sure which version of 360 Link your library uses, check your 360 Link Administration Console settings
- Configure the Page Head/CSS of your 360 Link results page
- Add the Save Article link icon to results
- Enable User Authentication for your remote users.
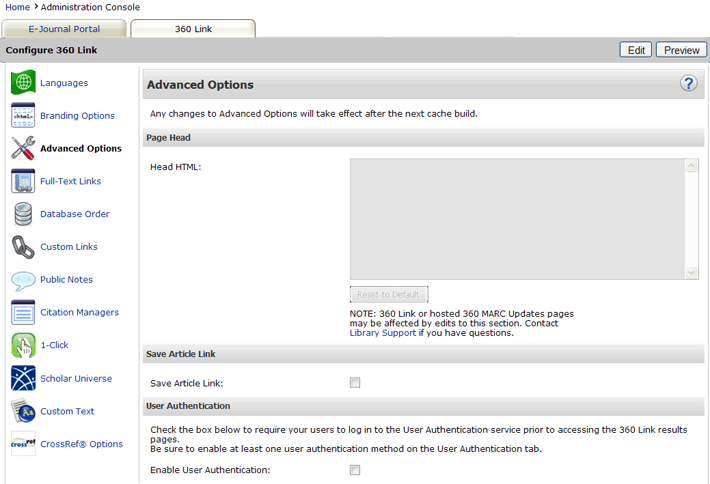
Here is the initial Advanced Options screen in the Administration Console:

To start, click Edit in the upper-right corner. After you make changes, click Save, or click Cancel to discard your changes.
For all customizations, be sure to save any existing code in the Head HTML section before you begin. There is no way to "undo" HTML changes, so you must save the code yourself in case you decide to revert to your original setting.
Changes to your 360 Link Results page will not be visible to your library's patrons until the next day; to see how your changes will look without having to wait, click Preview.
Page Head
This section allows you to enter your Cascading Style Sheet (CSS) settings or JavaScript, which will control the HTML elements you may enter in the Header and Footer sections on the Branding Options page in the admin console.
Generally speaking, the code entered here in the Page Head section is the code that you would use in the <HEAD></HEAD> section of an HTML document. <HEAD> and </HEAD> tags are not needed in the Head HTML field since these tags are already hard-coded into the template.
Style sheet references can be in the form of links to external style sheets or CSS statements entered directly into the form. Links to external style sheets should be in the standard format: <link type="text/css" href="your stylesheet URL here" /> where the portion ="your stylesheet URL here" is replaced by the URL for your stylesheet. You may include multiple style sheets if your library web site uses them, or you may create your own style sheet specifically for your E-Journal Portal, hosting it on your own web servers and referring to it here by its URL. (Please note that JavaScript and CSS will not work properly if they are not referenced with fully qualified links; for example, use http://www.yourlibrary.edu/css/default.css instead of /css/default.css.)
CSS statements may be entered to control specific elements within your branding or to override the default styles within the 360 Link results page. They should be entered using the standard syntax. For example:
<style type="text/css">
body { width: XX;
background-color: #FFFFFF;
}
</style>
If you want to clear the CSS information you've entered, click Reset to Default.
Save Article Link
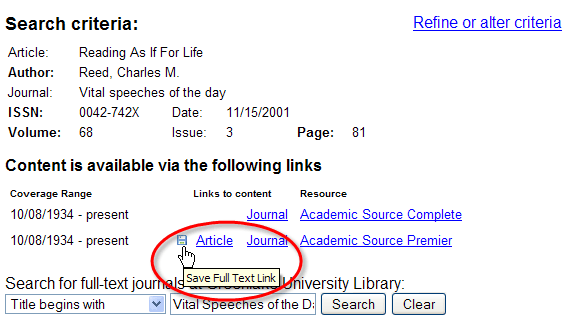
Checking the box for Save Article Link will cause an icon to display to the left of any article links that display on the 360 Link results page. The icon is useful for taking a link on a 360 Link results page and integrating it into a web page (such as a course page in your distance-education management system):

User Authentication
If you wish to require your remote users to authenticate through the User Authentication service prior to using the 360 Link results page, place a checkmark in the box labeled "Enable User Authentication." This will cause the 360 Link results page to refer to the settings you have defined in the User Authentication tab for the purposes of allowing your users in to the service. Leave the checkbox unchecked if you do not wish to require your remote users to authenticate prior to using the 360 Link results page. For more on User Authentication, click here.
- Date Created: 9-Feb-2014
- Last Edited Date: 22-Mar-2015
- Old Article Number: 7216

