
Managing Courses
This page describes how to manage courses including adding courses, managing reading lists, user and course enrollment information, etc. For an overview of the workflow for courses and reading lists see Workflow.
For links to all the main fulfillment documentation pages see Fulfillment.
- Course Reserves Manager
- Fulfillment Services Manager
- Course Reserves Operator
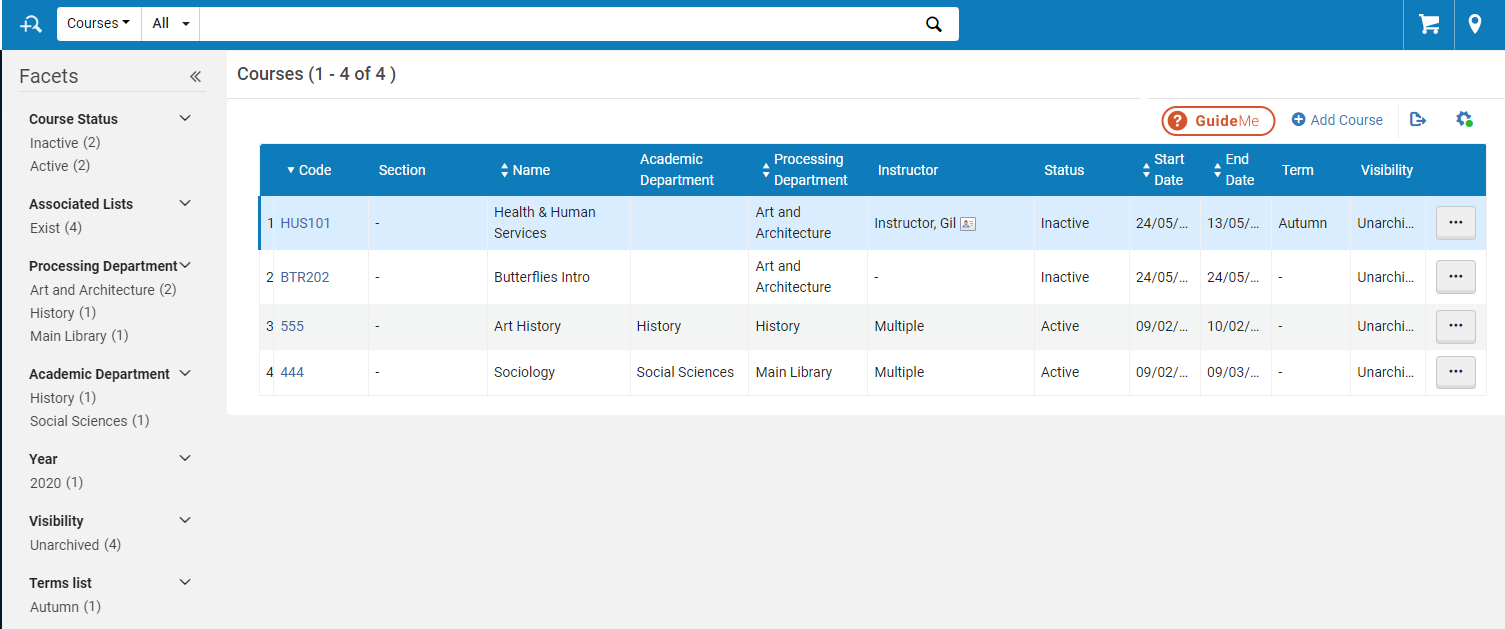
From this page, you can search for courses using the search box at the top of the page and filter your results by selecting the following facets:
-
Course Status
-
Associated Lists:
-
Exist (number of courses)
-
None (number of courses)
-
-
Processing Department
-
Academic Department
-
Campus
-
Year
-
Visibility
-
Terms list
Adding a Course
- If you are using Leganto, you can enable instructors to add courses directly in Leganto when arriving from a CMS; in addition, you can enable instructors to modify the course's dates and/or number of participants in Leganto. See Configuring Whether Instructors Can Create or Modify Courses.
- You can add courses in bulk using the course loading integration profile. For more information, see Configuring Course Loading.
- On the Courses page (Fulfillment > Course Reserves > Courses), select Add Course. The Manage Course Information page opens.
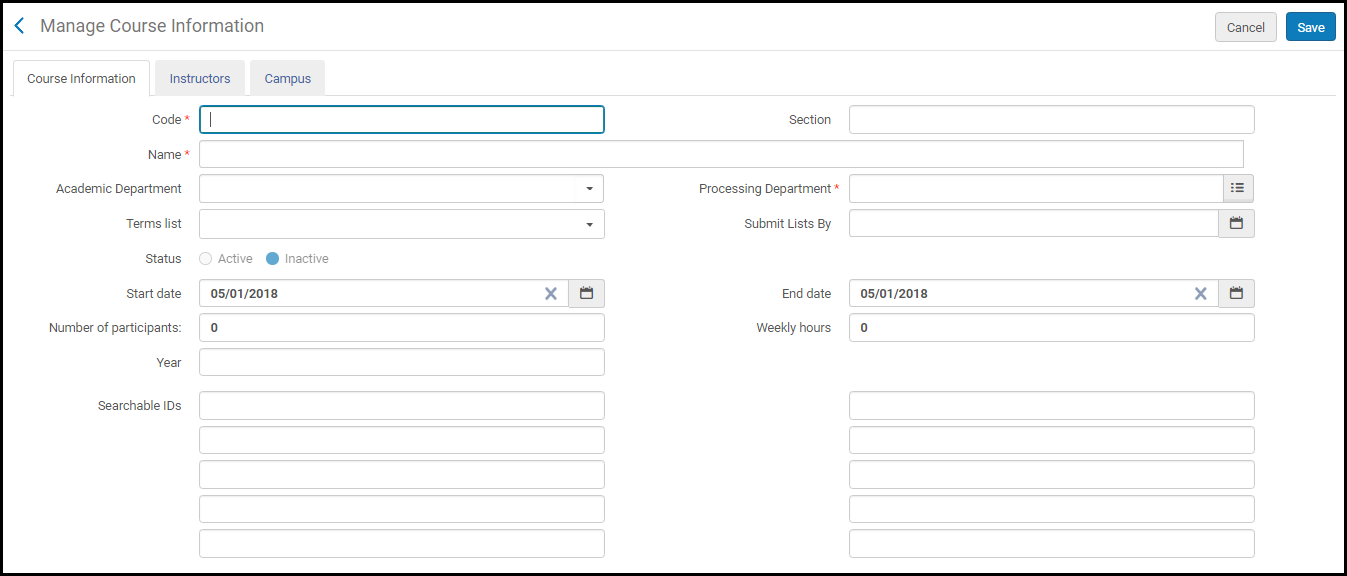 Manage Course Information Page
 - Enter the course information as required:
Manage Course Information Fields Field Description Code (Required) The combination course code + section must be unique. If you do not use sections, then all course codes must be unique. Section Courses can be divided into sections to better organize resources and activities for students. Each section may be taught by a different faculty member, have a separate description, and contain as many resources as the faculty member requires. The combination course code + section must be unique. Name (Required) Does not have to be unique. Processing department (Required) The department that "manages" the course. This field is currently for informational purposes only. Use the quick pick list to select a department predefined by an administrator (see Configuring Processing Departments) Academic department The academic department associated with the course. Select from a list predefined by an administrator (see Configuring Academic Departments) Terms list The term during which the course is taught. Select from a list predefined by an administrator (see Configuring Course Terms) Submit Lists By (Leganto only) A date that is intended to prompt instructors to send you their reading lists for processing with enough time to process them before the course begins. The notification about this date appears in Leganto for all reading lists associated with the course. Status The status of the course. It is determined by the course start and end date.
This field is disabled when you are creating the course.- Active – The course is currently being taught
- Inactive – The course was taught, or will be taught, but is not currently being taught
Course data for inactive courses is not published to Primo (see the Course Restricted field in Adding a New Book or Journal Article. Also see The Format of Published Data).Start date The current date is the default date. An administrator can set the default for this value, see default_course_start_date in Configuring Other Settings). End date This date cannot be earlier than the start date. An administrator can set the default for this value, see default_course_end_date in Configuring Other Settings). The course’s end date is transferred to the course’s reading lists.Number of participants The number of students that are enrolled in the course. This field is only active if you are not using campuses, or the number of participants is not defined for any campuses. Otherwise, the value in this field is the sum total of participants for all campuses. Weekly hours The number of hours the course is taught, per week. Year Academic course year. Searchable IDs Additional IDs for the course, Used for search indexes in Primo and external systems. Tabs: Instructor On the Instructor tab, browse for the instructor of the course (the list consists of all Alma users), and select Add Instructor. The instructor is added to the course. You can add multiple instructors for a course. When there are multiple instructors for a course, the Instructor column value on the Courses page is Multiple.(Leganto only) By default, instructors appear to student and guest users in Leganto in course-related tooltips and in a pane for reading lists associated to this course. Instructors that are configured to appear in Leganto have a green checkmark in the Display Instructor column in this tab. To configure an instructor to appear / not appear in Leganto, select Unhide / Hide in the row actions list for the instructor. See Enabling Instructor Information in Leganto.(Leganto only) Instructors arriving from the CMS are added as instructors to the relevant course if they are not already associated with the course as an instructor.Multiple instructors are listed by name in the header of the Course’s Reading List page (Fulfillment > Course Reserves > Courses, select Reading List in the row actions list for a course).Campus On the Campus tab, optionally select a predefined campus, enter the number of participants for the campus, and select Add Campus. The campus is added to the course. To configure campuses; see Configuring Campuses. You can add multiple campuses for a course. The number of participants for all campuses is listed as the total number of participants for the course. If no campuses are defined, or you do not enter the number of participants for any campuses, you can manually manage the number of participants for the course (see above).Students
(Leganto only) On the Students tab, you can view all students that are enrolled in the course, add students, and delete specific students or all students from the course.
For additional information on how to load user enrollment information, see Configuring Importing Course Enrollment Jobs.
Notes The general Notes tab enables you to add notes with general information about the course. - Select Save. The course material is saved.
- On the Courses page (Fulfillment > Course Reserves > Courses), select Duplicate in the row list actions for a course. The Manage Course Information page appears. For details on the displayed fields, see the Manage Course Information Fields table above.
- Modify the relevant fields as required and select Save. The new course appears on the Courses page.
Editing a Course
- On the Courses page, (Fulfillment > Course Reserves > Courses), select Edit in the row actions list for a course. The Manage Course Information page opens. If the course was rolled over from another course, a link to the original course appears in the header; for more about course rollover, see Rolling Over Courses.
- Modify the course information as required; see Adding a Course. When editing a course, you can add notes in the Notes tab (see Editing a Reading List).
- Select Save.
Contact support If you are unable to locate a course that you have not deleted.
Managing a Course's Reading Lists
Viewing a Course's Reading Lists
Reordering a Course's Reading Lists in Leganto

Copying and Adding Reading Lists to a Course
- On the Courses page (Fulfillment > Course Reserves > Courses), select Copy Reading List in the row actions list for a course. The Reading Lists Task List page appears.
The Reading Lists Task List page displays all reading lists defined for your institution.
 Reading Lists Task List Page
 - Select the checkbox of each reading list you want to add to the course and select Select. The reading lists are added to the course.
To view the added reading lists, select Reading List in the row actions for the course.
Managing User and Course Enrollment Information
You can import user and course enrollment information into Alma, which enables students to see all their reading lists on the Lists page without having to enter Leganto using an LTI link for each reading list. With this enhancement, you can use Alma to view student enrollment information and remove students from courses.
Importing user and course enrollment information is performed using the Course Enrollment integration profile (see Configuring Importing Course Enrollment Jobs).
To enable the management of student enrollment information in Alma, the display_course_students field has been added to the Customer Parameters mapping table (Configuration Menu > Fulfillment > General > Other Settings). When set to true, you can view enrollment information in the following tabs:
-
Students – This tab has been added to the Manage Course Information page (Fulfillment > Course Reserves > Courses) to enable you to view all students that are enrolled in a course and to delete specific students or all students from a course.
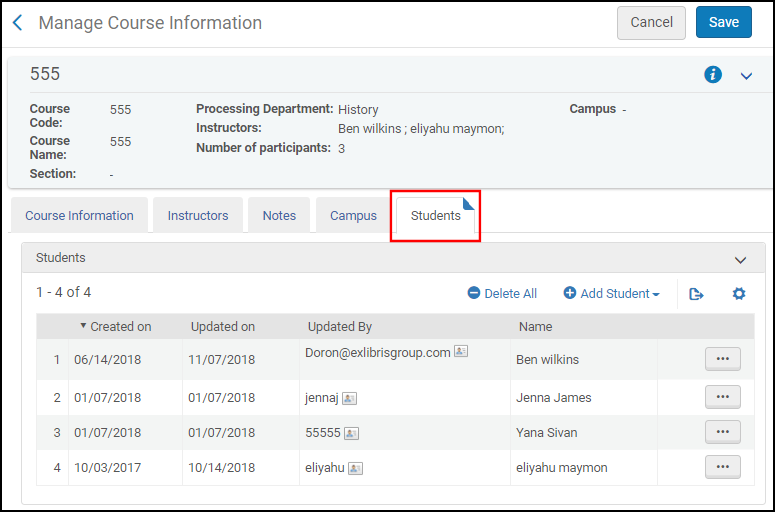 Manage Course Information Page - Students Tab
 -
Courses – This tab has been added to the User Details page (Admin > User Management > Manage Users) to enable you to view all courses to which a student has enrolled and to delete specific courses or all courses to which a student has enrolled.
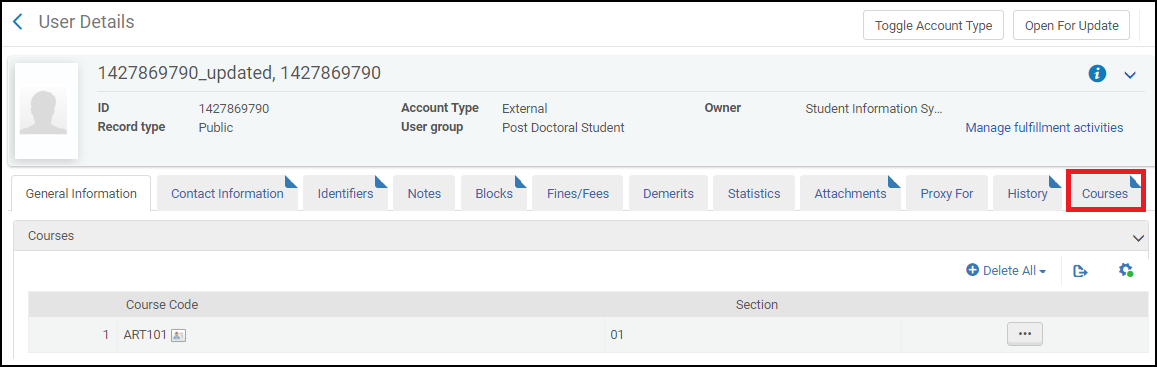 User Details Page - Courses Tab
Rolling Over Courses
- In the tab-separated data file:
- Enter all of the mandatory fields for each new course and enter ROLLOVER as the action in the Operation field.
- Enter the old course ID and section ID in the Old Course Code and Old Course Section ID fields, respectively.
- For each field whose value you want to copy, enter + in that field.
- To copy (or not) old course reading lists and instructors to the new courses, ensure that the rollover options are correctly configured in the integration profile.
- If you are using Leganto, see Leganto Course Rollover.
Deleting a Course
You can delete courses in bulk using either the course loading integration profile (see Configuring Course Loading) or the Course Bulk Update job (see Course Bulk Updates).
Archiving a Course
You can archive courses in Alma, enabling your library to reduce the amount of data you view in Alma without deleting historical information. Archived courses are still available for reference purposes, and you can view statistical data on archived courses from Alma Analytics. Courses can be archived and unarchived individually or in bulk.
Use the Archive action in the course action list to easily archive a single course. Marking a course as archived immediately filters the course from the current course list visibility, removing it from view.

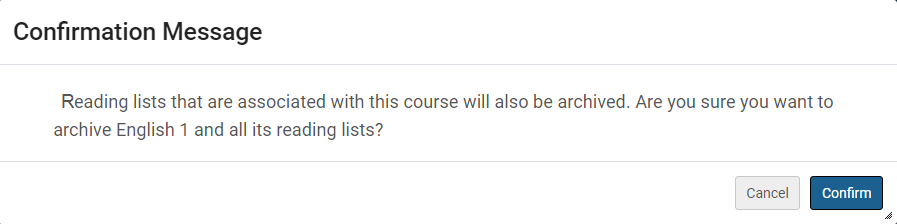
When marking a course as archived, any reading list associated with the course is also archived. Therefore, a confirmation message appears confirming that all reading lists associated with the course are archived as well.
Courses whose reading list is linked to additional unarchived courses cannot be archived. If you attempt to archive a course with a reading list that is linked to additional courses, you receive an error message:
This course cannot be archived because it has [number] unarchived reading lists that are linked to other courses. You should either archive the reading lists or remove the course association, then try again.
When viewing an Archived course, you can use the Unarchive action to restore archived courses. The course is then restored, but the associated reading lists remain archived, and you need to unarchive them separately.

Archived Courses in Leganto
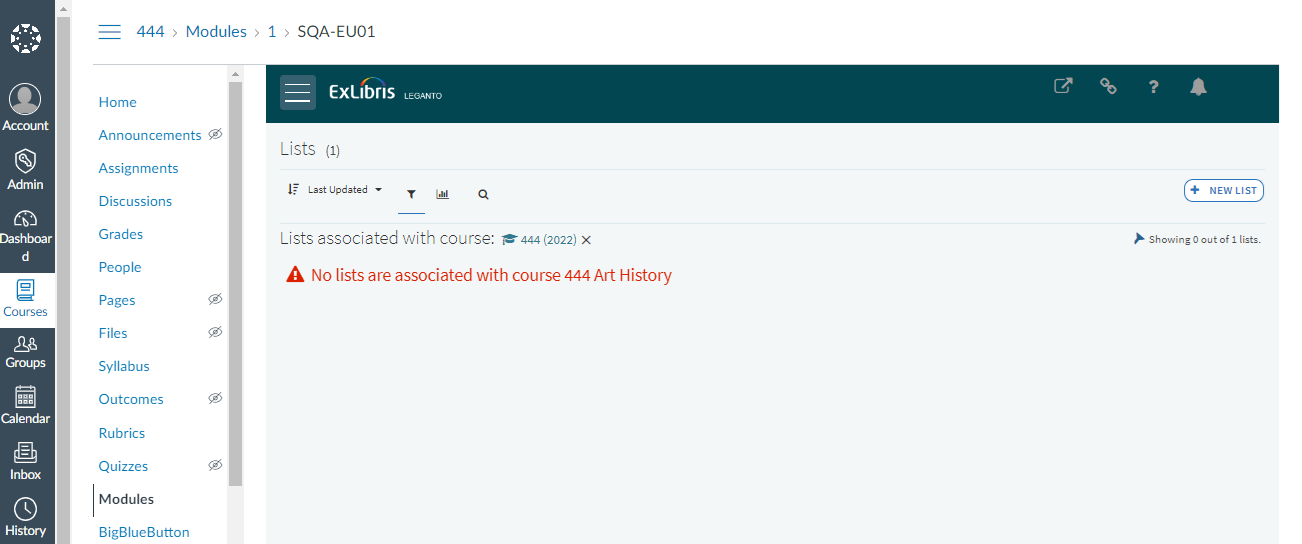
Archived courses are hidden from view in Leganto. When attempting to access an archived course from the Learning Management System (LMS), you receive a message that no lists are associated with the course.
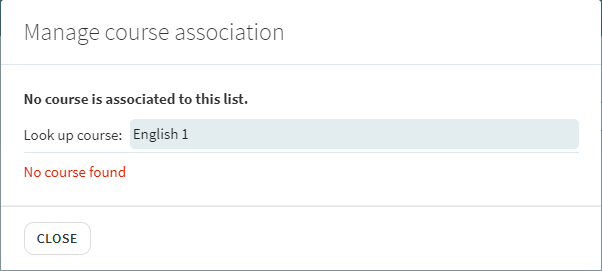
Archived courses are not included in the Manage course association and Roll Over lists in Leganto.
Course Bulk Updates
The Course Bulk Update job (Admin > Manage Jobs and Sets > Run a Job > Courses > Courses Bulk Update) enables you to perform either of the following actions on a set of courses:
-
Update course information such as processing and academic department, instructors, and so forth.
-
Delete courses that do not have an attached reading list.
-
Archive/Unarchive courses.
For details, see Course Bulk Update Job.