
Configuring Printers
This page covers the configuration of printers in Alma.
For links to all the main fulfillment documentation pages see Fulfillment.
To configure printers, you must have one of the following roles:
- General System Administrator
- Fulfillment Administrator
Alma is hosted in a SaaS environment. Due to security concerns and technical limitations, SaaS environments do not support direct connections of local or network printers. Instead, printing in Alma works using email or a printout queue. Printout queue is the preferred option though email printing is still supported (see Printouts Queue). Each library/institution must define the email addresses of its local printers in Alma, which route staff-oriented, Alma-originating e-mails (including request and transit slips) to the appropriate printer. The printing queue method is the preferred method when printing to a physical printer.
For information on printing in Alma, watch Printing (3:22)
You configure printers on the Printers page (Configuration Menu > Fulfillment > General > Printers).
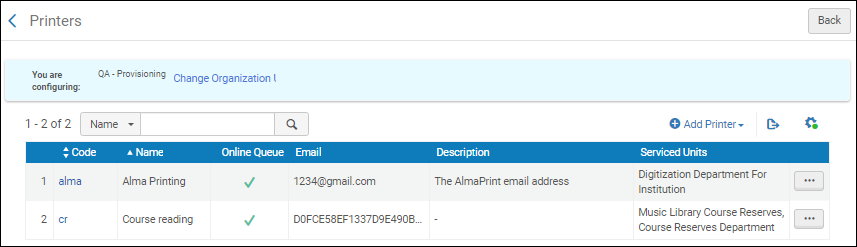
Printers Page
Ensure that you are within the context of the institution/library whose printers you want to configure by selecting the required institution/library from the Configuring filter on the Configuration page.
To associate a printer with a circulation desk, you must configure the printer at the library level. Ensure that you have selected a library in the Configuring filter on the Configuration page.
Select the printer code or name headings to sort the list alphabetically—in ascending or descending order—by printer code or name.
The following actions can be performed on this page:
- Add a printer (see Adding a Printer)
- Edit a printer (see Editing Printer Information)
- Delete a printer (Select Delete from the row actions list)
Adding a Printer
You can add a printer to the institution or a library. If you add a printer to the institution, it is available for all the libraries within the institution as well.
To associate a printer with a circulation desk, you must configure the printer at the library level. Ensure that you have selected a library in the Configuring filter on the Configuration page.
If you enter an email address for a printer, verify that it is configured in the Email Include List mapping table. For instructions, see Configuring Allowed Emails.
To add a printer:
- On the Printers page (Configuration Menu > Fulfillment > General > Printers), select Add Printer.
- In the Add Printer dialog box, enter a code and a name (both required). If you are not using the printouts queue or quick printing (see Printouts Queue), enter an email address for the printer. Optionally, add a description as well.
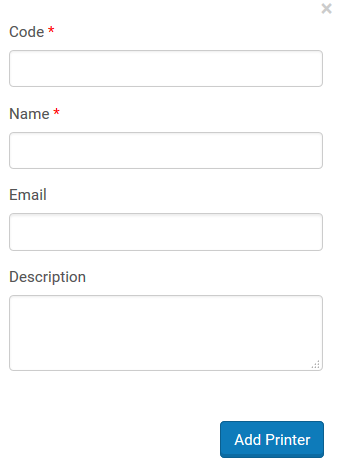 Add Printer Dialog Box
 - Select Add and Close to close the dialog box. The defined printer is added to the list of printers on the Printers page.
Printers PageAfter defining a printer, you can specify which circulation desks and service units are served by the printer. For details, see Editing Printer Information.
Editing Printer Information
You can edit the details of any printer. The details include:
- General printer information
- Circulation desks and service units that are served by the printer
To edit printer information:
- On the Printers page (Configuration Menu > Fulfillment > General > Printers), in the Code column, select the printer code link, or select Edit from the row actions list for the specific printer record whose information you want to update. The Edit Printer page opens.
- Under Edit Printer, edit the general printer details as required. When you want print routed to a queue in addition to an email address, select the Printout Queue option. See Printouts Queue for more information. When the Printout Queue option is selected, an additional column appears (Online Queue) in the list of printers with a check mark to indicate that the Online Queue option is selected..
- In the Served Circulation Desks List section, select a circulation desk that is served by the printer, and select Attach Circulation Desk. The selected circulation desk is added to the list of circulation desks that are served by the printer
-
This section displays only when you are configuring a library (that is, you have selected a library in the Configuring filter on the Configuration page.
- Repeat the previous step for all circulation desks that are served by the printer.
To remove a circulation desk from the list of circulation desks that are served by the printer, select Remove to the right of the circulation desk.
- In the Served Service Units List section, select the service unit that is served by the printer, and select Attach Service Unit. The selected service unit is added to the list of service units that are served by the printer.
- Repeat the previous step for all service units that are served by the printer.
To remove a service unit from the list of service units that are served by the printer, select Remove to the right of the service unit to be removed.
- Select Save to store your changes to the printer information.