
Linking Users in Collaborative Networks
Configuring Linked Account Rules
To configure linked account rules, you must have one of the following roles:
- User or General Administrator (to configure walk-in patron account rules).
Linked account rules enable you to configure a group to which walk-in patrons are assigned. Walk-in patrons are patrons that belong to another institution but are part of a fulfillment network and therefore have access to the current institution. (For managing users in the network zone see Centrally Managing Users in the Network Zone and also Registering Patrons.)
Watch the Walk-In Scenario in a Fulfillment Network video (4:00 mins).
You can configure an expiration date for the patron, either as an absolute date or as a date relative to the patron’s expiration date in the source institution. You can also configure an absolute purge date or a purge date relative to the patron’s expiration date. Expiry and purge dates may also be set to update from the source institution each time the data is refreshed.
You configure linked account rules on the Linked Account Rules page (Configuration Menu > User Management > Collaborative Networks > Linked Account Rules).
You can perform the following actions on this page:
- Add a linked account rule (see To add a linked account rules for a walk-in patron: below)
- Edit a linked account rule (select Edit from the row actions list)
- Duplicate a linked account rule (select Duplicate from the row actions list and edit the relevant fields)
- Delete a linked account rule (select Delete from the row actions list)
- Edit the default linked account rule (select Edit in the default rule section)
To add a linked account rule for a walk-in patron:
- On the Linked Account Rules page, select Add Rule. The Linked Account Rules page appears.
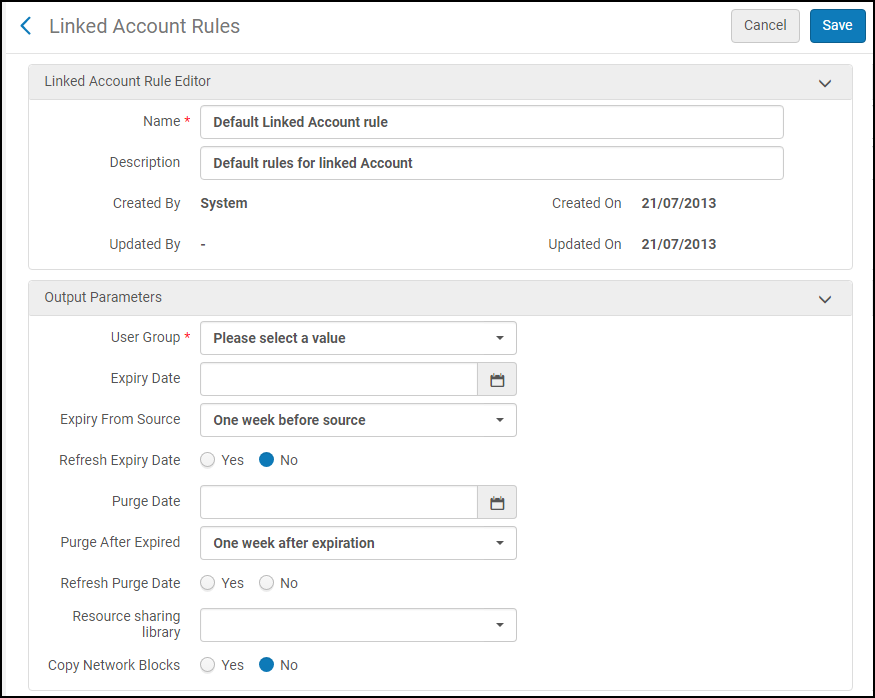 Linked Account Rules Page
 - Enter the name of the rule in the Name field.
- Enter a description of the rule in the Description field.
- In the Input Parameters section, select Source Institution (the institution with which the walk-in patron is associated) in the Name field and select an operator and value for the parameter. For example: Source Institution = Eastern State
The Value dropdown includes institutions that are part of a collaborative network, as well as institutions that are part of a fulfillment network.
- In the Output Parameters section:
- Select a User Group to which the walk-in patron will be assigned.
The User Group configured in the Linked Account Rules will only be applied when creating a new linked account or when refreshing an account that has expired. When an active, non-expired linked account is refreshed, its User Group will not be changed.
- Optionally, select an absolute or relative Expiry Date and/or Purge Date for the patron. For example, you may select Graduate Student as the User Group and a Purge Date of May 13, 2015, or you can set the date for the purge to One week after expiration in the Purge After Expired field.
- The Refresh Expiry Date and Refresh Purge Date fields define whether the expiry (account expiry, not patron role expiry) and purge dates refresh each time the linked account data is refreshed, if the Find user in other institution check box on the Patron Identification page (Fulfillment > Checkout/Check-in > Manage Patron Services) is selected. When either of these fields are set to No, the corresponding date is refreshed only when linking a new account or an account has expired. This is the default. When these fields are set to Yes, the corresponding date is recalculated each time the linked record is refreshed from the source institution.
The fact that the patron role expiry date is not refreshed should be taken into account when defining the terms of use for the user.
- In the Resource Sharing Library field, select a resource sharing library to be assigned to any new linked user that is created when a walk-in loan is performed.
- When Copy Network Blocks is set to Yes, Alma will delete all the current network blocks that exist on the linked account and re-create them each time the linked record is refreshed. When this parameter is set to No, no blocks will be copied from the source account to the linked account. No is the default value. For more information on network blocks, see Configuring Consortial Blocks.
Consortial blocks may be used when the linked accounts do not use consortial IDs. If consortial IDs are used, neither account is considered primary. Therefore, refresh actions (and copy of consortial blocks) from one account to the other do not take place.
- Select a User Group to which the walk-in patron will be assigned.
- Select Save. The rule is added to the list of rules on the Linked Account Rules page.
Rules are considered in the order in which they are listed on this page. The first rule whose criteria are met by the walk-in patron is applied to the patron. If no rule’s criteria are met, the default rule takes effect.
Configuring Restricted User Groups
To configure restricted users, you must have one of the following roles:
- User or General Administrator (to configure restricted user groups).
You can configure certain user groups to be hidden from other institutions in a fulfillment network. When searching for a walk-in patron from a linked institution, if the patron’s user group in the home institution has been configured as belonging to an unexposed group, the patron does not appear in the user search. As a result, the patron cannot receive walk-in services at linked institutions. In this way, you can effectively restrict the borrowing privileges of certain patrons, such as guests or visitors to the home institution.
To add a restricted user group:
- Go to the Configure Restricted User Groups page of the home institution (Configuration Menu > User Management > Collaborative Networks > Restricted Users).
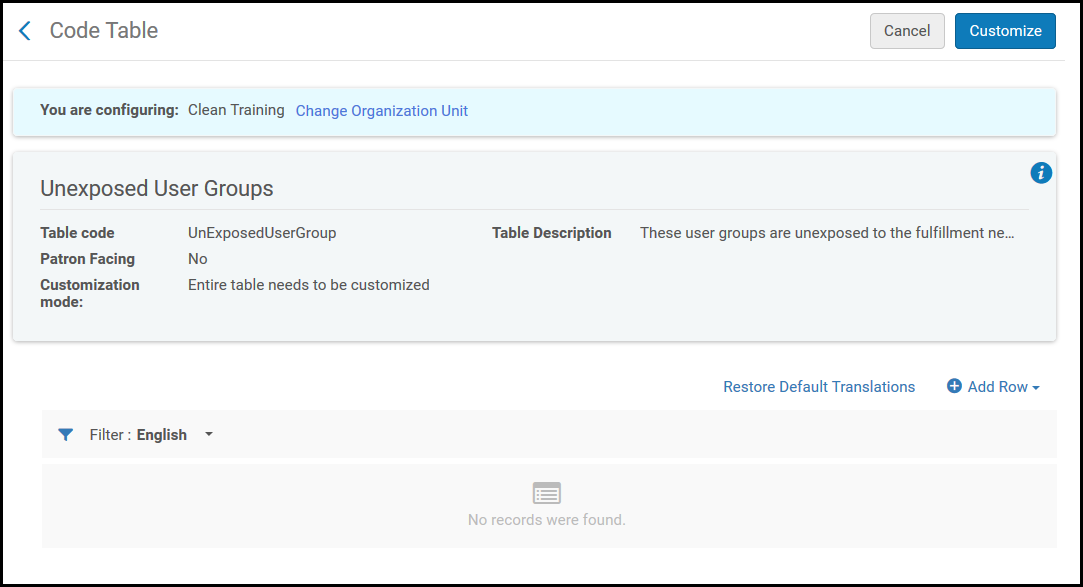 Restricted Users Page
 - In the Quick Add section, select the desired user group from the drop-down, add a description, and select Add Row. Repeat the procedure for any additional user groups.
- Select Customize.
Configuring Linked Account Shared Fields
To configure linked account shared fields, you must have one of the following roles:
- User or General Administrator (to configure restricted user groups).
When a new linked user is created, the originating institution defines which user attributes may be shared with the target institution. Only attributes configured with Shared set to True will be copied to the new linked user. Fields that have Shared set to False will receive a blank field at the target institution. Existing users that were created with more details will retain their data.
To configure linked account shared fields:
- Go to the Linked Account Shared Field page of the source institution (Configuration Menu > User Management > Collaborative Networks > Linked Account Shared Fields).
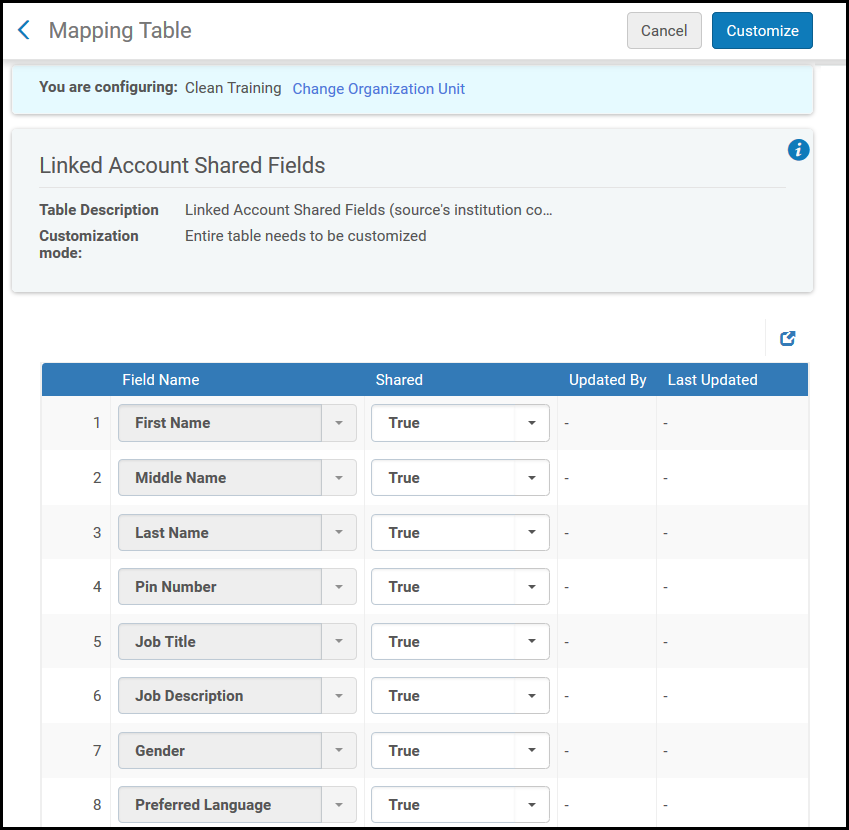
Linked Account Shared Fields
- Next to each field name, select the desired sharing status from the drop-down.
- Select Customize.
Configuring Searchable User Identifiers
To configure searchable user identifiers, you must have one of the following roles:
- User or General Administrator (to configure restricted user groups).
A library can limit the fulfillment network services to patrons that have been issued a specific ID type. Patrons with only specified ID types can be exposed in the linked account rules mechanism.
Searchable Identifiers define which user identifiers are searchable via the fulfillment network process for fetching patron information. If the table is empty, which is the default, all user identifiers will be part of the fulfillment network. If a value was entered into the table, but the searched user does not have an ID of this type in the other institution, the user's information from the other institution will not be returned.
The defined user identifiers also restrict the users that are fetched from other institutions by your library. Only users that have an ID defined in this table will have a linked account created for them when switching context in the Primo Get It tab. The defined user identifiers also restrict the users so that they can be fetched from other institutions only by using one of the configured ID types.
To configure searchable identifiers:
- Go to the Searchable Identifiers mapping table (Configuration Menu > User Management > Collaborative Networks > Searchable Identifiers).
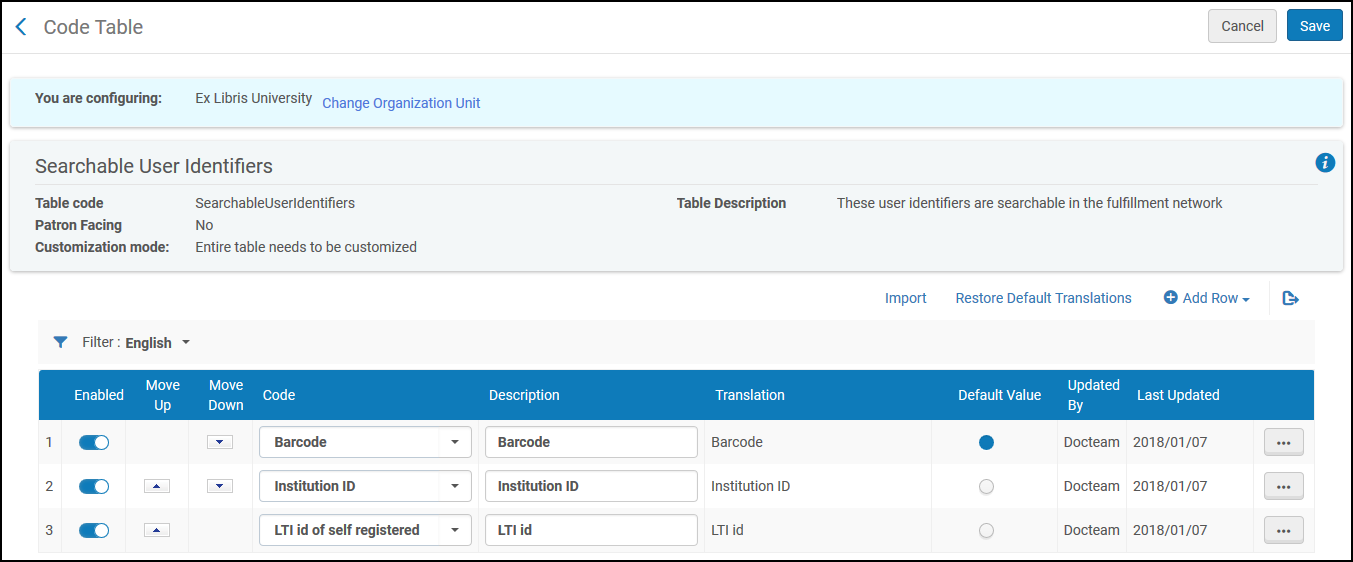 Searchable User Identifiers Page
 - To match users based on particular identifier fields, select Add Row.
- Select an identifier code.
- Enter a description.
For more information about the fulfillment_network_search_by_all parameter, which allows other members of the fulfillment network to search for your patrons by name, see Registering Patrons.