
Managing Search Queries and Sets
Overview
- For user sets, one of the following roles is required:
- User Manager
- User Administrator
- To manage a research asset set:
- Research Asset Manager
- To manage a researcher set:
- Researcher Manager
- To remove records from sets created by others, you must have the Repository Manager role.
Sets are managed on the Manage Sets page (Admin > Manage Jobs and Sets > Manage Sets). Sets can be created and updated on this page. Sets can also be created by saving search results as a logic set (see Creating Logical Sets).
Watch the Searching and Creating Sets video (5:50).
Types of Sets
- Itemized sets – static sets of individual items called members that are manually selected or uploaded by the staff member (see Creating Itemized Sets).
- Logical sets – are the results of a saved search query, and are created dynamically each time the search is run (see Creating Logical Sets).
- User sets
- Researcher sets (similar to user sets)
- Research asset sets
Filtering Sets
Scope and Status
You can filter the sets by defining their scope and status using the scope/status icons at the top of the page.

Scope
The following scopes are supported:
- My Sets – Your saved search queries, both private and public.
- Public Sets – All users' saved queries that are not marked private.
- All Sets – All queries.
- The All Sets tab is available only to a Repository Manager. This role is also required in order to edit public sets.
- Itemized sets may include references to deleted records. Deleted records do not appear in repository searches or in normalization jobs. Using itemized sets, you can perform operations on deleted records.
- There are no limits on the number of records that can be included in a set.
Status
- All — All queries.
- Active — An Active set refers to whether the set can be selected when running a manual job.
- Inactive — An Inactive set refers to a set that cannot be selected by users when running a manual job
Facets
Using the facets on the left of the page, you filter by Type (Itemized/Logical), Content Type (Research Assets/Researchers/Users) and Origin (for example Institution Only).
Sorting Sets
You can sort sets using the Sort icon.
![]()
Use the Sort Order icon to update the sort order to ascending/descending.
![]()
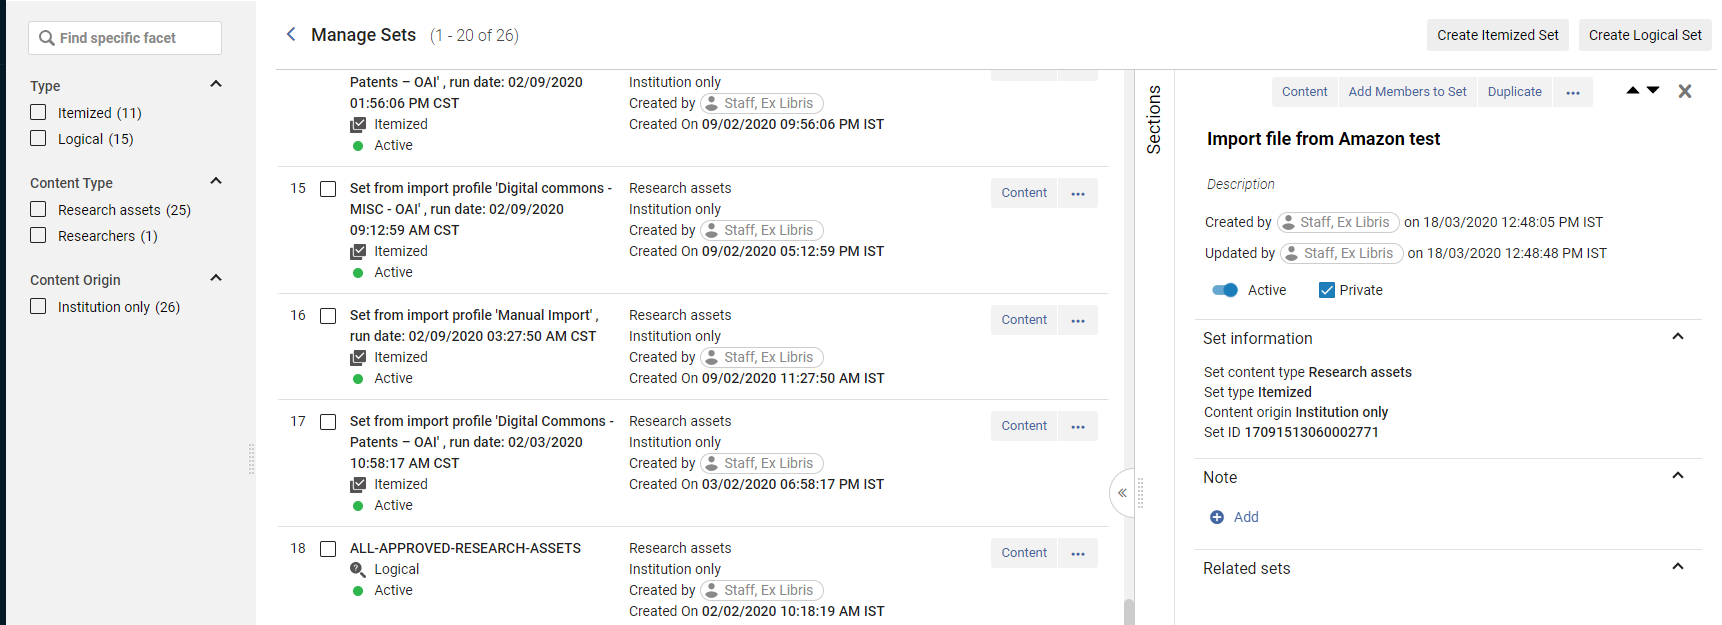
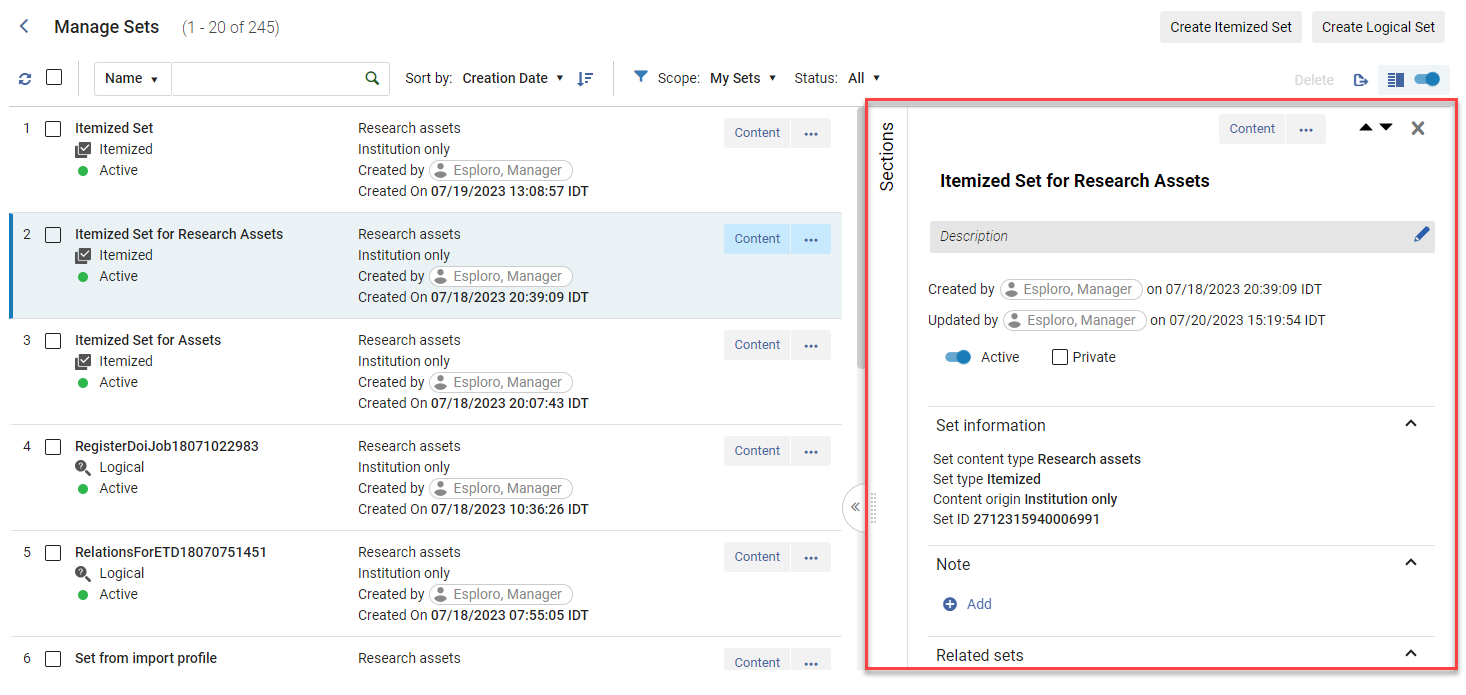
Viewing Details for Sets
The details for the set are displayed in the summary information.

- Active — Whether the set can be selected when running a manual job.
- Name — The set name.
- Type — Whether the set is logical or itemized.
- Content Type — The type of items in the set.
- Content Origin — The origin of the items in the set.
- Created by (Public Sets and All Sets tabs) — The name of the user who created the set.
- Creation Date — The date and time the set was created.
Actions to Perform on Sets
You can perform actions on sets from the row actions menu, or from the buttons on the right hand panel in the side by side view.

- Content — Select Content to view the records of this set.
- Duplicate — Copy a set. The duplicated set is added to the Manage Sets page with the words Copy of added as a prefix to the set name.
- Itemize — Convert a logical set to an itemized set. Select Confirm in the Confirmation Message dialog box; see Converting Logical Sets to Itemized Sets..
- Combine Sets — Create a new set based on the members of two existing sets; see Combining Sets.
- Delete — Delete a set. Select Confirm in the Confirmation Message dialog box.
You can delete only sets that you created. A Repository Manager can delete any set.
Itemized Sets
Itemized sets are created manually by the user. Below are instructions for working with itemized sets.
Creating Itemized Sets
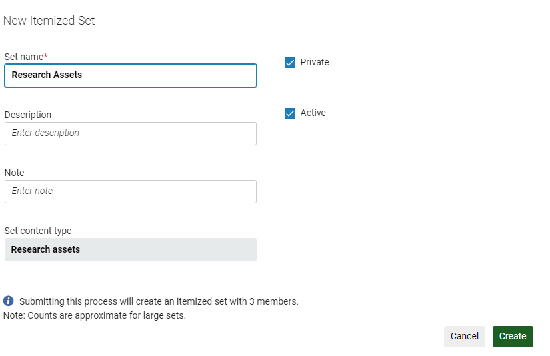
- On the Manage Sets page (Admin > Manage Jobs and Sets > Manage Sets), select Create Itemized Set. The Itemized Set Details page opens.
 Itemized Set DetailsThe From Analytics option only displays for users with the Esploro Designs Analytics role.
 - Enter the set details as follows:
- Set name — This field is mandatory. The set name cannot contain special characters (for example: &, #, $, %).
- Description — Enter the description.
- Note — Enter a note for the set.
- Set content type — Select the type of items in the set (see Types of Sets).
- Content Origin — The origin of the items in the set.
- Add items to set
- From search — See Add Items from Search Results for more information. Note that
- From file — See Add Items from Uploaded Files for more information.
- From analytics— See Add Items from Analytics Reports for more information.
- Private — By default, the set is designated as private. This means that the set is only available to you. If this option is not selected, the set becomes a public set and is available to all other users.
- Active — By default, the Status is set to Active. Inactive sets cannot be selected by users when running a manual job.
- Select Create to create the set.
- In order to add items from search results, you first need to select Create in the Itemized Set Details page.
- Search for the relevant items.
- In the search results page, select the checkboxes for the relevant items and then the Add Selected button.
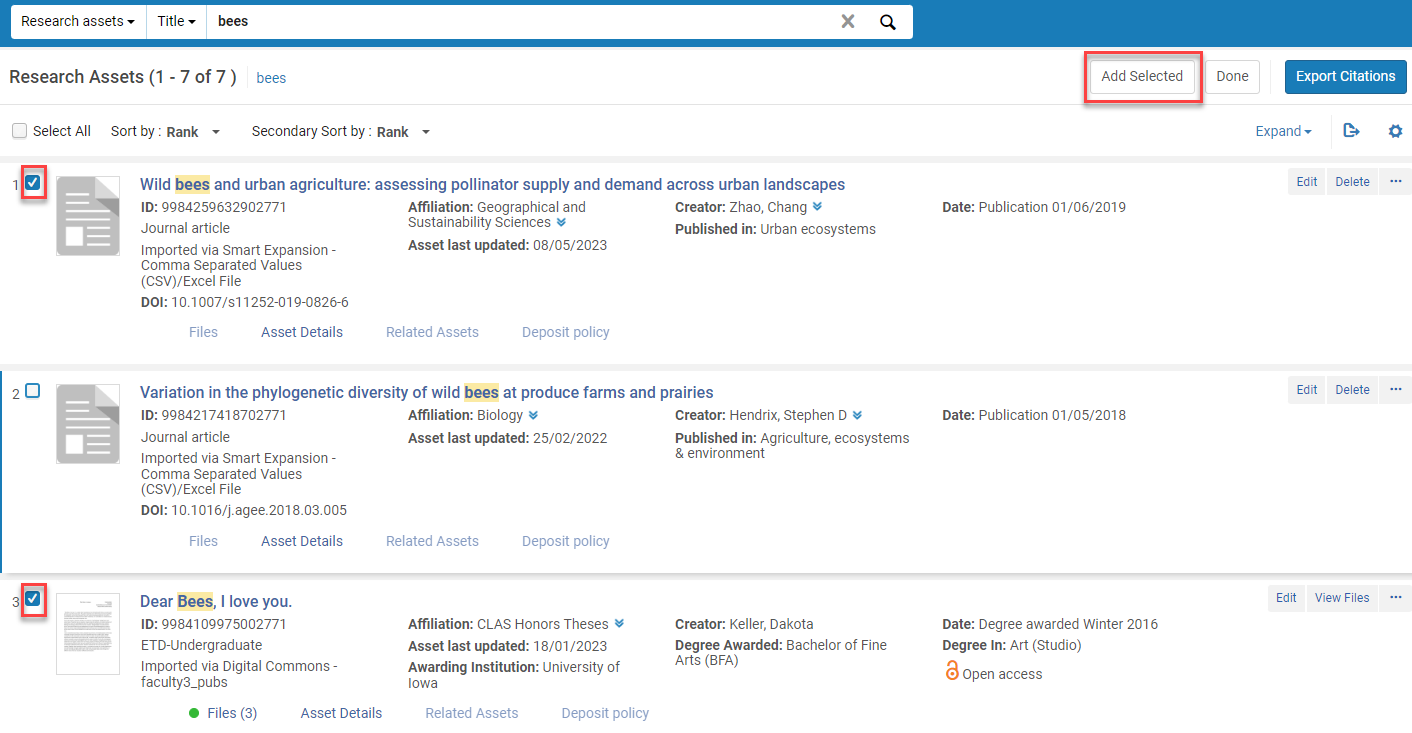
- The items are added to the set. Select Done to complete the operation. If the Ascending option is selected for sorting (see Sorting), the new set appears at the top of the list of sets.
- You can drag the file to the upload area or select Upload File.
The import file can be a maximum size of 10 MB. If you perform an import with invalid data, each invalid cell is ignored. If you import a file and then change the content type, you must re-import the file.
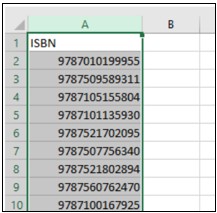
- The imported file must be a text file (.txt or .csv) or Excel file (.xls or .xlsx) and have the correct header at the top of the column for the data to be read. All other information in the file is disregarded. If the Excel file has more than one column, it utilizes the first column of data that has a valid header type. See the table below for acceptable header types.
Header Types Content Type Header Research Assets - MMS ID
Researchers Any user identifier defined in the system can be used. The column header must be the code of the identifier. Below is a partial list of the codes that are defined by default in the system. The full list can be found in the User Identifier Type code table. Note that only codes that are enabled in this table can be used. Customers of Esploro who also use Alma can access this code table via the Alma administrative interface (Admin > User Management > User Identifier Types). If you need to access this table and do not have access to Alma, please contact Ex Libris support. (Admin access to this table will be added to Esploro in the future.)
-
USERNAME (Use this header for the Primary identifier of the researcher, as defined in their user account.)
-
ORCID
-
INSI
-
Scopus
-
ResearcherID
-
arXiv
-
ERA
-
Pivot
-
Pubmed
-
LCNAF
-
Wikidata
-
VIAF
User - PRIMARYIDENTIFIER
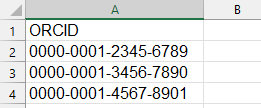
When uploading researchers to an itemized set with an Excel file, the A1 cell must contain either the code of the identifier type used in the file or USERNAME (for the Primary identifier specified in the researcher's user account), and the ensuing cells of the A column must contain the user identifiers. Similarly, when uploading a .txt file, the first line must contain either the code of the identifier type used in the file or USERNAME, and the ensuing lines must contain the user identifiers (each separated by a carriage return). For example, if you want to upload a set of user names using a list of their Primary identifiers, enter the text USERNAME in the top cell/line of your Excel/.txt file, and enter the actual Primary identifiers in the ensuing cells/lines.
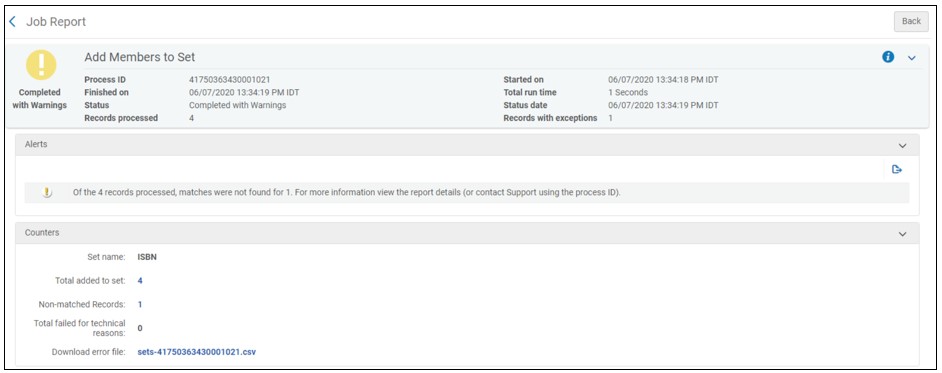
- After using the file input method, the system runs the Add Members to Set job and creates a set from the file. Several instances of this job can run in parallel. The resulting number of records/members in the set may be more or less than the number of entries in the input file. If, for example, an asset has multiple matches in the Esploro database, all matches found are added as members to the set; and the opposite is true if no matches are found. Similar to other jobs that are run, you can view the job status/history on the Monitor Jobs page (see Viewing Running Jobs and Viewing Completed Jobs).
- For sets of content type Research assets, If the number of items is large, a Manage set members job is run to add the assets to the set; to see the results, see Viewing Completed Jobs.
- When the Add Members to Set job is run using the file input method, the resulting Job Report will include a Validation File, if the submitted file uses a list of one-to-one identifiers.
- When the Add Members to Set job is run using identifiers that have the potential for many matches per identifier, there will be no Validation File in the Job Report.
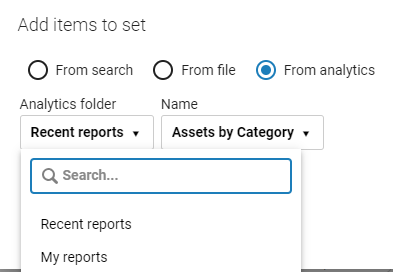
To add items from analytics reports:
- Select the relevant folder:
- Recent reports — Reports that you ran within the last hour. Select the report from the Name field.
- My reports — Reports to which you have permissions to access (see Analytics Object List). Select the report from the Name field.
 Add Contents from Analytics
- A job creates the Esploro set from the analytics report. Note that the From Analytics option only displays for users with the Esploro Designs Analytics role.
Editing Itemized Sets
- On the Manage Sets page (Admin > Manage Jobs and Sets > Manage Sets), select the set that you want to edit and update the information in the relevant sections.
- After updating the information, it is saved automatically when selecting any area outside the updated section.
- On the Manage Sets page (Admin > Manage Jobs and Sets > Manage Sets), scroll to the itemized set to which you want to add items and select Add Members to Set in the row actions list or on the right hand panel. A search page opens, depending on the content type.
- Search for the items you need.
- From the search results, select the items you want included in the set (or select Select All) and select Add Selected.
- The selected records are added to the set. You can continue searching, selecting, and adding records. When you are finished, select Done. The Manage Sets page opens indicating that the set has been successfully saved.
Viewing Members of Itemized Sets
- Navigate to the Manage Sets page from Admin > Manage Jobs and Sets > Manage Sets.
- Find the set and select Content in the row actions list or the right hand panel. A search page opens showing the members of the set.
Removing Members of Itemized Sets
You can remove members (selected items) in an itemized set.
- On the Manage Sets page (Admin > Manage Jobs and Sets > Manage Sets), find the set and select Content in the row actions list or the right hand panel.
- Select the member/s to remove and then the Remove Selected option.
- Select Done.
There is an alternative to manually scrolling between the pages to find the records to remove. After opening the set, you can perform a new repository search, in order to more easily locate members in the set. You can then mark them and select Remove Selected to remove them from the set.
Identifying Records Matching Esploro Records Based on Itemized Set
Institutions often get a list of record identifiers used in external systems (e.g. in a vendor system). You can load this list to Esploro and easily get a list of what you already have in Esploro and what you don't have in Esploro, in order to facilitate your decisions.
- Load your input file of identifiers into Esploro (see Creating Itemized Sets). Esploro runs a job to create the set and produces the Add Members to Set report.
- Do one of the following:
- To download a file of records for which a match was not found with Esploro records, Click the counter for Non-matched Records to download an .csv file of identifiers for which a match was not found with Esploro records, for example:
- To download a file of records matching Esploro records, click the counter for Total added to set to download an .csv file of identifiers for which a match was found with Esploro records. The file features an additional column that indicates the ID of the records for which a match was found, for example:
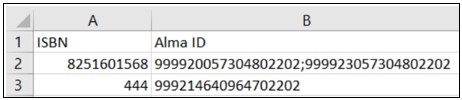
The file provides the following Esploro ID for each set content type:Set Content Type Esploro ID Users Primary ID
Logical Sets
Logical sets are created as a saved search query and the results are determined each time the search is run. Logical sets can be created by first running a search query and saving the results, or by first adding a new logical set and then defining the search query for it.
Creating Logical Sets by First Saving a Search Query
- Perform a search and select Save Query.
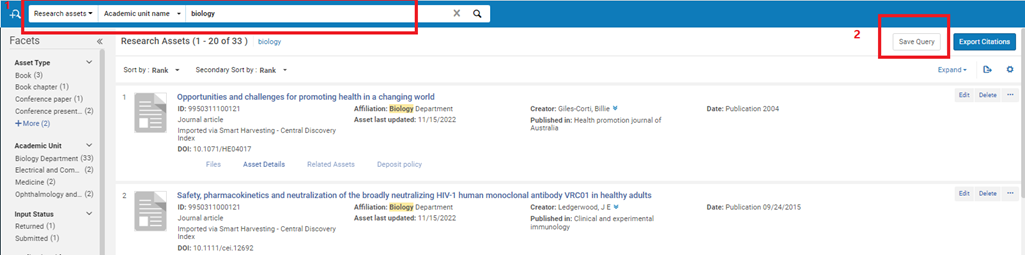 It is recommended not to use Keywords contains * as a basis for a logical set.
 - After saving the query, the Set Details page appears.
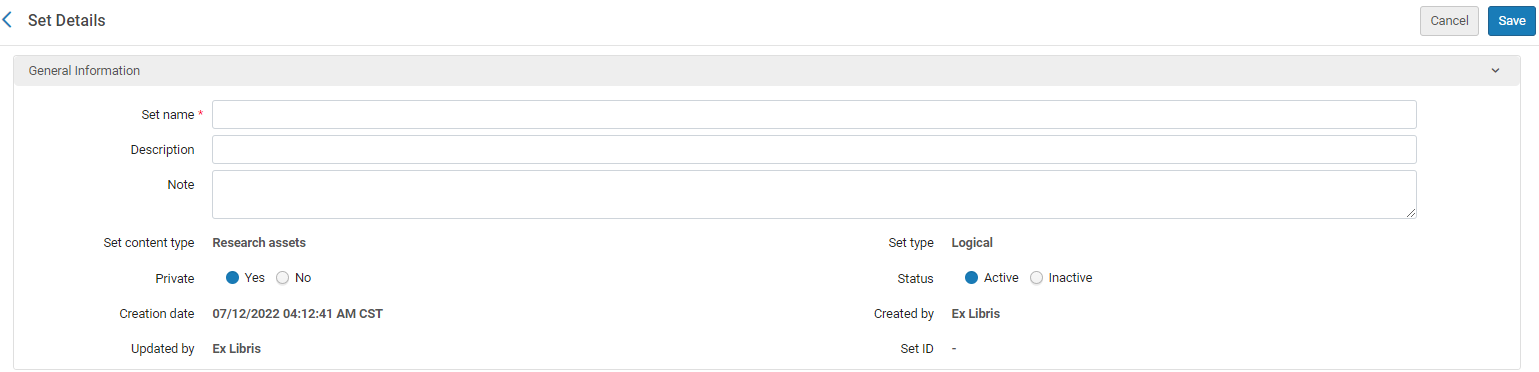
- Enter the set details in the respective fields. Note that the Set name is a mandatory field and must be unique.
The set name cannot contain special characters (for example: &, #, $, %).
- The options that are available for Set content type depend on your permissions as described at the top of this page.
- By default, the set is designated as a Private (Yes) set. This means that the set is only available to you. If you select No, the set becomes a public set and is available to all other users.
- By default, the Status is set to Active. Optionally, select Inactive. Inactive sets cannot be selected by users when running a manual job.
- Select Save. The logical set is saved. For sets of content type Research assets, if the number of items is large, a Manage set members job is run to add the assets to the set; to see the results, see Viewing Completed Jobs.
Creating Logical Sets by First Adding a New Set
- On the Manage Sets page (Admin > Manage Jobs and Sets > Manage Sets), select Create Logical Set. The Set Details page opens.
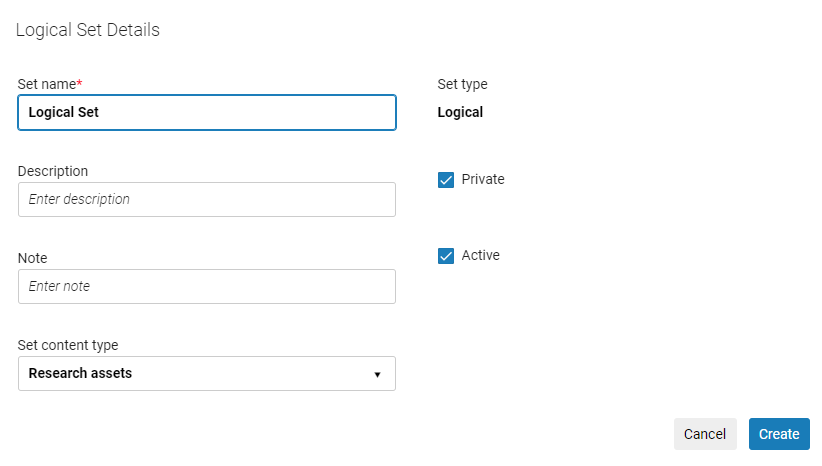 Set Details Page for Logical Sets
 - Enter the set details in the respective fields. Note that the Set name is a mandatory field and must be unique.
The set name cannot contain special characters (for example: &, #, $, %).
- The options that are available for Set content type depend on your permissions as described at the top of this page.
- By default, the set is designated as a Private set. This means that the set is only available to you. If Private is not selected, the set becomes a public set and is available to all other users.
- By default, the Status is set to Active. Inactive sets cannot be selected by users when running a manual job.
- Select Create. A search page opens for the selected content type.
It is recommended not to use Keywords contains * as a basis for a logical set.
- Select Save. The logical set is saved. For sets of content type Research assets, If the number of items is large, a Manage set members job is run to add the assets to the set; to see the results, see Viewing Completed Jobs. If you exit this page without selective Save, the Add Query option displays for that set.

Viewing the Results of Logical Sets
Converting Logical Sets to Itemized Sets
- On the Manage Sets page (Admin > Manage Jobs and Sets > Manage Sets), scroll to the logical set that you want to convert to an itemized set and select Itemize in the row actions list. The Set Details page opens with the set name filled in:
 Set Details Page Convert Logical Set to Itemized Set
 - Modify the set details as required.
- Select Create to create the itemized set.
Combining Sets
- On the Manage Sets page (Admin > Manage Jobs and Sets > Manage Sets), navigate to the set whose members you want to combine with another set and select Combine Sets in the row actions list. The Combine Sets page opens:
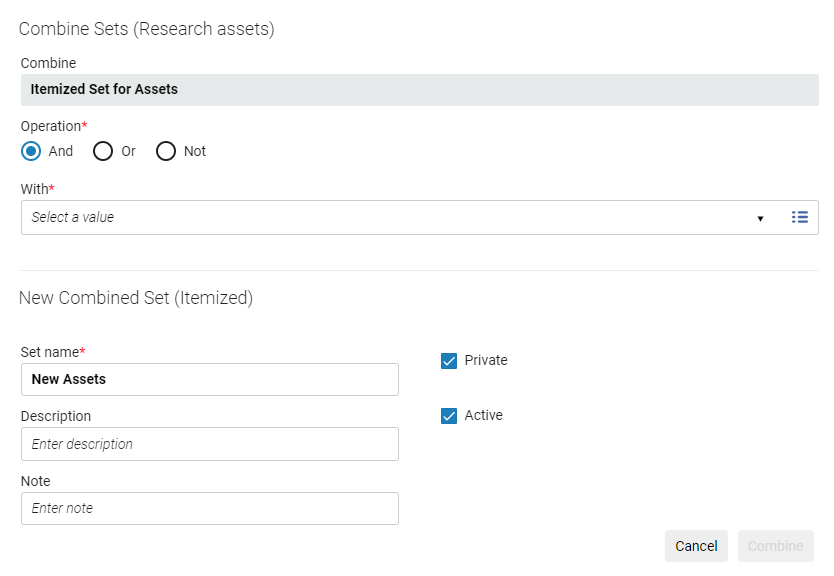 Combine Sets
 - Select an Operation:
- And – Include only the members in common between the two sets in the new combined set.
- Not – Include only the members that are in the first set and not in the second set in the new combined set.
- Or – Include all of the members in both of the sets in the new combined set.
- In With, select the set that you want to combine with the first set you selected.
- Select Combine to create the new set. Note that you may need to refresh the page in order to see the new set.