
Hiding and Reordering Information for Research Management
You can customize the display of information in the Projects (Research Management > Projects > Manage Projects), Activities (Research Management > Activities > Manage Activities), and Resources (Research Management > Research Resources > Manage Research Resources) Research Management pages of the Esploro hub. This includes reordering and hiding of information in the displays of sections, actions, records, and facets.
Default customization settings can also be set for the entire institution. Individual users can override these default settings, if they wish.
Customizing the Settings of Research Management Pages
This section explains how to work with the customization feature. Specific information about configuring the displays of sections, actions, records, and facets appears below.
- Select the Customize button (
 – or
– or  if any of the settings are already customized).

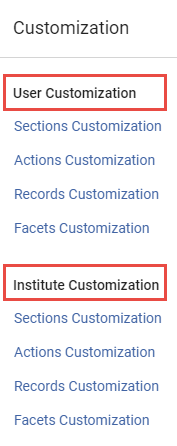
- Select the category of settings to update – Sections Customization, Actions Customization, Records Customization, or Facets Customization – as follows:
- To customize the display for the current user, select the category under User Customization.
- To set the default customizations for the entire institution, select the category under Institute Customization.
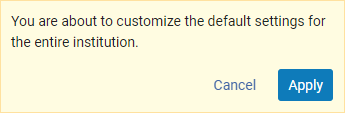
The settings for the selected category open. If you selected an institution-wide option, a note appears above the settings:
- Customize the settings, as explained below – see:
- Customizing Section Display
- Customizing Action Display
- Customizing Record Display
- Customizing Facet Display
Or select Reset to default to restore the out-of-the-box settings. (If you select this option, the change is applied automatically; the customization window closes immediately, and you do not have to perform the next step.)
- Select Apply to implement the customizations.
Customizing Section Display
You can reorder and hide the sections that appear in the Details panel (the right panel).
For information about accessing these settings and implementing changes, see Customizing the Settings of Research Management Pages, above.

To customize section display:
- In the page whose display you want to customize, open the Sections Customization (see Customizing the Settings of Research Management Pages, above).
- Do the following, as required:
- Drag and drop a section name to change its position in the sequence.
- Drag a section to the Hide Sections area to hide that section from the display.
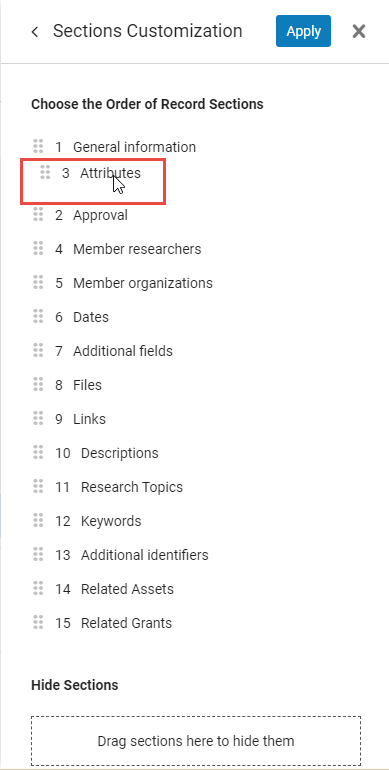 Dragging a Section Name to a Change Its Position in the Menu
 - Select Apply.
Customizing Action Display
You can reorder and hide the action options that appear for each record, both in the list of records (in the center panel) and in the details of the selected record in the Details panel (the right panel).
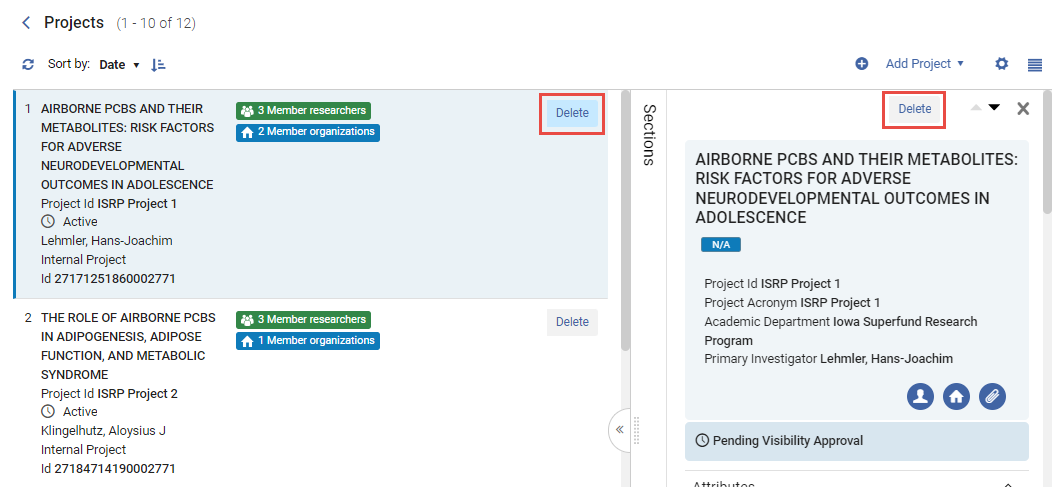
- At present, only one action is available, Delete, so there is currently nothing to reorder.
To customize action display:
- In the page whose display you want to customize, open the Actions Customization (see Customizing the Settings of Research Management Pages, above).
- Do the following, as required:
- Drag and drop an action to change its position in the sequence of options.
- Drag an action to the Hide Sections area to hide that section from the display.
- Select Apply.
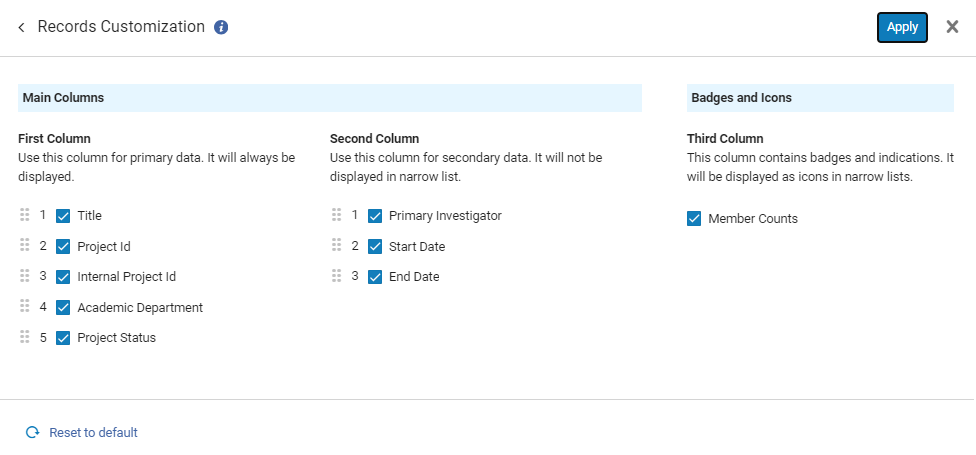
Customizing Record Display
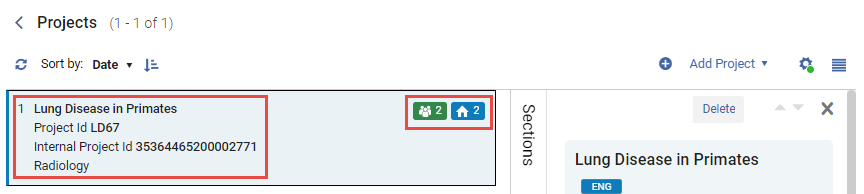
The information that appears for each record in the list of records (in the center panel) is divided into up to three columns. the number of columns displayed depends on the width of the space available to display them. When insufficient space is available for all three columns, the first column is always shown, but the second column may be hidden, and the third column may just display icons, without any explanatory text about them.
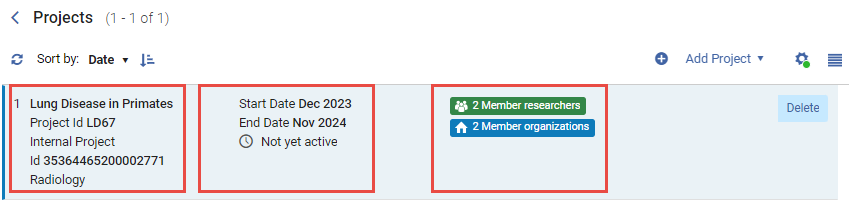
You can configure the record display in a number of ways:
- Change the order of the items in the first and second columns
- Move items between the first and second columns
- Hide items from the display
For information about accessing these settings and implementing changes, see Customizing the Settings of Research Management Pages, above.
- In the page whose display you want to customize, open the Records Customization (see Customizing the Settings of Research Management Pages, above).
 Project Page Record-Display Customization
 - Do the following, as required:
- Drag and drop items in the first or second column lists within or between the lists to change their locations in the record display.
- Clear the checkbox of an item to hide that item from the record display.
-
Select Apply.
Customizing Facet Display
You can control the display of facets in the Facets panel by changing the order in which they appear and hiding the ones that are not of interest.
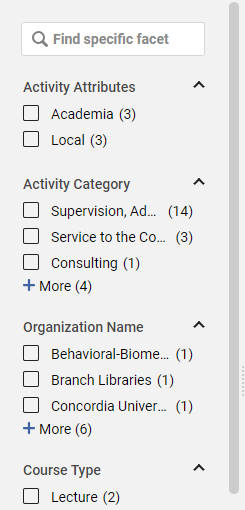
- In the page whose facet display you want to customize, open the Facets Customization (see Customizing the Settings of Research Management Pages, above).
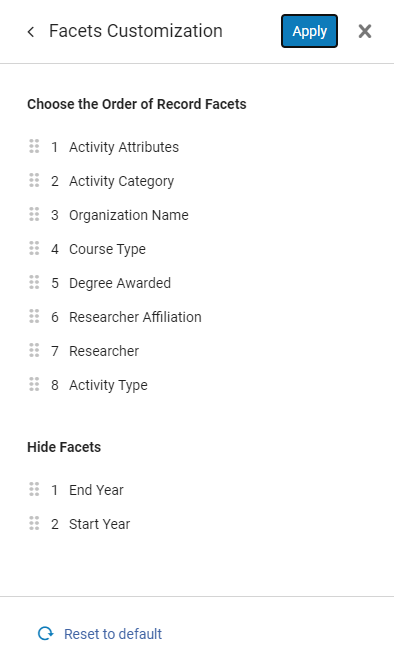 Activities-Page Facets Customization
 - Do the following, as required:
- Drag and drop a facet name to change its position in the sequence.
- Drag a facet to the Hide Facets area to hide that facet from the display.
-
Select Apply.