Working with Projects
- Project Manager
This page describes working with projects in the Esploro Research Hub. For additional information about project management in Esploro, see: Configuring Project Management on the Research Hub; Configuring the Research Portal; Adding and Editing Content on a Profile. For information about customizing the display of project information in the Research Hub, see Hiding and Reordering Information for Research Management.
Watch the Projects training video (5:23).
The Projects feature is only available to Esploro Advanced Edition customers.
Projects allow researchers to store and manage research projects conducted in their institutions. Projects are usually ongoing and can be related to other entities in Esploro, such as assets. By adding projects to Esploro, you can enrich the research information available for display and reporting and provide a wider and more comprehensive picture of the research done in the institution.

Projects can be associated with organizational units and researchers in the institution, and can appear in researchers' Profiles. They can also be associated with assets and grants, providing an even more detailed picture of the research project and the research done at the institution.
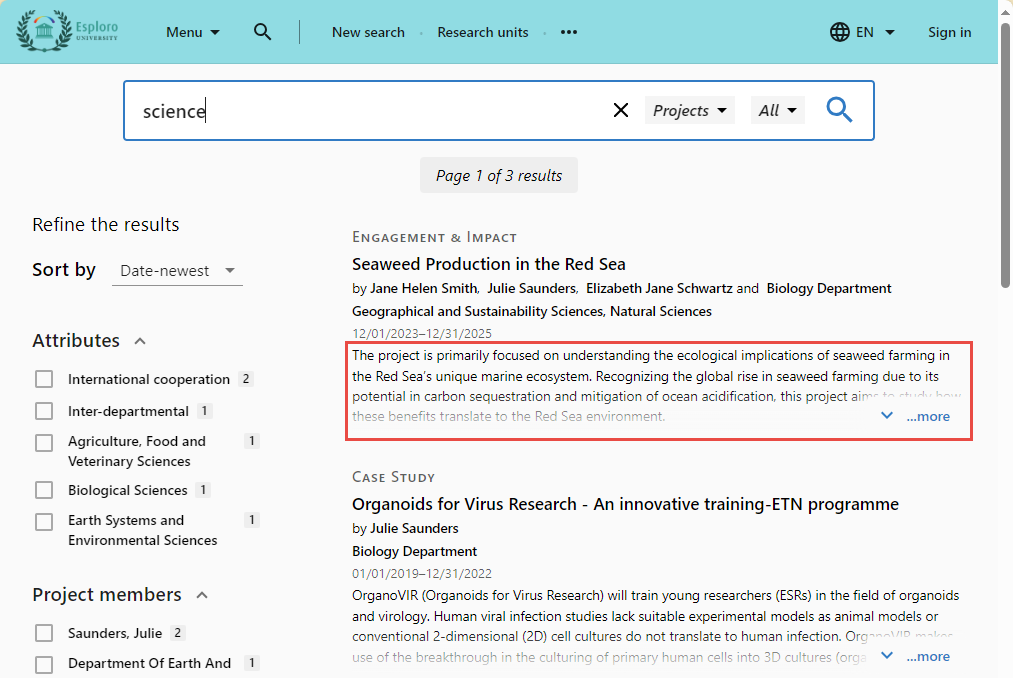
Projects are searchable from the persistent search box located at the top of every Esploro page. For more information, see Searching in Esploro.
Managing Projects
In the Hub, viewing and managing project information is done in the Projects page (Research Management > Projects > Manage Projects).
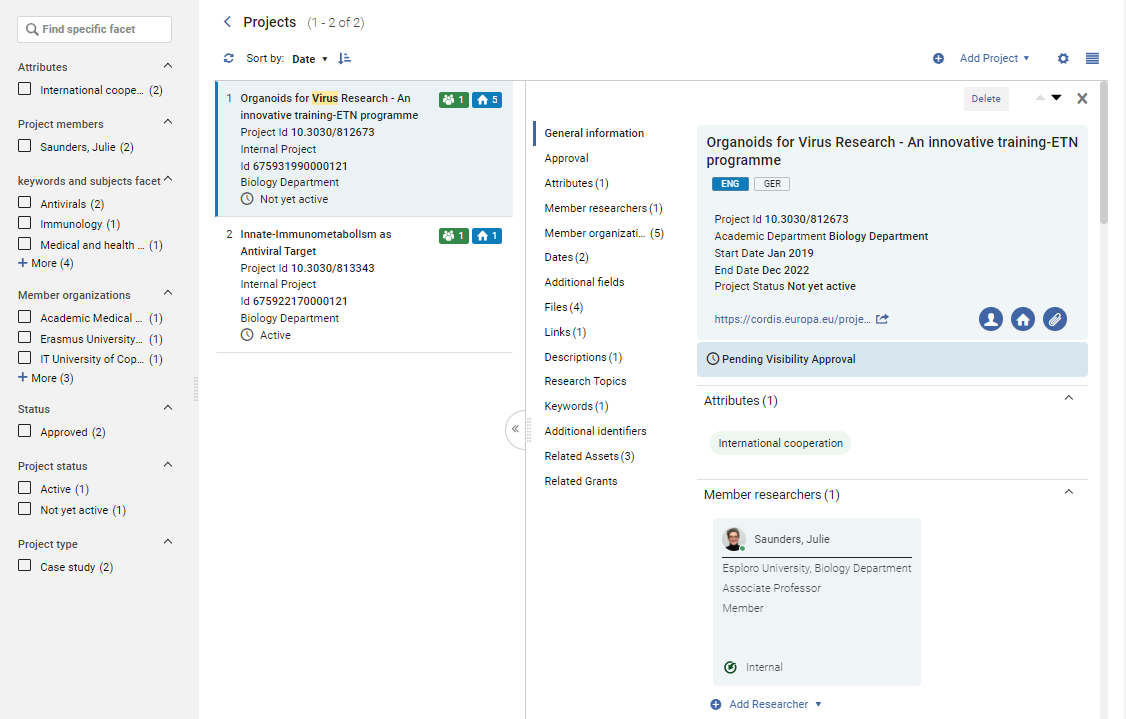
By default, the Projects page is divided into three panes. In the left pane are the facets that you can use to filter the display of projects. In the center pane is a list of the institution's projects, along with basic information about each project, such as the its title, ID, and status, and the number of members and member organizations associated with the project. Select a project in the list to display the project's complete information in the Details pane on the right. The display can be changed from this default Split Screen view to List view, if desired. In List view, the middle pane and the right pane are not shown simultaneously. When the list is displayed, selecting a project from the list opens its Details pane in place of the list. Selecting Back to list then switches the display back to the project list. You can switch between List view and Split Screen view by selecting ![]() or
or ![]() in the upper-right, above the list.
in the upper-right, above the list.
In narrow windows, such as those that are opened on relatively small computer screens, this page is shown in List view by default.
Adding a New Project
You can add a new project to the list of projects by specifying a title for the project, and, optionally, a project ID. (The system automatically generates an internal ID for every project, but you can manually add an additional project ID, as required by your institution.) Once you have created the new project, you can enter more information about it by editing it.
- Select Add Project. A dialog box appears:
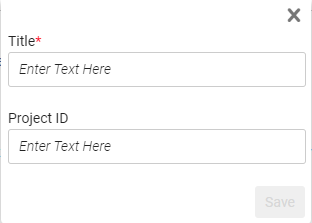 Add Project
 - Enter a Title, and a Project ID (optional).
- Select Save. The project is added to the list of projects, and is assigned an Internal Project ID. It is automatically selected and opened in the Details pane, where you can add information to it (see below).
 New Project
Working with the Details Pane
Information about a project is displayed and managed in the Details pane on the right. Much of the information available there can be displayed in the Portal, both in the project page and/or in the researchers' Profile pages. For information about configuring the Portal display, see Configuring the Research Portal.
Sections Menu
The Details pane is divided into sections containing specific types of information about the project. Beside the sections themselves is a Sections menu, which can be expanded, as in the illustration above, or collapsed, as in the illustration below.
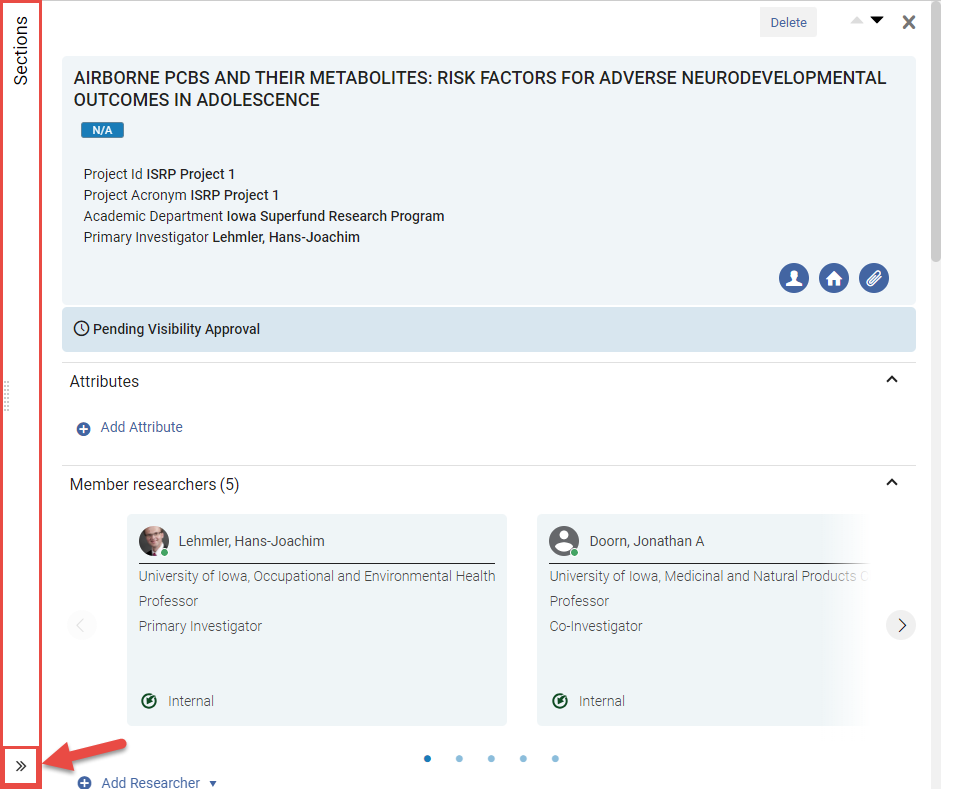
To expand the Sections menu, at the bottom of the collapsed menu, select  . To collapse the menu, select
  .
.
Sections in the Details Pane
The Details pane is divided into the following sections:
- General Information – Basic information about the project, such as its title, ID, and status
- Approval – Visibility settings of the project on the Portal
- Attributes – Properties of the project
- Member researchers – Researchers working on the project
- Member organizations – Organizations associated with the project
- Dates – Dates of events included in the project (e.g., submission date, expected start date)
- Additional Fields – Locally defined fields
- Files – Files related to the project
- Links - Links to URLs related to the project
- Descriptions - Additional information about the project
- Research Topics – Subjects to which the project relates
- Keywords – Free text keywords associated with the project
- Additional Identifiers – Additional identifiers for the project
- Related Assets – Assets related to the project
- Related Grants – Grants related to the project
For additional information about these sections, see Configuring the Settings of Project Sections.
Fields that Support Multiple Languages
Some fields allow you to add text in multiple languages. These fields have language controls above them.
The languages for which text has been entered in the field appear as a series of icons. The selected language icon (e.g., ![]() ) indicates the current language. Select a different language icon to see the text in that language.
) indicates the current language. Select a different language icon to see the text in that language.
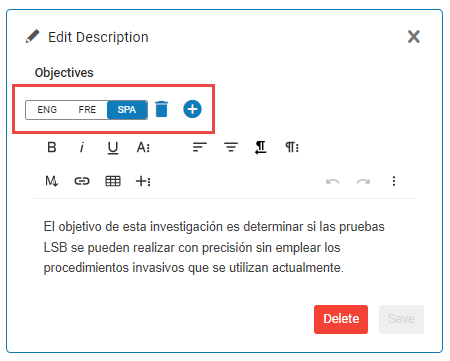
Select  to add additional languages and enter text in those languages.
Configuring the Settings in the Project Sections
The sections described below appear for projects. Multiple entries can be added for all sections, except for the General Information and Approval sections. Some of the information in these sections, such as attributes and project members, is incorporated into the Facets, enabling you to locate projects based on these characteristics.
Information in each section can be edited by selecting the section. For sections that can have multiple entries, counters indicating how many items exist in each section appear in parentheses after their names. In these sections, you can select an item to edit the information it contains, or select the Add option to add additional items to the section.
- If you do not see a section, it may be hidden. See Hiding and Reordering Information for Research Management for more information.
- For some of the fields in these sections, the list of available options can be customized by the organization. For more information, see Configuring Project Management on the Research Hub.
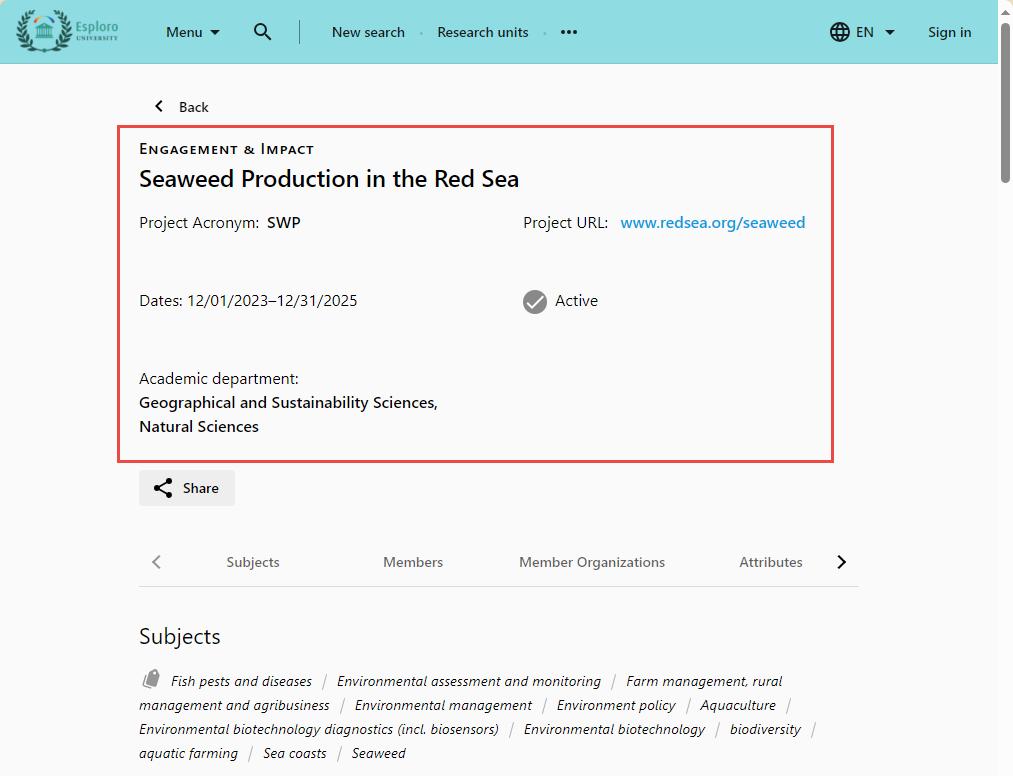
General Information Section
The General information section contains the basic information about the project. The text fields in this section can be translated into multiple languages (see Fields that Support Multiple Languages, above). In the Portal, some of the general information appears when the project appears in search results, and everything but the Project Id appears in the full project page. (The Primary Investigator appears with the Member Researchers.)
- Select the section. The section opens for editing.
 Editing the General Information Section
 - Add or update the details, as follows:
- Title – The name of the project
- Project Id – An identifying code used within the organization for the project
- Project Acronym – An acronym that is used within the organization as a nickname for the project
- Academic department – The organizational units in the institution that are involved in the project (On organizational units, see Working with Organizational Units.)
- Project Status The current status of the project. This is initially set to Not yet active when a new project is opened. It is not updated automatically when the start and/or end date arrives, and should be updated manually as the project progresses. The value selected has no functional impact, and is for informational purposes only.
The names of these statuses, and whether they are available, is configured in Configuration > Research Administration > Projects > Project Statuses; see Configuring Project Management on the Research Hub.
The following statuses are defined:- Active – The project is currently active – the start date is in the past and the end date is in the future.
- Completed – The project has ended – both the start and end dates are in the past.
- Not yet active – The project has not yet begun - both the start and end dates are in the future.
- Not used – The status of the project is not currently known – the project is not yet approved, has been suspended, etc.
- Type – The type of project (configured in Configuration > Research Administration > Projects > Research Project Types; see Configuring Project Management on the Research Hub)
- URL – The URL of a website related to the project
- Start Date – The date on which the project began or is expected to begin
- End Date – The date on which the project was completed or is expected to be completed
- Primary Investigator – If a primary investigator is identified under Member Researchers, their name appears here.
- Select Save.
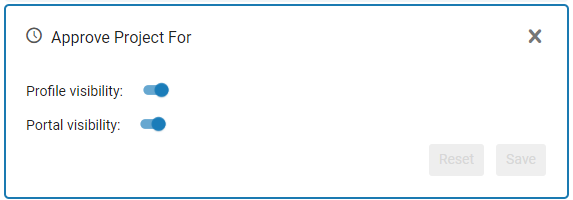
Approval Section
In the Approval section, you can approve the project for display in the Portal and in Profiles:
- Profile visibility – When turned on, the project appears in the Profiles of its affiliated member researchers.
- Portal visibility – When turned on, the project appears in the list of projects in the Portal.
If a researcher working in the Portal selects the Make public button on the project form in their Profile, both of these options are turned on.
Attributes Section
The Attributes section lists properties of the project. Attributes appear in the project page in the Portal and in the Facets in both the Portal and the Hub.

The list of attributes is configured by the organization to suit its requirements. For information about configuring the list, see Configuring Project Management on the Research Hub.
- If no attributes have been selected, select Add Attribute to open the list of attributes. If attributes are already selected, select the list to open it for editing.
- In the search box, enter a string of characters. A list of attributes that contain the string you entered opens.
- Select the checkboxes of the attributes you want to attach to the project, and clear the checkboxes of those you do not want attached to it.
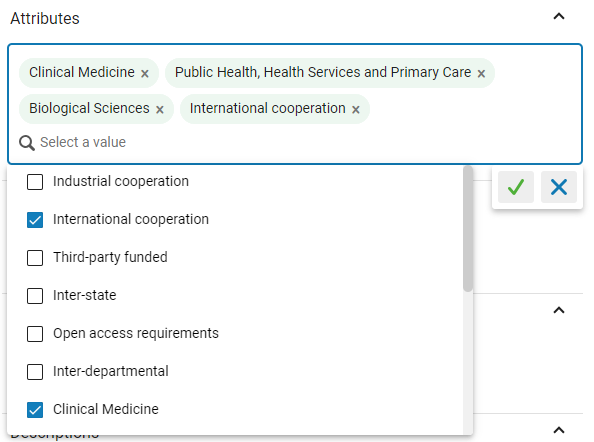 Editing the Attributes of the Project
 - When you have finished, select the checkmark
 twice to save your selections.
Member Researchers Section
The Member researchers section lists the researchers working on the project. Member researchers appear in the project page in the Portal and in the Facets in both the Portal and the Hub. Projects can also be found by searching for their member-researchers' names.

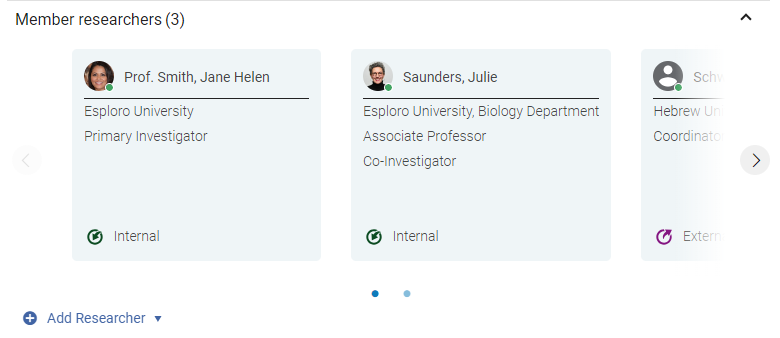
Researchers must exist in the database in order for them to be saved with the project. In this section, you can select affiliated or non-affiliated researchers that are already in the database, or create new non-affiliated researchers. When you add new non-affiliated researchers in this way, they are automatically added to the database of existing researchers. Once researchers have been added to the project, they can be dragged and dropped to change the order in which they appear in the list.
To search the existing list of researchers in order to add affiliated or non-affiliated researchers, select Add Researcher > Search Existing. To add non-affiliated researchers that are not in the list, select Add Researcher > Create non-affiliated.
To edit a member researcher that is already attached to the project, select it.
The following information may appear or be added in this section:
- Name – When adding a new non-affiliated researcher, enter the researcher's name (First name, Middle name, Last name, Suffix). When adding a researcher from the existing list, the name is displayed and cannot be edited (although it can be edited in the researcher's record; see Working with Researchers).
- Affiliation – When adding a new non-affiliated researcher, enter the researcher's affiliation. When adding a researcher from the existing list, the affiliation is displayed and cannot be edited (although it can be edited in the researcher's record; see Working with Researchers).
- ORCID – When adding a new non-affiliated researcher, enter the researcher's ORCID ID. The ID is saved in the researcher's record in the database (see Working with Researchers).
- Role – Select the researcher’s role in the project.
This list can be managed in the Project Participant Roles table (Configuration menu > Research Administration > Projects > Project Participant Roles).
- Start Date – Enter the date the researcher will start (or started) being a member of the project.
- End Date – Enter the date the researcher will end (or ended) being a member of the project.
- Researcher Position – For existing researchers, this field displays the position of the researcher in their organization (e.g., professor, or assistant dean), as specified in the researcher's record (see Working with Researchers).
- Active – Specify the current status of the researcher in the project – select the checkbox if the researcher is actively involved in the project at this time, or clear it is the researcher is not currently active.
When you have finished configuring a member researcher, select Save.
Member Organizations Section
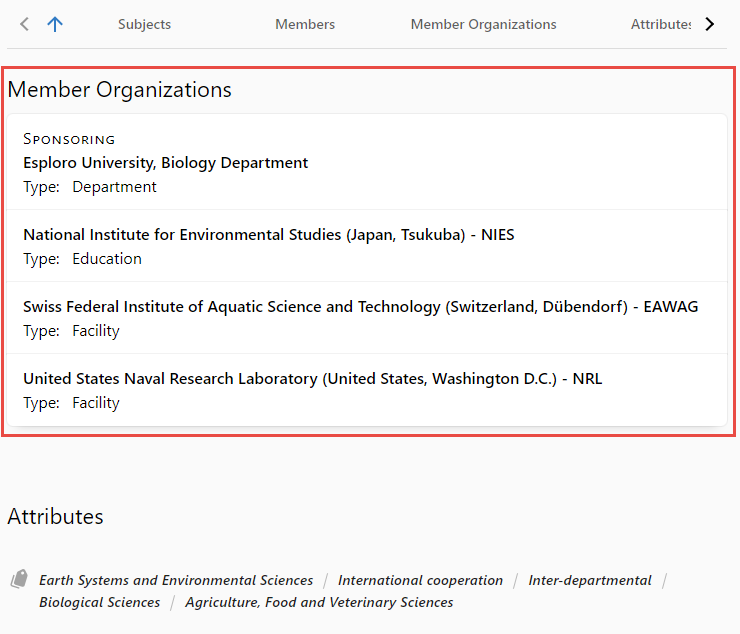
If the Projects tab is activated for display in organizational units' pages in the Portal (see Configuring the Research Portal), the project appears in the Projects tab for each internal member organization that is visible in the Portal (including parent organizations of member organizations).

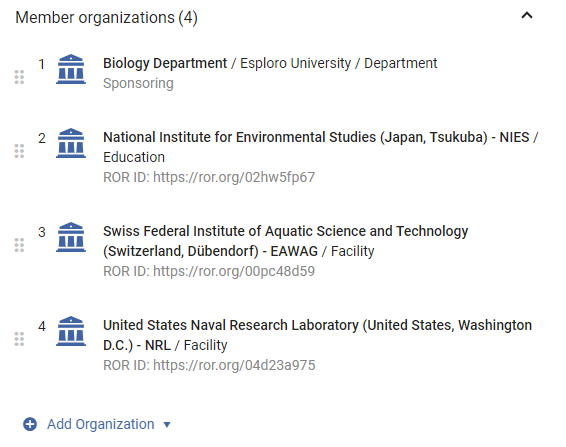
- Organization Name – The name of the organization, as it appears in the database (read only).
- ROR ID – For external organizations, the Research Organization Registry ID of the organization, as it appears in the database (read only).
- Type – The type of organization, as it appears in the database (read only).
- Role – Select the organization's role in the project.
This list can be managed in the Project Organization Roles table (Configuration menu > Research Administration > Projects > Project Organization Roles).
- Active project member – Select this if the organization is actively involved in the project.
- Display as member – Select this to include this organization in the information about the project that appears in the Portal.
When you have finished configuring the member organization, select Save.
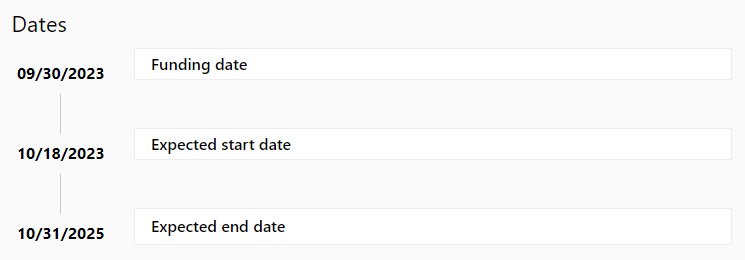
Dates Section
The Dates section is where you can list important dates related to the project, such as a funding date and an expected start date.
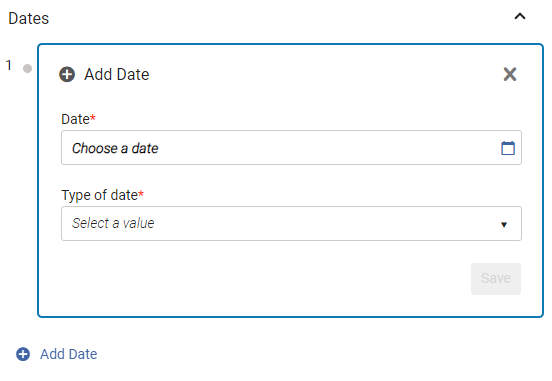

- Select Add Date.
- Select the Date and the Type of date.
The list of date types can be managed in the Research Project Date Types table (Configuration menu > Research Administration > Projects > Project Date Types).
- Select Save.
Additional Fields Section
If local fields – custom fields that were created by your organization – are defined in your organization's Esploro system, you can add one or more of them to the project, and add values to them, in the Additional Fields section. For information about creating and managing local fields, see Configuring Project Local Field Names.
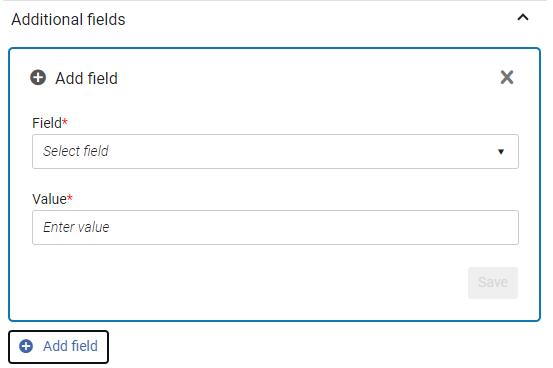
- Select Add field.
- Select the Field to add.
- Enter a Value for the field.
- Select Save.
Files Section
The Files section is where you upload files to the project. Once files are uploaded, you can choose whether to make them available for viewing and downloading by users of the Portal and, if they will be accessible there, how they will appear in the Portal. You can also change the order in which the files appear in the list by dragging them up or down.


- Either drag the file to the Drop a file area, or select Browse files to navigate to the file and select it. The file is uploaded to the project, and appears in the list of files in the section.
Once a file has been uploaded, you can configure the following optional settings by selecting Edit from the row actions:
- Display Name – Text to display instead of the file name (both in the Research Hub and in the Portal); in the illustrations below, "Preliminary Results" is the Display Name of the file, while "LSB_Test.pdf" does not have a Display Name configured.
- Display Date – A date to associate with the file and display in the Portal. Optional. This field can be used to indicate when the contents of the file were downloaded or received, such as for files containing data from websites or blogs, or messages sent by email. When this field is filled in, the date it contains appears under Date in the list of files in the Hub, instead of the upload date that is filled in automatically when the file is uploaded. This date is also displayed for the file in the Portal. (The upload date is not displayed in the Portal.)
The display format of this field can be configured in Configuration menu > General > Institution Settings > Institution Settings under esploro_project_file_date_format. The display format of the upload date is the general format configured for dates in Configuration menu > General > Institution Settings > Institution Settings under esploro_date_format. (Since these formats may not be identical, the dates shown in the Hub for different files may not be formatted in the same way. See, for example, the dates in the illustration above.) For additional information about configuring these date formats, see Configuring Institution Settings). - Content Type – Select Logo to use the file as the logo for the project, or Gallery to use it as the gallery image of the project. The logo and gallery images are displayed in the full project page – the logo in the logo section, and the gallery image in the center of the page, stretched to fill the page widthwise. Selecting other content types is for admin's information; the type only appears in the project information in the Hub, and does not affect the display of the project in the Portal.
The list of Content Types can be managed in the Project Files and Links table (Configuration menu > Research Administration > Projects > Project Files and Links). This list defines the available content types for both files and links (see below).
- Access rights policy – Open if the file should be made available from the project page and the researcher Profiles for download by users of the Portal; Closed if it should not be made available in the Portal. Closed by default.
- Descriptions – A description to display in the Portal, below the File Name or Display Name; for example, "Results of the First Round of Testing" in the Files in the Portal illustration below.
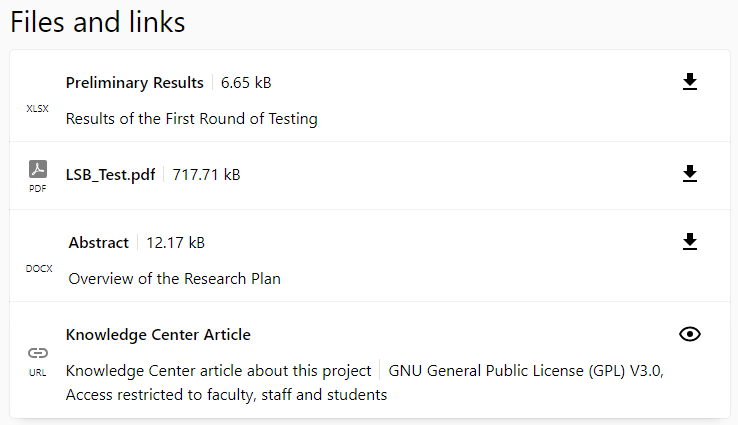
Links Section
The Links section is where you can add links to the project. For each link, you must specify a URL, and you can configure other optional settings. Once the links have been added to the list, you can also change the order in which they appear by dragging them up or down.
Files and links appear in the Portal in the same section, Files and links. For example, in the following illustration, three files and one link appear in that section:
- Select Add link. The Add box opens.
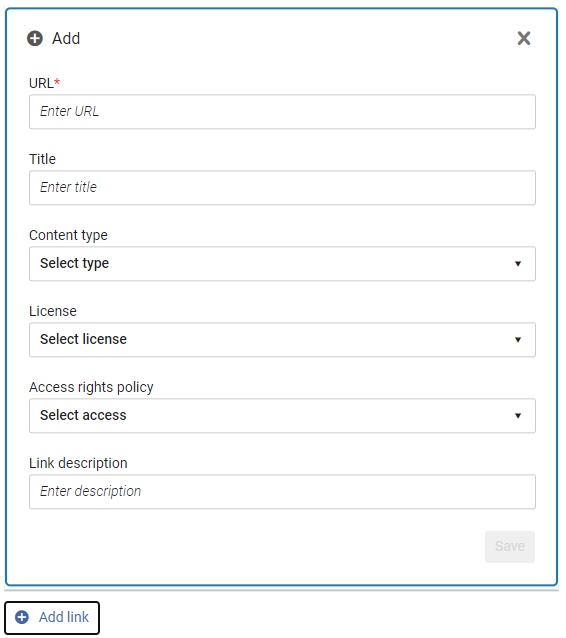
- Specify a URL for the link.
- Optionally, fill in the other fields:
- URL – The link address
- Title – The title to display in the Portal
- Content type – Select the type of content found at the target of the link.
The list of Content types can be managed in the Project Files and Links table (Configuration menu > Research Administration > Projects > Project Files and Links). This list defines the available content types for both files (see above) and links.
- License – The license type
- Access rights policy – Indicate whether the user needs credentials in order to access the target of the link. The selected policy is displayed along with the link in the Portal. Note that the link is active in the Portal regardless of which policy is selected here; the policy selection is only intended to tell the user what to expect if they follow the link. The options are:
- Open Access – There are no access restrictions.
- Restricted – Credentials are required in order to access the target of the link.
- Access restricted to faculty, staff and students – Only users directly associated with the institution can access the target of the link (using their credentials).
The default value is Restricted. Access Rights Policy Indicated Along with the Link in the Portal
 - Link description – Description of the content that is found at the linked location
- Select Save.
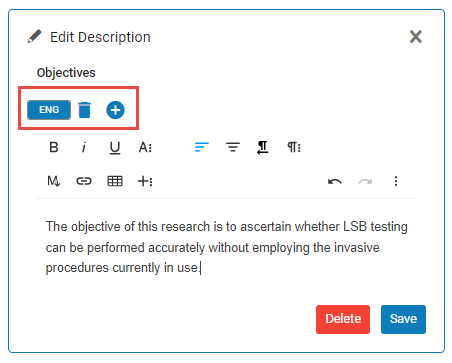
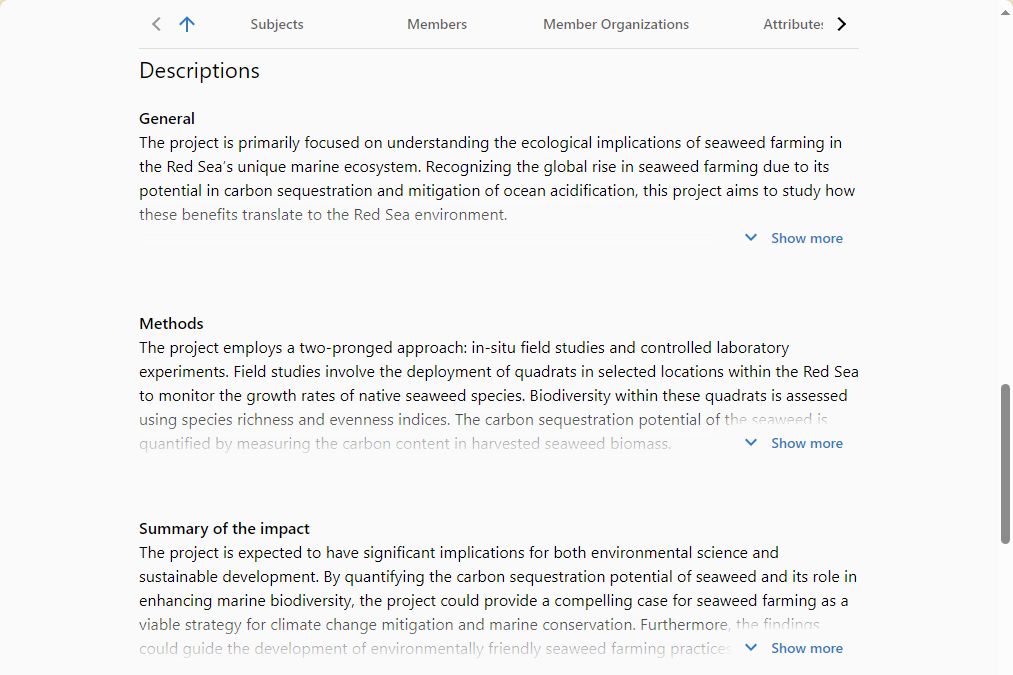
Descriptions Section
In the Descriptions section, you can add more detailed information about the various aspects of the project, such as a general description, or descriptions of the objectives of the project or its methodology. The General description appears in the Portal in both the short description of the project that appears in the search results, and the full project page. Other descriptions appear only in the full project page. Descriptions can be translated into multiple languages (see Fields that Support Multiple Languages, above).
- Select Add Description, and then select the type of description you want to add. A text-editing area opens.
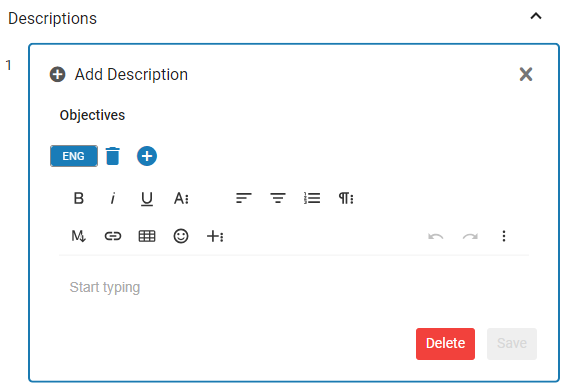
- Enter the text you want to add.
- To add text in a different language, select
 (see Fields that Support Multiple Languages, above).
 - Select Save.
- To add additional descriptions of different types, repeat the previous steps for each one.
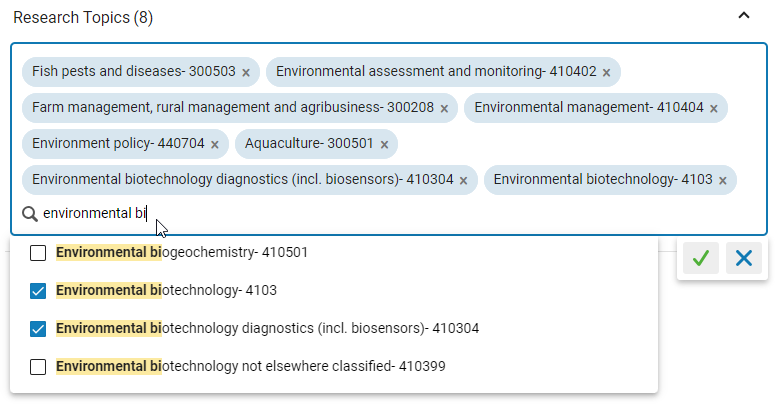
Research Topics Section
Research topics appear in the project's page in the Portal, under Subjects (along with keywords).
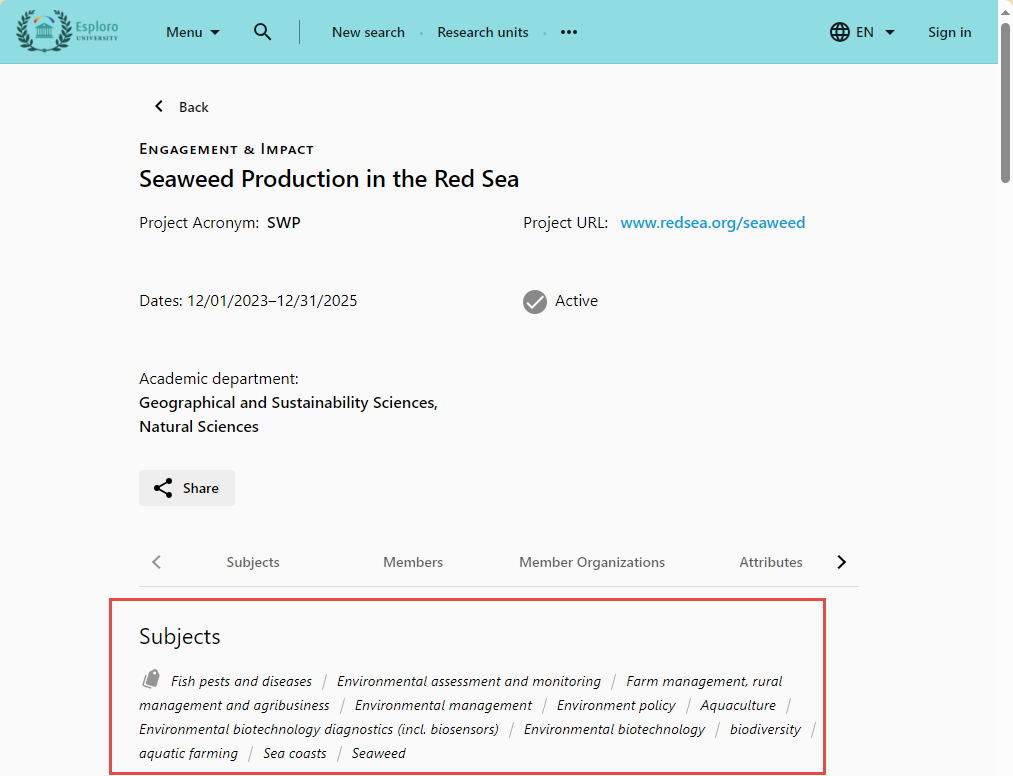
Attach research topics to the project by selecting them from a predefined list of research topics. Begin by entering a string of characters in the search field in order to find topics that contain the string. The list is not configurable.
Keywords Section
Add keywords to the project. Keywords are free-text terms describing the project's focus and activities. They can be added in multiple languages (see Fields that Support Multiple Languages, above). Keywords appear in the project's page in the Portal, under Subjects (along with research topics; see illustration above).
- Select Add Keywords.
- In the text box, type a keyword.
 Text Box for Adding Keywords
 - Select the checkbox of the keyword you typed. The keyword is added above the typing area.
 New Keyword Added Above the Typing Area
 - To add a translation of the keyword in a different language, select (see Fields that Support Multiple Languages, above).
- When you have finished adding keywords, select the Save button (
 ).
).
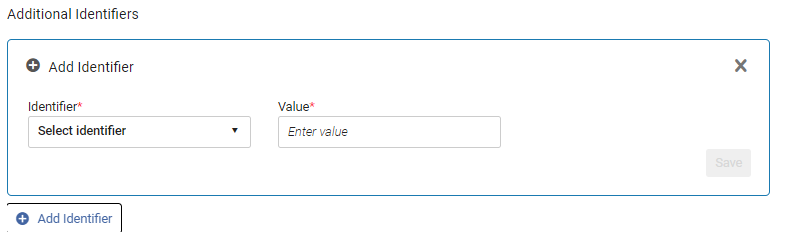
Additional Identifiers Section
Add additional identifiers to the project, as required. The list of identifier types is configured in Configuration menu > Research Administration > Project Identifiers; see Configuring Project Management on the Research Hub.
Related Assets Section
The Related Assets section allows you to link the project to assets in the database that are relevant to the project - publications, datasets, creative works, etc. By default, related assets are displayed in the project page in the Portal. Once you have added an asset, you can choose to hide it from the Portal if you wish.
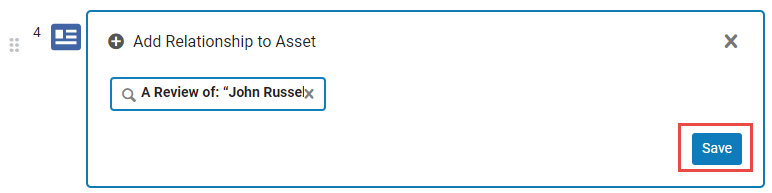
- In the Related Assets section, select Add Related Asset.
- In the search box, enter either a word or phrase that appears in the title of the asset, or an asset ID. Assets that meet the search criteria are listed above or below the search box.
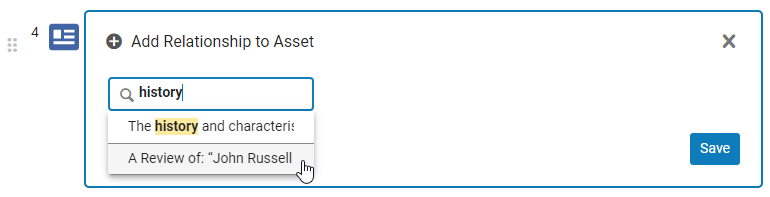
- Select an asset, and then select Save. The asset is added to the list of related assets.
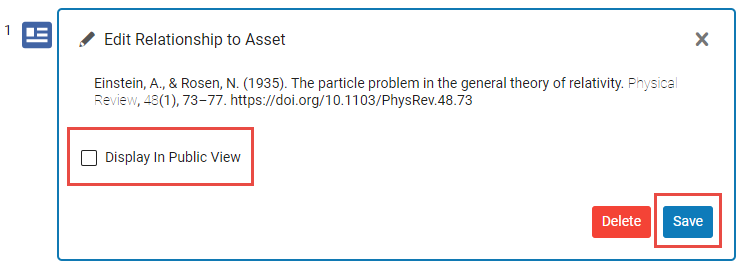
- If you do not want the asset to appear in the project's page in the Portal, select the asset, and then clear the Display in Public View checkbox and select Save.
If multiple assets are related to a project, you can change the order in which the assets appear by dragging their Drag icons (![]() ) up or down.
) up or down.

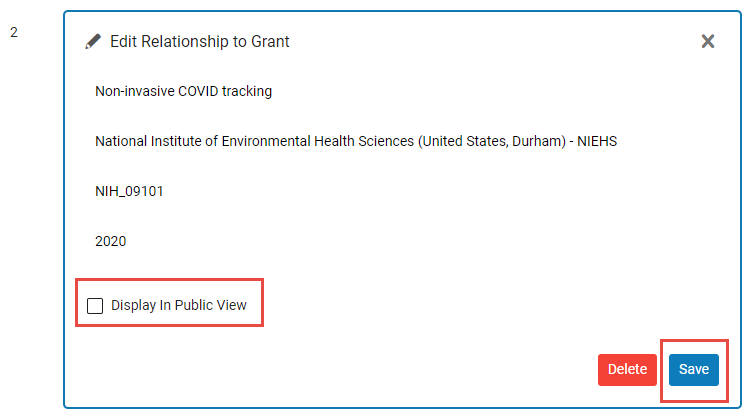
Related Grants Section
The Related Grants section allows you to link grants that are already recorded in the database to the project.
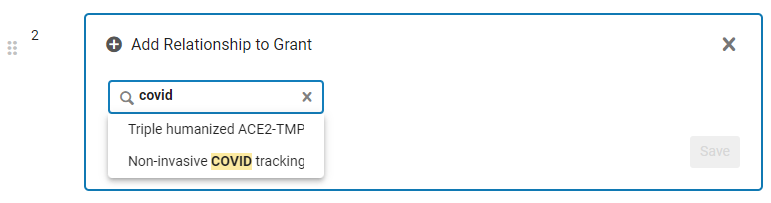
- In the Related Grants section, select Add Related Grant.
- In the search box, enter either a word or phrase that appears in the name of the grant, or a grant ID. Grants that meet the search criteria are listed above or below the search box.
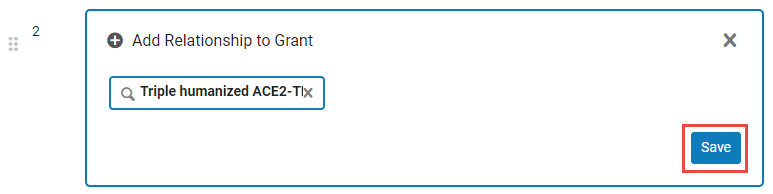
- Select a grant, and then select Save. The grant is added to the list of related grants.
- If you do not want the grant to appear in the project's page in the Portal, select the grant, and then clear the Display in Public View checkbox, and select Save.
If multiple grants are related to a project, you can change the order in which the grants appear by dragging their Drag icons (![]() ) up or down.
) up or down.

Related Activities Section
The Related Activities section allows you to link activities that are already recorded in the database to the project.
- In the Related Activities section, select Add Related Activity.
- In the search box, enter a word or phrase that appears in the name of the activity. Activities that meet the search criteria are listed above or below the search box.
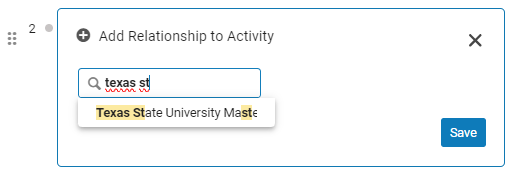
- Select an activity, and then select Save. The activity is added to the list of related activities.

- If you do not want the activity to appear in the project's page in the Portal, select the activity, and then clear the Display in Public View checkbox, and select Save.

If multiple activities are related to a project, you can change the order in which the activities appear by dragging their Drag icons (![]() ) up or down.
) up or down.
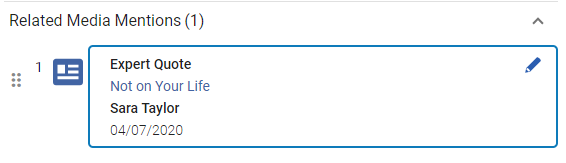
Related Media-Mentions Section
The Related Media Mentions section allows you to link media mentions that are already recorded in the database to the project.
For information about managing media mentions, see Working with Media Mentions.
It is not currently possible to display related media mentions in the project page in the Portal. This functionality will be added in the future.
- In the Related Media Mentions section, select Add Related Media Mentions.
- In the search box, enter a word or phrase that appears in the name of the media mention. Media Mentions that meet the search criteria are listed above or below the search box.

- Select a media mention, and then select Save. The media mention is added to the list of related media mentions.
If multiple media mentions are related to a project, you can change the order in which the media mentions appear by dragging their Drag icons (![]() ) up or down.
) up or down.
Deleting Projects
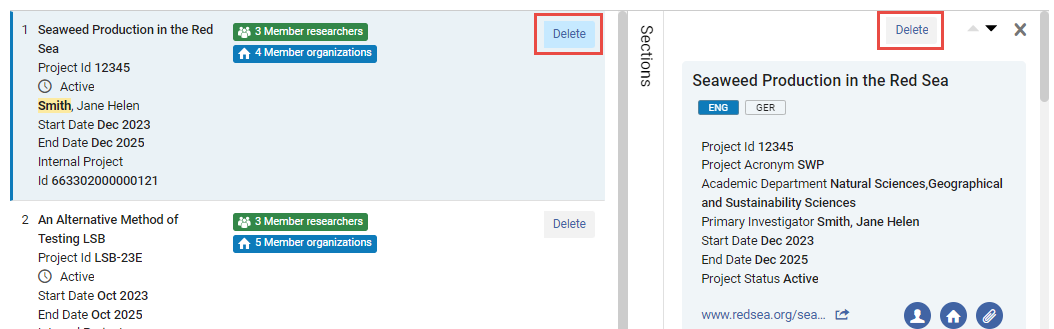
- In either the project summary, or, when the project is selected, at the top of the Details pane, select the Delete button.