
Intota: DRS Request Form: Enter Provider Credentials on a Spreadsheet with the Export-Upload Tool
- Product: Intota
How do we add our credentials to provider pages of the DRS Request Form using the DRS Request Form Export/Upload Tool?
To inform ProQuest which usage reports you'd like us to collect from each provider with the Data Retrieval Service (DRS), you will need to fill out certain information about the providers shown on DRS Request Form.
This Answer describes how to do that using the Form's export/upload tool. Alternatively, you can enter information about the providers one at a time.
Most clients will probably prefer to enter provider information one at a time because it is more intuitive. However, if you are very familiar with a spreadsheet program such as Microsoft Excel and if you have your DRS information from many providers ready, then you might prefer to use the export/upload tool of the Form, using the following instructions.
There are three primary actions to take. Click the action to jump to that section on this page:
Export DRS Request Form
-
Click the Download button on the Vendor Statistics Management page (access Vendor Statistics by clicking Tools on the Intota menu bar):
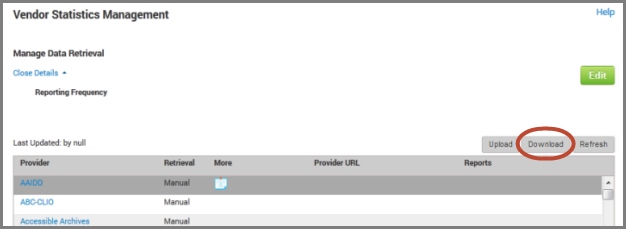
-
Save the .csv (comma-separated values) file. You may change the filename if you like; for instance, you could add the current date. Ensure the suffix remains .csv
Modify the Spreadsheet Offline
-
Open the file with a spreadsheet program like Excel. You can adjust the width of each column as needed to see the columns and fields (cells):
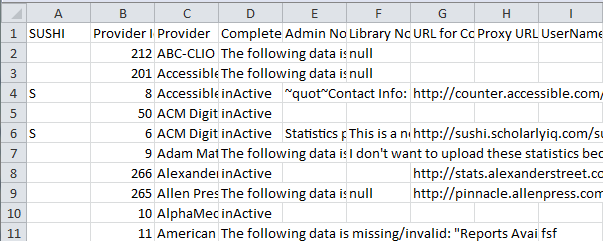
The spreadsheet has many columns so it is helpful to "freeze" the second column (provider) onto a split-screen on the left side so you can move right through the columns but still see which provider is on each row.
-
The list of providers is mostly in alphabetical order. However, you will find that some providers are not listed in alphabetical order. The best way to find the provider you're looking for is to use the Find function of your browser, which is usually CTRL-F.
You may also sort the rows when you work with the list, because they don't need to be in a particular order. For example, you could sort them alphabetically by provider name and then remove the rows with providers you don't subscribe to. Or, if you're only going to be adding SUSHI-protocol information, sort by SUSHI and only keep the rows for which the SUSHI column has an "S".
You could also split the file into two (or more) separate files; for instance, one with SUSHI-protocol-harvesting entries and one with administration-based-harvesting entries. -
Some of the columns and fields cannot be modified and are only here to help you organize information, while the others are where you should enter your library's information, as shown in the table here:
Column
in a SpreadsheetColumn Header Information A
SUSHI
An "S" indicates the provider supports connection to its SUSHI service.
B
Provider ID
Do not change any cells in this column. The DRS system uses the Provider ID to match your entries in the spreadsheet with those in the system itself.
C
Provider
Vendor/provider name as found in the Knowledgebase. If you accidentally change this, it will not affect the upload, because the DRS system does not check it.
D
Complete
This is the field where the DRS indicates whether this entry is complete. You can sort the rows based on this column, to easily find all the providers that say "No" and are not yet complete.
E
Admin Note
This is an administrative message created by ProQuest with instructions on how to provide the credentials for that provider.
F
Library Note
This is a message that you and others in your library can create to give us any special instructions. You can enter a maximum of 2000 characters.
G
URL for Counter Report
This is the URL for logging into either the provider's SUSHI usage-reports system or the provider's non-SUSHI usage-reports system. If we already provided a URL for a provider, we recommend you do not change this field. If we have not provided a URL, you will need to get a custom URL from the provider.
H
Proxy URL
For a very few providers, we will need to proxy into your library's system to retrieve files from the provider. (The Admin Note in column D will indicate if this is one of those providers.) Enter your proxy URL here, and enter an proxy access UserName and Password in the next two cells (H and I).
I
UserName
This is the username credential supplied to you by the provider for logging into the provider's non-SUSHI usage-reports system. If this provider requires us to proxy into your library's system (see the Admin Note in column D), then enter your proxy access UserName here instead.
J
Password
This is the password credential supplied to you by the provider for logging into the provider's non-SUSHI usage-reports system. If this provider requires us to proxy into your library's system (see the Admin Note in column D), then enter your proxy access Password here instead.
K
Vendor URL Added to Proxy Config
For a very few providers, you must add the provider's (vendor's) URL to your library's proxy configuration file so that we can access that URL when we proxy in through your system. (The Admin Note in column D will indicate if this is one of those providers.) When you have done that, enter Yes in this cell.
L
SerSOl IPAddress Added To Vendor Account
For a very few providers, you must inform your provider of the ProQuest IP addresses so that our DRS system can access your usage reports. (The Admin Note in column D will indicate if this is one of those providers.) If this is one of those vendors, contact us with the Support Portal option and we will let you know our IP addresses. Once you have entered the ProQuest IP addresses into your provider's administration account, enter Yes in this cell.
M
SUSHI Requestor ID
This is the Requestor ID supplied to you by the provider for logging into the provider's SUSHI usage-reports system.
N
SUSHI Requestor Name
This is the name of the person on your library staff who requests reports from the provider's SUSHI usage-reports system.
O
SUSHI Requestor Email
This is the email of the person on your library staff who requests reports from the provider's SUSHI usage-reports system.
P
SUSHI Customer ID
This is the Customer ID for your library for requesting reports from the provider's SUSHI usage-reports system.
Q
SUSHI Customer Name
This is the Customer Name for your library for requesting reports from the provider's SUSHI usage-reports system.
R
SUSHI User Name
This is the username credential supplied to you by the provider for logging into the provider's SUSHI usage-reports system.
S
SUSHI Password
This is the password credential supplied to you by the provider for logging into the provider's SUSHI usage-reports system.
T, U, V, W, X, Y, Z, AA, AB
JR1, JR1a, JR2, and so on.
This field is where you request which usage-report types you want us to retrieve from the provider. If the field contains Not Available, then do not change it, because that means the provider does not offer that type of report at all. Otherwise, enter Yes if you do want us to retrieve that report type, or No if you do not.
-
When you are done making changes, save the file again.
Upload DRS Request
-
Click the Upload button on the Vendor Statistics Metadata page.
-
On the small pop-up screen, click the Browse button and open the modified .csv file.
-
Click the Upload button on the small pop-up screen. You will return to the Vendor Statistics Metadata page. Click the Refresh button if needed to update the view with your changes. Those providers with the green arrow
 have all required fields filled out successfully.
 -
If the rows of any providers are not complete (they have the yellow arrow icon
 ), you will need to click on the provider name to open the pop-up window and make the changes manually.
For any providers that you've put in SUSHI-protocol-harvesting entries, you'll also need to test SUSHI settings.
- Date Created: 12-Jun-2014
- Last Edited Date: 20-Jun-2014
- Old Article Number: 10895