
Configuring the Leganto UI
The Quick Start Welcome Screens (LTI)
The Quick Start Welcome Screens guide instructors on quickly setting up a course.
When an instructor logs in from an LMS using an LTI link from a course that does not exist in Alma or does not have any lists, the Quick Start Welcome screens displays.

The Quick Start Welcome screen can include the following options:
- Create a new list from scratch (list)
- Create list from an existing list
- Duplicate list (rollover): Create a copy of the list and link it to this course. See Enabling Instructor Rollover.
- Link course to this list (link): Link the course to an existing list. You must enable the duplicate/rollover option to enable this option.
- Ask your library to create your list (file): upload a file that contains the reading list materials. The file is sent to the library for processing. See Configuring Whether Instructors Can Upload Files that Contain Reading Lists.
Set cms_entry_actions (Configuration > Leganto > LTI > Settings) to:
- all (include all options)
- course (create course — see below)
- list (create list)
- rollover (duplicate existing list)
- link (link existing list to course)
- file (upload file for library)
If not using all, separate multiple values with commas.
The instructor can only create a list if the course exists in Alma. If the course does not exist in Alma, you can enable that the course is created when accessing Leganto from the LMS by setting cms_entry_actions to all or course, configure default_processing_department.
For LTI 1.1 users, add the course name field name to the integration profile.
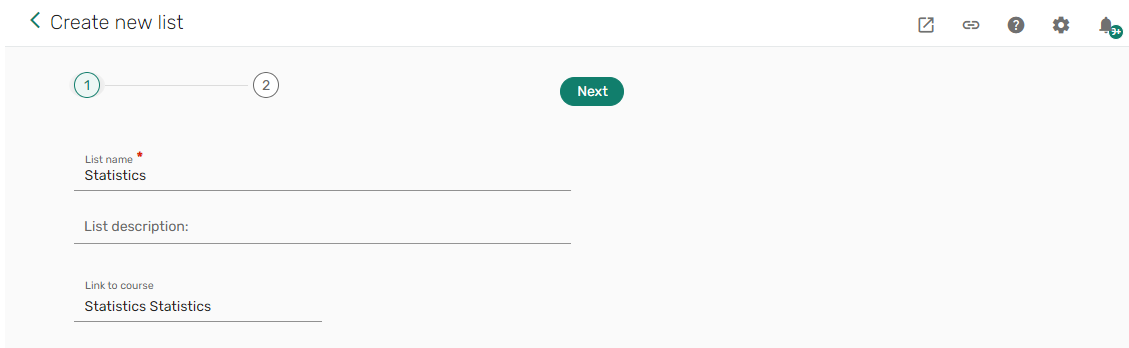
The instructor is prompted to fill in course information.
 |
 |
|
Create new list wizard
|
To have the course created automatically rather than created by the instructor, set create_course_automatically (Configuration > Leganto > LTI > Settings) to true.
- Set quickstart_screen_instructor to false in the Leganto Features code table (Configuration > Leganto > Features > Leganto Features).
Getting Help
The library can define customized help pages for Leganto. The default URL when selecting Help opens the Leganto online help page.
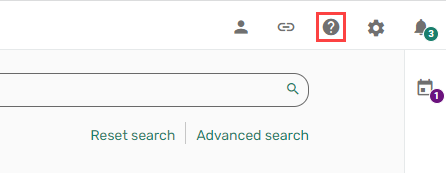
- From the Help Pages mapping table (Configuration > Leganto > Features > Help Pages - New UI) institutions can specify the customized URL by role and language. You can add multiple languages per role. Once configured, selecting Help
 directs the user to the defined URL according to the interface language.
- The URL must begin with https:.
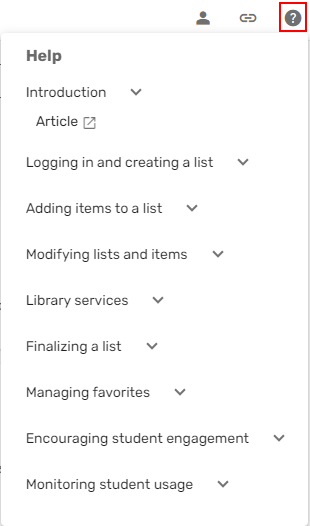
Institutions can edit, remove, or add topics. For each topic, you can customize the links displayed for written help and videos, and each can be customized per user role and by language.
By default, each article links to the corresponding article in the Leganto English online help. Each article opens in a new tab.
Linking Leganto to an External Citation Manager
If you use RefWorks, Zotero, or Mendeley citation managers, users can configure Leganto with the external site's credentials and then drag and drop these citations into Leganto. Also see Adding an Item from a Reference Manager.
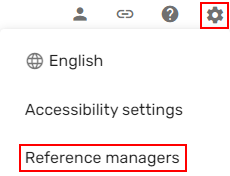
- From the Settings
 menu, select Reference managers. The Reference managers window opens.
 Reference managers
The library must configure RefWorks/Mendeley credentials (Configuration > Leganto > General > External Integrations) for these options to appear correctly. Also see Enabling and Configuring RefWorks and Enabling Mendeley.
Collapsing or Expanding a Section
Institutions can present sections by default as either collapsed or expanded for all lists.
- Set the parameter sections_collapsed (Configuration > Leganto > UI > Settings) to false to present sections as expanded. Set the parameter to true to present sections as collapsed.
 A collapsed section
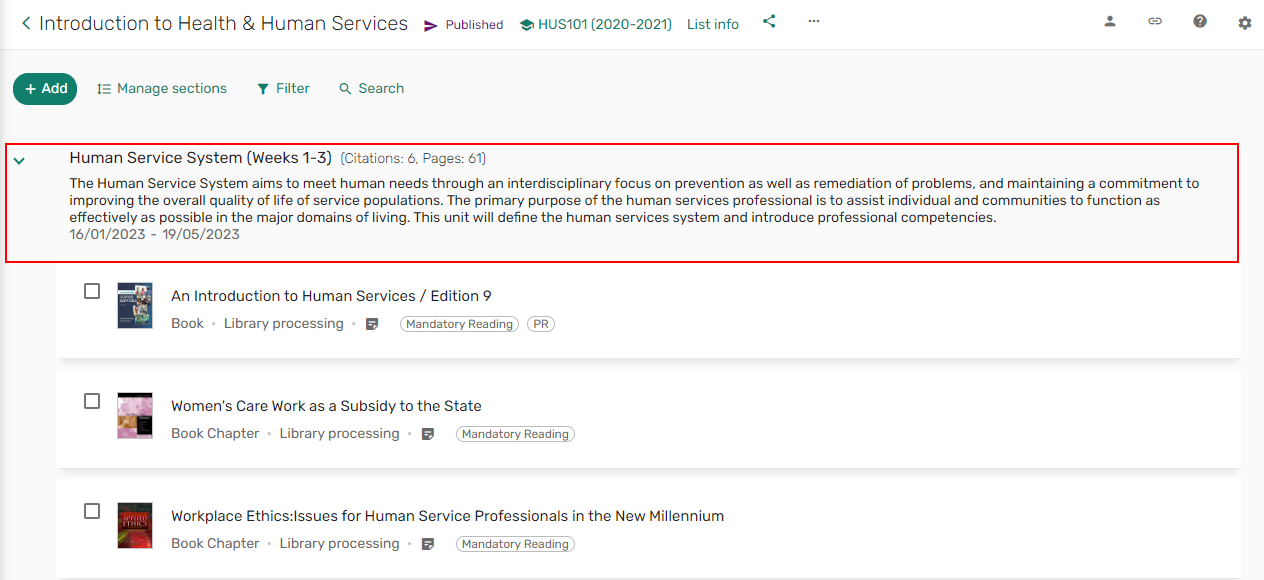 An expanded section
- Set the parameter set_section_view (Configuration > Leganto > UI > List Menu) to Yes. By default, the setting is No. When enabled, instructors can use the Set default section view action to override the institution's default setting.
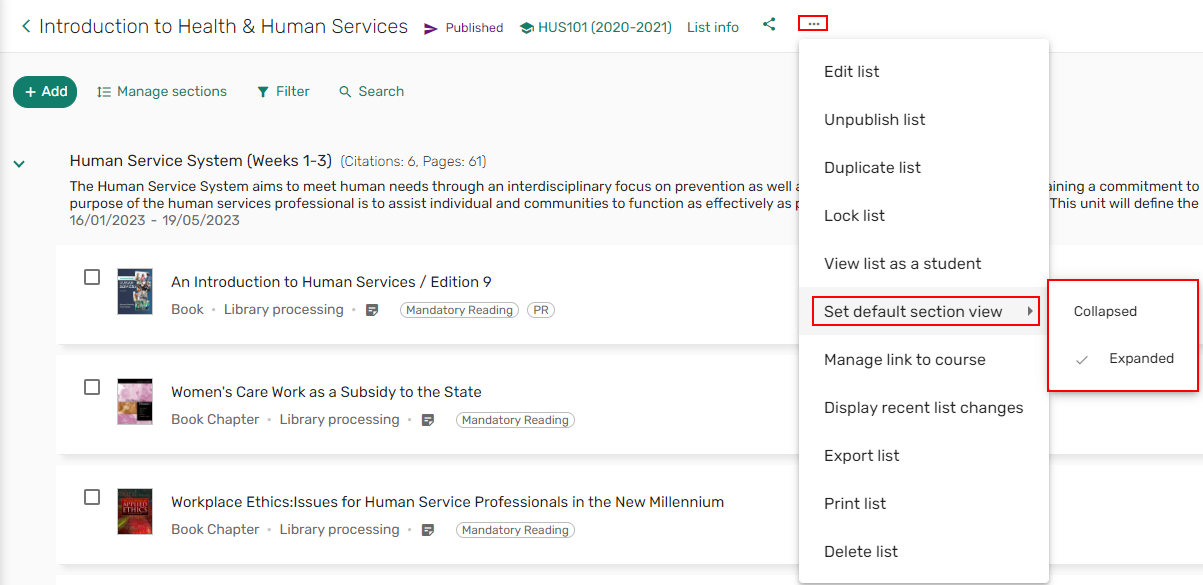 Override default section view
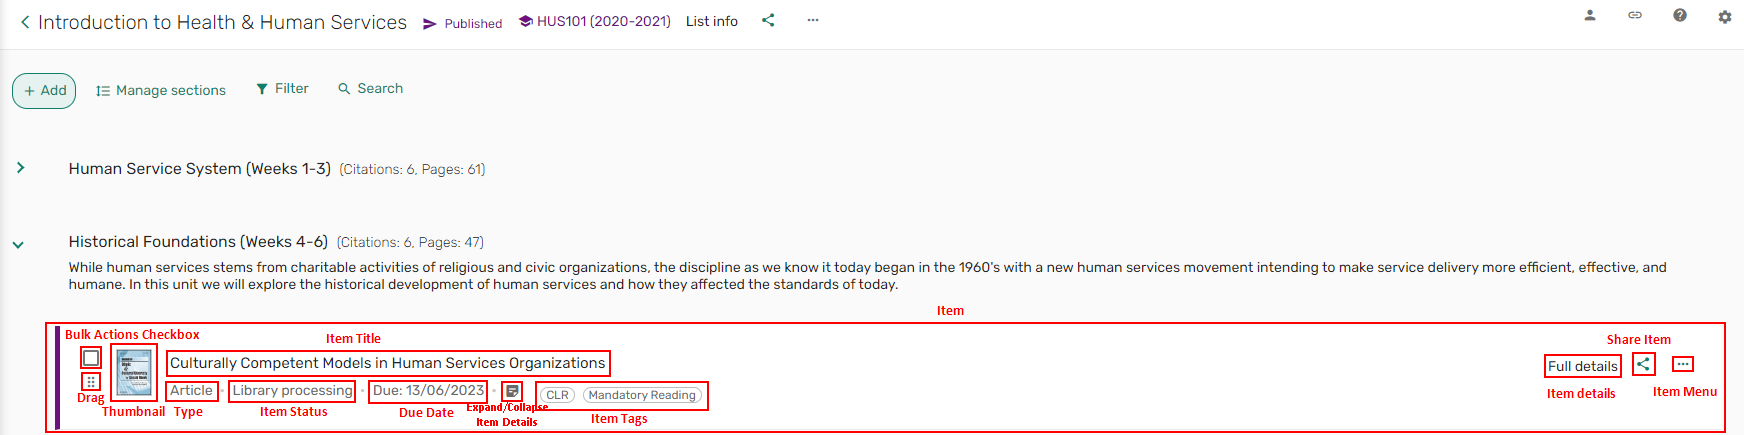
Item Details
Some options are only viewable depending on user permissions and what is configured by the institution.
The item includes:
- A bulk actions checkbox
- Drag icon

- Item title
- Item type
- Item status
- Item Due date
- Note for students
- Item tags — when configured (Configuration > Fulfillment > Courses > Tag Mapping)
- Full details button
- Share item link — when configured (Configuration > Leganto > UI > Citation menu)
- Item menu actions
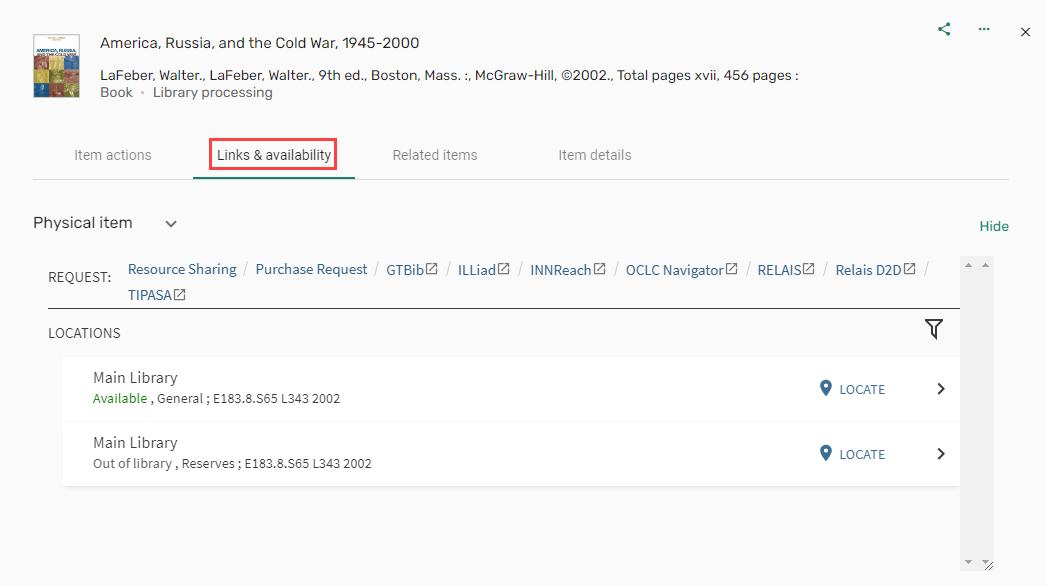
Links & Availability
The Links & availability tab lists links to electronic resources and/or physical availability information. From the Links & availability tab, you can:
- View any links or files related to the item
- Download files
- Make a file read-only or downloadable (Note: the display of PDFs is configurable. See Configuring PDFs to Open in a New Tab.)
- Hide links/items — viewable when the parameter instructor_manage_citation_availability_link is true (Configuration > Leganto > Features > Leganto Features).
- Set first — when configured. See Setting Preferred Citation Link.
- Mark a link as broken or Report a problem with the file — when configured. See Enabling Broken Link Reporting.
- Enable Public annotations — when configured. See Creating Private Annotations.

Related Items
When the parameters other_formats_and_editions and recommendations (Configuration > Leganto > Features > Leganto Features) are enabled, related items, if any, (bX, videos including Alexander Street Press (ASP), and/or shelf browsing) are listed on the Related items tab offering suggestions related to the citation.
From the Related items tab, you can:
- View and add items related to the item. Related items can be dragged and dropped to a list, or be added using the + icon, or by expanding the item and adding the item to the list, as a suggestion, or as a favorite.

New for June! When the parameter related_items (Configuration > Leganto > Features > Leganto Features) is set to All (instructor and student) or student, related items, if any, (bX and/or shelf browsing) are viewable by students on the Related items tab, offering suggestions related to the item. The default setting for this parameter is instructor. If the parameter is blank, the tab is not displayed to students.
New for June! Additionally, when the parameter other_formats_and_editions (Configuration > Leganto > Features > Leganto Features) is enabled, and the item has other formats/editions, and the parameter related_items (Configuration > Leganto > Features > Leganto Features) is set to All (instructor and student) or student, the option to View editions/Other versions is available to students.
- View and merge other versions of the item. This applies to cases where both a physical and electronic version of an item are available, and one of those versions exists in the list. For example, if a physical item is added to a list, and electronic version is also available, when selecting Merge availability, the link to the electronic version is added to the Links & availability tab. This eliminates the need to add both versions of the item to the list.

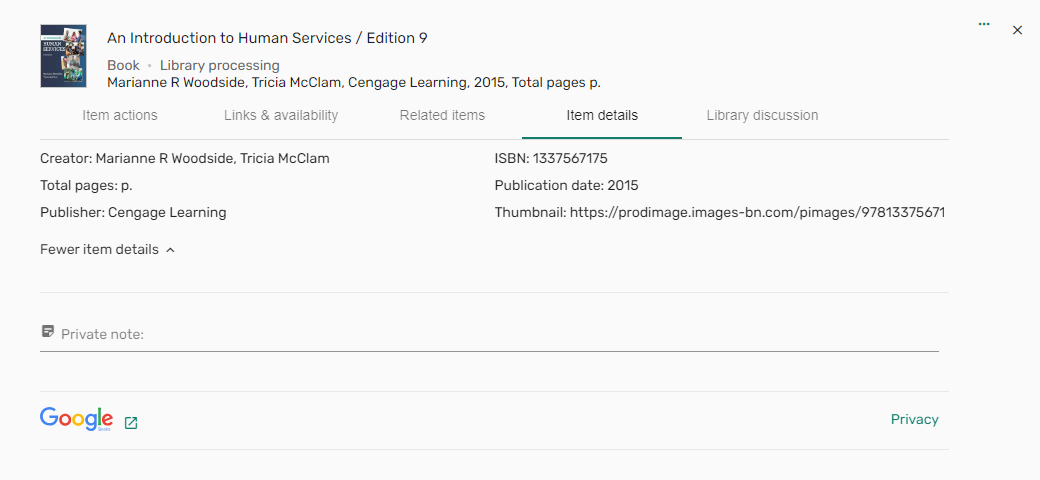
Item Details
From the Item details tab, users can:
- View the item details
- Add/view a Private note
- Open the item on Google Books (when the parameter google_book_preview (Configuration > Leganto > Features > Leganto Features) is enabled)
- View the Google privacy details (when the parameter google_book_preview (Configuration > Leganto > Features > Leganto Features) is enabled)
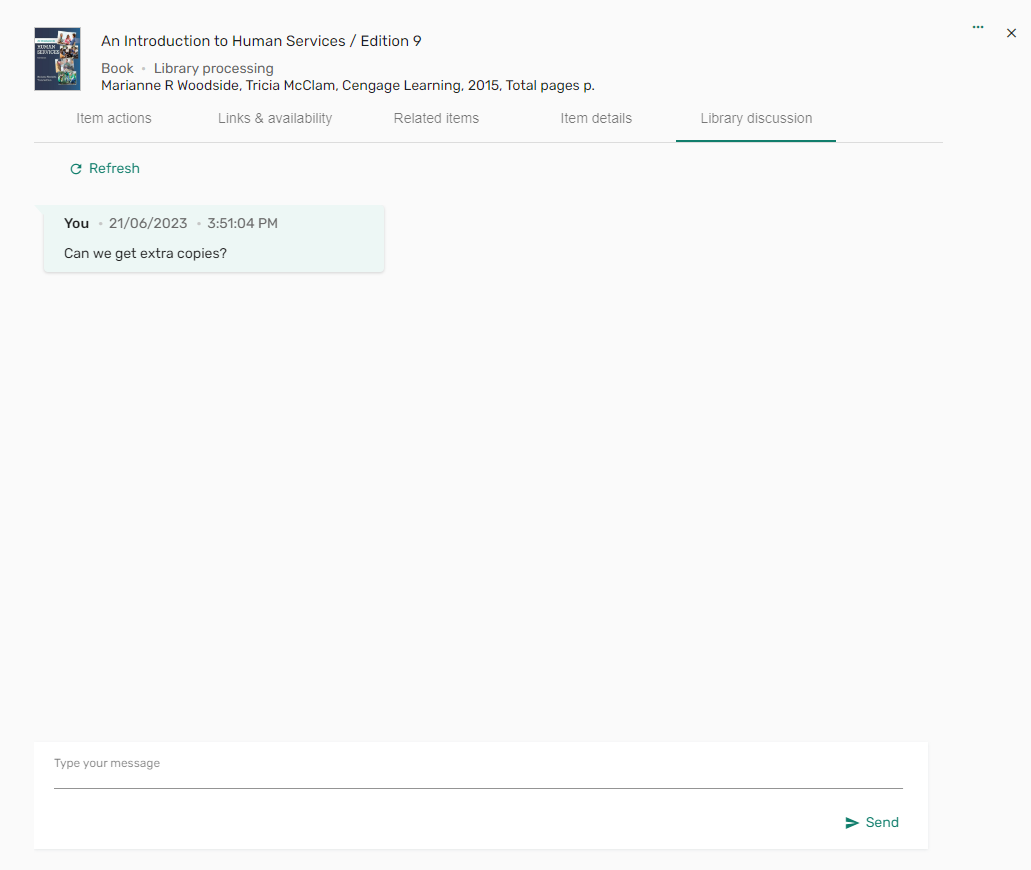
Library Discussion
When library_discussion (Configuration > Leganto > Features > Leganto Features) is set to all or citation, the Library discussion tab appears. If library_discussion is left blank, the tab is not visible. From the Library discussion tab, users can:
- Communicate with list owners/the library
- View your correspondence
Creating a List from a Syllabus
When the parameter leganto_import_syllabus (Configuration > Leganto> Features > Leganto Features) is set to true (default false), library staff have the option to create a list by importing a syllabus or other file (PDF, Word, or txt).
Pasting References in Existing List
New for June! When the parameter leganto_import_syllabus (Configuration > Leganto> Features > Leganto Features) is set to true (default false), library staff have the option to paste references in bulk to add them to a Leganto list. From the Add > Import references > Paste references menu, paste references into the Paste references window and select Import. The reference(s) can be added to a specified section.


Additionally, to support library review workflows, when using the Syllabus Assistant to create a list by uploading a list or pasting references, the original syllabus/references file is now stored on the List info page. The data from the file is still not stored in AI, but the file is saved to Leganto for the library's reference.

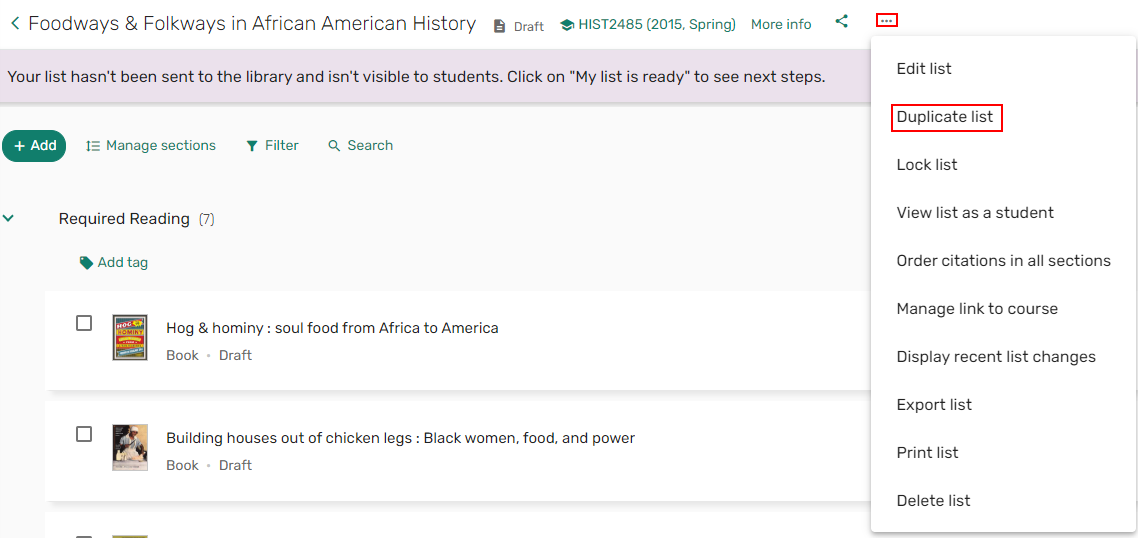
Duplicating a List
Duplicating a list makes a copy of the list and all sections and items. As part of the duplicating workflow, you can decide whether other aspects of the list are copied or reset.
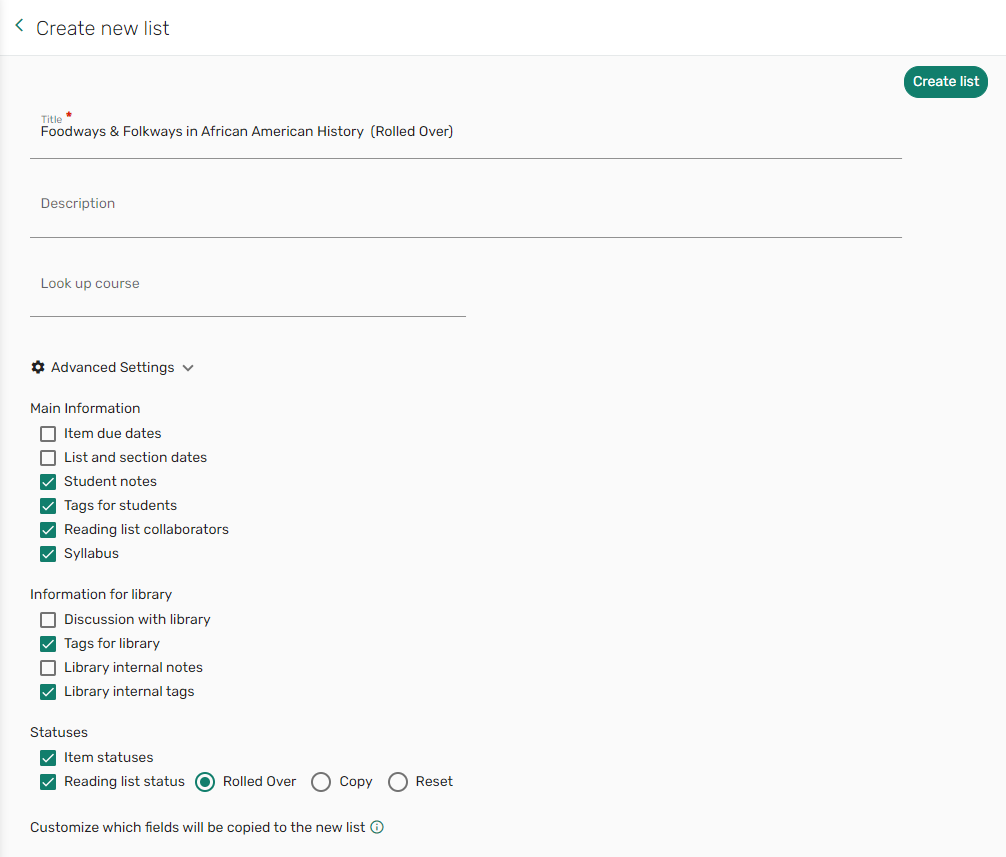
Select Duplicate list in the list menu. The Duplicate list option is enabled or disabled from the Configuration > Leganto > UI > List menu. Out-of-the-box, the duplicated list has the old list's name with (Rolled Over) appended to it. This label configuration can be changed from Configuration > Leganto > General > Labels - New UI.
When duplicating a list, you can associate the list with a course. Optionally, you may want to review or change the Advanced Settings to confirm whether other aspects of the list are copied or reset. To configure which options are displayed to Instructors and the default setting for each option, see Enabling Instructor Rollover.
Preventing Instructors from Creating New Lists
For institutions whose librarians are the sole list creators, it is now possible to configure Leganto to prevent instructors from creating new lists. The following workflows are now supported:
- Instructors can create new lists (no changes).
- Instructors can create lists from the learning management system (LMS) but not from the standalone. This ensures all reading lists are linked to courses.
- Instructors can create lists from the standalone but not from the LMS. This provides flexibility for instructors who create lists that are not linked to courses.
- Instructors cannot create any new reading lists. This gives the library full control over all lists that are created.
To remove the permission to create lists in the Leganto UI standalone, set the parameter instructor_create_list (Configuration > Leganto > List Management > Settings) to false (default true). When set to false, the Create list menu does not appear.
To prevent instructors from creating lists when beginning in the LMS, the parameter cms_entry_actions (Configuration > Leganto > LTI > Settings) cannot contain the value all or the parameter value list.
All other parameters that enable list creation such as Duplicate and Rollover must be disabled separately.

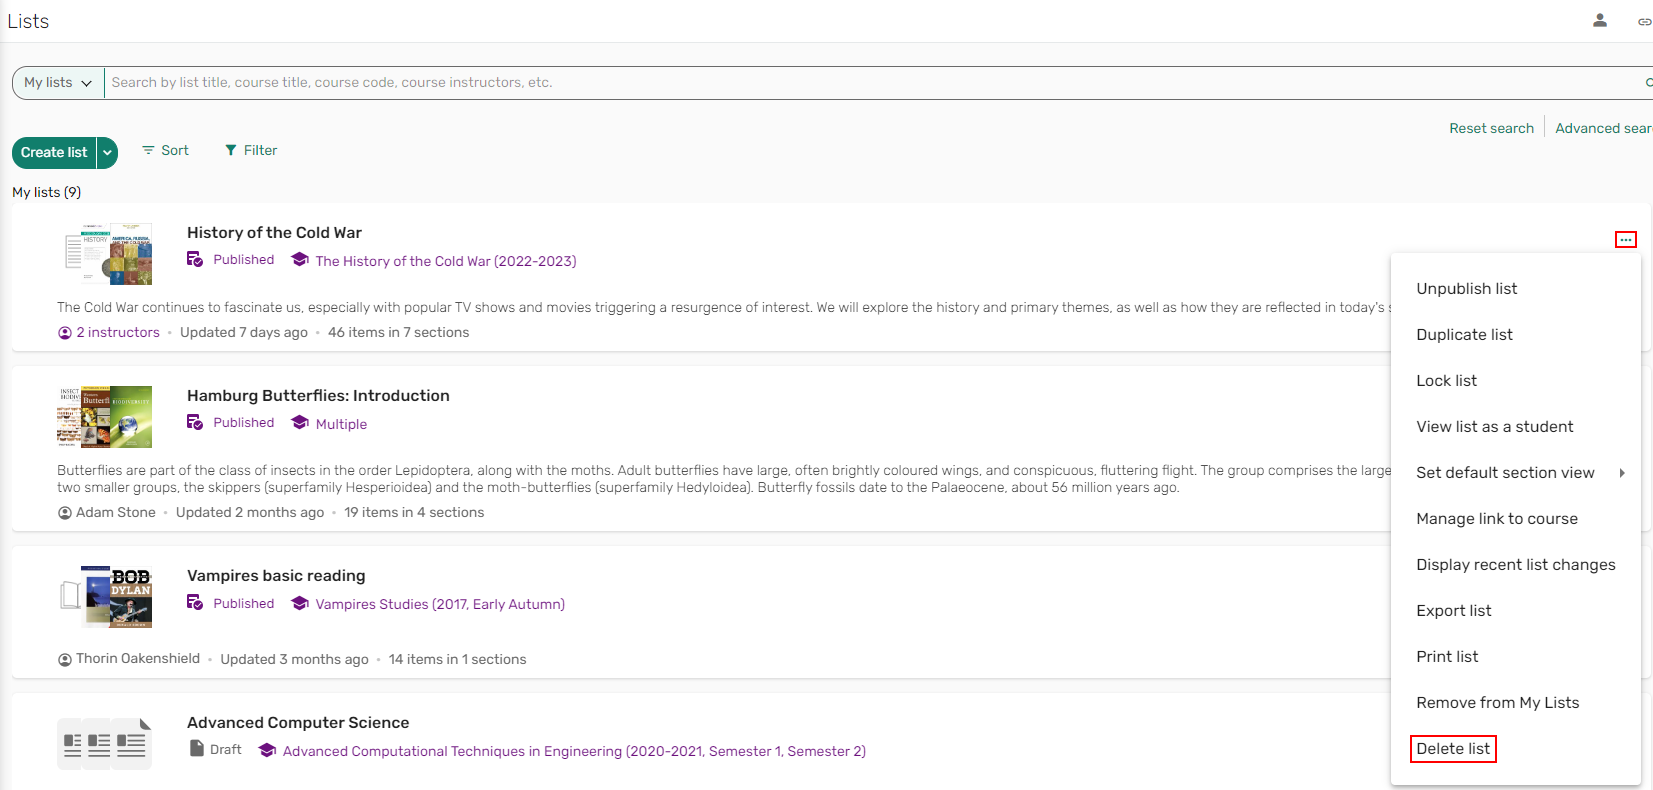
Deleting Lists
When configured, instructors can delete lists (delete_reading_list (Configuration > Leganto > Features > Leganto Features) is set to true).
Archiving Lists
When configured, instructors can filter Lists by by archived lists (archived_lists (Configuration > Leganto > Features > Leganto Features) is set to true).

Adding a Section to a List
Instructors can create a new section from scratch or by duplicating an existing section. Lists created in Leganto include a default section. Libraries can configure the default section name to appear when a reading list is created in Alma or imported into Leganto using the defaultSection.title label in the Labels configuration table (Configuration > General > Labels). Whenever you import references into Leganto or create the list in Alma, the value of this label appears in Leganto as the section name. The label's default value is Resources. When creating a reading list in Alma or importing a reading list into Leganto, the description defaults to blank.
Adding Sections from a Template
Leganto provides easy and flexible templates for creating sections when building new lists. Templates also give the library options for adding, updating, and removing or disabling templates. Leganto includes out-of-the box section templates (Configuration > Leganto > List Management > Templates). The Resources and Week templates are enabled by default.
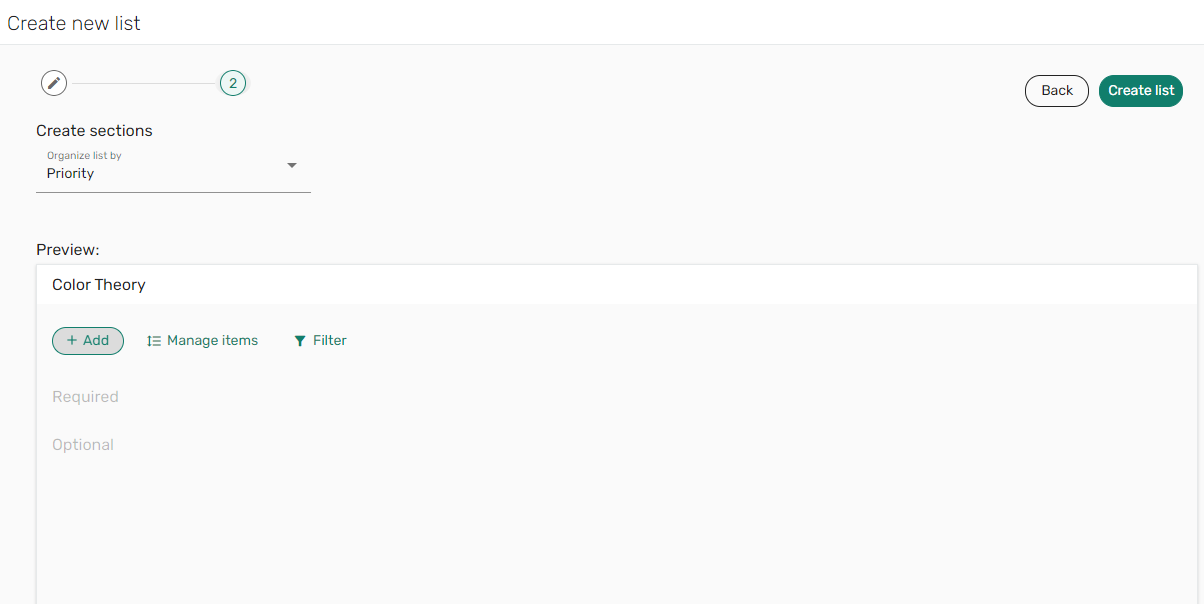
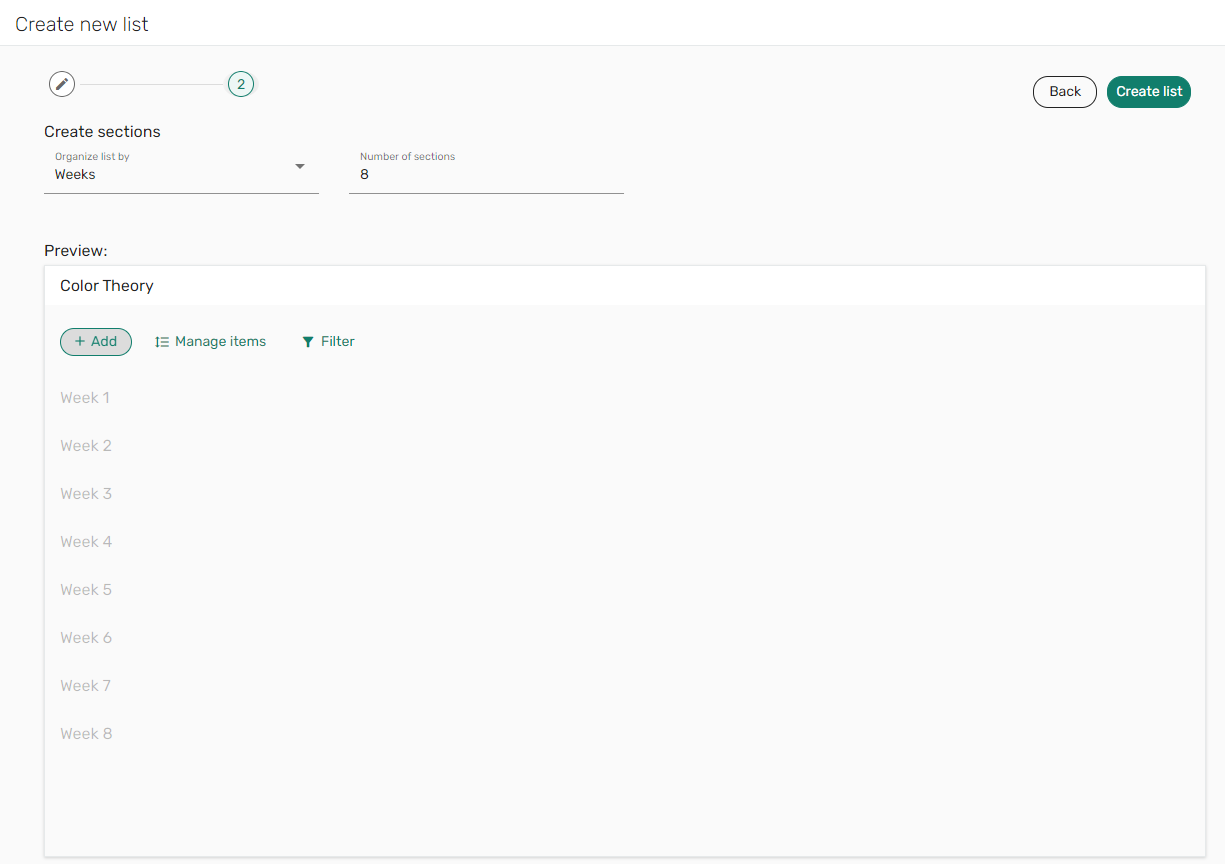
Two types of templates are supported. The Numbered pattern type creates sections with the text of the Description field, followed by a number, up to the desired number of sections. For example, the out-of-the-box weekly template creates sections titled Week 1, Week 2, Week 3, etc. Alternatively, the Defined list templates create one section per section names defined in the Description field. For example, the out-of-the-box Priority template creates two sections, entitled Required and Optional.
The Description field is mandatory.
When defining or customizing a template, you can set the Default number of sections to include for a Numbered pattern template. For a Defined list template, multiple section headings can be added to the Description field, separated by a semicolon (;). The library can disable or enable templates.
Templates are displayed in Leganto according to the order in Alma.
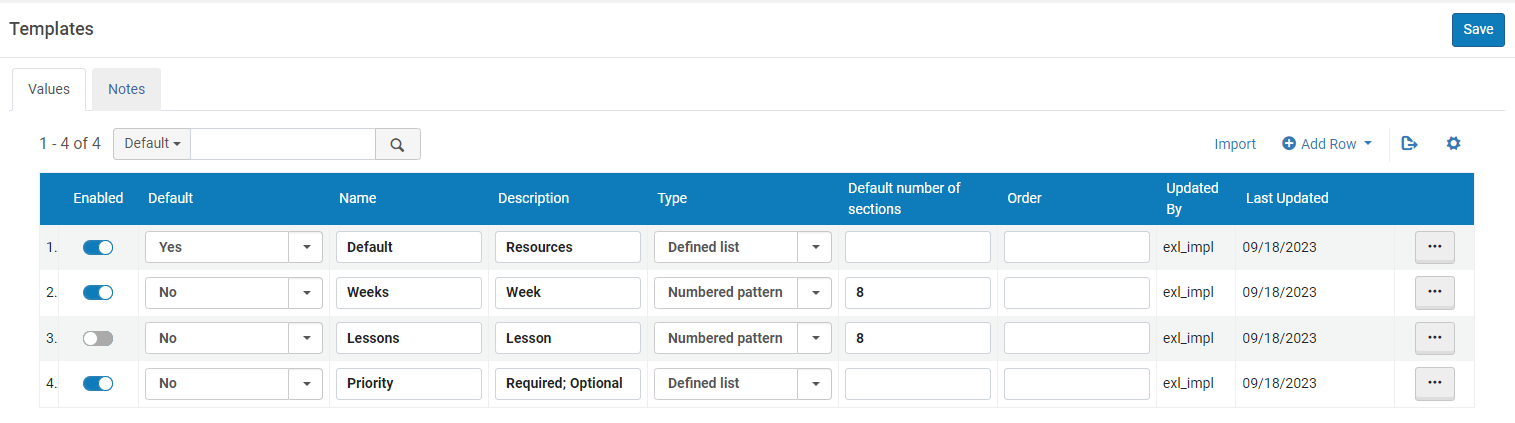
When adding sections to a new list, list creators can select a section template to help organize the list. For the Numbered pattern templates, they can adjust the number of sections if needed.
The Create new list wizard includes a Preview section to preview how the sections will be displayed on the list. The list creator can view different options before selecting Create list.
Searching for an Item from the Institution's Library
The library configures whether the library search is in Alma, Summon, or Primo, and/or whether you can select the Primo scope in which to search. See Configuring Repository Search in Leganto.
- From a list, select Add > Search the library. The basic Search the library pane opens.
 Basic library search
 - When primo_default_search_scope (Configuration > Leganto > Discovery > Primo Integration) is set true, you can select the Search everything search scope.
The following search filters are available:
- Whichever scopes the library has for their Primo view
- Newspapers -- when configured. See Primo Newspapers Scope.
- Alma — only viewable by library staff
- Rialto — when configured. See Enabling the Rialto Search Scope.
- Enter your search criteria.
- Optionally select whether to include or hide records that do not provide full-text access. The default is configured using the primo_include_non_fulltext_option parameter (Configuration Menu > Leganto > Discovery > Primo Integration).
- Press Enter. The search results are displayed.
- Optionally select Filter to filter your results by Type or Availability.
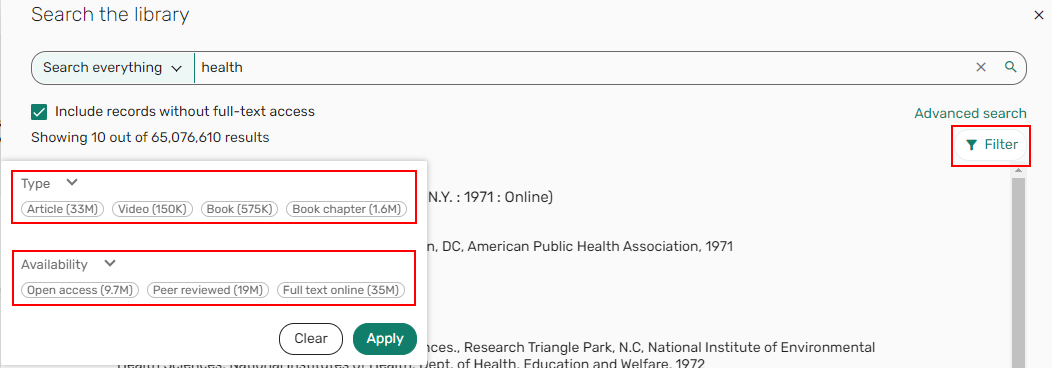 Filter by Type/Availability
Uploading a File
When display_file_option (Configuration > Leganto > Features > Leganto Features) is set to true, the option to Upload Files is available in the Add list. The default for this parameter is true.
The library can set the maximum file size in the parameter max_file_size_allowed_faculty_MB (Configuration > Leganto > General > Settings). The default is 50 MB. If the maximum file size is more than 0, instructors can upload files to existing citations even when display_file_option is set to false. To block instructors from uploading files in Leganto, set max_file_size_allowed_faculty_MB to 0 and set display_file_option to false.
- Select Add > Upload Files.
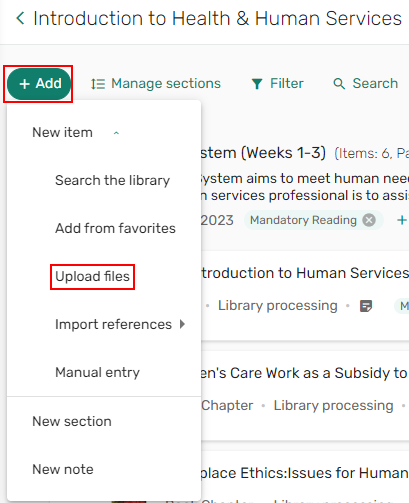 Upload files option
 - Browse to upload a file/folder. The Upload files wizard appears.
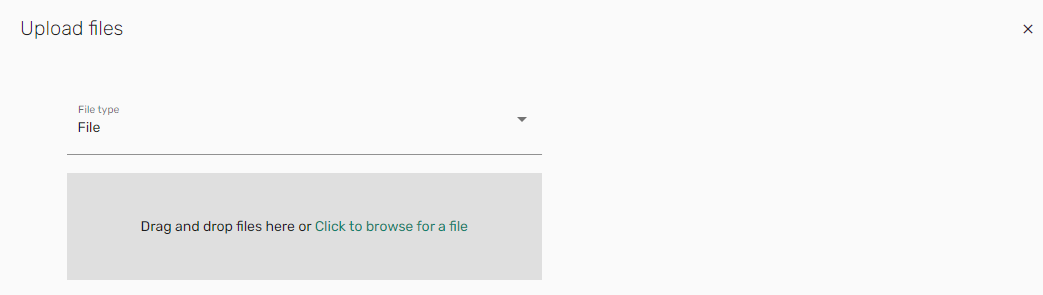 Upload files/folder
 - If the File Upload Copyright Options (Configuration > Leganto > List Management > File Upload Copyright Options) are enabled, select the copyright information and select Next. For information about configuring File Upload Copyright Options see Configuring File Upload for My Collection/Favorites or as Citation.
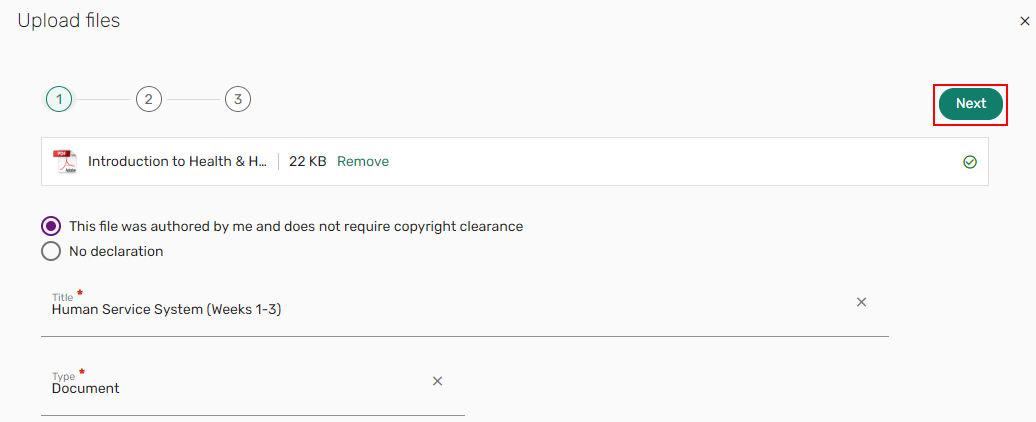 Upload wizard
 - Leganto attempts to pull item details from the file. If needed, enter or edit the details and select Next. The fields that appear depend on the type. Some of these fields appear only if you select More item details. For more information on types, see Adding an Item Manually.
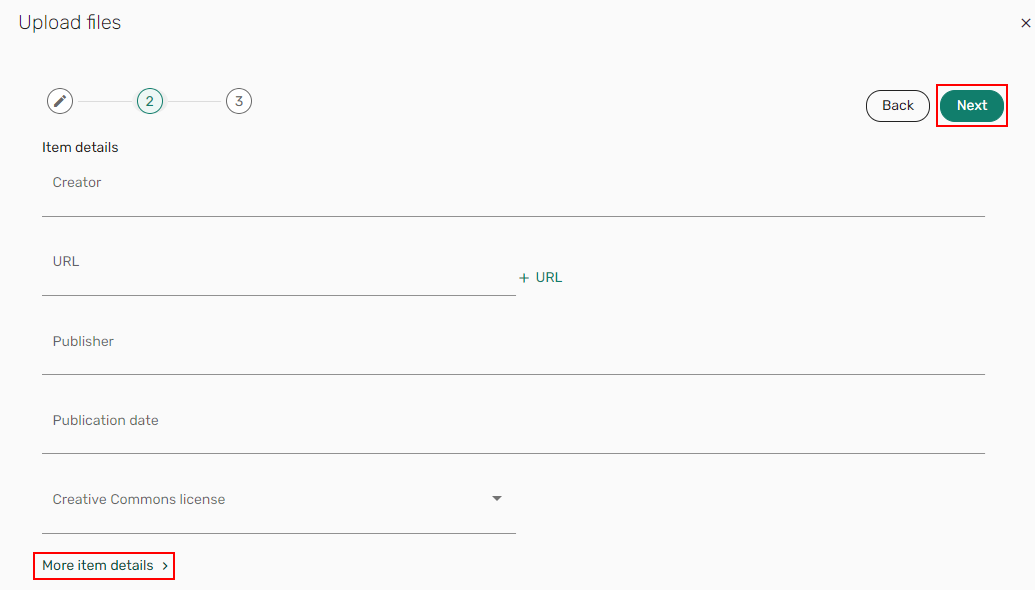 Item details
 - Optionally, select the section to which to add the file, fill in the course information section, and select Add. The file is added to the list.
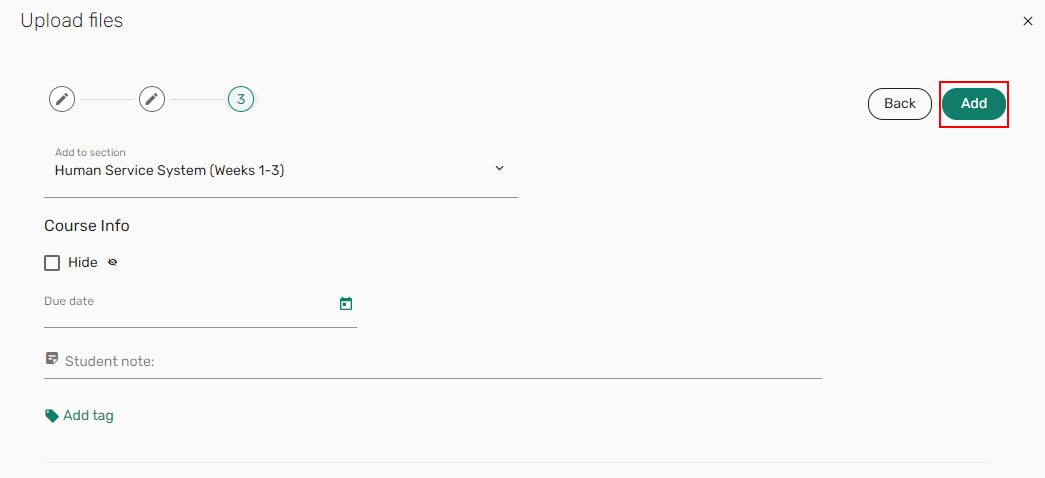 Add uploaded files
If pdf_use_leganto_viewer (Configuration > Leganto > Features > Leganto Features) is enabled (see Configuring Whether Instructors Can Embed Citations Directly in Leganto), the file includes a download icon to download the file and an icon that indicates the item type.
 Uploaded file
Cite It! Display
The library can configure Leganto to display a small login window and then redirect the user back to CiteIt.
To enable this feature:
- Set the parameter citeit_login_new_tab (Configuration > Leganto > Leganto Features) to true.
To accommodate multiple browser extensions, the Cite it! installation window includes a link to the Leganto browser installation.

By default, the link value is set to link to Leganto Cite it! Bookmarking Tool Installation Instructions, but the value can be replaced with your institution's custom link by replacing the parameter citeit_browser_extension_installation_link (Configuration > Leganto > Features > Leganto Features) value. When reset, the parameter link value is restored the default Leganto documentation link.
Enriching Citation Metadata
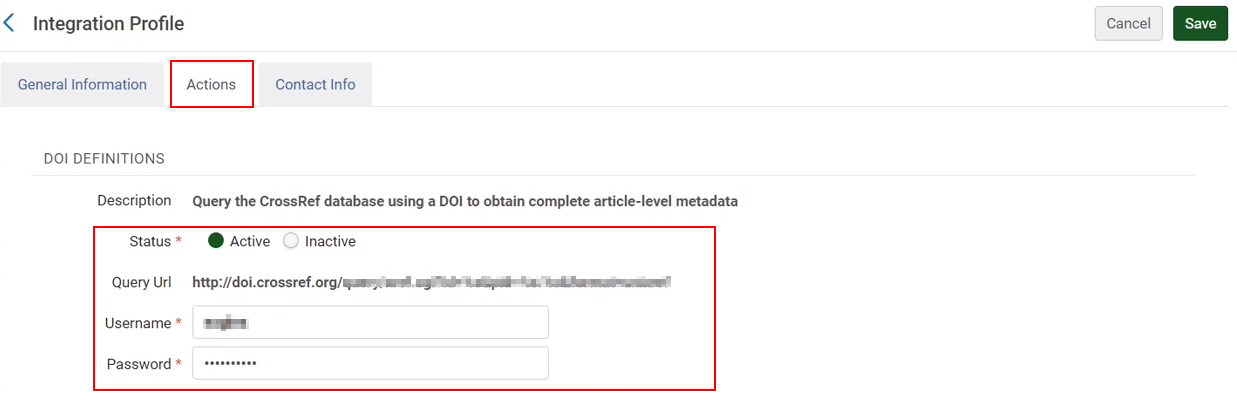
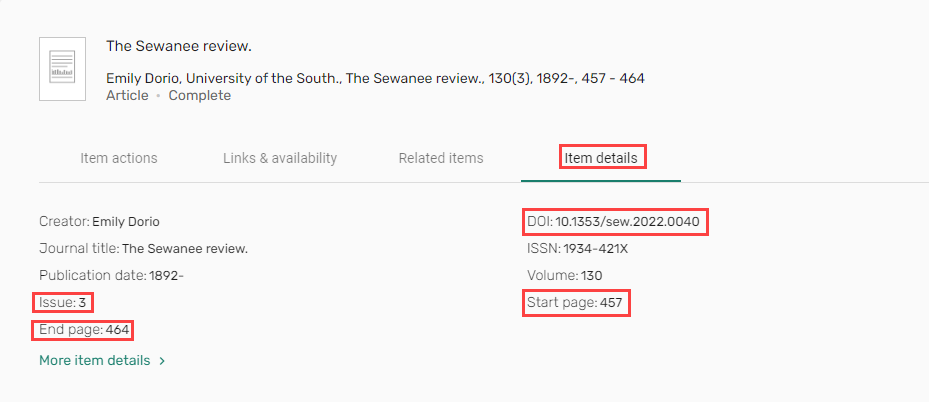
For institutions whose AUGMENTATION profile (Configuration > General > External Systems > Integration Profiles) is configured to work with CrossRef, when a citation containing a DOI is added, any missing metadata is automatically added to the citation.
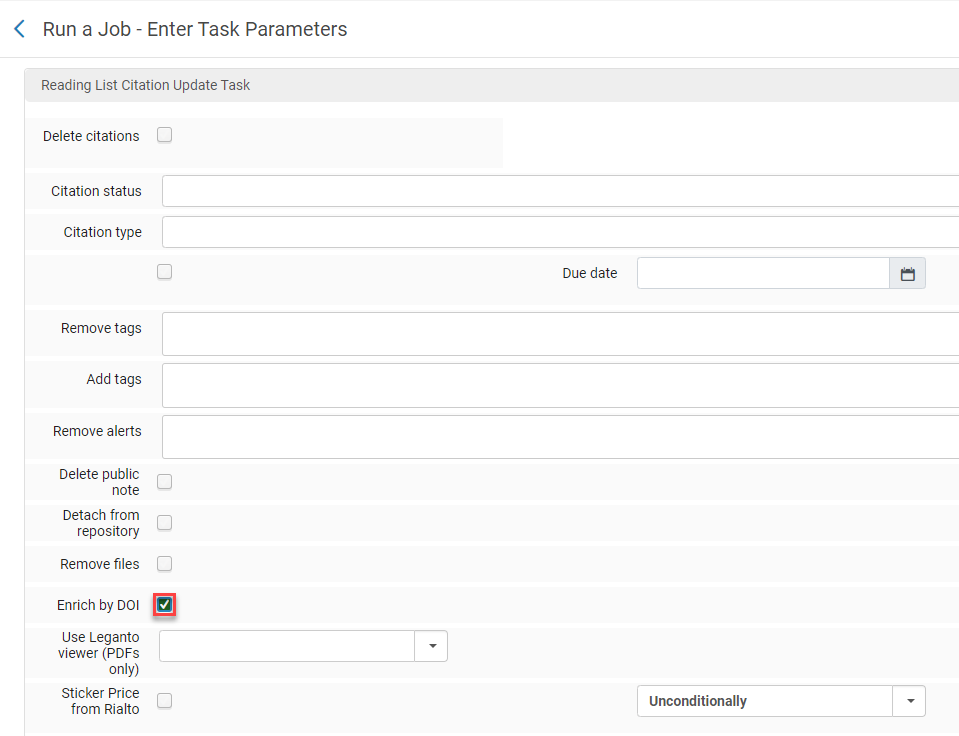
You can also automatically enrich citations containing a DOI with additional metadata in bulk by checking Enrich by DOI in the Reading List Citation Update Task job (Admin > Manage Jobs and Sets > Run a Job). The default setting for this checkbox is unchecked.
Filtering Lists By Course Dates
When Course dates (Configuration > Leganto > Features > Find List Settings) is enabled (default disabled), the list view can be filtered by Past, Current, or Upcoming course dates.
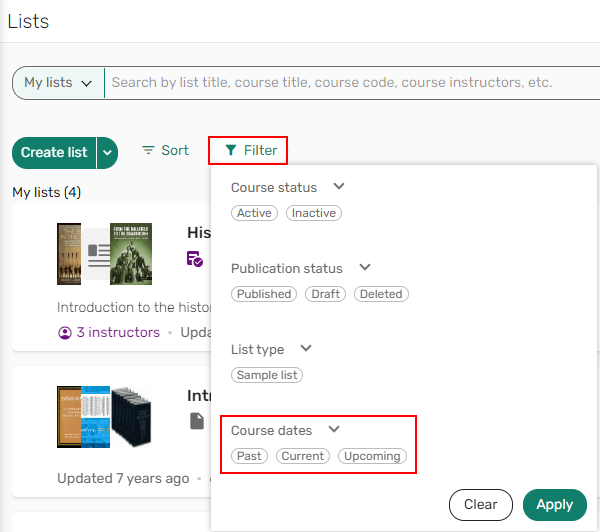
Lists without courses are excluded from the Course dates filter.
Modifying List Details
Once a list is created, you have the flexibility to modify a list as necessary. For information about creating lists, see Creating a List.
Suppressing the List Process Status
The list header displays information about the list. The display_in_process parameter (Configuration > Leganto > Features > Leganto Features) enables you to suppress the process status that is displayed on the list. When set to false, (default true) the status is suppressed from the header.
Adding a Syllabus To a List
Instructors can add a syllabus using a URL or upload a file when the parameter syllabus (Configuration > Leganto > Features > Leganto Features) is set to true.
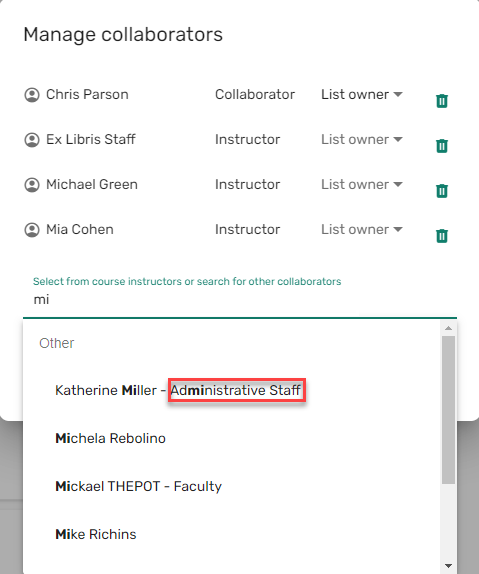
Managing a List's Collaborators
When auto_set_instructors_as_owners (Configuration > Leganto > List Management > Settings) is set to true, course instructors are automatically added as collaborators for a course's lists and can only be removed by library staff removing them from the course record in Alma.
When suppress_user_group (Configuration > Leganto> General > Settings) is set to true (false), the collaborator's user group is not displayed in the collaborator dropdown list.
Marking a List as a Sample List
Sample lists can be used as templates for other lists and/or courses. List owners, Leganto course operators, and librarians can assemble lists of resources (such as for a specific course or a specific topic) and indicate that the list is a sample list. Other instructors can easily discover sample lists and can copy the full list, specific sections, or individual items to their own lists.
When the parameter mark_as_sample (Configuration > Leganto > Features > Leganto Features) is set to true (default), the Edit list form in Leganto includes a checkbox to Mark as sample list.

The list is marked with a Sample indicator.

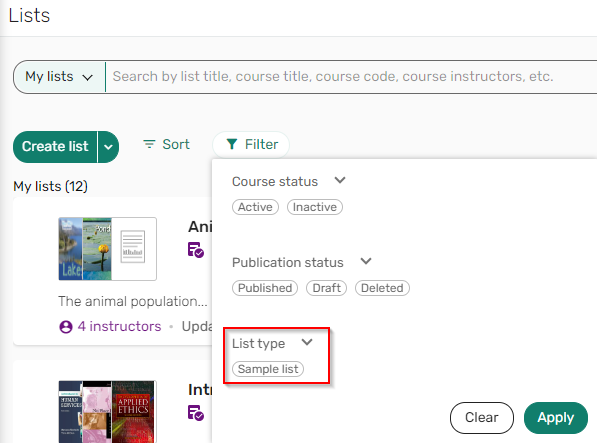
When Sample reading list (Configuration > Leganto > Features > Find List Settings) is Enabled, lists can be filtered by Sample list using the List > Filter > List type. As with other types of lists, instructors can only discover and access sample lists that have been published to All Students or Anyone.
If you duplicate a sample list, the Sample tag is removed from the new list and the Mark as sample list checkbox is cleared.
Newer List Indication
When the parameter display_newer_version_exists (Configuration > Leganto > Features > Leganto Features) is set to always, a banner message is always displayed after duplicating a list, notifying you that a newer version of the list is available. New for June! When the parameter is set to redirect, users are directed to the newer list version when the shareable links point to the newer list. If the parameter is blank, the banner message is not displayed on rollover.
The banner is only displayed for lists associated with a course.
A newer version is created when the list is duplicated or when the library rolls over the reading lists at the start of a new term. You can select the message to navigate to the newer list or dismiss the message by selecting the X.

Associating a List with One or More Courses
Associating a reading list with a course is recommended for enabling several list features.
- When multicourse_lists (Configuration > Leganto > General > Settings) is enabled by your institution, a list can be associated with multiple courses. When a list is associated with multiple courses, the list uses (by default) the earliest start date and the latest end date and is set to a number of participants equal to the total number of participants for all associated courses.
- Students can find the list when accessing Leganto using an LMS link to the associated course or by searching for the course.
- Lists that are associated with a course inherit the start and end dates of the course, as well as the number of participants.
- When assign_to, instructor_copyright_clearance, or instructor_digitization_request (Configuration > Leganto > List Management > Copyright Settings) are enabled by your institution, you can initiate digitization and/or copyright clearance requests for the items on the list.
- When auto_set_instructors_as_owners (Configuration > Leganto > List Management > Settings) is set to true, instructors associated with a course are automatically made owners of all lists associated with the course.
- You cannot change the course association of a list if any of the items in the list have approved copyright requests.
- If the course is associated with a campus, the campus appears in the list information area and when searching for items in the library.
When modify_course_details (Configuration > Leganto > Features > Leganto Features) is set to true, instructors can change the Number of participants, and the start and end dates.
Indicating that Courses Deliberately Have No Reading List
Reading lists can still be added to courses with the No list expected checkbox checked and existing lists are not removed.
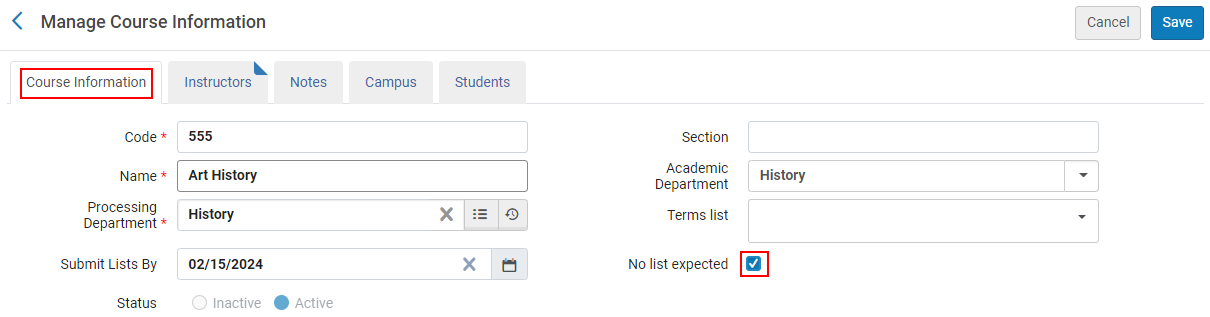
The No list expected column indicates which courses have the No list expected checkbox checked.
The No list expected column is hidden by default. To show the No list expected column, select the column from the Manage column display  list.
list.

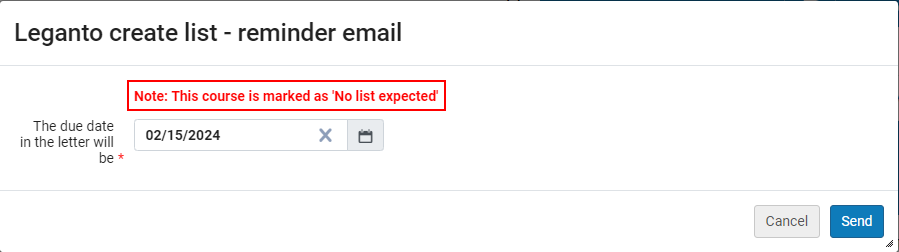
If the librarian selects the Leganto create list - reminder email action for a course that has the No list expected checkbox checked, the librarian can still send the reminder email, but an alert appears indicating that This course is marked as 'No list expected'.
When duplicating a course that has the No list expected checkbox checked, the No list expected checkbox is checked on the duplicated course.
When rolling over a course that has the No list expected checkbox checked, the No list expected checkbox is checked on the rolled over course.
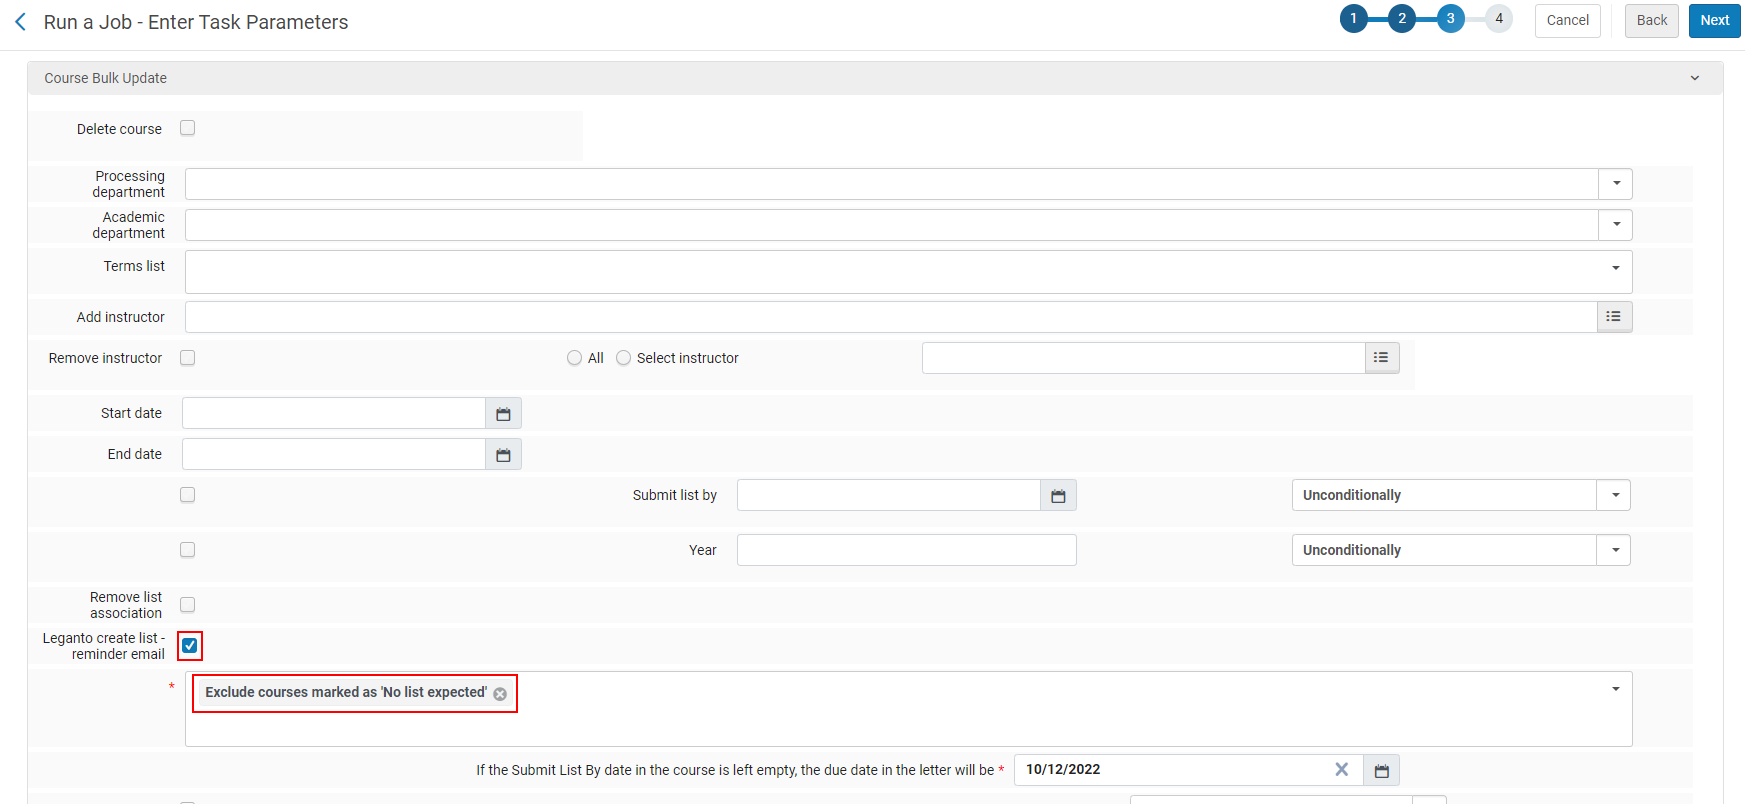
The Course Bulk Update job (Admin > Manage Jobs and Sets > Run a Job) now includes the condition Excluded courses marked as 'No list expected' when the Leganto create list - reminder email checkbox is checked. This enables you to bulk-exclude emails to instructors whose courses intentionally do not include reading lists when the job runs.
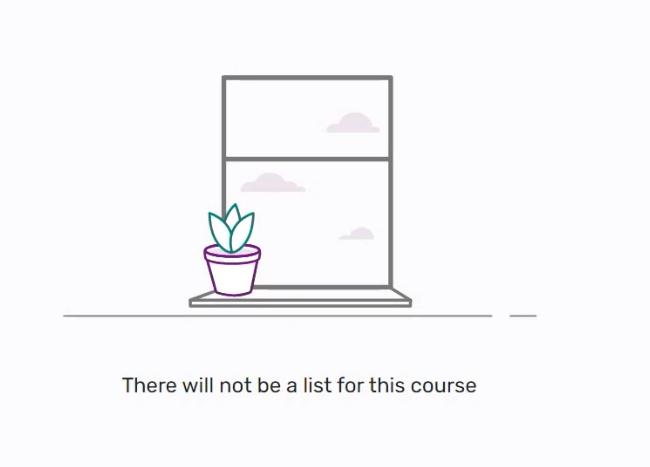
When a student accesses a course from an LMS link and the course has the checkbox No list expected checked, the student receives a message indicating that this course will not have a list, so the student knows not to expect a list at a later date. If the institution wants to customize the out-of-the-box message, change the Description for Code label error.1 (Configuration > Leganto > General > Labels - New UI).
Offering a Citation Replacement for an Existing Citation
Leganto supports replacing citations in bulk. For example, this feature can be used to replace citations with newer editions or to replace physical citations with electronic citations. The library can configure whether citations are replaced immediately, or whether the replacement appears to instructors as a suggestion.
Citations with a Copyright Status of Approved cannot be replaced.
If your institution would like to have replacements presented to instructors as suggestions, set the parameter replacement_suggestion_auto_replace (Configuration > Leganto > Features > Leganto Features) to false. This is the default. When set to true, when the librarian suggests the replacement, the edition is automatically replaced.
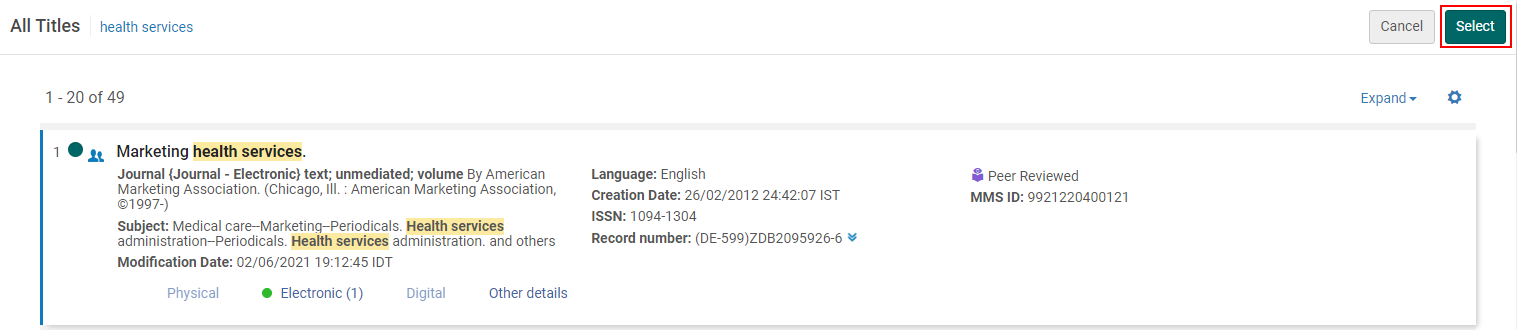
From the Edit Citation screen, select the citation or citations to be replaced. Then choose Suggest Replacement.
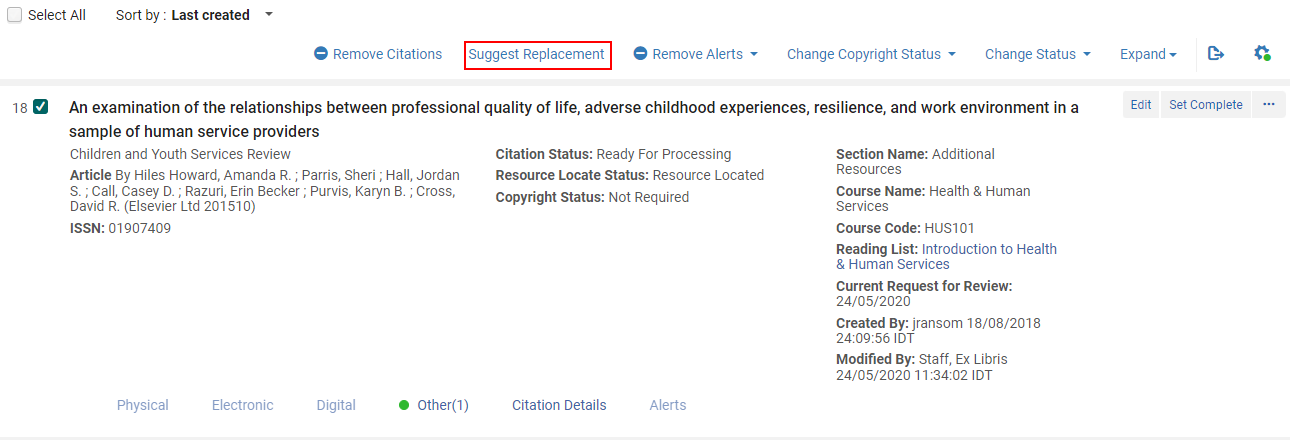
Library staff are directed to the Repository Search, where they can search for and select the new citation that they want to use as the replacement.
Library staff are presented with a confirmation screen.
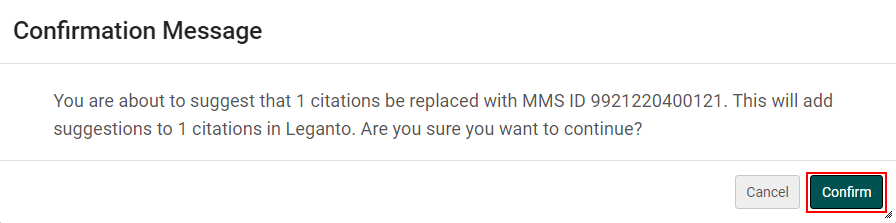
After selecting Confirm, suggestions are added to each of the items in Leganto. Additionally, a system tag New Edition Available is added to each item and you can filter by the New Edition Available tag.

Instructors receive an alert letting them know about new suggestions. They can select the alert to filter the list to see items with new edition suggestions.
The banner is only displayed for Librarians, Leganto Course Operators, and List Owners.

Instructors can select the banner to see items with new edition suggestions.
Instructors can also filter to see items with new editions using the New Edition Available tag.
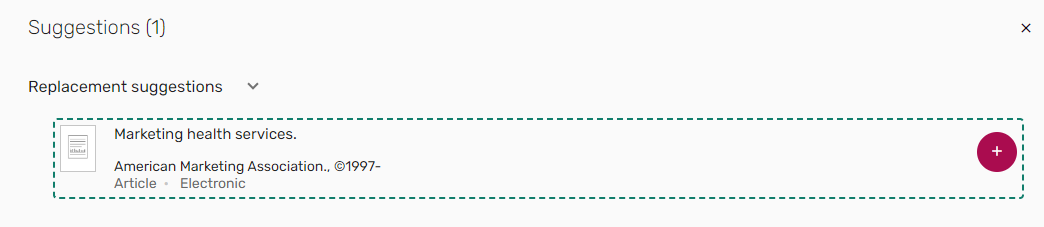
The details of the Replacement suggestions are viewable from the Suggestions pane and the Related items tab on the Full details of an item.
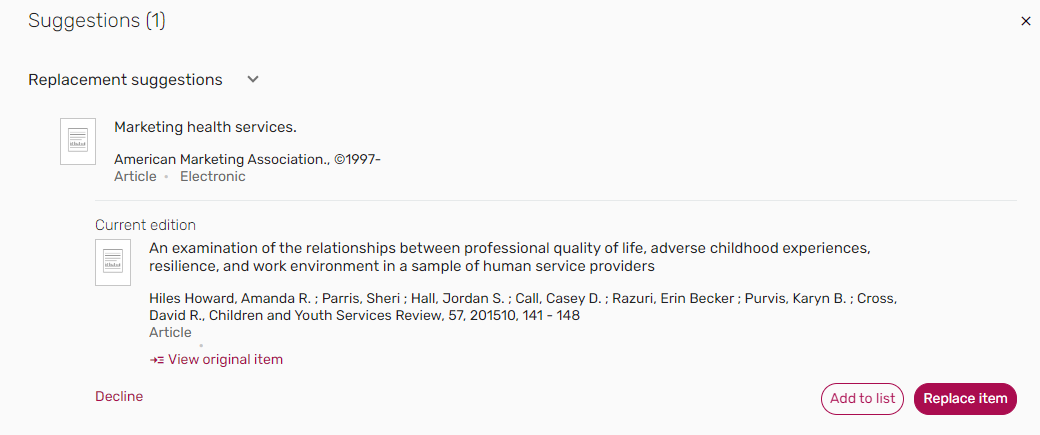
Selecting the suggested item opens the full suggestion, which includes the details of the original item and a link to the original item. From either the Suggestions pane or the Related items tab of the original item, instructors can choose to replace the item, which re-links the citation to the new MMS ID, updating the citation metadata. Other existing information about the citation, including usage information, tags, and notes, is preserved. The instructor can instead choose Add to list, which keeps the original item and adds the suggestion as an additional resource on the list. Alternatively, the instructor can choose to decline the suggestion, which removes the suggestion and the tag.
Alternatively, if your institution would like to have citations replaced immediately, rather than sent to instructors for approval, set the parameter replacement_suggestion_auto_replace (Configuration > Leganto > Features > Leganto Features) to true. Once library staff has selected a new item to use as a replacement, they are presented with a confirmation screen.
After selecting Confirm, all the citations that were selected for replacement are linked with the MMS ID of the item chosen as the replacement item. The citation metadata and inventory update, but tags, notes, and usage information are preserved.
Managing Section Tags
When enabled (Configuration > Fulfillment > Courses > Tag Mapping), users can add section tags. The list of tags is maintained by the library. Tags appear beneath the section name. For more information about configuring tags, see Configuring Citation and Section Tags.
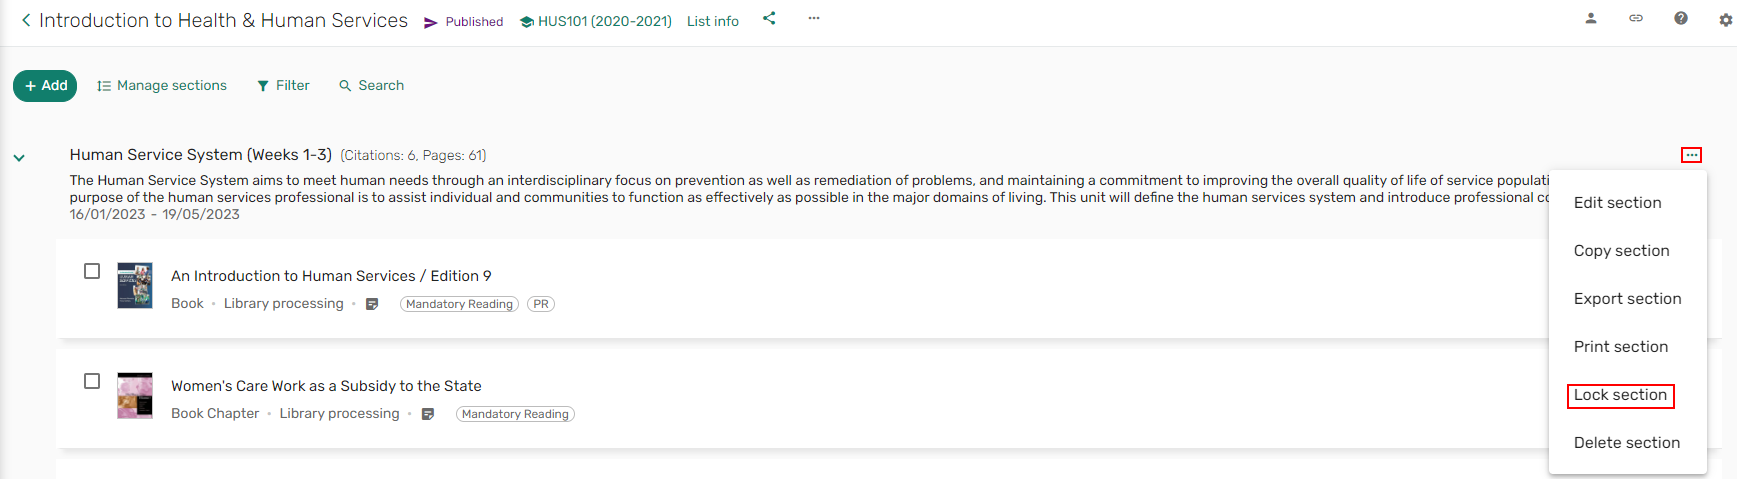
Locking a Section
Users can lock a section for editing using the Lock section option in the section menu. For this feature to be available, the library must set the Lock parameter (Configuration > Leganto > UI > Section Menu) to Yes.
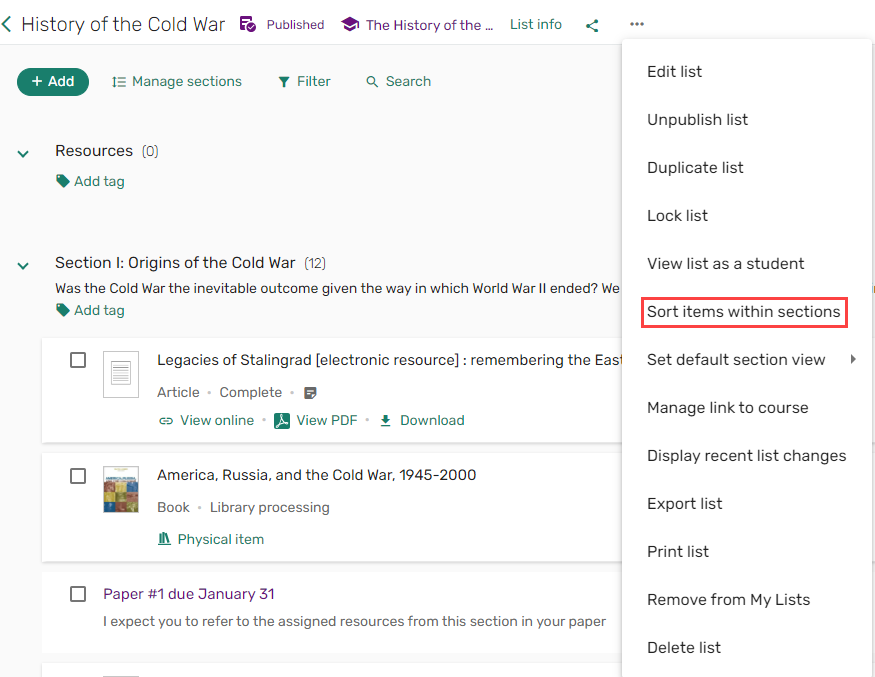
Ordering Items Within a Section
When order_citations_in_all_sections (Configuration > Leganto > UI > List Menu) is set to Yes, users can sort all items in each section by author or title, and by by descending or ascending order. Additionally, you can reorder specific items in a section.
Indenting a Section
When the parameter section_indentation (Configuration > Leganto > UI > Section Menu) is set to Yes (default No), the Indent/Outdent section action is available in the section action list.

Modifying Items
For information on adding items, see Adding Resources.
Managing Item Tags
When enabled by the library (Configuration > Fulfillment > Courses > Tag Mapping), users can add tags to items. The list of tags is maintained by the library. For more information about configuring tags, see Configuring Citation and Section Tags.
Hiding Items from Students
By default, all items are displayed by default but can be hidden from students.
If an item is not marked as complete on a list, you can hide the item from students. To enable this feature, set the hide_uncompleted_citations (Configuration Menu > Leganto > Leganto Features) parameter to true.
If the parameter is set to false, incomplete items are displayed; however, students do not have the option to download a file if one exists. Students cannot open links for items that require copyright.
If you set the hide_uncompleted_citations to a specific status or combined status (BeingPrepared, Complete, Declined, Inactive, InProcess, ReadyForProcessing, or a code from the Additional Reading List Citation Statuses code table), citations with those specified statuses are hidden from students.
Managing an Item's Electronic Links and Physical Ability
The Links & availability tab presents electronic links, digital files, and physical availability for an item, when available. Physical availability includes the barcode, status, and location, and may include options to make requests for the item. When instructor_manage_citation_availability_link (Configuration > Leganto > Features > Leganto Features) is set to true, users can select whether to hide or display this information (all physical availability) to students.

Other availability, including electronic, digital, and file uploads include the following row actions for each availability link when made available by the library:
- Mark the link as broken. This notifies the library to fix the issue at their discretion. For more information, see Enabling Broken Link Reporting.
- Hide/display the link to students.
Managing an Item's Files
To prevent students from downloading or printing files, instructors and librarians can set files attached to items as read only. You can configure PDFs to open in a new tab by default by setting the pdf_use_leganto_viewer (Configuration Menu > Leganto > Features > Leganto Features) parameter to true. When set to true, the PDF opens in a new tab and is downloadable. If the parameter is left blank or set to false, the PDF does not open in a new tab by default. If the parameter is set to readonly, then the PDF opens in a new tab by default but is not downloadable in the brief or full citation views.
Additionally, when instructor_remove_file (Configuration > Leganto > Features > Leganto Features) is set to true (default false), instructors can remove files that have been added to items.
Adding Related Items
When the parameters other_formats_and_editions and recommendations (Configuration > Leganto > Features > Leganto Features) are enabled, the Related items, if any, appear here (bX and/or shelf browsing) to offer suggestions related to the citation. For more information, see Configuring the Display of Other Formats and Editions of Citation.

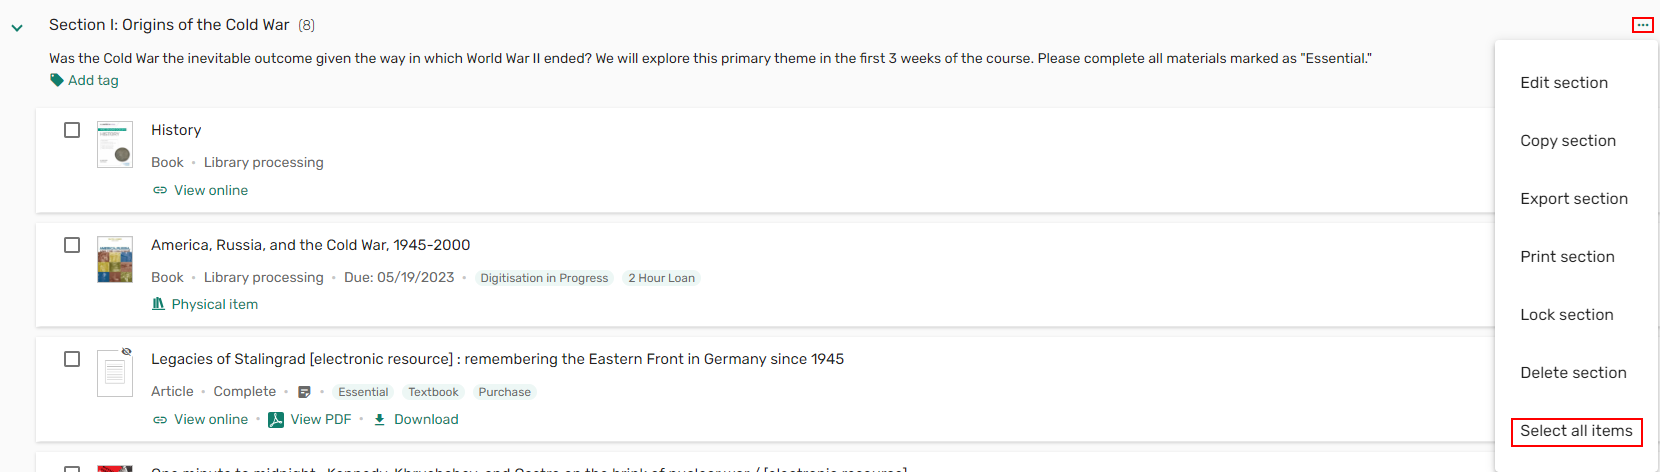
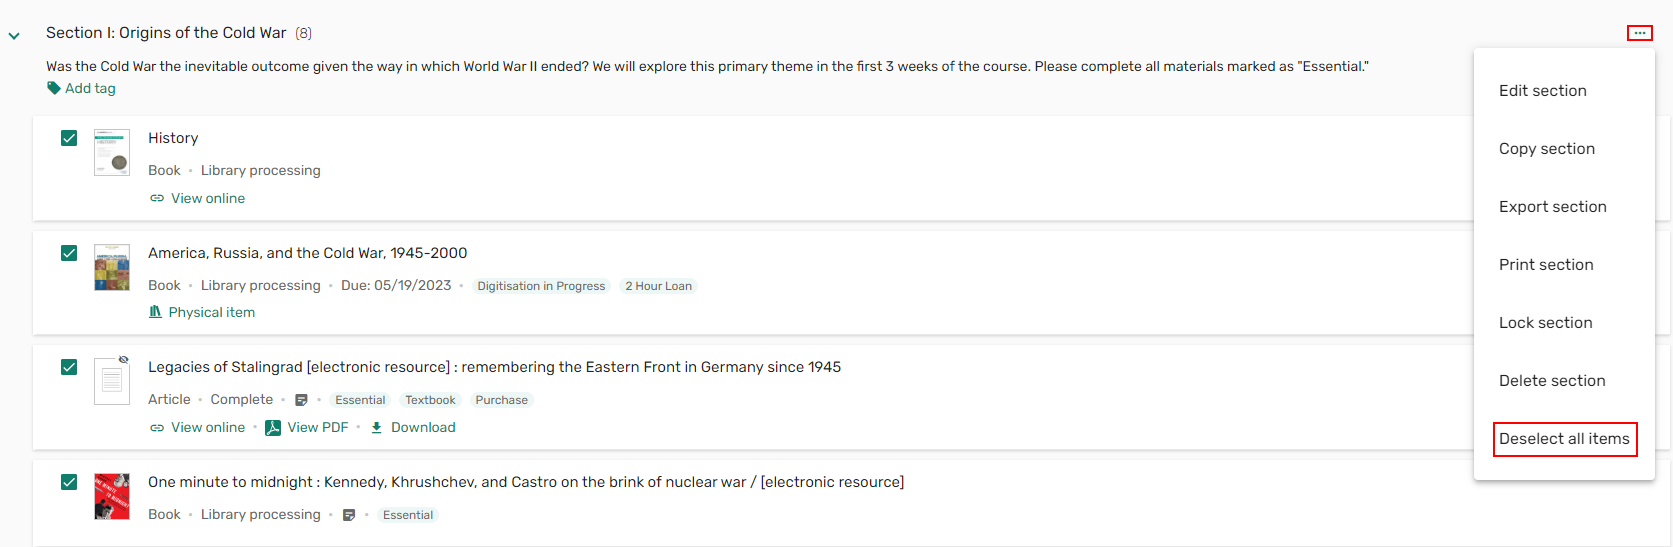
Editing Items in Bulk
When the parameter select_all_items (Configuration > Leganto > UI > Section Menu) is set to Yes, the section action list includes a Select all items/Deselect all items action to either select all items or deselect all items in a section.
Exporting Shareable Links
Shareable links can be included or excluded from exports.
Set the parameter export_permalinks (Configuration > Leganto> Leganto Features) to false (default true).
Exporting a Single Item in a Specific Reference Format (Quick Cite)
Users can copy the default item style set in Leganto > Features > Bibliographic Styles when quick_cite (Leganto > UI > Citation Menu) is enabled (default). If no default style is set, the first style in the Bibliographic Styles table appears.
When generating and exporting formatted items from Leganto, additional authors can be treated as contributors when export_additional_name_as_editor is set to true (default) or editors when set to false.
Exporting an Item to RefWorks
When export_to_refworks (Configuration > Leganto > UI > Citation Menu) is set to Yes, users can export items to RefWorks. For more information see Enabling and Configuring Refworks.

Discussing the List with the Library
When library_discusion (Configuration > Leganto > Features > Leganto Features) is set to list/citation/all, instructors can write messages to the library/list owners and read their replies from either the list level, item level, or both. The Discuss with library icon  includes a number count of how many new messages there are in the discussion. Messages that you enter in the Library discussion pane create alerts for librarians in Alma, and you can view their responses in this pane.
Submitting Digitization/Copyright Clearance Requests to the Library
When a list is associated with a course, and when assign_to, instructor_copyright_clearance, or instructor_digitization_request (Configuration > Leganto > List Management > Copyright Settings) are enabled by your institution, users can initiate digitization and/or copyright clearance requests for the items on the list.
A copyright request asks the library to clear copyrights for specific pages and/or chapters. Use this option when you upload a file or you plan to make copies of the material yourself (such as photocopies) or upload a file.
A digitization request asks the library to make copies of specific pages and/or chapters.
In quick edit mode, the digitization and copyright options do not appear when these options are not applicable. These options are still displayed as disabled in the full view.
Requesting Digitization
When enabled by your library, and when a list is associated with a course, users can initiate a specific digitization and/or copyright request with the library. (For a digitization request, there must not already be another open request and the citation must be a physical title with at least one item. For a copyright clearance request, the citation must be an uploaded file, and the copyright must not be already set as self-declared or marked as Creative Commons.) These requests are handled manually or automatically by the library, depending on the library's back-end configurations.
- A copyright request asks the library to clear copies for specific pages and/or chapters. Use this option when you plan to initiate a digitization request or you plan to make copies of the material yourself (such as photocopies) or upload a file.
- A digitization request asks the library to make copies of specific pages and/or chapters.
A copyright approval may be relevant for a specific date range, and the library may require you to enter a date range when making the request. In this case, students cannot access the material before and after the range, regardless of the visibility settings of the material, citation, section, and/or reading list. A warning notice may appear when accessing the material and during the final days before the last date (according to your library's configuration).
When instructor_digitization_request (Configuration > Leganto > List Management > Copyright Settings) is set to course_association, and instructor_digitization_electronic (Configuration > Leganto > List Management > Copyright Settings) is set to true, an instructor can initiate a library physical or electronic digitization request, which includes a copyright clearance request, while an item is expanded or from the item Full details.
Automatically Trigger Copyright Clearance Form
When configured, users can automatically trigger the copyright clearance form when a file is added to a citation in Leganto. To enable this feature, ensure that the parameter instructor_copyright_clearance (Configuration > Fulfillment > Copyright Management > Leganto Copyright Settings) is set to course_association. The copyright clearance form appears when the list is linked to a course and the user selects a copyright option that is mapped to a Copyright Status (Configuration > Leganto > List Management > File Upload Copyright Options) that is not set to Self Declared, Fair Use, Declined, or Approved. The status of the copyright request is viewable in the Item actions > Library services section.


Personal Copy
When configured by the library, instructors can mark items where they plan to lend their personal copy of an item to the library for circulation. When instructor_personal_copy (Configuration > Leganto > Features > Leganto Features) is set to true, instructors can indicate that an item is a personal copy and enter the name of the person who owns the item. The instructor can drop the item off at the library, the library will circulate it to students for the duration of the course, and the instructor can pick it up again at the end of the term. The library can configure which types of items can be used for personal copies.
For more information, see Contributing Instructor Resources to a Reading List.