
Go NDE - Steps to Transition to NDE UI
What is Go NDE?
Go NDE is a self-switch process managed by the institution. It enables a smooth transition from the existing Primo VE interface to the NDE UI, the future interface for Primo VE customers.
The transition to the NDE UI is simply an interface update. All discovery-related data managed in Alma, including PNX records, local fields, normalization rules and other configurations, remain unchanged. This ensures that the underlying data layer remains consistent, allowing institutions to focus on the new interface options and customization capabilities provided by the NDE UI.
Before starting the Go NDE steps, ensure you have reviewed the NDE UI functionality and release plan, and you are familiar with the NDE UI's key milestones:
-
May 2025 – Managed General Release: Customers planning to go live with the new NDE UI by March 2026 must register for access between March 19 and April 20.
-
November 2025 – General Release (Self-Switch): The Go NDE self-switch process opens, allowing institutions to transition independently at their own pace.
If you have any questions regarding the transition to the NDE UI, you can check the FAQ to learn more or submit a case.
The following sections describe each step of the Go NDE process.
✅ Step 1: Enablement
Create a new NDE View or duplicate an existing one. See Getting Started with the NDE UI.
Starting to work on the NDE means creating your NDE view in production, in parallel with your existing live view. The setup of the NDE view does not impact your current view as customizations and configurations are view-specific. Once the NDE view is created, it is immediately available for internal testing but remains hidden from end users until you choose to expose it.
As part of the Managed General Release process, access to the NDE will be available only in production starting in May. Your work on production will be cloned to your sandbox during the next semi-annual refresh, currently planned for August. This means you can begin testing and configuring in production now, knowing your sandbox environment will reflect these changes after the August clone.
✅ Step 2: Test and Review Configuration
Conduct testing on your NDE view:
-
Once you have initiated your NDE view, perform thorough testing
-
Review notable NDE items and additional configurations for the NDE UI. See Overview of the NDE Interface and Configuration.
-
Explore upcoming functionalities to align your transition plan accordingly. See Available Features, Functionality and Relase Plan for NDE UI.
✅ Step 3: Branding Your View
Customize your logo, favicon, themes, icons, and CSS.
Design your Landing Page.
Integrate with external vendors like LibKey,
Create and implement custom components. See Customization Best Practices.
✅ Step 4: Enable Mixpanel to Provide Analytics for the NDE UI
Once you have added an NDE UI view to your Production environment (not supported in the Sandbox environment), you can enable Mixpanel to begin tracking usage and user engagement.
The NDE UI does not support the OBI version of Primo Analytics.
-
Open the attached form and select the tab for either a single institution or a consortium (NZ) configuration. The consortium configuration has two options: Centralized or Independent Institutions. Switching this configuration later will result in a loss of collected metrics.
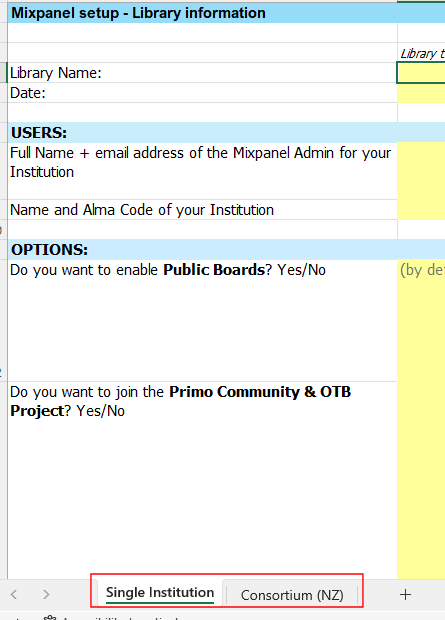 Select Mixpanel Configuration Form
 -
Fill out the selected form and save your changes.
-
Open a Support Case to create a Mixpanel Admin User (set Category to Mixpanel) and attach the completed form for your institution or consortium.
-
Set the enable_mixpanel parameter to true on the Discovery Customer Settings page (Configuration > Discovery > Other > Customer Settings). Please get in touch with Support if the parameter is not available.
For additional product documentation and videos, see Primo VE Analytics - Mixpanel and Mixpanel for Primo VE Customers.
✅ Step 5: Go Live
If you have tested your new NDE view and conducted sanity tests on all your systems, you can go live. Once you go live, all your discovery-related links (permalinks, saved searches, deep links, and so forth) are redirected from your live Primo VE view to your new NDE view.
-
On the Views List page (Configuration > Discovery > Display Configuration > Configure Views), select the Switch to Live option in the row containing your NDE view.
This option is a one-time feature designed to redirect traffic from your live Primo VE view to your NDE view. Please do not use this option until your official Go-Live day.
 Switch to Live Option
A check mark is placed in the new NDE Live column for NDE views that have gone live.
-
In the Switch to Live dialog box, update the following fields:
-
Choose a non-NDE to redirect from—Select the old non-NDE view to redirect live traffic to the NDE view.
-
Do not use redirection—If this is a new NDE view that is not replacing an old non-NDE view, select this option to go live without any redirection from another view.
 Switch to Live Dialog Box
 -
-
Select Confirm.
-
In the Confirmation Message dialog box, select Confirm to complete the switch.
-
Verify that your access to the NDE view comes from your previous live view, your portal search box redirections, and so forth.
✅ Step 6: Post Go Live
After you have switched all your existing non-NDE views to live NDE views, you can switch to NDE-only mode to hide all non-NDE views on the View List page (Configuration > Discovery > Display Configuration > Configure Views). To switch to the NDE-only mode, please submit a Support case.