Getting Started with RefWorks
RefWorks is located on the internet at https://refworks.proquest.com/.
RefWorks Supported Browsers
- Microsoft Edge
- Latest versions of Firefox (Windows, Mac, and Linux)
- Latest versions of Safari (Mac)
- Latest versions of Google Chrome
- Using a browser extension for content filtering and ad blocking may block RefWorks.
- RefWorks is compliant with Section 508 of the Rehabilitation Act (U.S.)
Creating a RefWorks Account
- Using an email and password, either via the RefWorks website or via a unique link from your institution.
- Using institutional credentials (Single Sign On).
Creating an Account Using Email and Password
Creating an Account from the RefWorks Website
You can create an account from the RefWorks website using an email and password. To create an account via a unique link from your institution, using email and password, see here.
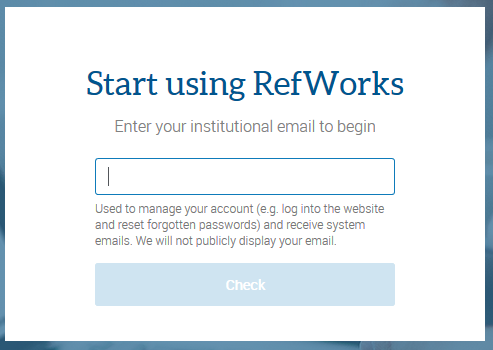
- Enter your email address and select Check to see if your institution has enabled RefWorks. If it has not enabled RefWorks, contact your librarian or administrator about having RefWorks enabled for your institution.
- Enter a password and select Sign Up. RefWorks sends you an activation email. Open the URL in the email. The Sign in to use RefWorks page displays.
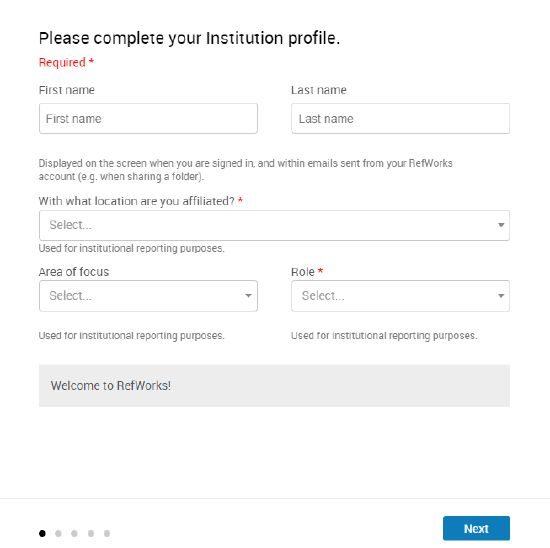
- Enter your login credentials and follow the on-screen instructions to complete your registration. You are logged into your new account and can start using RefWorks.
Creating an Account from a Unique Link
You can create an account from a unique link provided to you by your institution. You create the account using your email and password. To create an account from the RefWorks website, using email and password, see here.
- Click the link that your institution provided by email or on their website.
- You will be prompted to enter an access code. Enter the provided code and select Check.
- Enter your email address and a password. Select Sign Up.
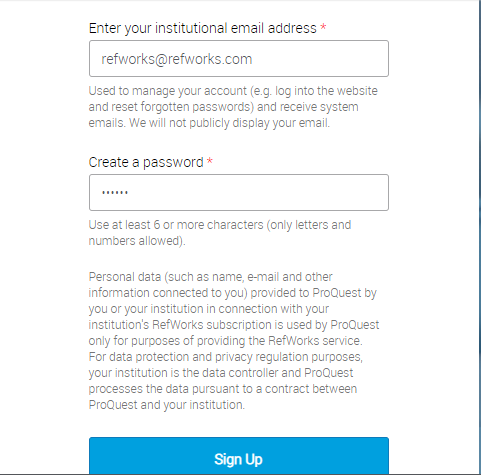
- RefWorks sends you an activation email. Open the URL in the email. The Sign in to use RefWorks page displays.
- Enter your login credentials and follow the on-screen instructions to complete your registration. You are logged into your new account and can start using RefWorks.
Creating an Account Using Single Sign On (SSO)
- On the Refworks website login page, select Use login from my institution and select your institution. If you are logged in to your institution's network, you are directed to the Start using RefWorks page. If you are not logged in to your institution’s network, you are directed to your institution’s login page; login to your institution.
If your institution does not appear in the list, this means Single Sign On is not enabled for your institution and you should create an account using an email and password.
- In the Start using RefWorks page, enter your email address and select Please create my account.
- Confirm your RefWorks cookie preferences.
- Enter your details and follow the on-screen instructions to complete your registration. You are logged in to your new account and can start using RefWorks.
Remove Single Sign On (SSO) for an Account
You can remove your institutional credentials in order to stop using SSO.
- Log in to RefWorks.
- From the user menu at the top right select Settings > Institutional Credentials > Remove Credentials.
Link Institutional Credentials to an Existing RefWorks Account
- From the user menu at the top right select Settings > Institutional Credentials > Associate Credentials. You are directed to your Institution's website to complete the process.
Logging in to RefWorks with Email and Password
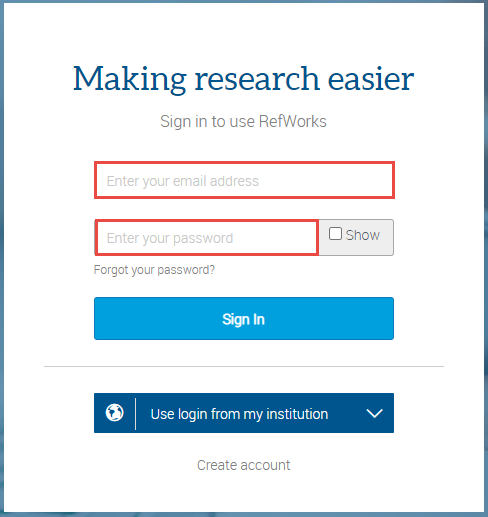
- Enter your email address and password and select Sign In.
- If you forgot your password, select Forgot your password? and follow the on-screen instructions, or contact your administrator for assistance.

Logging in to RefWorks with Institutional Credentials (Single Sign-on)
Select your institution from the Use login from my institution list.
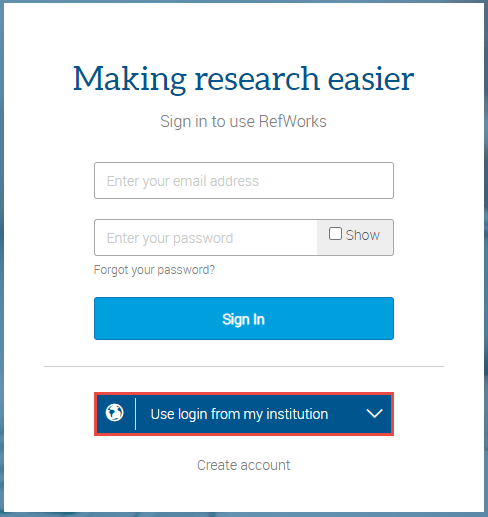
- If you are logged into your institution's network, you are automatically logged into RefWorks.
- If you are not logged into your institution's network, you are directed to the institution's login page, and, after logging in to your institution, you are automatically logged into RefWorks.
The RefWorks User Interface
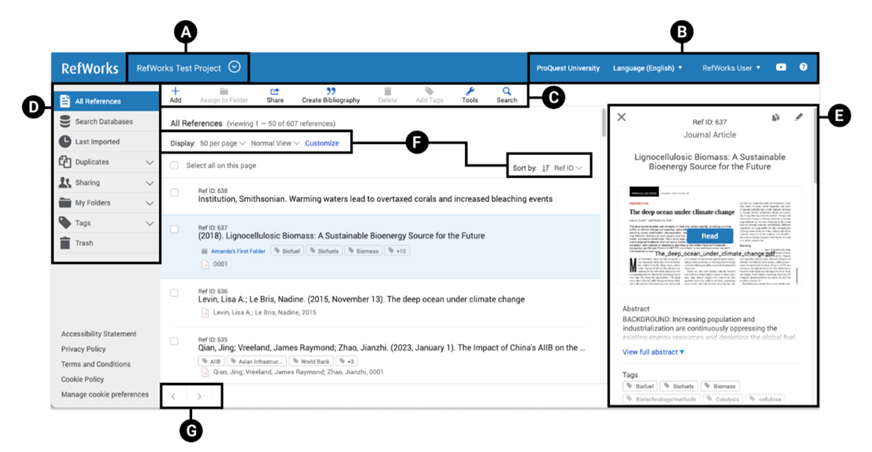
RefWorks user interface contains:
- A: Projects
Projects enable you to maintain separate reference collections for different research projects. - B: Utility Toolbar
Includes institutional information and link, when enabled by Admin, language menu, user menu, and help menus. - C: Reference and Tools Actions
Includes the main menu with various features:- Add – Opens a menu with the following actions:
- Upload document – Browse your computer's files for a file to upload to RefWorks as a reference. See Uploading Files as References.
- Import references – Upload a reference file that you previously exported from another reference management service or authorize a direct import from Mendeley. See Importing References.
- Create new reference – Manually create a new reference. See Manually Adding References.
- Assign to Folder – Add or remove the currently selected references to or from folders. This can also be used to add a local copy of a reference in a shared folder to your list of references. A single reference can be in multiple folders. See Organizing References by Folders and Working with Shared Folders of References.
- Share – Opens a menu with the following actions:
- Share folder – Share references in a folder with other users. See Sharing Folders of References.
- Export references – Export references to your computer's file system. See Exporting References to a File.
- Create Bibliography – Opens a menu with the following actions:
- Create bibliography – Create a bibliography of your references to add to your document or to a website. See Copying References from RefWorks to Your Document.
- Quick cite – Create citations in RefWorks to copy and paste. See Copying References from RefWorks to Your Document.
- Citation style editor – Manage your reference citation styles. See Managing Citation Styles.
- Delete – Opens a menu with delete options which are enabled or disabled depending on the tab you are currently viewing.
- Remove from Folder – Available when in Folder; Remove references from the folder but do not move them to Trash.
- Move Selected to Trash – Available in All References, Last Imported and Folder. Move references to Trash.
- In Trash Folder:
- Delete selected (#) – Permanently remove selected references.
- Delete all (#) – Permanently remove all references in Trash folder.
- Restore – Available in Trash Folder only – Restore deleted references to previous location and remove them from the Trash folder
- Add Tags – Add tags to selected references. See Organizing References by Tags.
- Tools – Opens a menu with the following actions:
- Find duplicates – Find and remove duplicate references. See Finding Duplicate References.
- Tools – Open the RefWorks Tools page to download and install RefWorks add-ons. See Connecting Your Browser, Microsoft Word, and Google Docs to RefWorks.
- Global edit – Perform bulk edit operations on references. See Editing References.
- Search – Search your references. See Viewing Your References and RefWorks Reference Fields and Types.
- Add – Opens a menu with the following actions:
- D: Reference Organization
This sidebar contains tabs that provide quick access to your references. See Viewing Your References. These tabs are:- All References – All records available in your RefWorks library except those in Trash folder.
- Search Databases – Open a search area to discover items in external databases. See Finding References to Add to RefWorks.
- Last imported – References added within the last 30 days. References imported prior to last 30 day are no longer visible in this tab.
- Duplicates– Find and remove duplicate references. See Finding Duplicate References. See last results of your most recent duplicates search.
- Sharing – Share a folder or view folders available in your institution. See Sharing References and Working with Shared References..
- My Folders – Your references by folder, including those that are not assigned to any folder. A single reference can be in multiple folders. Also enables you to add and manage your folders. See Organizing References by Folders.
- Tags – Your references by tag. A single reference can have multiple tags. A tag is created when you add it for the first time to any reference, or if it is assigned to a reference in a folder shared with you. When importing references, you can choose whether to import the tags or not. See Organizing References by Tags.
- Trash – References you have deleted. RefWorks does not clear Trash folder automatically. References that you delete from this tab are permanently removed from RefWorks.
- E: Reference Details/Reference Editor
Manually create a reference, view, edit or duplicate the reference that is currently in focus.- Reference Details/Reference Editor pane is hidden unless a reference is in focus, or you are creating a reference.
- When enabled by your institution (see Configuring Site Settings), a link appears on the reference details view and in reference editor, with Full-text or partial access to the reference within your institution’s library or on an external site. This is your institution’s Link Resolver.
- Attachments: when multiple attachments are present, scrolling is enabled.
- When the reference has a full text PDF attachment Read link is visible to read the PDF in a reader.
- When the reference has a non-PDF attachment, Download link is visible.
If there is an attachment in the reference, Link Resolver link is not displayed.
- F: Display Options
The following display options are available:- Display: number of references per page; limited to 2000.
- View: Type of view used for the page.
- Normal
- Table
- Full
- Citation
- Customize: What to display/hide on the page. Applies to Normal and Full views only.
- Folders
- Tags
- Sort order: Ascending or Descending
- Sort by: Define what data to sort on.
- Date added
- Date modified
- Date published
- Title
- Author
- Ref ID
- G: Pagination Buttons
Enables navigation between the pages.
Managing Your RefWorks Account
Configuring Basic Information
You can configure the following items in your account:
- User interface language – Select the language in the language menu. The labels in the UI update to the selected language.
New features are developed in English. It may take time before their labels are translated to other languages.
- The following information can be configured on the Settings page (select Settings in the user menu):
- First and last name
- Email address
- Area of Focus - This field is used by your institution for reporting
- User role – This field is used by your institution for reporting.
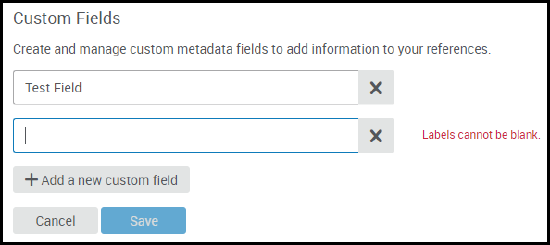
- Custom fields – These fields are configurable for all of your references and are available when manually adding or editing a reference; see Manually Adding References and Editing References. You can add and delete custom fields here, and you can also add them when manually adding or editing a reference. You can also search for references using these custom fields; see Viewing Your References.
Custom FieldsYou cannot delete a custom field that is currently in use in any reference. To remove a custom field, you must first remove its content from your references. You can click on "Display references using this field" to view which references are utilizing that custom field.
- Password – Even if you use single sign-on and do not require a password, you may set a password. See the on-screen instructions for more information.
Configuring Synchronization with Dropbox
When enabled by your institution (see Configuring Site Settings for Admins) you can synchronize RefWorks with Dropbox, in which case RefWorks automatically makes copies of your uploaded attachments in your Dropbox account. When you remove citations from RefWorks, RefWorks removes them from Dropbox.
On the Settings page (select Settings from the user menu) select Connect from the Dropbox section.
You are redirected to Dropbox's login page. Follow any on-screen instructions to complete the configuration. You are asked to give RefWorks permission to create a folder in your Dropbox called ProQuest RefWorks in your Apps folder. This is where RefWorks places copies of your citations.
You can remove the synchronization at any time. Removing the synchronization does not remove any items that are currently in your Dropbox account.
Configuring Synchronization with My Research
Reviewing Personal Data Stored by RefWorks
To review all personal data that RefWorks stores about you, select Send me my personal data on the Settings page (select Settings from the user menu).
Deleting Your RefWorks Account
To delete your account, select Remove my RefWorks account on the Settings page (select Settings from the user menu). Select Remove Account in the confirmation dialog box. This action cannot be undone.


