
360 Core: E-Journal Portal Administration Console -- 2.0 Search Page Options
- Product: E-Journal Portal
How do I use the Administration Console to configure search options for E-Journal Portal 2.0?
This page is part of a larger set of documentation about using the Administration Console to configure your E-Journal Portal service.
November 11, 2016 Update: Database List section updated to reflect new options for making Terms of Use and Public Notes visible.
Introduction
The Search Page Options page on the E-Journal Portal 2.0 tab in the administration console is where you change search options available to your E-Journal Portal 2.0 users.
Access the page by clicking on the E-Journal Portal 2.0 tab in the 360 Core Administration Console:

When you are ready to start configuring your options, click Edit in the upper-right corner of the page. After you make your changes, click Save, or click Cancel to discard your changes.
Changes you make to the E-Journal Portal will not be visible to patrons until the daily profile data refresh has completed; to see how your changes will look without having to wait, click Preview.
-
See Previewing Changes You Make in the New Interface for additional information about previewing changes.
-
For more information about the daily profile data refresh:
To change any labels and text, use the Custom Text page on the E-Journal Portal tab of the admin console.
Title Search
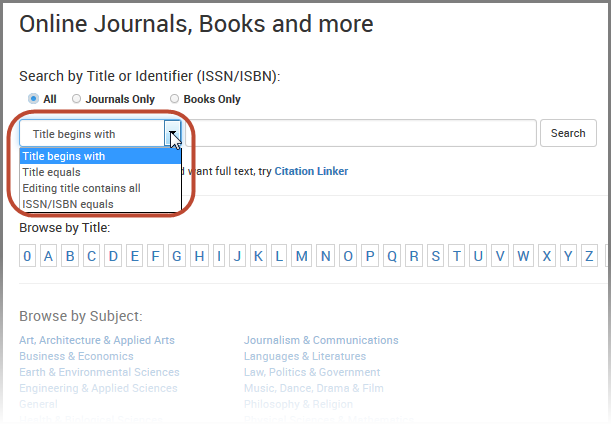
By default the title search box applies a Title begins with search. Use the Set Default Search setting to select a different search type to display by default.
Regardless of which title search is set as the default, all search options are always available to E-Journal Portal users via the drop-down menu:
Enable Alternate Title Searching For: Here you can choose to include alternate titles when conducting a Title begins with and/or a Title equals search. By default, alternate titles are included as a way for users to expand searching options for finding titles. Alternate titles display along with authority titles (Results Page Options admin console page provides display options).

-
To learn more about how alternate title searching works, see Alternate Title Searching, the functionality works the same in E-Journal Portal 2.0 as it does in the legacy interface.
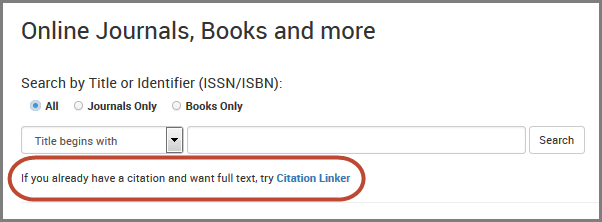
Display "Already have a Citation?" link: 360 Link customers can choose to include a link to assist users conducting known item searches. The link displays below the title search box and it takes the user to 360 Link's Citation Linker form where the user can enter a citation.
Autocomplete
Select the Enable autocomplete search checkbox to have the system generate suggested titles when the user begins to type. Suggested titles (up to 12) come from tracked titles in your Client Center / Intota profile only, not all titles in the KnowledgeBase. This eliminates the possibility of zero results if the title is not in the profile. Autocomplete suggestions apply to journals, books, and videos.
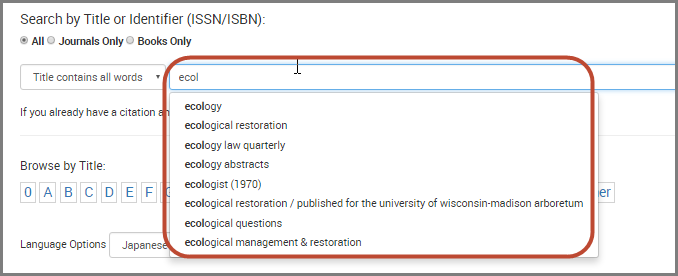
The index that supports autocomplete suggestions is updated weekly, so there may be a delay in the appearance or disappearance of a title when changes are made to the library profile.
A-Z Links
Use the Display A-Z links checkbox to turn ON/OFF the A to Z links at the top of the E-Journal Portal.

To turn ON Chinese, Japanese and/or Korean A to Z links, select the Display additional CJK A-Z Links checkbox. Display options for CJK links are on the Languages page on the E-Journal Portal tab of the admin console.

Subject Browse
Choose to display HILCC (Hierarchical Interface to LC Classification) subjects and/or MeSH medical subjects.
Select the Display HILCC Subjects checkbox to turn on HILCC subjects. Display options include:
-
Pull down menu: User is presented with top-level HILCC subjects via a drop-down list.
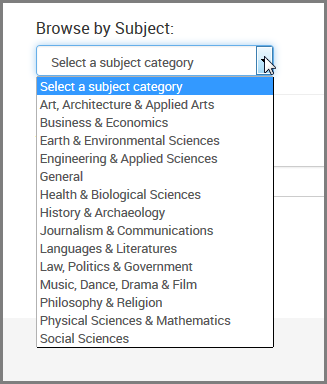
When a top-level term is selected, the HILCC sub-categories display below the pull down menu.
-
Expanded List format: HILCC top-level terms (approximately 15) are displayed on the search page.

When the user selects a term, the HILCC sub-categories are displayed below the top-level terms.
Display MeSH Subjects: Select the checkbox to turn on MeSH subjects. MeSH terms automatically display within a pull down menu; there is no display option for an expanded list format.
If you activate both HILCC and MeSH subjects, by default the HILCC Subjects display above the MeSH Subjects. To display the HILCC Subjects below the MeSH Subjects, select the Display MeSH subjects above HILCC subjects checkbox.
Provider Browse
Choose to display a browse option by Provider. To enable Provider Browse, select the Display Provider Browse checkbox. Display options include:
-
Pull down menu: Users can select a Provider via a drop-down list.
-
Expanded List format: Users can select a Provider via a full list of providers.
Database List
Use the Display Database List on result page checkbox to display links to directly access the databases to which you subscribe. The databases can be displayed either via a Pull Down Menu or Expanded List (see display formats in above Subject Browse section).
360 Resource Manager and Intota customers: If you have Terms of Use entered into your profile, Terms of Use will be accessible from the E-Journal Portal's Database List unless you select the second display option, Pull Down Menu 1.
If you have very long Public Notes (and/or Terms of Use if you are a 360 Resource Manager or Intota customer) and you want them to display to your users, we recommend using the Pull Down Menu 2 display option rather than the Expanded List Format option.
Use the Database List admin page on the E-Journal Portal tab to customize the list of displayed resources.
Search by DOI or PMID (PubMed ID) (For libraries with 360 Link)
If your library subscribes to 360 Link (link resolver), you can provide E-Journal Portal users with item-level (rather than title level) searching by DOI or PMID:
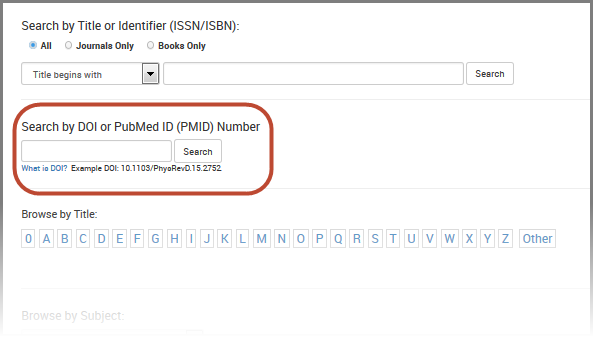
When a DOI or PMID is entered into the search box, 360 Link processes the query and displays the results.
Turn ON the search box by selecting the the checkbox in the PMID and DOI Search Box area of the admin page.
- Date Created: 1-Jun-2016
- Last Edited Date: 13-Nov-2024
- Old Article Number: 13895