Configuring Digital Fulfillment
This page describes how to configure digital fulfillment including digitization departments, electronic document delivery rules, viewer labels and share buttons, etc.
For links to all the main fulfillment documentation pages see Fulfillment.
For links to all the main fulfillment documentation pages see Fulfillment.
For additional configuration tasks related to digital fulfillment, see:
Configuring Digitization Departments
To configure digitization departments, you must have one of the following roles:
- General System Administrator
- Fulfillment Administrator
A digitization department is the place where digitization requests are processed. One institutional digitization department is provided “out-of-the-box” by Alma. If necessary, the existing department may be modified or additional departments created. You can configure digitization departments on both the institution and library levels. Unless a specific library-level digitization department is defined, the institution-level digitization department applies to the library level as well.
You configure digitization departments on the Department List page, (Configuration Menu > Fulfillment > Digital Fulfillment > Digitization Departments).
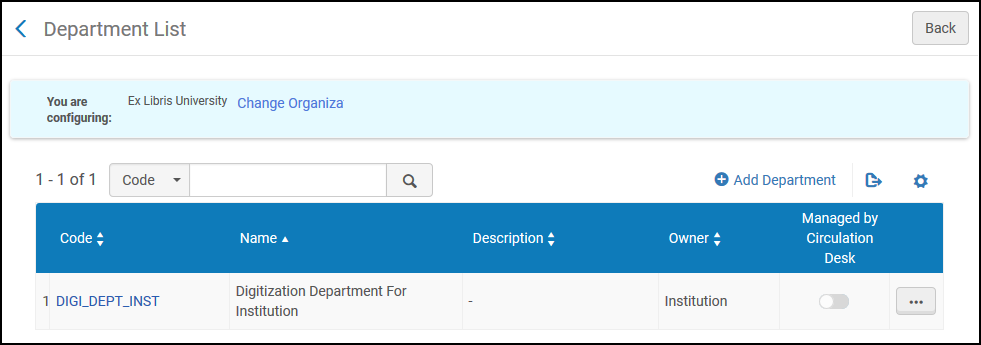
Department List Page
Ensure that you are within the context of the institution/library whose digitization departments you want to configure by selecting the required institution/library from the Configuring filter on the Fulfillment Configuration page.
Select the digitization departments code, name, description, or owner headings to sort the list alphabetically, in ascending or descending order.
The following actions can be performed on this page:
- Add a digitization department (see Adding a Digitization Department)
- Edit a digitization department (select Edit from the row actions list)
- Delete a digitization department (select Delete from the row actions list)
Adding a Digitization Department
If you add a digitization department to the institution, it is available for all the libraries within the institution as well.
The procedure for adding a digitization department is identical to the procedure for adding a processing department (see Configuring Processing Departments).
To add a digitization department:
- On the Department List page (Configuration Menu > Fulfillment > Digital Fulfillment > Digitization Departments), select Add Department. The General Information page appears. This is the first page of a four-page wizard.
- Enter the code and name (both required) for the new digitization department.
- Enter information in the remaining optional fields, as described in the following table.
Digitization Department – General Information Fields Field Description Description A textual description of the digitization department. Work time (days) The number of days after which an item is considered expired. Note that the default is three days. Map The URL of a map to assist patrons in finding the department. Printer The printer that is associated with the digitization department can be selected from the Printer list. The digitization department prints all non-automated print jobs on this printer. - Select Next. The Served Libraries page appears.
- Select Next. The Contact Information page appears.
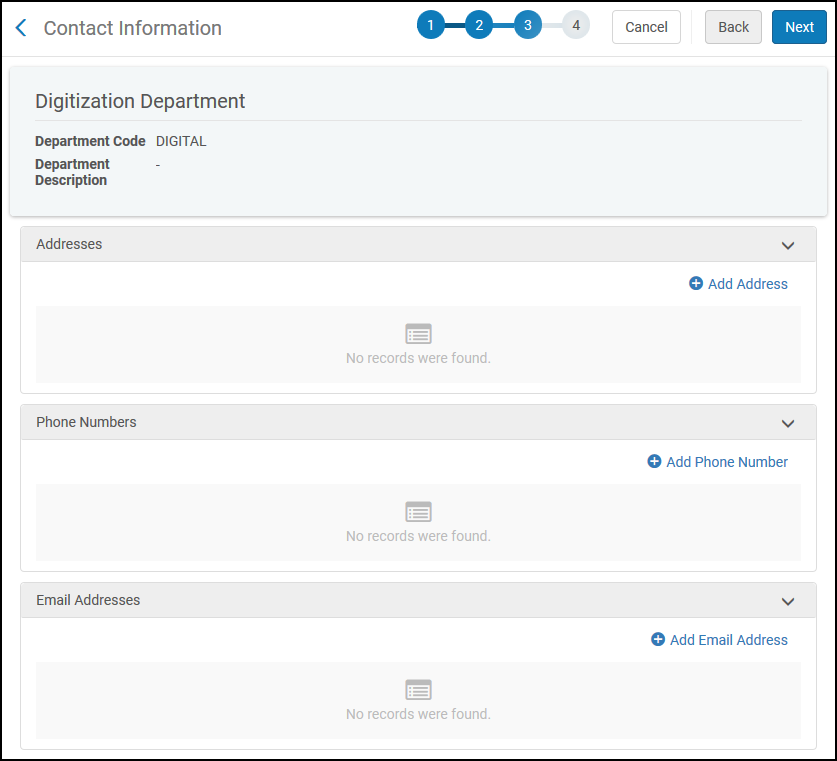 Contact Information Page
- To add a new address, select Add Address. In the Add Address dialog box, enter the required information (indicated by a red asterisk), and select Add if you want to add more addresses, or Add and Close if you do not want to add more addresses.
- To add a phone number, select Add Phone Number. In the Add Phone Number dialog box, enter the required information (indicated by a red asterisk), and select Add if you want to add more phone numbers, or Add and Close if you do not want to add more phone numbers.
- To add an email address, select Add Email Address. In the Add Email Address dialog box, enter the required information (indicated by a red asterisk), and select Add if you want to add more email addresses, or Add and Close if you do not want to add more email addresses.
- Select Next. The Operators page appears.
- To add an operator, select Add Operator. The Add Operator dialog box appears.
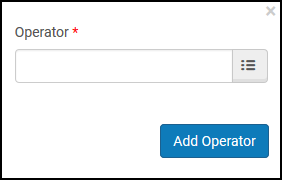 Add Operator Dialog BoxSelect the select from list icon to search for and add operators, and select Add to add more operators, or Add and Close if you do not want to add more operators.
 - Select Save. The digitization department is added to the Department List.
Configuring Electronic Document Delivery Rules
To configure electronic document delivery rules, you must have one of the following roles:
- General System Administrator
- Fulfillment Administrator
Electronic document delivery rules provide functionality that enables libraries to take portions of a resource and make digital copies of that portion only. These rules define the conditions under which libraries can perform this function.
Each electronic document delivery rule can be either enabled or disabled. By default, each new rule is enabled.
You configure electronic document delivery rules on the Electronic Document Delivery Rules List page (Configuration Menu > Fulfillment > Digital Fulfillment > Electronic Document Delivery Rules). For more information about rules tables, see Rules Tables.

Electronic Document Delivery Rules List Page
Electronic document delivery rules can be configured at the institution level only. Select the institution from the Configuring filter on the Fulfillment Configuration page.
The following actions can be performed on this page:
- Add electronic document delivery rules (see Adding Electronic Document Delivery Rules)
- Edit electronic document delivery rules (select Edit from the row actions list)
- Duplicate electronic document delivery rules (select Duplicate from the row actions list and modify the relevant fields)
- Delete electronic document delivery rules (select Delete from the row actions list)
- Enable/Disable electronic document delivery rules
Adding Electronic Document Delivery Rules
The electronic document delivery rules that you define apply to all libraries within the institution.
Each electronic document delivery rule can be either enabled or disabled. By default, each new rule is enabled.
To add a new electronic document delivery rule:
- On the Electronic Document Delivery Rules List page (Configuration Menu > Fulfillment > Digital Fulfillment > Electronic Document Delivery Rules), select Add Rule. The Electronic Document Delivery Rules Editor page appears.
If you want to create a copy of an existing electronic document delivery rule, select Duplicate from the row actions list. Once you have copied the rule, you can modify it as needed.
- In the Electronic Document Delivery Rules Editor section, specify a name (required) and description (optional) for the new rule.
- In the Input Parameters section, specify the components of the input parameter (Name, Operator, and Value). A set of input parameters may look like this: User group = Graduate student or Inventory owner = Art Library.
- Select Add Parameter. The set of input parameters is added to the list of parameters for the electronic document delivery rule.
- Repeat the previous two steps to add all the required parameters for the rule.
All the input parameters must be fulfilled in order for the rule to be applied. If not all the input parameters are fulfilled, the default electronic document delivery rule will be applied.
- In the Output Parameters section, select whether electronic document delivery should (True) or should not (False) be allowed.
- Select Save to store the new rule.
- If you have defined more than one rule, on the Electronic Document Delivery Rules List page, use the Move Up and Move Down arrows to set the order of the rules. The order of the rules is important, as the system applies the first (and only the first) appropriate, enabled rule.
Configuring Delivery Profiles Metadata
To configure delivery profiles metadata, you must have one of the following roles:
- General System Administrator
- Fulfillment Administrator
You can configure what metadata fields are displayed when viewing digital content in the Alma viewers and the order in which they appear.
To configure the Alma viewer metadata elements:
- Select Delivery Profiles Metadata (Configuration > Fulfillment > Digital Fulfillment). The following appears:
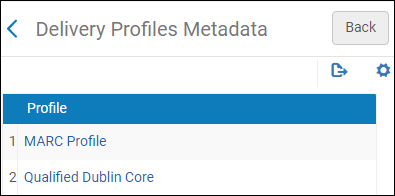 Select Metadata TypeIf you have DC Application Profiles configured, they appear in this list as well. For more information, see Working with DC Application Profiles.
 - Select the metadata type that you want to configure. (The following appears for Qualified Dublin Core. If you select MARC, MARC fields appear): The metadata type appears as a code table. For more information about code tables, see Code Tables.
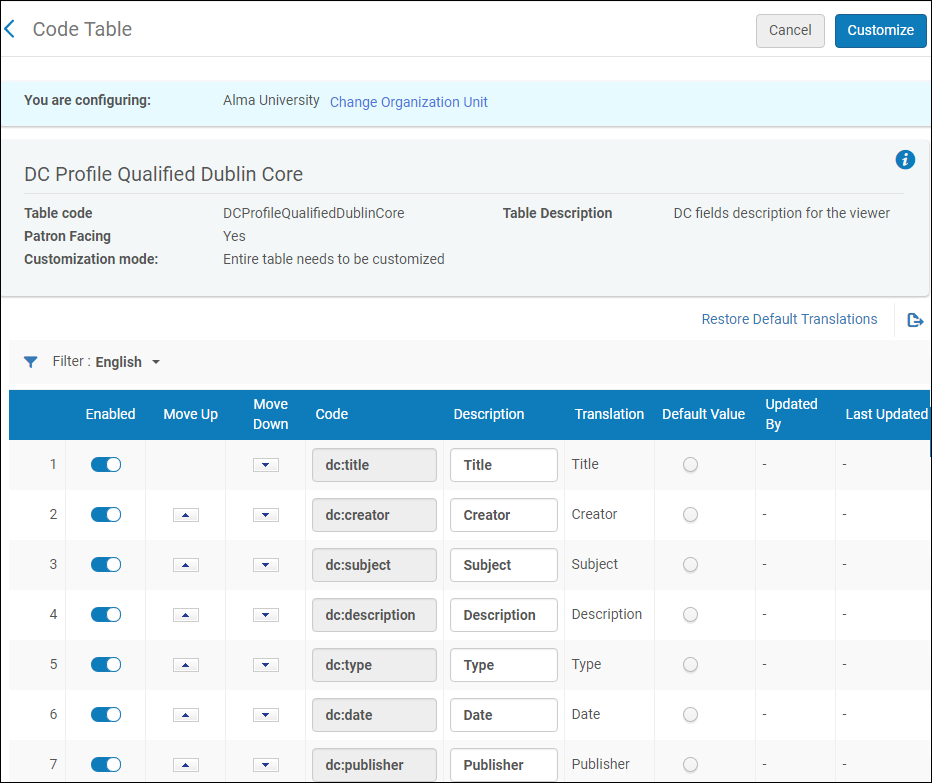 Delivery Profiles Metadata
 - Enable any metadata fields that you want to appear in the Alma viewers. Disable any fields that you do not want to appear.
- Reorder the fields using the arrow buttons to change the order in which the fields appear in the Alma viewers.
- Select Customize.
The fields appear in the viewer according to your configuration.
For information on the mapping of these fields to MARC fields, see Bibliographic Details. Note that the Description field (which is not in Analytics) is mapped to MARC fields 505 and 520.
Configuring Viewer Labels
To configure viewer labels, you must have one of the following roles:
- General System Administrator
- Fulfillment Administrator
You can configure the viewer labels for each language that is configured. For information about the viewer, see The Digital Viewer. You manage these labels on the Viewer Labels code table (Configuration > Fulfillment > Digital Fulfillment > Viewer Labels). For more information about code tables, see Code Tables.
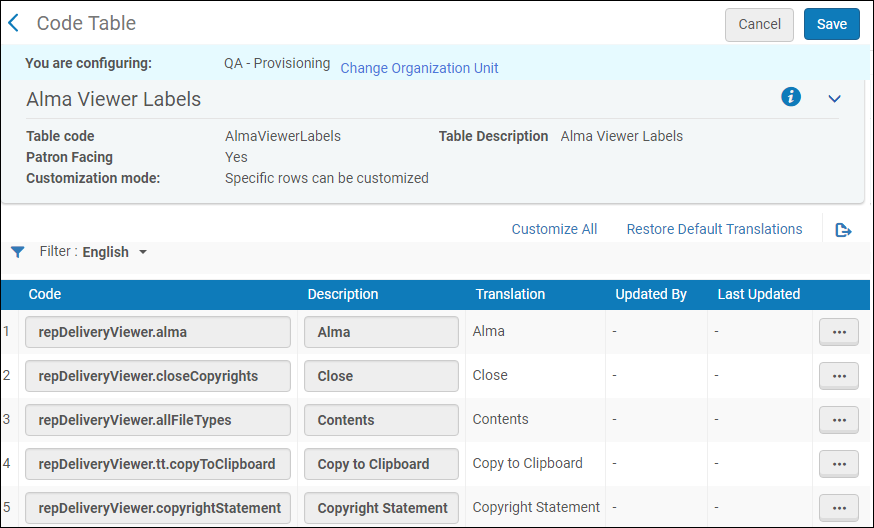
Viewer Labels Code Table
You can edit and restore the default label and translations for each label in your configured languages.
Configuring Viewer Share Buttons
To configure viewer share buttons, you must have one of the following roles:
- General System Administrator
- Fulfillment Administrator
You can configure the social network sharing buttons that appear when selecting the Share link in the Digital Viewer, Universal Viewer, and Internet Archive Book Reader Viewer. You manage these social network sharing buttons on the Viewer Share Buttons code table (Configuration > Fulfillment > Digital Fulfillment > Viewer Share Buttons). For more information about code tables, see Code Tables.
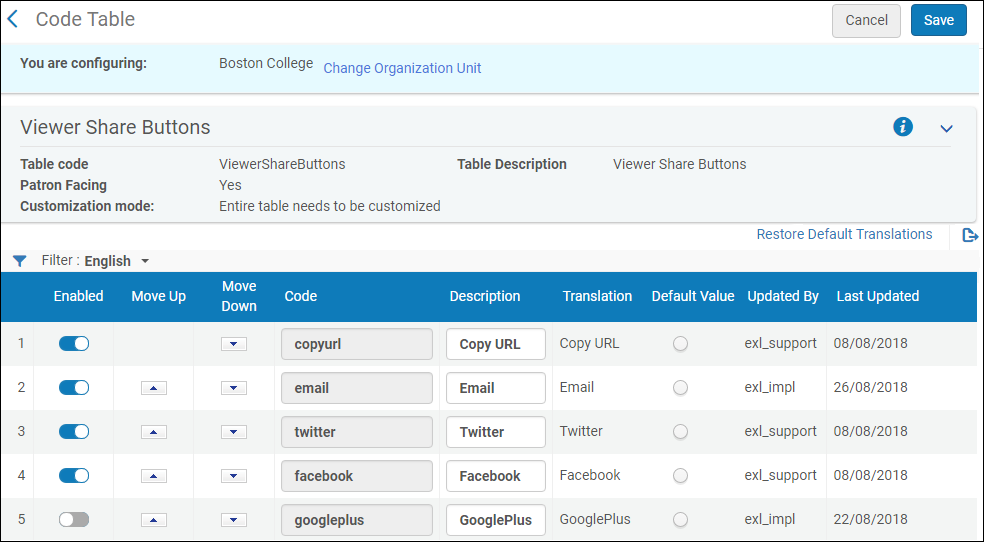
Viewer Share Buttons

