
General Configuration for Fulfillment
This page describes general configuration related to fulfillment including item policies, self check machine messages, printers, etc.
For links to all the main fulfillment documentation pages see Fulfillment.
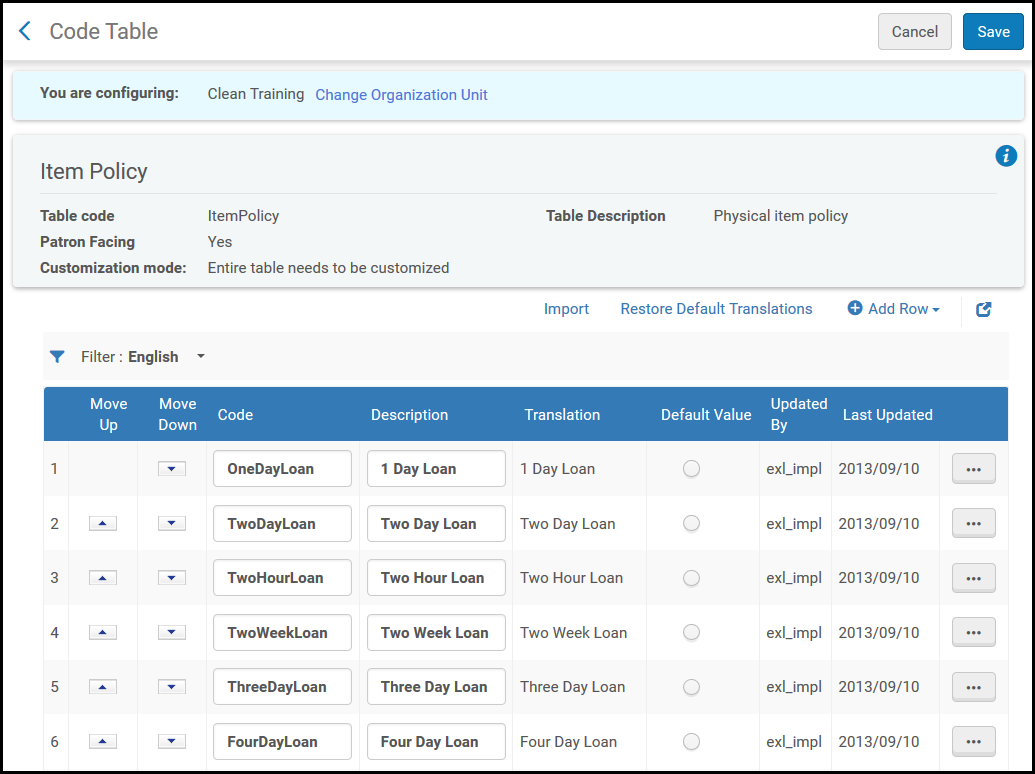
Configuring Item Policies
- General System Administrator
- Fulfillment Administrator
Configuring Self-Check Machine Messages
- General System Administrator
- Fulfillment Administrator

- On the Self-Check Messages page, select Customize from the row actions list of the message that you want to configure.
- Enter the new message in the Description field. Repeat these two steps for all messages that you want to configure.
- When you are done, select Customize to save your changes.
Configuring Scan In Alerts
- General System Administrator
- Fulfillment Administrator
You can configure how item alerts display in the Scan In Interface (Acquisitions > Post Receiving Processing > Scan In Items or Fulfillment > Resource Requests > Scan In Items). You can configure them to appear as pop-up messages, feedback messages, or to not appear at all.
| Alert Type | Example |
|---|---|
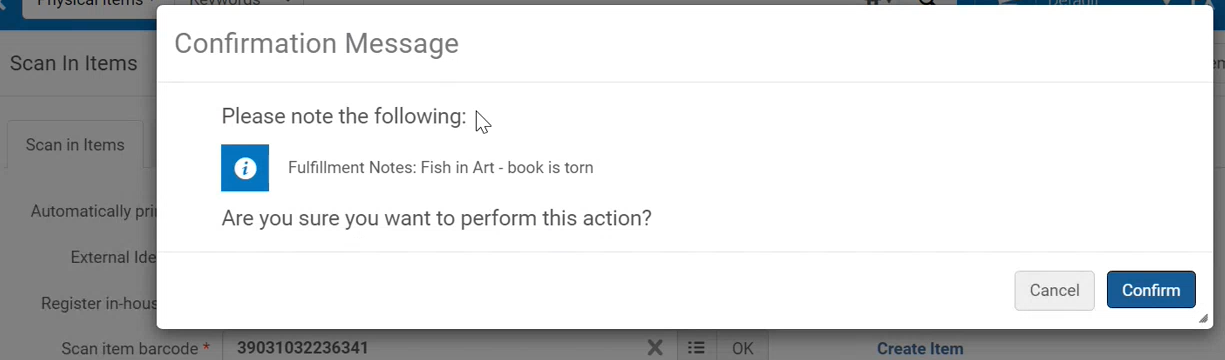
| Pop-up |
The message is shown as a pop-up and the operator must pause to make this selection before moving on to scan the next book. Each pop-up message can be configured to have or not to have the "Confirm" button. For messages where it appears, the pop-up message appears before the scan-in is performed. Based on the contents of the message, the operator can decide not to continue with the scan-in (select Cancel in the message), or to continue with the scan (select Confirm). For messages where "Confirm" does not appear, the pop-up message is informative only. It is not possible to configure the pop-up message's content. |
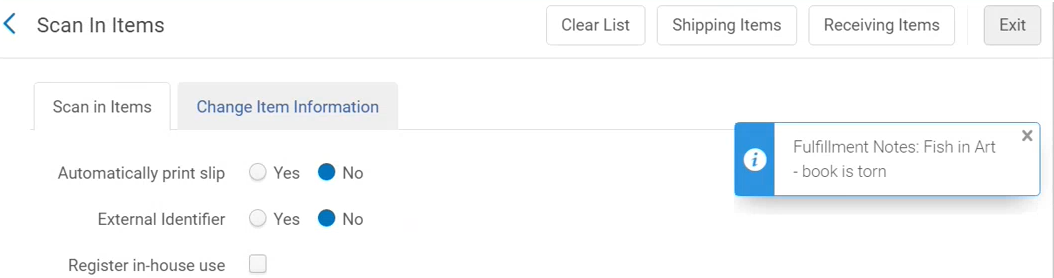
| Feedback |
The feedback message pops up after the scan has been performed and it serves an informative function only. The operator does not have to pause to make any selection before moving on to scan the next item. It is not possible to configure the feedback message's content. |
| None | The user is not notified about the note - no message is shown. |
To configure scan-in alerts:
- On the Scan In Messages Configuration page (Configuration Menu > Fulfillment > Physical Fulfillment > Scan In Messages Configuration), select Customize from the row actions list of the message that you want to configure.
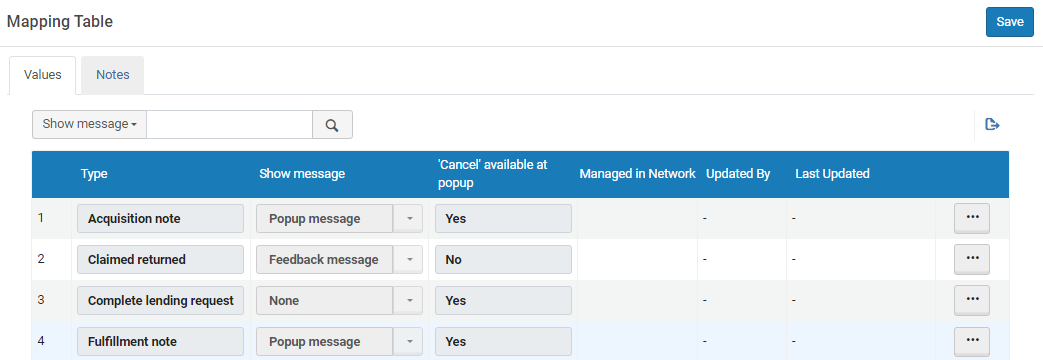
- Select the information as per the below:
Column Description Type The list of note types is a built-in list.
The types of notes are as follows:
- Acquisition note - The message is: Item has not been received by Acquisition Department.
- Claimed returned - The item was on loan and claimed returned.
- Complete lending request - The item participates in a resource sharing workflow, the scan completes the lending request.
- Fulfillment note - A fulfillment note exists on the item.
- Hold shelf processing - A request to put the item on the local hold shelf exists, but no message has yet been sent to the patron. This message appears if the circulation desk has been configured with the Has hold shelf processing option selected, and the Place directly on hold shelf option has been selected in the Scan In Items page.
- Internal note 1, 2, 3 - An internal note (general notes regarding the item visible only to library staff in Alma) exists on the item.
- Item has requests - This item was requested.
- Lost - The book was on loan and registered as lost in Alma.
- Magnetic material - The value of the Is magnetic field in the scanned-in item’s record is Yes.
- Missing - The book was registered as missing in Alma.
- Overdue loan was returned - The item was returned late and may have fines standing against it.
- Personal delivery - The scanned-in item is requested for personal delivery (such as home or office delivery).
- Place on hold shelf - The item needs to be placed on the hold shelf to be picked up by a patron.
- Public note - A public note (general note regarding the item that is visible to patrons in Primo as well as in Alma) exists on the item.
- Remote storage location - The item needs to be returned to its remote storage location.
- Request note - This item was requested and the request placer entered a note on the request.
- Temporary location - The item is currently not at its permanent location and needs to be shelved in its temporary location.
- Transit - The item needs to be sent to a different desk/library.
- Work Order - The item needs to go into a work order.
Show message Select if and how to display the note. - If several popup messages of the same “Cancel available at popup” type should be shown for the item, the system merges multiple messages into a single pop-up window.
- If a pop-up message and a feedback message of the same “Cancel available at popup” type are defined for the same item, both will be displayed as a pop-up message, in order for the feedback message not to get obscured by the pop-up and be missed by the operator. For example, if two messages are triggered for the same item, an Acquisition note and a Fulfillment note, but one is set to Popup message and the other is set to Feedback message, both messages will appear in a pop-up message, instead of a pop-up message and a feedback message.
'Cancel' available at popup Defines the phase during which a pop-up action is performed during the scan-in process. For Feedback Message or None, this is not applicable
- Yes - for actions that are done before the scan-in operation is performed and support cancelling the scan-in action..
- No - Messages that appear only after the scan-in operation is completed and do not offer a Cancel option.

Messages where the Cancel available at popup=yes are displayed in a single pop-up window (for the same item) and all messages where Cancel available at popup=no are displayed in a separate window. Thus, the operator can potentially receive two sets of messages for a single item. However, if a message in the first set was canceled, no further messages appear.
- Select Save to save your changes.
Configuring Printers
- General System Administrator
- Fulfillment Administrator

- Add a printer (see Adding a Printer)
- Edit a printer (see Editing Printer Information)
- Delete a printer (Select Delete from the row actions list)
Adding a Printer
- On the Printers page (Configuration Menu > Fulfillment > General > Printers), select Add Printer.
- In the Add Printer dialog box, enter a code and a name (both required). If you are not using the printouts queue or quick printing (see Printouts Queue), enter an email address for the printer. Optionally, add a description as well.
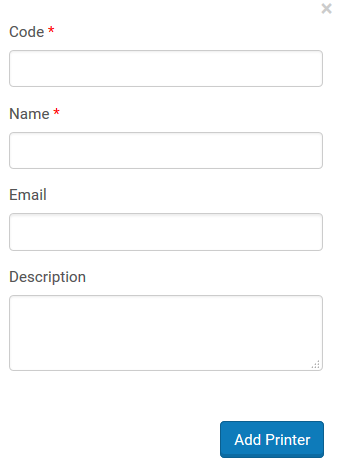 Add Printer Dialog Box
 - Select Add and Close to close the dialog box. The defined printer is added to the list of printers on the Printers page.
Printers PageAfter defining a printer, you can specify which circulation desks and service units are served by the printer. For details, see Editing Printer Information.
Editing Printer Information
- General printer information
- Circulation desks and service units that are served by the printer
- On the Printers page (Configuration Menu > Fulfillment > General > Printers), in the Code column, select the printer code link, or select Edit from the row actions list for the specific printer record whose information you want to update. The Edit Printer page opens.
- Under Edit Printer, edit the general printer details as required. When you want print routed to a queue in addition to an email address, select the Printout Queue option. See Printouts Queue for more information. When the Printout Queue option is selected, an additional column appears (Online Queue) in the list of printers with a check mark to indicate that the Online Queue option is selected..
- In the Served Circulation Desks List section, select a circulation desk that is served by the printer, and select Attach Circulation Desk. The selected circulation desk is added to the list of circulation desks that are served by the printer
-
This section displays only when you are configuring a library (that is, you have selected a library in the Configuring filter on the Configuration page.
- Repeat the previous step for all circulation desks that are served by the printer.
To remove a circulation desk from the list of circulation desks that are served by the printer, select Remove to the right of the circulation desk.
- In the Served Service Units List section, select the service unit that is served by the printer, and select Attach Service Unit. The selected service unit is added to the list of service units that are served by the printer.
- Repeat the previous step for all service units that are served by the printer.
To remove a service unit from the list of service units that are served by the printer, select Remove to the right of the service unit to be removed.
- Select Save to store your changes to the printer information.
Configuring Article and Book Form Mandatory Fields
- General System Administrator
- Fulfillment Administrator
- Configure mandatory fields for resource sharing request forms (see To configure mandatory fields for resource sharing request forms:)
- Configure a group of fields in which at least one of the fields is mandatory when configuring a resource sharing request (see To configure a group in which one field is mandatory:)
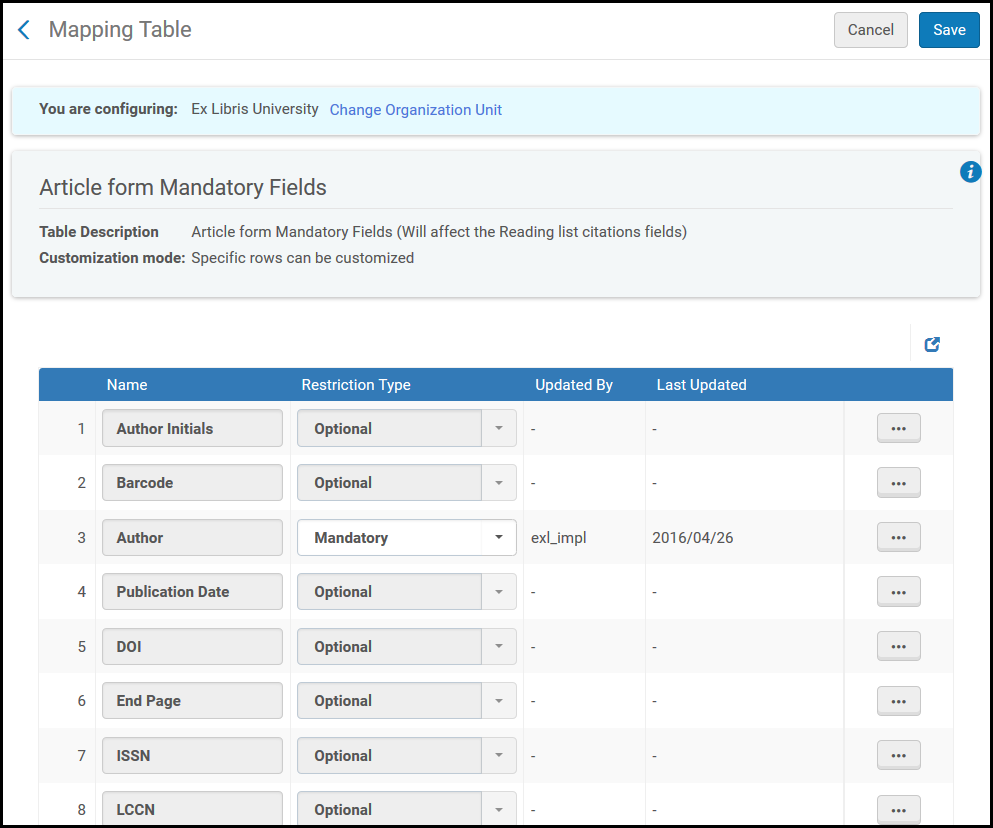
- On the Mapping Table page for an article or a book (Configuration Menu > Fulfillment > General, select Article Form Mandatory Fields or Book Form Mandatory Fields), select Customize for the fields you want to be mandatory when configuring a resource sharing request.
- In the Restriction Type column, select Mandatory.
To restore a field to its default value, select Restore.
- Select Save. The indicated fields display as mandatory on the relevant Resource Sharing Lending Request or Resource Sharing Borrowing Request page.
- On the Mapping Table page for an article or a book (Configuration Menu > Fulfillment > General, select Article Form Mandatory Fields or Book Form Mandatory Fields), select Customize for the fields you want to arrange into a group.
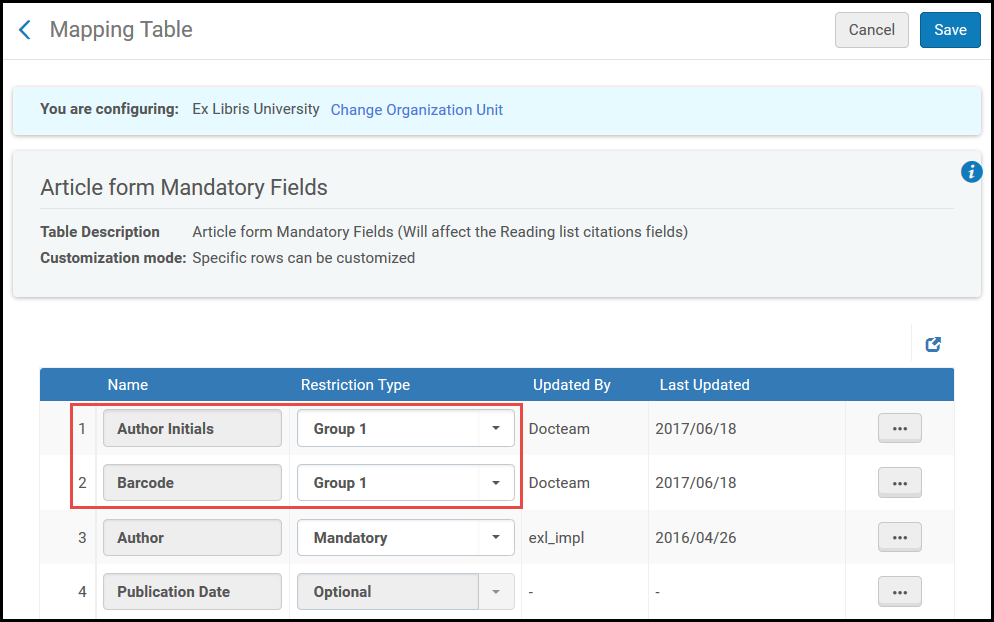 Mapping Table Page – Configuring Groups
 - In the Restriction Type column, select Group 1 (or another group). The indicated fields belong to the same group.
To restore a field to its default value, select Restore.
- Select Save. At least one of the indicated fields must be configured on the relevant Resource Sharing Lending Request or Resource Sharing Borrowing Request page.