Working with Record Templates
- Cataloger
- Cataloger extended
- Catalog Manager
- Catalog Administrator
All template values are hardcoded and cannot be modified for the default publishing settings.
Private, Shared, and Community Zone Templates
Templates may be private or shared among catalogers:
- Private templates are only available to the user who is logged in.
- Shared templates can be used and edited by any user who has permission to work with templates.
- Both private and shared templates can be contributed to the Community Zone, where templates can be shared between institutions. For information on contributing templates to the Community Zone, see Contributing to the Community Zone - Normalization, Merge, and Indication Rules.
![]()
Icons in the Templates List:
| Icon | Description |
|---|---|
 |
Private institution template. Only the user currently logged in can use and edit this template. |
| Shared institution template. Any user who has permission to work with templates can use and edit this template. | |
| Network template. Network templates are always shared. Any network user who has permission to work with templates can use and edit this template. | |
| Community Zone template. CZ templates are always shared. Any CZ user who has permission to work with templates can use and edit this template. |
Out-of-the-box (Default) Templates
Out-of-the-box templates (also called 'system' templates) are the templates that were provided by Ex Libris. These templates have the indication '(Default)' by their name. When an out-of-the-box template does not meet your requirements, use the "Duplicate" option to make a copy and modify the copy to match your requirements.
Other templates can be set as default!
Out-of-the-box templates cannot be deleted!
It is not recommended to change the default bib template during the implementation period, as it could impact the migration processes.
In addition to the MD Editor usage, the default template is applied to records added by automated processes such as records added using an API or through purchase requests.
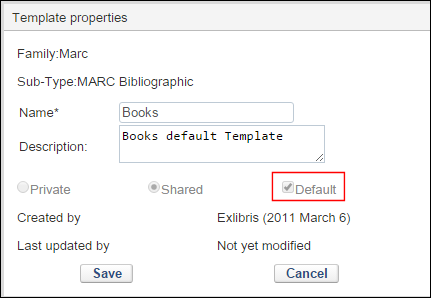
Out-of-the-box templates are identified as "Default" in its template properties (see below). Note that such templates must contain default values for any mandatory fields/subfields (see Editing Fields) to ensure that automatically-created records have the minimum required information.
For holdings records, the Default holdings template can be used outside of the MD Editor, such as when placing orders through Acquisitions or doing a repository import of holdings records, if the use_marc_record_holdings_template customer parameter is set to true; see Configuring Other Settings for more information.
The Default template is applied to records before normalization processes are applied to these records. See Working with Normalization Processes
Using the Form Editor When Creating Templates
The form editor for the 006 and 008 fields presents only the relevant options for the current type of record as identified by Type of record (position 6) and Bibliographic level (position 7) in the LDR field. You may need to change the LDR for these positions to be able to view the options that you want to incorporate into your template for the 006 and 008 fields.
Working with Existing, Locally Created Templates
| Option | Available for | Description |
|---|---|---|
| New Record from Template |
Institution templates
Network Zone templates |
Select to create a new bibliographic record from the template.
If you select a Network Zone template, by default the record is created in the Network Zone. To create the record locally, select File > Options New > Placement of new records and templates options and select Local within this dialog box.
|
| Edit | Institution templates | Select to edit the template (available only for local templates). |
| View | All templates | Select to view the template in cases when you cannot edit it. |
| Duplicate | All templates | Select to duplicate the template, so you can modify the copy and create another template based on this template. |
| Set as Default | Shared institution templates | Select if you want the template to serve as the default template for newly created records. The Default option is not available when Private is selected. |
| Contribute to CZ | Institution templates Network Zone templates |
Select to contribute this template to Community Zone (if you have this capability). |
| Make Private | Shared institution templates | Select to make the template private. Only the template creator can change template access from Shared to Private. Alma moves the template made private from the Shared folder to the Private folder. |
| Share Template | Private Institution templates | Select to share template with other users in your institution (available only for local templates). |
| Properties | All templates | Select to view and modify the template properties, such as its name. |
| Delete | Institution templates |
Select to delete the template (available only for local templates). |
Editing Template Properties
Use the procedure below to edit template properties for an existing template:
- On the MD Editor page (Resources > Cataloging > Open Metadata Editor), select the Templates tab.
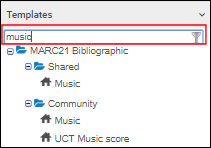
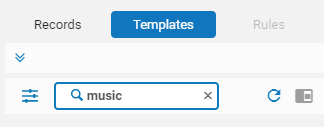
- Enter the template name in the search box.
- Select the template whose properties you want to modify and select the Properties option. The Template Properties dialog box appears
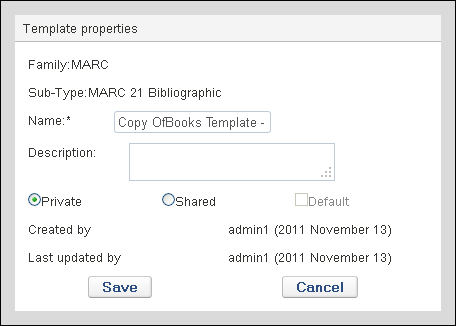 Template Properties Dialog Box
 - Modify the following template properties to match your requirements:
- Name – You may rename the template. This is a required field.
- Description – Enter or modify the description to more specifically identify the template. This is especially useful when contributing templates. See Contributing to the Community Zone - Rules and Templates for more information.
- Private – Select this option to restrict access to the template. Only the template creator can change template access from Shared to Private. The Default option is not available when Private is selected.
- Shared – Select this option to make the template available to other users.
- Default – Select this option if you want the template to serve as the default template for newly created records. The Default option is not available if you have selected the Private access option.
- Select Save.
Creating a New Template
- Open an existing record in the MD Editor (under the Records tab).
- Select File Save > Save as Template. The Save as Template dialog box opens.
- Enter/select the following:
- Name (required)
- Description
- Private or Shared template
- Default if you want this to be the default template that opens when creating a new record.
- Select Save. The new template is saved under the Templates tab and appears with the local institution icon.
Menu Bar of the Templates Area

| Action | Description |
|---|---|
| Save Menu | |
| Save Record (Ctrl+S) | Select Save to save your work, or select the arrow next to it to open the list of Save options. |
|
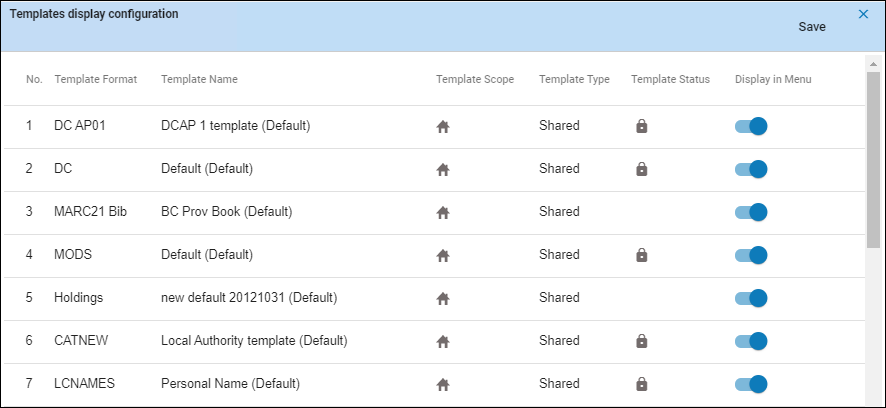
New Menu The New menu presents a list of templates for the different types of entities that you may want to create. This list varies depending on the templates that you have identified to appear in the New menu. This list can be customized with the Templates display configuration option.
|
|
| Templates Display Configuration |
Select to hide or display templates in the New menu. This allows you to display only the templates that you work with, and make the list of available templates shorter.
To customize the list of templates that appear in the New menu:
New templates can easily be created from the records on which you are working. See Save as Template.
|
| Placement Options | Appears only for Network Zone consortia members. Select where to save new records, templates, and rules - whether locally or in a network institution. Note that this selection is per user. 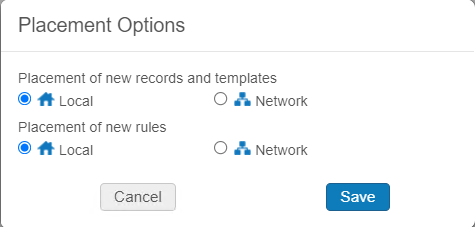 |
|
Template Actions Menu See Template Actions. |
|
|
Editing Actions Menu
|
|
|
Add Field (F8) |
Adds a new empty row that can be set with a field value when cataloging.
When the field/row being added is a control field such as the LDR, 005, or 008, the space for the first and second indicators does not appear. For some fields, you need to be certain to enter the beginning zero to make it a full three-digit field for the first and second indicator to appear. Refer to the figures below.
  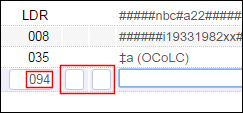 |
| Add Subfield (F9) | Adds a new subfield with the defined separator, for example $$ or ‡, to allow inline cataloging of the active field. |
| Remove Field (Ctrl+F6) | Use this option to remove one or more fields.
Select the row you want to delete or use Ctrl+select to select multiple rows, and then choose Remove Field or Ctrl+F6. |
|
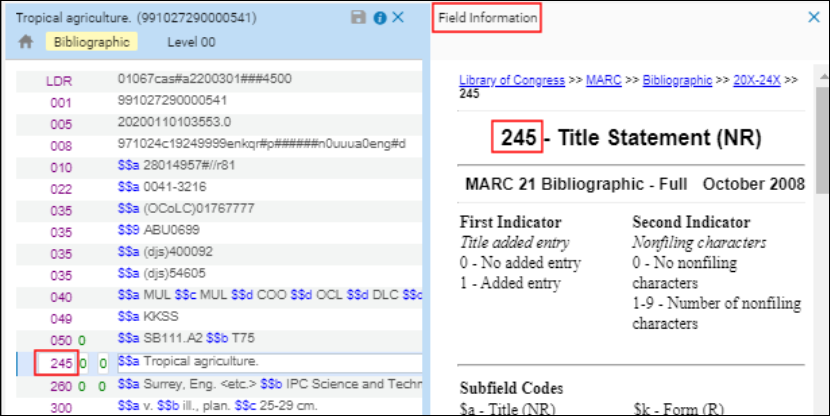
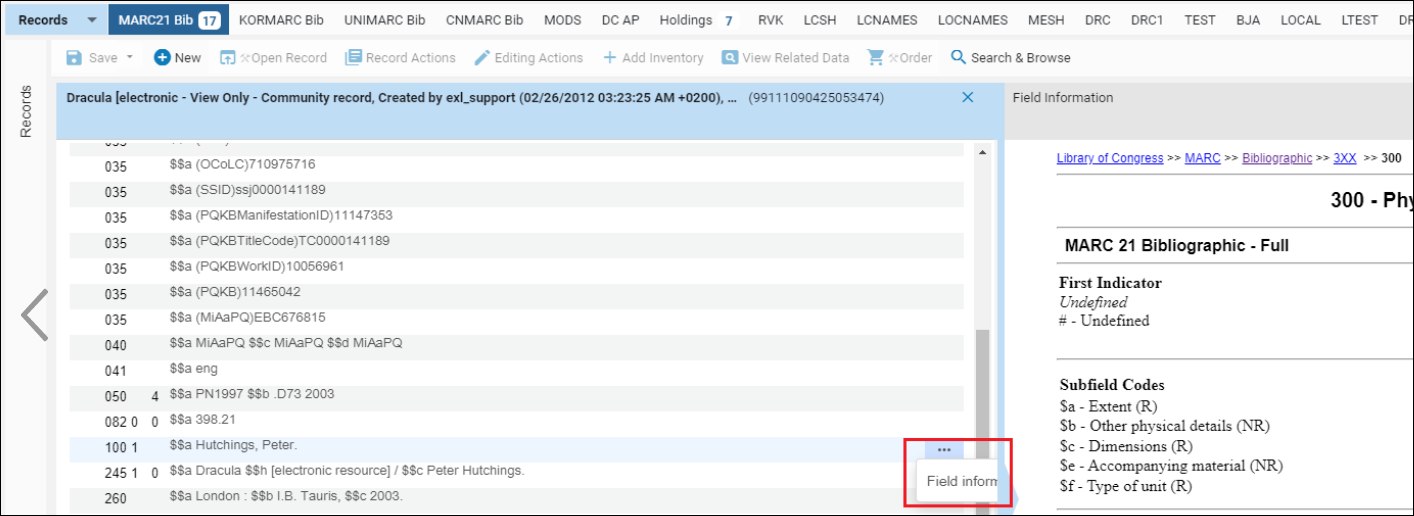
Select this option to display the vocabulary explanation for the field that you are editing. The field information appears in the editor split mode next to the record that you are editing.
Alt+F is per field. To display field information of another field, select Alt+F again. Alternatively, to display the Field information, select
Field Information is controlled by the Help URL, see Editing Fields. |
|
| Cut (Ctrl+X) | Cuts the selected text. |
| Copy (Ctrl+C) | Copies the selected text. To copy multiple fields simultaneously, press Ctrl and select all the fields to be copied. |
| Paste (Ctrl+V) | Pastes text that was previously cut or copied. Fields are pasted at the cursor location. Pasting multiple fields simultaneously pastes the fields in their numerical sort order. |
|
Runs pre-configured normalization routines. Normalizations are intended to correct or update metadata records. For example, sorting a record's fields, removing empty fields, or stripping out fields containing order information. See the enhance the record procedure and Working with Normalization Rules for more information. When working on a Network Zone record, this functionality is applied only to shared fields and not to local fields. If you want to run a normalization rule on a local field, you can do so using one of the Bib normalization jobs (see Running Manual Jobs on Defined Sets), which take into account only local fields. |
|
| Expand from Template (Ctrl+E) | Expands a record's data fields using a specified template. The record may be any of the following types: bibliographic, holdings, and authority.
When multiple panels are open in the Metadata Editor, the Expand from Template function is applied to the panel that is the focus. See Expanding a Record from a Template for more information.
Network Zone templates are available for an institution to be used when cataloging Community Zone managed authorities such as GND and BARE.
|
| Search and Browse Menu | |
| Browse Shelf Listing (Alt+C) | Displays the following options in order for you to do a call number browse:
This functionality is also available by selecting Resources > Cataloging > Browse Shelf Listing. When you select the link in the Description column for a call number, the bibliographic record opens in the Metadata Editor for editing. When you select the Holdings link in the Level column for a call number, the holdings record opens in the Metadata Editor for editing. The way in which this browse works cannot be configured.
|
|
Browse Bibliographic Headings (Alt+H) |
Use this option to view bibliographic headings determined by the following search criteria that you select:
See Browsing Bibliographic Headings for more information. This capability can also be accessed from Resources > Cataloging > Browse Bibliographic Headings. |
| Search Resources (Alt+E) | Exclude the record from being searched by external systems. |


