
Managing Search Queries and Sets
Any role that can perform a repository search can save a query in order to create a set and manage sets (a user can only manage sets created by that user).
However, users can do so only for content types with which a user is allowed to work according to the user's role.
The following roles are required depending on the content type of the set:
- For Resource Management content type sets, one of the following roles is required:
- Electronic/Digital Inventory Operator
- Repository Manager
- For user sets, one of the following roles is required:
- User Manager
- User Administrator
- To remove records from sets created by others, you must have the Repository Manager role.
- To see the combined results of sets made by other users, you must have the Repository Manager role.
Types of Sets
- Itemized sets – Static sets of individual items that are manually selected or uploaded by the librarian (see Creating Itemized Sets),
- Logical sets – These are the results of a saved search query, and are created dynamically each time the search is run (see Creating Logical Sets).
Set Content Types
Sets can be created from several content types. Your ability to create a set of a certain content type depends on your permissions, as described in the Permissions section above.
- User sets
- Resource Management sets
- All Titles
- Collections
- Digital Files
- Digital Titles
- Electronic Collections
- Electronic Portfolios
- Electronic Titles
- Physical Holdings
- Physical Items
- Physical Titles
For information, see Creating Batches of Records (7:14 min).
Managing Sets
Sets are managed on the Manage Sets page (Admin > Manage Jobs and Sets > Manage Sets).

For more information on Facets, see New Layout > Facets.
Manage Sets Toolbar
The following functionality is displayed in the Manage Sets toolbar:
| Field/Icon | Description |
|---|---|
 Refresh Refresh |
Refreshes the Manage Sets page. |
 Select/Deselect all items Select/Deselect all items |
Selects all or deselects all items only in the displayed list. If there are many sets that span across numerous pages, only the items on the current page are selected/deselected. |
 Search Search |
Search list results by set Name or by the Created by user ID. In the drop-down field, select Name or Created by and enter the criteria for either option.
Use asterisk ( * ) wildcard character to search for a string that begins with the searched characters. For example: search for “ser*” to search for “serials” along with “series” and ”serology”. |
Sort by: Ascending/Descending Ascending/Descending |
Sort the list of Sets by either Name or Creation Date. In the drop-down field, select the option to sort. Additionally, select the Ascending or Descending button to display the results in ascending or descending order according to the option selected (Name or Creation Date). |
| Filter | Scope:
Users can filter the displayed sets as follows:
|
| Status:
Presents the option to filter the sets by whether the sets are active, inactive, or all (for both inactive and active sets). An Active set refers to whether the set can be selected when running a manual job.
An Inactive set refers to a set that cannot be selected by users when running a manual job.
|
|
| Delete | When one or more sets are selected, the Delete button is displayed in the toolbar. Select this option to Delete a set. Select Confirm in the Confirmation Message dialog box.
You can delete only sets that you created. A Repository Manager can delete any set. |
 Export Export |
Exports the selected sets to Excel (*.csv format). Only the first 100,000 records are exported. |
 Enable/Disable Split Screen Enable/Disable Split Screen |
When a set is selected in the Manage Sets screen, the screen splits to display an additional screen indicating associated information with the selected set. Users can enable/disable the split screen functionality by selecting either one of the following two buttons .
For more information, see Split View. |
| Create Itemized Set | Creates a static set of individual items that are manually selected or uploaded by the librarian (see Creating Itemized Sets). |
| Create Logical Set | Creates a saved search query, and is dynamically updated each time the search is run (see Creating Logical Sets). |

Manage Sets Page Actions Menu

| Action | Description |
|---|---|
| Content | Runs the saved search query and displays the results. |
| Duplicate | Copy a set. The duplicated set is added to the Manage Sets page with the words Copy of added as a prefix to the set name. |
| Itemize | Convert a logical set to an itemized set. Select Confirm in the Confirmation Message dialog box; see Converting Logical Sets to Itemized Sets. |
| Combine Sets | Create a new set based on the members of two existing sets; see Combining Sets. |
|
Filter Set |
Presents the option to filter the set using an indication rule. Records will be included in the set when the indication is true. See Filtering Sets for more information. |
| Delete | Delete a set. Select Confirm in the Confirmation Message dialog box.
You can delete only sets that you created. A Repository Manager can delete any set.
|
| Action | Description |
|---|---|
| Content | Displays the results of the saved set. |
| Add Members to Set | Display the members (results) of the saved set; see Viewing Members (Itemized Sets Only). |
| Duplicate | Copy a set. The duplicated set is added to the Manage Sets page with the words Copy of added as a prefix to the set name. |
| Combine Sets | Create a new set based on the members of two existing sets; see Combining Sets. |
| Delete | Delete a set. Select Confirm in the Confirmation Message dialog box.
You can delete only sets that you created. A Repository Manager can delete any set.
|
Creating Itemized Sets
- On the Manage Sets page (Admin > Manage Jobs and Sets > Manage Sets), select Create Itemized Set. The Itemized Set Details page opens.
 Itemized Set Details page
 - Enter the set details in the respective fields. Set name is a mandatory field and must be unique.
The set name cannot contain special characters (for example, &, #, $, %).
- You may optionally include additional information for the set by including a Description or Note.
- The options that are available for Set content type depend on your permissions as described at the top of this page. For Rapido environments, this field is set to All Titles if you select Discovery from the Content Origin field.
- By default, the set is designated as a Private (
 ) set. This means that the set is only available to you. If you deselect the checkbox (
 ), the set becomes a public set and is available to all other users.
 - By default, the Status is set to Active (). Optionally, deselect the checkbox () to make the set Inactive. Inactive sets cannot be selected by users when running a manual job.
- The Content Origin field indicates the origin of the source records, which is set to Institution only.
- Add records to a set using one of the following methods:
Method Description From search After entering a set name and defining the other fields, select Create. A search page opens, depending on the content type you selected.From file Select a file in the Add Contents from File to Set section that contains the identifiers (MMS ID, ISSN, ISBN, and so forth).Do not select Add Members to Set since this has no functionality when adding records to the set by uploading a file.The imported file must be a text file (.txt or .csv and the files must be encoded as UTF-8) or Excel file (.xls or .xlsx). For the data to be read, it must have the correct header at the top of the column. If the Excel file has more than one column, it utilizes the first column of data that has a valid header type. See the table below for acceptable header types. All other information in the file is disregarded.The file must not contain any duplicate barcodes. If the file does contain some duplicate barcodes, Rapido skips all instances of them (for example, if the same barcode is mentioned twice in the file, Rapido skips both instances).Creating sets from digital representations is not supported.Header Types
Content Type Header ID Prefix When you use the 035 field option in a file (see below), the matching process to build your itemized set uses only 035 $a to create the set. Note that this is different from the matching method used in an advanced search with the Other System Number parameter: it includes the 035 $9, however, this field is not accepted when creating an itemized set.The header column should have only one value for each line, meaning only one identifier for each line. For example, if an MMS record has several ISSN values, only one should be included in the imported file.All Titles - MMS ID
- ISSN (matches on both active and non-active fields (022 $a,z) )
- ISSN_A (matches only on active fields (022 $a) )
- ISBN (matches on both active and non-active fields (020 $a,z)
- ISBN_A (matches only on active fields (020 $a) )
- OCLC number
- 035 field
99 Digital files PID When creating itemized sets from analytics reports, this is the IED (not the Rep ID).13 Digital titles - PID
When creating itemized sets from analytics reports, this is the IED (not the Rep ID).
- ISSN
- ISBN
- OCLC number
- 035 field
11 Electronic collections PID 61 Electronic portfolios - PID
- Portfolio ID
53 Electronic titles - PID
- ISSN
- ISBN
- OCLC number
- 035 field
51 Physical items - Item ID (or PID or Item PID)
When creating itemized sets from analytics reports, this is the IEP (21) or the Physical Item ID (23) (not the bibliographic MMS ID).
For more information, see Record Numbers. - Barcode
21, 23 Physical titles - PID
When creating itemized sets from analytics reports, this is the IEP (21) or the Physical Item ID (23) (not the bibliographic MMS ID).
For more information, see Record Numbers. - ISSN
- ISBN
- OCLC number
- 035 field
21, 23 Physical holdings - HOLDING ID
- HOLDINGS ID
User - Barcode
- User name (default primary ID)
- PRIMARYIDENTIFIER
- Institution ID
Sets that have PIDs as headers import successfully. However, due to a known issue, you cannot view the members of such sets.For more information, see the Create Itemized Sets by Uploading List of Identifiers video (1:53 mins).Users:When uploading users to an itemized set with an Excel file, the A1 cell must contain either the code of the identifier type used in the file or USERNAME (for the primary ID), and the ensuing cells of the A column must contain the user identifiers. Similarly, when uploading a .txt file, the first row must contain either the code of the identifier type used in the file or USERNAME, and the ensuing rows must contain the user identifiers (each separated by a carriage return). For example, if you want to upload a set of user names (default primary ID), enter the text USERNAME in the top row of your Excel/.txt file, and enter the actual user names in the ensuing cells/rows.For details on available user identifier types, see Managing User Identifiers.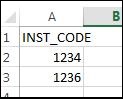 Example of an Excel File with User IdentifiersValidation is performed for the set types of Users, Order lines, and Physical items. The Add Members to Set job runs and creates a set from the file. Several instances of this job can run in parallel.
- If you select Add Members to Set after selecting a file, the file is not loaded. Select Confirm in the confirmation dialog box to search the repository for records to include in the set. The records that are then selected, and not those in the file that was previously selected, are included in the set after you select Done.
- The import file can be a maximum size of 10 MB.
- If you perform an import with invalid data, each invalid cell is ignored.
- If you import a file and then change the content type, you must re-import the file.
From analytics Select From analytics. Note that using this method you cannot add members (items, users, etc.) to an existing set. You can only use Analytics to create a new set.When creating an analytics set, only institution sets can be used, not private sets.The following options appear: Add Contents from AnalyticsSelect an option from the Analytics folder drop-down list:
- Recent reports – Reports that were recently used in the Manage Sets screen (not recently-created reports in Analytics). Select the report from the Name field. The Name field is populated for recent reports when you have created an itemized set from a report and saved it.
- My Reports – Reports to which you have permission to access (see Analytics Object List). Select the report from the Name field.
This feature works only with reports, not dashboards or DVs.
Reports must be in a shared folder for this feature to work.
Select Download Report to download the report.Similar to when creating an itemized set from a file, the Analytics report must contain a header with a valid field for creating the report. If the report contains a Title header at the top of the report, it must be removed. For more information, see Analytics - Creating sets in Alma from Alma Analytics Reports.pptx.A job creates the Rapido set from the analytics report.For a video that describes this feature, see Create a Set in Alma from an Alma Analytics Report. - When you are done, select Create.
If you use the file input method, the system runs a job to build your set that appears in the list of sets when it is done. The resulting number of records/members in the set may be more or less than the number of entries in the input file. If, for example, an ISBN has multiple matches in the Rapido database, all matches found are added as members to the set; and the opposite is true if no matches are found. Similar to other jobs that are run, you can view the job status/history on the Monitor Jobs page (see Viewing Running Jobs and Viewing Completed Jobs).
- When the Add Members to Set job is run using the file input method, the resulting Job Report includes a Validation File, if the submitted file uses a list of one-to-one identifiers, such as MMS ID, Portfolio ID, Primary ID, etc.
- When the Add Members to Set job is run using identifiers that have the potential for many matches per identifier, there is no Validation File in the Job Report.
Resource Management Sets

User Sets

Viewing and Removing Members of Itemized Sets
- On the Manage Sets page (Admin > Manage Jobs and Sets > Manage Sets), find the set and select Add Members to Set in the row actions list. A search page opens, depending on the content type. For example, for a Resource Management content type, the Repository Search page opens:
 Repository Search Members
- View members.
- For multiple members – Select the members you want to remove and select Remove Selected.
- For one member – Select Remove in the row actions list.
- Select Done.
When removing members from a set, selecting Done or using the Back button saves the changes.
Another way to remove records is to create a set of unwanted records, then use the Combine Sets operation (see Combining Sets) with the 'Not' operator.
Editing Itemized Sets
- On the Manage Sets page (Admin > Manage Jobs and Sets > Manage Sets), scroll to the itemized set you want to edit and select it. The Set Details are displayed on a split screen.
 Set Details Page Itemized Set to Edit
 - In the split screen, hover over the section to edit and select the Edit icon (
 ). Modify the set details as required. The Set name is a mandatory field and must be unique (see Adding Itemized Sets for a description of the fields).
 - When you navigate away from the updated section, Rapido saves your changes with the following indication (
 ).
).
- On the Manage Sets page (Admin > Manage Jobs and Sets > Manage Sets), scroll to the itemized set to which you want to add items and select the Content button. The Edit page opens.
- In the Search bar, enter the search parameters for the set you want to add items for.
- Select the items you want to be included in the set (or select Select All).
- Select Done. The selected records are added to the set.
You can continue searching, selecting, and adding records by following steps 2-4 above. When you are finished, select Done. The Manage Sets page opens indicating that the set has been successfully saved.
Identifying Records Matching to Rapido Records Based on Itemized Set
Institutions often get a list of record identifiers used in external systems (e.g. in a vendor system). You load this list to Rapido and easily get a list of what you already have in Rapido and what you do not have in Rapido, in order to facilitate your purchasing decisions.
-
Load your input file of identifiers into Rapido (see Creating Itemized Sets). Rapido runs a job to create the set and produces the Add Members to Set report.

- Do one of the following:
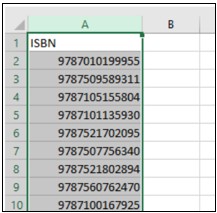
- To download a file of records for which a match was not found with Rapido records, select the counter for Non-matched Records to download a .csv file of identifiers for which a match was not found with Rapido records, for example:
- To download a file of records matching Rapido records, select the counter for Total added to set to download a .csv file of identifiers for which a match was found with Rapido records. The file features an additional column that indicates the ID of the records for which a match was found, for example:
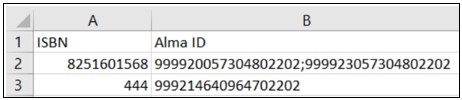
The file provides the following Rapido ID for each set content type:Set Content Type Rapido ID Collections PID Digital files PID Electronic collections PID Electronic portfolios PID Physical items Barcode Titles MMS id Users Primary ID
Creating Logical Sets
For other kinds of sets, a logical set is created by filtering the results on the search page.
- On the Manage Sets page (Admin > Manage Jobs and Sets > Manage Sets), select the Create Logical Set button. The Set Details page opens.
 Set Details Page for Logical Sets
 - Enter the set details in the respective fields. Note that the Set name is a mandatory field and must be unique.
The set name cannot contain special characters (for example: &, #, $, %).
- The options that are available for Set content type depend on your permissions as described at the top of this page. For Primo VE environments, this field is set to All Titles if you select Discovery from the Content Origin field.
- By default, the set is designated as a Private () set. This means that the set is only available to you. If you deselect the checkbox (), the set becomes a public set and is available to all other users.
- By default, the Status is set to Active (). Optionally, deselect the checkbox () to make the set Inactive. Inactive sets cannot be selected by users when running a manual job.
- The Content Origin field indicates the origin of the source records, which is set to Institution only.
- Select Create. A search page opens for the content type you selected.
- For repository sets, enter the search parameters for the set. For other kinds of sets, filter the list to determine the parameters for the set.
It is recommended not to use Keywords contains * as a basis for a logical set. A term such as Tag Suppressed (Title) equals "No" is more efficient.
- Select Save. The logical set is saved.
Editing Logical Set Details
- On the Manage Sets page (Admin > Manage Jobs and Sets > Manage Sets), scroll to the logical set you want to edit and select it. The Set Details are displayed on a split screen.
 Set Details Page Logical Set to Edit
 - In the split screen, hover over the section to edit and select the Edit icon (). Modify the set details as required. The Set name is a mandatory field and must be unique. (See Creating Logical Sets for a description of the fields).
- When you navigate away from the updated section, Rapido saves your changes with the following indication ().
Viewing the Results of Logical Sets
Editing Logical Set Queries
- On the Manage Sets page (Admin > Manage Jobs and Sets > Manage Sets), scroll to the logical set whose query you want to edit and select the Content button. The search page for the query opens.
- Change the search as required.
 Change Advanced Search Page
 - To save the set, select Save and Filter Query. The Set Details page opens. Edit any other details as required and select Save.
Converting Logical Sets to Itemized Sets
- On the Manage Sets page (Admin > Manage Jobs and Sets > Manage Sets), scroll to the logical set that you want to convert to an itemized set and select Itemize in the row actions list. The New Itemized Set page opens with the set name filled in:
 New Itemized Set Page Convert Logical Set to Itemized Set
 - Modify the set details as required. See Creating Itemized Sets for a description of the fields.
- Select Create. A confirmation message opens.

Combining Sets
- On the Manage Sets page (Admin > Manage Jobs and Sets > Manage Sets), scroll to the set whose members you want to combine with another set and select Combine Sets in the row actions list. The Combine Sets page opens.
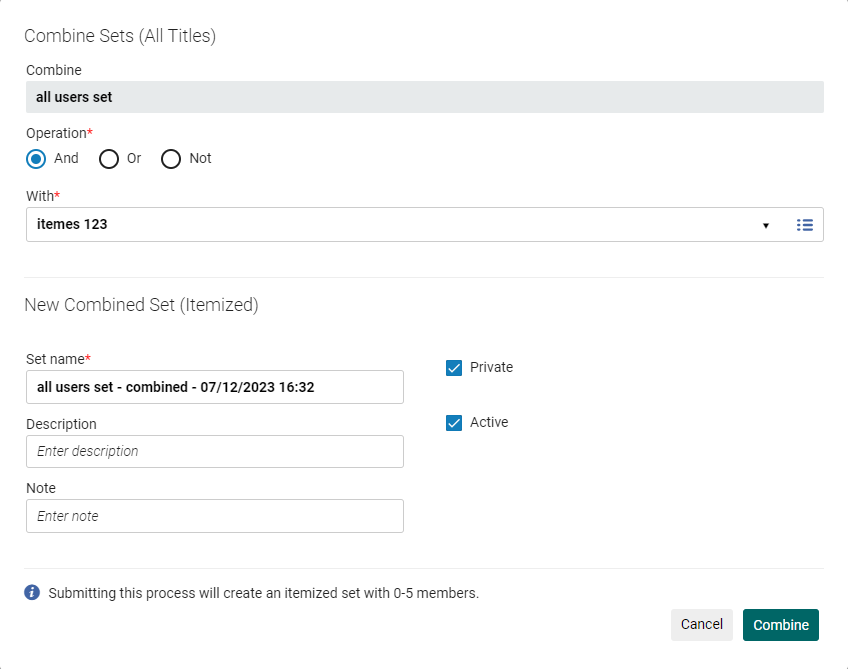 Combine Sets page
 - Select an Operation from the Operation list:
- And – Include only the members in common between the two sets in the new combined set.
- Not – Include only the members that are in the first set and not in the second set in the new combined set.
- Or – Include all of the members in both of the sets in the new combined set.
- In With, select the set that you want to combine with the first set you selected.
- In the Set Name field, type a name for the combined set or use the default name from Rapido.
- Select the Combine button. A confirmation message is displayed.
 A job is run to combine the sets. After the job finishes, the new set is added to the list of sets (you must refresh the list to see the new set).
Combining Sets — Example
- Create set X, set Y, and set Z.
- For set X, select Combine sets in the row actions list.
- Combine set X with set Y:
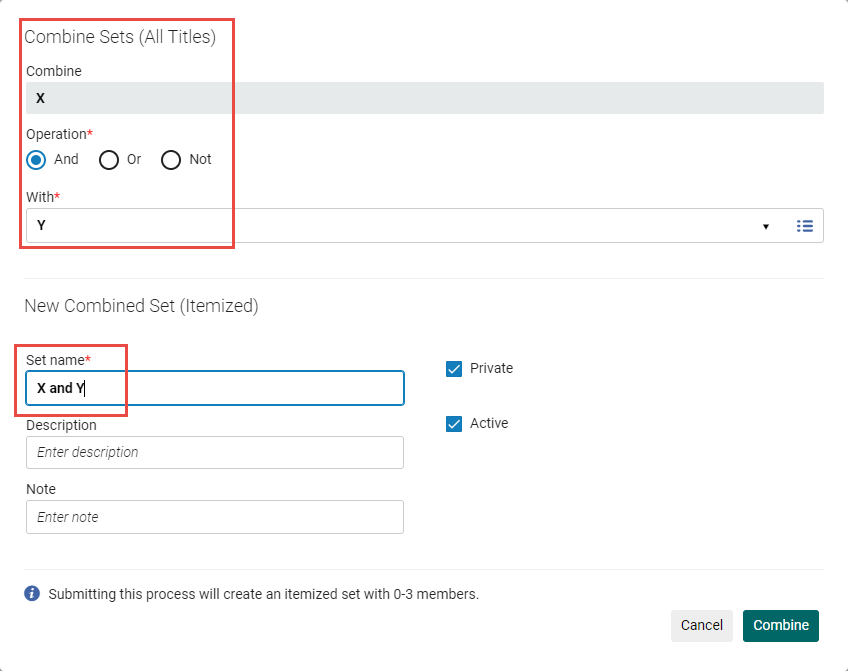 Combine Set X and Set Y
 - For the new X and Y set, select Actions > Combine sets.
- Create set (X and Y) or Z:
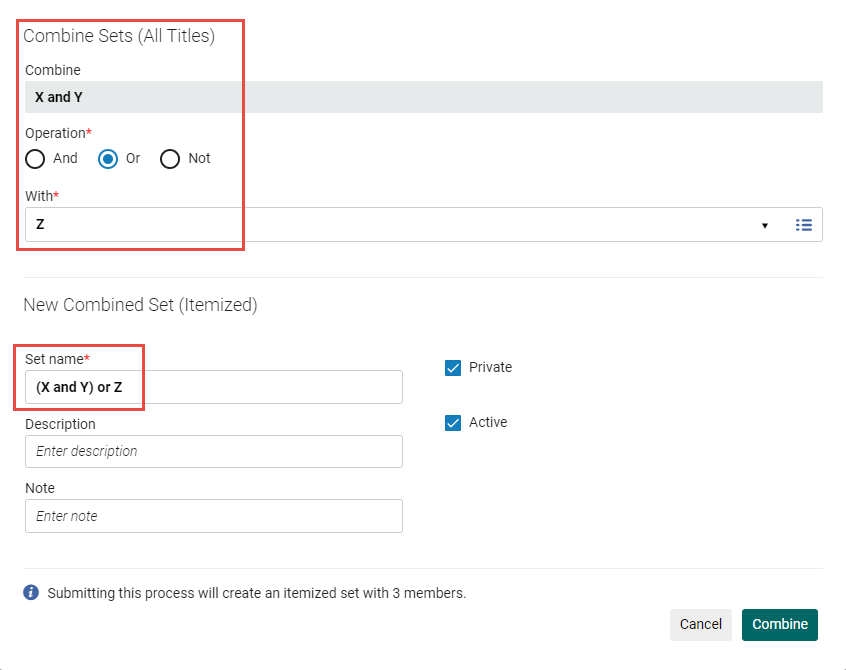 Create (X and Y) or ZSet (X and Y) or Z is now available:
 Set (X and Y) or Z
Creating a Titles Set from an Items, Portfolios, or Files Set
- Title sets can be created only from Resource Management content types.
- To create a title set from a logical set, you must first convert the set to an itemized set.
- On the Manage Sets page (Admin > Manage Jobs and Sets > Manage Sets), select Create title set in the row actions list for an itemized set of physical items, electronic portfolios, or digital files. The Create Titles Set (Itemized) page opens with information concerning the new title set - such as the date and time that the set was created - added to the set name.
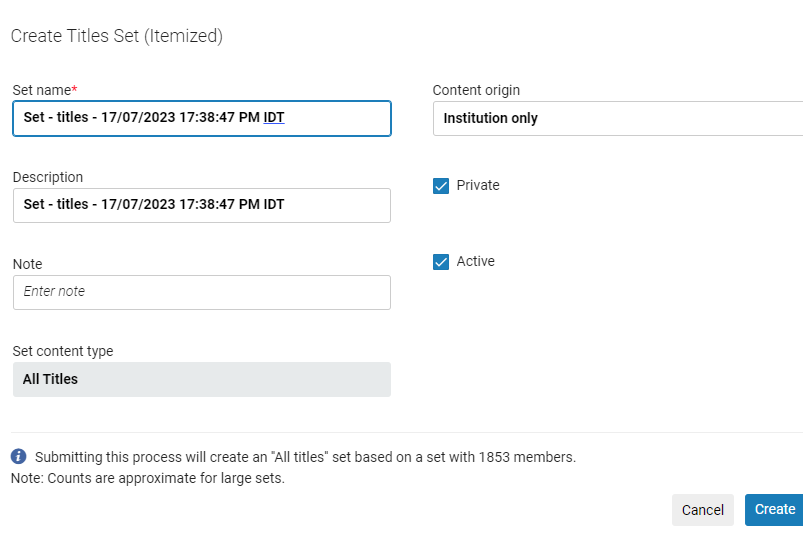 Create Titles Set (Itemized) page
 - Fill in the Description and Note fields (optional) and select Create. A confirmation message appears.
The job runs and creates the title set.