
Working with Formats
Working with Formats
Users can make institution-based changes and adjustments to some components that impact their library.
To access information about the formats in the Format Library, follow the menu path Preservation > Format Library > List of Formats.

List of Formats
The List of Formats opens with the following columns containing information for each format:
The number of items shown out of the total number of items shows above the columns, along with navigation page numbers and arrows.
To search for a format in the List of Formats, type a term or keyword in the Find box near the top of the page, select the field to search, and click Go.
Click the Registry ID of the format (if it is linked/clickable) to see the information on the Registry ID in the UK National Archives Web site.
Viewing and Editing Formats
To view or edit a format, click View or Edit in the row of the format you want to examine. A page for that individual format opens with six tabs containing information for it. Some information can be edited or adjusted for the institutional library.
The following tabs are available for viewing and/or editing:
The following discussion presents formats in edit mode for the institutional library. View mode contains the same information but is completely read-only. For information on edits to the master or global library, see Adding and Editing Global Formats.
General Details
The General Details tab displays format information and allows users to select a metadata extractor and format validator.

Editing Formats/MD Extractor
The information presented on this tab includes the fields from the List of Formats (see Table) and fields described in the following table:
| Field | Description |
|---|---|
| Version | The version number of the format |
| File Extensions | The file extension associated with the format |
| Mime type | A file format identifier of the format |
| MD Extractor | The metadata extractor used with the format |
| Format Validator | The Format Validator used with the format |
| Obsolete | Indicates if the format is obsolete |
Additional fields and values may appear in the Technical Details section.
Users can change the metadata extractor and format validator for the format (if there are options available) by clicking the MD Extractor and Format Validator drop-down menus, selecting an option, and clicking Apply or Save. For more information, see Metadata Extractor Library and Format Validator Library.
Adding Fields to General Details
Although the metadata extractor is the only value that can be edited on the General Details tab, you can create additional custom fields to appear in a separate section on the page. Once added, a custom field appears on the General Details tab for every format. Institutions outside the consortium cannot see the customization of institution(s) within it.
To add a field to the General Details tab for formats:
- From the Preservation roll-over menu, select Manage Format Local Fields under the Format Library heading.
The Manage Format Local Fields page opens.
 New Format Details Form
 - Use the following table to enter values in the required fields.
Adding Local Fields Field Description UI Placement Instructions Tells the user how to enter information in the field First line of field entry, followed by text box, drop-down, etc. Value UI Type The type of data the user will enter: select text box, combo box, etc. Next to the Instructions, the field type specified appears. Field Description Describes the field Second line of field entry. - For data types requiring two or more pre-set values for a user to choose, select an existing code table from the Code Table Name field. If you don’t see the pre-set values that you need in the existing list, create your own code table using the following procedure:
- Click the Create New Table button.
A form for the table name and description opens.
 Adding a code table
 - Enter a name and description of the code table and click the Next button.
The code table form opens. The table name and description you entered populate those fields.
 Code Table Creation Page
 - To classify the code table within a sub-system, select an entry from the Sub System drop-down menu.
- Enter a code and description in the new code table row. Enter an optional language and, if you want this value to be the default on the form, click the Default Value check box. Click Create and repeat this step until you have entered all the values for this field.
 Code Table with Entries
 - In the Code Table Rows section, to change the order of the values as they will appear to the user, click the up and down arrows. To disable a value, click its yellow check mark.
- When your code table is complete, click the Save button.
- Click the Create New Table button.
- Select the code table you want to use from the Code Table Name drop-down menu.
 Code Table Name drop-down menu
 - When you have entered all required fields, click the Add button.
The system adds your local field(s). They are now part of the format template in the local section.
 New Local Information Fields in General Details
Related Applications
Applications can be associated with the formats with which they operate. To view or change the activation status of applications related to the format, click the Related Applications tab. All applications related to the rendering of the format appear in a table.
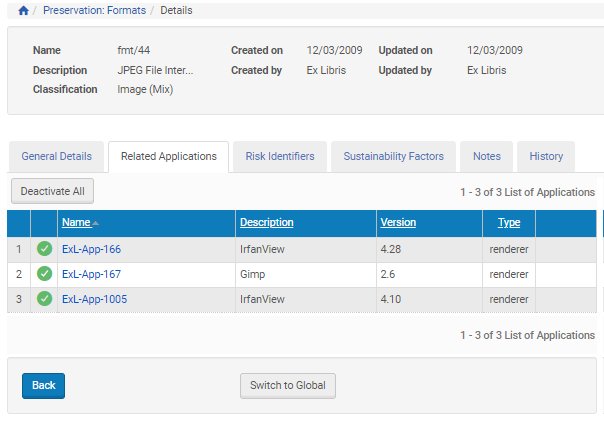
Editing Related Applications
To change the status of an application from Activated to Deactivated or vice versa, click the check mark. To deactivate all applications associated with the format, click the Deactivate All button.
Adding Fields to Related Applications
Just as you can add fields related to your library’s formats, you can add fields to your library’s related applications. The custom fields appear in the Local section of the Related Applications tab. For more details about this feature, see the Applications Library chapter of this guide.
For information on how to add a field, follow the instructions for Adding Fields to General Details.
Risk Identifiers
A Risk Identifier flags a perceived risk to the viability of a format. The risk may be a result of a format or format parameter becoming deprecated or obsolete (property- or tool-driven).
To view or change the activation status of risk identifiers, click the Risk Identifiers tab. (The following is an image of global risk identifiers. For information on local risk identifiers, see Managing Local Risk identifiers.)
Editing Risk Identifiers (Global)
The following information is displayed:
| Field | Description |
|---|---|
| Risk Name | The name of the risk identifier |
| Risk Identifier | A description of the risk identifier |
| Risk Type | Whether the risk is based on a property of the format or the tool used with the format |
To change the status of an a risk from Activated to Deactivated or vice versa, click the check mark in the Activated column. To deactivate all risks associated with the format, click the Deactivate All button.
Sustainability Factors
Sustainability factors describe a format’s fitness for use in the future preservation of digital objects, including factors of cost, stability, longevity, ease of implementation, self-documentation, and external dependencies. For more information, see http://www.digitalpreservation.gov/formats/sustain/sustain.shtml.
To access sustainability factors in the Preservation module, click the Sustainability Factors tab. The List of Sustainability Factors opens.

Sustainability Factors
For each factor, you can select a an option from the corresponding drop-down menu and/or enter text in the Note field. Clicking Apply saves your changes without taking you from the page. Clicking Save saves your changes and returns you to the List of Formats page.
Notes
You can leave general notes about the format in the Notes tab.

Notes
The following information is displayed:
| Field | Description |
|---|---|
| Created on | The date the note was created |
| Scope | Whether the note is global or local in scope |
| Notes | The text of the note |
| Created by | The user that created the note |
To add a note, type the note in the Add Note text box and click the Add Note button.
Once created, notes cannot be edited or deleted.
History
The History tab shows information about any changes made to the format since your library’s initial adoption from the master format library.

History Tab
Each change is listed by date and by the staff who supervised the changes. For additional details about the change to the field, click the plus sign (+) next to Field information. Specific information will open below.