
Creating Services
![]()
For more information about services and service types, see Services and Other App Elements.
You create services in the App Builder (see Working with the App Builder). For static content services, you must continue to create the service in the Content menu (Working with Static Content and the Content Menu). For integration services, you must continue to create the service in the AEK Content menu (Working with the Application Extension Kit).
For more information, see Add Tiles to Your App Homescreen, How to Add a Tile to an App Profile, and Creating Content Pages.
To create a new service:
- Before creating the service:
- Upload any files, images, or other contents required for the service. See Uploading Files.
- If you are creating a feed service, and you plan to use pre-configured feeds (see Configuring Default RSS Feeds), configure the feeds and ensure that the feeds are available to the relevant app roles. See also Managing App Roles.
- If you are creating a default banner service, configure the default banner images (see Configuring Default Banner Images) and ensure that the images are available to the relevant app roles. See also Managing App Roles.
- If you are creating an integration service, deploy the AEK screen using your AEK development environment (CLI) to the app. For more information, see AEK (Application Extension Kit).
- In the App Builder, in the Menu Options tab, select Add. The Create New Menu Option pane appears.
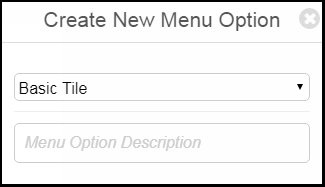 Create New Menu Option Pane
 - Select the service type:
- Basic - A basic service: a basic, non-functional tile, or one that, when selected, redirects to another service or URL.
- Content Menu Option - A static contents service.
- AEK Component - An integration service. A service that provides other dynamic content, build using the Application Extension Kit (AEK). See Working with the Application Extension Kit.
- Feeds Tile - A service that provides dynamic syndicated content from an RSS feed.
- Banners Tile - A service that presents an image marquee.
- Calendar Tile - A live tile that shows the next timetable item and opens the calendar.
- Product Integrations Tile
- Product Features Tile
- Smart Tile - A live tile that shows the next activity in a timetable or feed, and opens the calendar or the event feed:
- Day View - For React Native, a live tile that shows the next scheduled activity of the day, from any timetable or feed included in the calendar (see Feature Focus – My Calendar)
- Events - A live tile that shows the next scheduled event from a specific feed
- Nested Smart Tile - A live tile with links to multiple feeds
- Alerts Tile
- Maps Tile
- Enter a name (short description) for the service.
- Select Create. The service is created. By default, the service is enabled. The service tab appears, enabling you to configure the service. See Configuring Services.
The service is initially configured with any default system service properties, as well as any properties configured as default for the profile. See Configuring Default Service Properties and Managing Profile Defaults for Services.If you created a basic, feed, or banner service, after configuring and saving the service, you are done.Otherwise, you must save the newly created service before continuing. You can configure the service before saving it or at a later time.To prevent end-users from seeing the service while you are still working on it, configure the app roles for the service to be only ones that are not used by end-users, or disable the service, before saving it.
- For a basic service, ensure that you configure the URL, if the service is intended to open another service when the end-user selects it.
- For a feed service, ensure that you configure the feed sources (Feeds).
- For a banner service, ensure that you configure the banner images (Banners).
- For a static content or an integration service, continue with step 6 or 7, respectively.
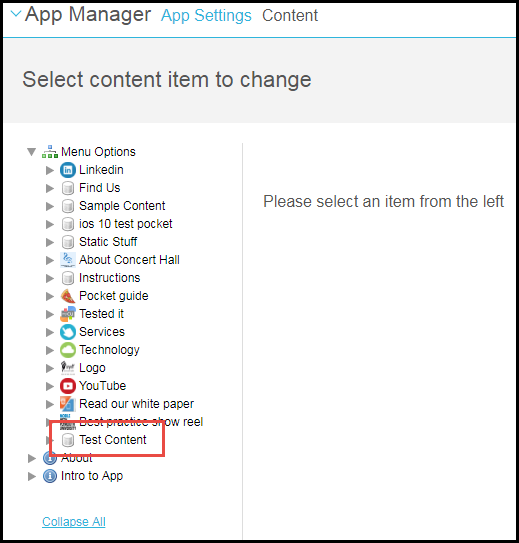
- For a static content service, open the Content menu (App Settings > Content > Content) and locate the service.
See Creative Studio for an alternate method of creating and configuring static content services.
 Content MenuAdd one or more sub-nodes to the service (see Working with Static Content and the Content Menu) with the required menu structure and/or content pages/redirects. Note that a static content service without any sub-nodes functions exactly like a basic service.Don't forget to save your changes.
 - For an integration service:
- Configure the AEK screen (after deploying the AEK screen using your AEK development environment (CLI)). You create and manage AEK screens on the the Select AEK screen to change page (AEK > App Extension Kit > AEK Screens). This page presents a list of AEK screen for use in your integration services; for information about working with lists, see Working with Lists. The only field you may want o configure is SSO protected: if using SSO authentication (see Configuring End-User Authentication Types), select Yes. The other fields (Ref, Description, GPS Enabled, and Precache) are not in use.
- Open the Select AEK menu option to change page (AEK > App Extension Kit > AEK Menu Options). This page presents a list of integration services; for information about working with lists, see Working with Lists. Edit the service and configure:
- Description - The name of the service. This is the same as the Description field that you can configure while configuring the service; see Configuring How Services Appear.
- Image Icon - Tile background image. This is the same as the Image field that you can configure while configuring the service; see Configuring How Services Appear.
- Authentication Access - The authentication access. These options (appearing on App Settings > Customer Web Services > Authentication Access) are configured together with Ex Libris during setup.
- Profile owner - Optionally select a profile. When selected, the integration service will only appear in this profile.
- Roles - Optionally select the roles for which this service appears.
- Toolbar items - The integration service screen. Note: although multiple screens are supported in the UI, the current version of campusM only supports a single screen. Add one screen and don't add any others. The only field required when adding a screens is Screen: select the screen configured in the previous step. If installing the app on a public kiosk and using LDAP authentication for the service, set Secure Prompt to Yes so that the service will prompt for a login every time it is launched. The other fields (Label, Description, and Icon image) are not in use.
- Continue with configuring the service in the App Builder; see Configuring Services. Ensure the service is enabled for all required roles; see Enabling/Disabling Services in Apps.