
Managing the Hold Shelf
This page describes how to manage the hold shelf including scanning in items at the hold shelf, cancelling hold requests, managing expired requests, etc. For a full overview of the requests workflow starting from the different ways a request can enter into the Alma system through to scanning and final processing, see Resource Requests Workflow.
For links to all the main fulfillment documentation pages see Fulfillment.
- Requests Operator
For resource sharing requests, the hold shelf period can be determined as for a regular request, or by the Request Due Date minus the Delivery Delay (days) that can be viewed in Fulfillment > Partners > Edit a Partner > General Information. This is the default option. You can change the default option in the rs_hold_shelf_expiration parameter at Configuration > Fulfillment > Other Settings (see Configuring Other Settings for Fulfillment).
- The item’s request expires (see Managing Expired Hold Shelf Items) and the item is returned to its permanent location.
- A notification is sent to the requesting patron.
Scanning Items at the Hold Shelf
Managing Active Hold Shelf Items
- Place in Queue – Indicates the place of the item in the requests queue. Select the number to open the Request Queue page (see Viewing and Handling Processes and Requests).
- Cancel request – See To cancel a request: When canceling requests for items on the hold shelf, the requests are marked as expired and appear in the Expired Hold Shelf Items page (see Managing Expired Hold Shelf Items), unless there is another request in the queue that can be activated. When canceling a resource-sharing borrowing request on the hold shelf, the request also appears in the Resource Sharing Borrowing Requests list if the item is in a process (see Managing Resource Sharing Borrowing Requests).
- Update expiry – Opens the Update Expiration Date dialog box, in which you can change the request expiration date.
If the Notify Patron checkbox is marked (default), the Hold Shelf Expiry Update Letter is sent (see Letters). - Mark as missing – Opens the Mark as Missing page, on which you can mark an item as missing. If the request is not connected to an item, all items under this holding are marked as missing.
- Waiting for Pickup – Active hold shelf items that are waiting to be picked up by a patron, as described above. Note that if you edit a request in order to change a Pickup At location from one location to another, there is no indication that the item should be moved to the new location.
- Held by Patron – Requested items that are currently held by a patron. When selecting this tab, the name of the page changes to At Reading Room Items. Select from the following options:
- Receive from patron – Receive the item from the patron. The item is transferred to the On Shelf (Not Final) tab.
- Print slip – The Print Slip button and links on this tab are not currently in use.
- Receive from Patron – Select multiple items on the list to be returned to the hold shelf in bulk.
- On Shelf (Not Final) – Items that have been loaned to a patron but are still on the shelf in the reading room. Select from the following options:
- Loan to patron – Transfers the item to the patron. The item is transferred to the Held by Patron tab.
- Print slip – The Print Slip button and links on this tab are not currently in use.
- Loan to Patron – Select multiple items on the list to be loaned to the patron in bulk from the hold shelf.
Cancelling a Hold Request
You can cancel a hold request as required. When you do so, you must select a reason for the cancellation from a predefined list of reasons.
- Select Cancel request for the relevant item. The Confirm Request Cancellation page opens.
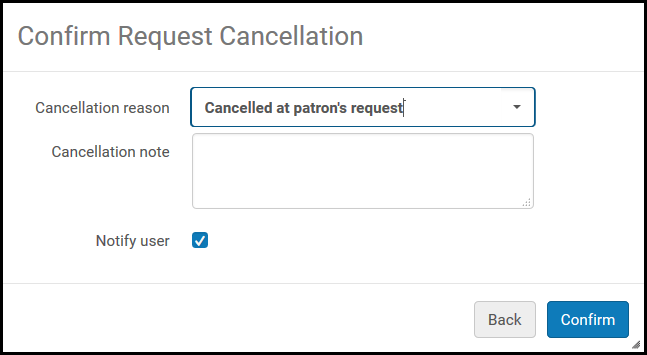 Confirm Cancellation Page
 - From the Cancellation reason drop-down list, select a reason for the cancellation. For additional information about the options in this list, as well as information about customizing the list for your institution, see Configuring Request Cancellation Reasons.
Adding a cancellation reason does not trigger any action other than the cancellation request itself. For example, it does not mark an item as "missing."
- In the Cancellation note field, enter notes as required.
- To send an email notifying the requester that the request has been canceled and that the item has been returned to its permanent location, select the Notify user check box. The email letter that is sent is the Ful Cancel Request Letter. To configure the email, see Configuring Alma Letters.
If the date by which the request is needed has passed, a letter is no longer sent.
- Select Confirm. The request is canceled and the item is returned to its permanent location. The next step for the item is displayed at the top of the page.

Managing Expired Hold Shelf Items
-
On the Expired Hold Shelf Items page (Fulfillment > Resource Requests > Expired Hold Shelf), select the criteria for sorting the results in the Sort by field.
The default option that is displayed in the Sort by field is the option you selected for hold shelf sorting at the circulation desk, in the Hold shelf sorting field on the Circulation Desk – General Information page (see the Has hold shelf description in Circulation Desk – General Information Fields table in Adding a Circulation Desk).The Expired Hold Shelf option appears only when you are at a circulation desk; see Library/Desk Selector in The Persistent Menu.When the circulation desk is also a reading room, the Items drop-down list appears, where you select the type of items you want to view: Picked up by user or Waiting for pickup. -
Select one of the following tabs:
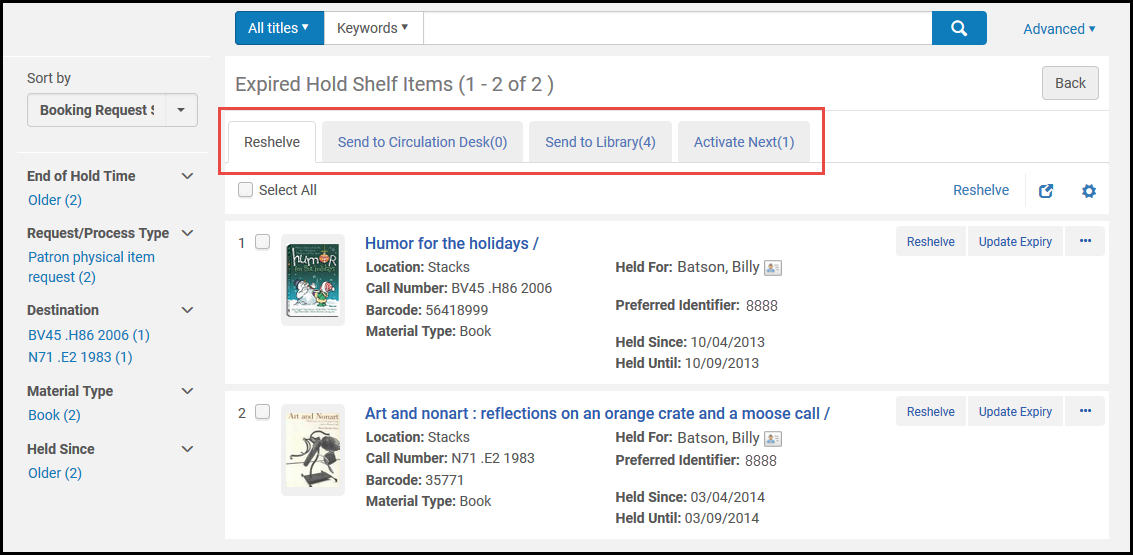 Expired Hold Shelf Tabs
-
Reshelve - Displays all expired requests for items belonging to the current circulation desk and for which there is no other request in the queue.To reshelve an item, select the Reshelve link beneath the item or, to reshelve multiple items, select the check boxes of the relevant items and select Reshelve.
-
Send to Circulation Desk - Lists all requests for items belonging to a different circulation desk in the same library or that are requested for pickup at another desk within the same library.To send an item to another circulation desk, select the Transit link beneath the item or, to send multiple items, select the check boxes of the relevant items and select Transit. The Ful Transit Slip letter is printed and the item is put in transit.
-
Send to Library - Lists all requests for items belonging to a different library or that are requested for pickup at another library.To send an item to another library, select the Transit link beneath the item or, to send multiple items, select the check boxes of the relevant items and select Transit. The Ful Transit Slip letter is printed and the item is put in transit.
-
Activate Next - Activates the next request in the queue, which cancels the first request and makes the item available to the next requester.To make an item available to the next patron, select the Activate next link beneath the item or, for multiple items, select the check boxes of the relevant items and select Activate next. The following occurs:
- A cancellation message is sent to the current requester, and the request is deleted.
- The item is placed on the active hold shelf for the next patron who has requested this item.
- A call slip is printed for the item with the new requester’s details.
-
Send to Institution - Lists all requests for items belonging to a different institution or that are requested for pickup at another institution.
-
To update the request expiration date for an item in any tab, select the Update expiry link beneath the request and modify the expiration date in the Update Expiration Date dialog box.