
Digitization Processing
This page describes how to work with digital files, including the basic workflow, delivering digitized items to patrons, attaching digitized items to send to a patron, etc. It also describes the management of digitization using the Actions menu for cancelling requests, changing physical requests to electronic and vice versa, using View it for the Alma Link Resolver, etc. For a full overview of the requests workflow, starting from the different ways a request can enter into the Alma system through to scanning and final processing, see Resource Requests Workflow.
For links to all the main fulfillment documentation pages see Fulfillment.
- Work Order Operator
- Fulfillment Services Manager
- Institution – The digital file is owned and managed by the institution as part of the repository. Access to the file is controlled by access rights.
- Patron – The patron receives the digital file, or a link to the digital file, in an email.
Digitization Department Workflow for a Physical Item
- The workflow commences when the requested physical item arrives at the digitization department and its barcode is scanned (see Scanning Items). The item acquires the status Digitization. For information on requests to digitize physical items, see Creating a Request.
Upon arrival of the physical item, the digitization request is sent for review to determine whether there are elements that require special attention based on the review rules preconfigured by an administrator (see Configuring Digitization and Copyright Rules). These include:
- Copyright clearance – If required, the library receives a copyright license (for example, from the Copyrights Clearance Center Services) to re-use copyright-protected content.
- Approve – The request is approved and the digitization process continues.
- Reject – The request is rejected. The reason for rejection is specified.
- Approval of a digitization request can take place at any point in the digitization workflow, but must be before the Delivery stage. For details on approving/rejecting a request, see Approving/Rejecting a Request for Digitization.
- Notification to the requester is withheld until the request is approved.
- The item is digitized (see Digitizing Items).
- The request proceeds to the delivery stage (see Delivery of Digitized Items). Delivery is handled in one of the following ways:
- By the Add Digital Representation functionality (see Adding a Representation). The digital file can be searched in the Primo application.
- By the Document Delivery – Attachment – An email is sent to the requesting patron with the digital file as an attachment (see Attaching Digitized Items to Be Sent to a Patron).
- By the Document Delivery – Link – An email is sent to the requesting patron with a link to download the digital file (see Attaching Digitized Items to Be Sent to a Patron).
The delivery method is defined by preset rules (see Configuring Digitization and Copyright Rules).
Approving/Rejecting a Request for Digitization
- Fulfillment Services Manager

- Filter the requests - In addition to the Status and Associated With Course filters, you can select Filter by this Record from the row actions list in a request row to view only requests for that record, including all other requests for the same MMS ID, ISBN (ISBN/10 or ISBN/13 are both returned), or ISSN/Volume/Issue. In the latter case, items with no issue but the same ISSN and volume, or no volume and no issue bu the same ISSN, are returned also.
When entering this page after selecting Save and Manage Approval on the Edit Reading List Citation page, Filter by this Record is selected by default.
- Update the request's expiration date - Select Update Expiry from the row actions list to open the Update Expiration Date dialog box. Change the request expiration date and select Save. This action is possible only if the request already has an expiration date.
- Approve or reject the request - See below.
- View relevant digitization and copyright rule - To view the digitization and copyright rule that resulted in this request requiring manual approval (instead of being automatically approved or rejected), select View Rule from the row actions list. A read-only version of the Digitization Workflow Setup page appears, containing information about the rule that triggered manual approval for this request.
For a video on how to find and monitor requests, as well as how to fulfill them, see Digitization Request Management. (4:24 min)
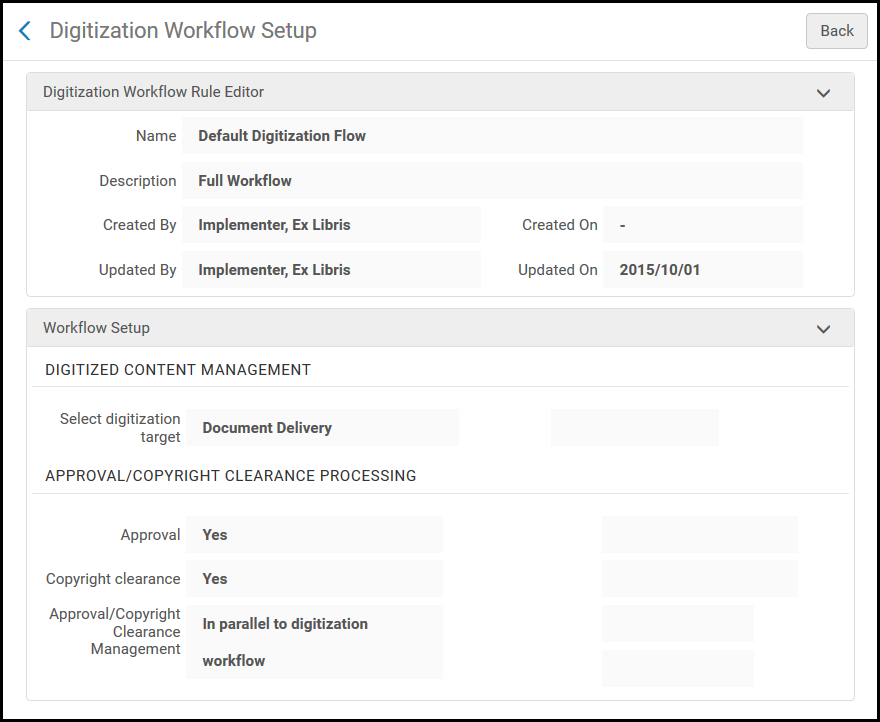 Digitization Workflow Setup Page (Read-Only)
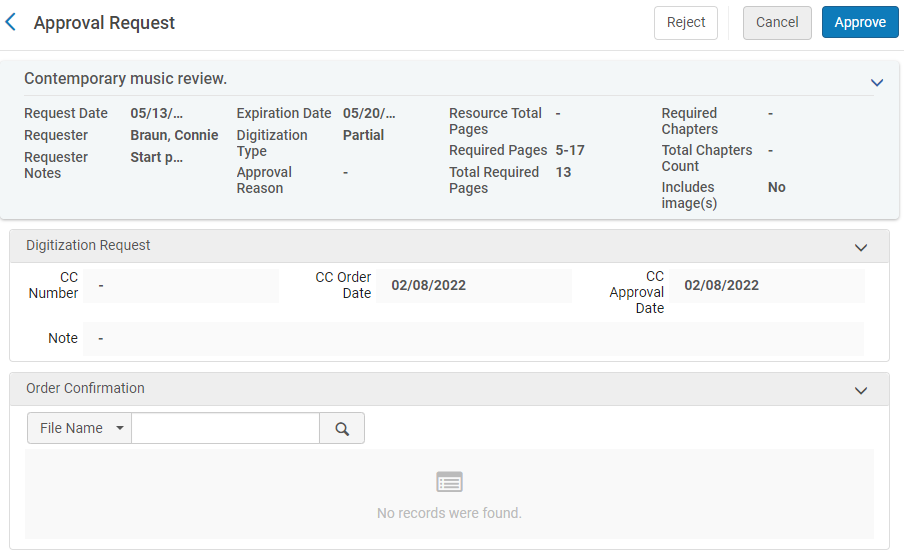
- On the Approval Requests List page, select View or Work on from the row actions list of the item you want to approve. The Approval Requests List page appears, displaying details of the item.
 Approval Requests List Page - Work On
 - If you selected Work On, you can modify the necessary fields, as described in the following table:
Approval Request Fields Section Name Description Digitization Request These fields are mandatory if the request requires copyright clearance.CC number The Copyright Clearance Center number. The number indicates that the library has a license to use copyright-protected content. CC order date The date the copyright clearance was ordered CC approval date The date the copyright clearance was approved Note User notes Order Confirmation
(not mandatory)Optionally, the library can attach a copyright confirmation (e.g. CCC confirmation) in the Order Confirmation section. Note that if you select Cancel after adding an attachment, the attachment remains and can be worked on later. After the attachment is uploaded, you can select Actions in the row of an attachment to:- Edit – Edit the attachment, including uploading a different file
- Delete – Delete the attachment
- Download – Download the file
- Approve or reject the digitization request:
- Select Approve to approve the digitization request. On the Approve the Request page, select a reason from the Reason drop-down list, enter any notes in the Notes field, and select Submit. The list of reasons are:
- Automatic
- Covered by License
- Creative Commons
- Direct Permission Obtained
- Legal Exception
- Open Access
- Other
- Out of Print
- Preprint
- Primary License
- Self-Declared
- Select Reject to reject the request. On the Rejection Request page, select a reason from the Reason drop-down list, enter any notes in the Notes field, and select Submit. The approver’s decisions are saved for the digital file. The list of reasons are:
- Other
- Rejected by Manager
- Rejected by CCC
If the request is rejected, the digital file is not created and the requester is notified that the request was rejected. The rejection email only sends 254 characters in the body of the email, but you can manually enter more.
- Select Approve to approve the digitization request. On the Approve the Request page, select a reason from the Reason drop-down list, enter any notes in the Notes field, and select Submit. The list of reasons are:
Digitizing Items
- Items - deposit
- Items - digitization
- Items - document delivery
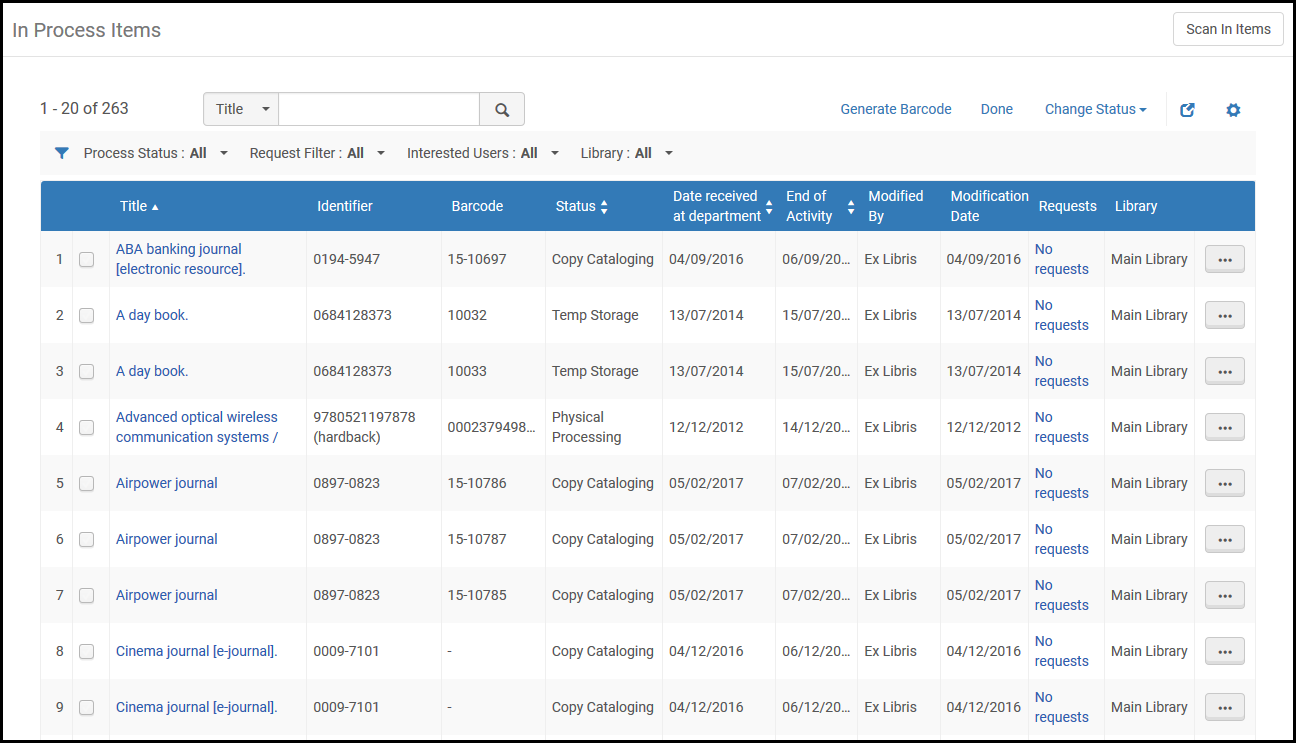
- From the In Process Items page, locate an item with the Digitization status.
An item has this status after: a) it has a digitization request attached to it and b) it is then scanned in at the digitization department.
- Select Next Step from the row actions for the item. The status changes to Digital Inventory or Document Delivery depending on the digitization configuration (see Configuring Digitization and Copyright Rules).
It is not necessary to create an item when handling a digitization or digitize another issue request. However, if an item is not created and attached to the request, terms of use such as digitization fees (which are applied according to item) will not apply.
Fees are applied as follows:
- If the request is attached to an item, use the item’s terms of use, as is currently done in the digitization task list.
- If the request is attached to a holding with items, use the first item that has an is digitizable = true policy. If no items can be digitized, the digitization terms of use are irrelevant, including the fee.
- For general digitization requests where no items exist, digitization fees are not added unless the operator creates an item and attaches it to the request.
Delivering Digitized Items to the Patron
After digitizing items (see Digitizing Items), you send the digital file to the requester or add it to the inventory of the institution. Before performing digitization delivery, ensure that you are at a digitization department; see Library/Desk Selector in The Persistent Menu.
There are two ways to deliver digitized items to the patron as described below. Note that the second way using the Document Delivery page is an alternative streamlined flow.
Delivering Digitized Items Using the Task List
Delivery of digitized items is configured on the In Process Items page (Fulfillment > Resource Requests > Manage In Process Items).
-
For items waiting for an attachment-based document delivery, select Attach documents from the row actions list to open the Attachments page and attach digitized items to be sent as attachments to the requesting patron (see Attaching Digitized Items To Be Sent To a Patron).
-
For items waiting for a link-based document delivery, select Upload documents from the row actions list to upload digitized items to be sent as links to the requesting patron (see Attaching Digitized Items To Be Sent To a Patron).
Attach documents to be sent to the requesting patron on the Attachments page. The Attachments page is visible when you select Attach Documents from the row actions for an item on the In Process Items page.
- To add an attachment, select Browse in the File name field and select a file. Add a URL and/or note, if required, and select Add Attachment. The attachment appears in the list of attachments in the Attachments tab.
- To edit an attachment, select Edit from the row actions list for the attachment that you want to update, modify the File name, URL, and Notes fields as required, and select Save Attachment.
- To delete an attachment, select Delete from the row actions list for the attachment that you want to delete and select Confirm in the Confirmation Message pop-up window.
- To download a file, select Download from the row actions list for the file that you want to download, specify the folder to which you want to save the file, and select OK.
- Click Refresh to see the upload status of your file.
- Click Done to complete the digitization process.
- If the delivery method is Attach Documents - Attachment, the patron receives the digital file as an email attachment. An example of the Ful Digitization Notification Item letter follows.
 Notification Item Letter for Digital File
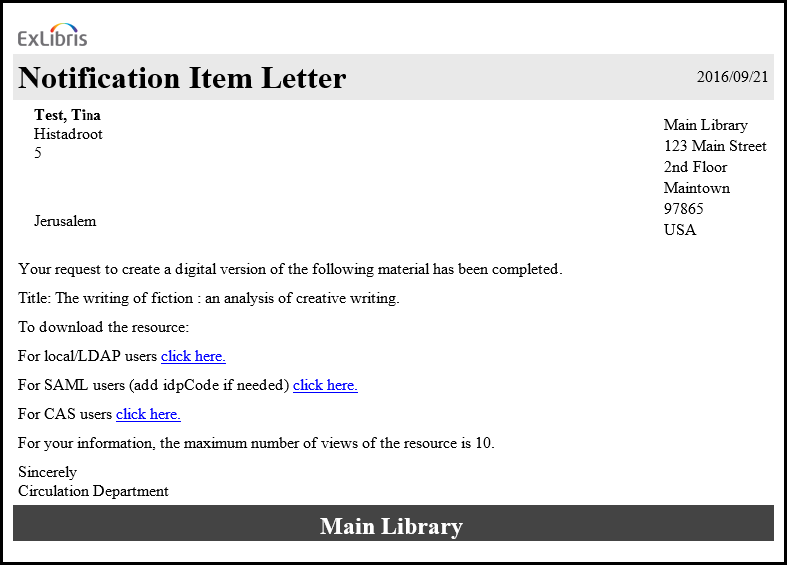
 - If the delivery method is Attach Documents - Link, the patron receives a link to download the file in an email. Using this method will decrease the size of the email, and easily enable managing more digital resources in a single request. An example of the Document Delivery Notification Letter follows.
 Notification Letter - Document LinkThe library administrator must configure the email to include only the relevant login option for your institution (local/LDAP, SAML or CAS). When selecting the relevant select here link, the patron will first be required to log in using the standard Alma/Primo credentials. After a successful login, the patron will gain access to the digitized files stored in the document storage folder. Note that access will be limited to the number of times configured in the digitization and copyright rule, and the files will be automatically removed from the storage after the configured number of days. This value is defined in the document_delivery_cleanup_days parameter. See Configuring Other Settings.
 -
Libraries can include a link in the Document Delivery Notification Letter email that does not require authentication. Digital requests that are not subject to copyright restrictions can be accessed without first authenticating. This link can provide access to both locally (borrower side) and remotely (lender side) managed resources.
When the parameter rs_no_authentication_document_delivery (Configuration > Fulfillment > General > Other Settings) is set to true (default false), and the label without_authentication (Configuration > General > Letters > Letters Configuration > Document Delivery Notification Letter) is enabled, the Without authentication link is included in the Document Delivery Notification Letter and does not require user authentication when opening the link.
 Document Delivery Notification Letter - Without authentication lin
 - If the delivery method is Digital Inventory (representation), the digital file is made available in the repository under the same title (items attached to the same bib record) as the physical item, and can then be requested by a patron.
The file size limit is 25 MB for attachments and 1000 MB for link digitization requests. A message appears if the total digital file size limit has been reached. Additional email-related constraints may be relevant if the digitized material is sent as an email attachment.
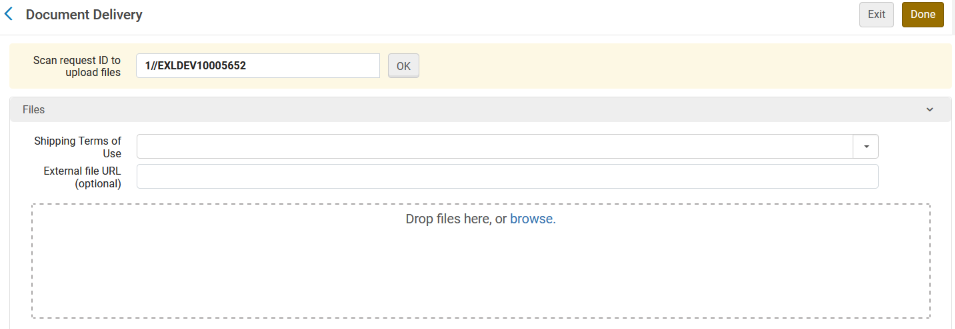
Delivering Digitized Items Using the Document Delivery Page
- Fulfillment services operator
- Fulfillment services manager
- Requests operator
- Circulation desk manager
- Circulation desk operator
- Circulation desk operator – limited
- Work order operator
If Shipping Terms of Use were configured for the library, then you can select the relevant option from the Shipping Terms of Use drop down list (see Configuring Shipping Terms of Use). The terms of use will be included in the Shipped message if ISO based peer to peer communication is used, or in the email if the partner type is Email.
.png?revision=1)
An Alma borrower that receives the Shipped message with a communicated terms of use will notice a note about the terms of use attached to the borrower request. The digital content, even if shared via Rapid ILL or via as a link Alma, will not be automatically forwarded to the patron. Rather, staff mediation will be required to make the file accessible to the patron.
To configure the digital shipping terms of use see Configuring Digital Shipping Terms of Use. For receiving of digitally sent requests in peer to peer resource sharing see Peer to Peer Resource Sharing.
Managing the Digitization Requests for Actions
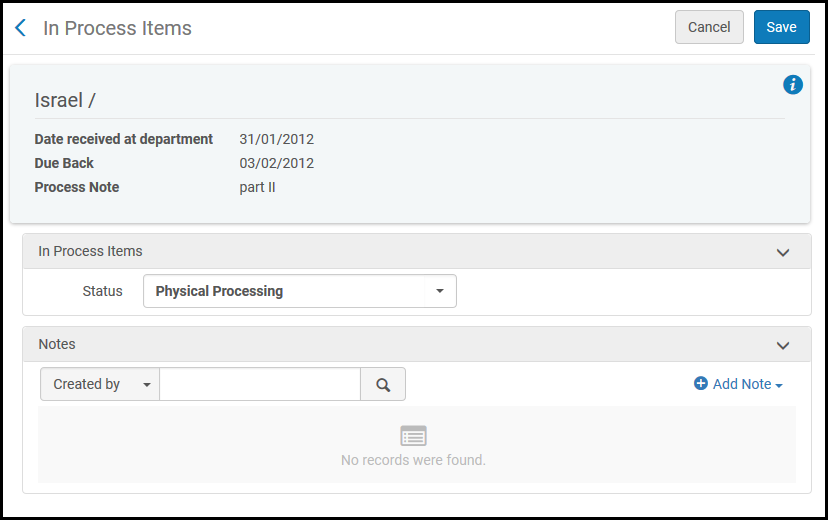
- Edit – The In Process Items: Request Management page appears.
 In Process Items: Request Management Page
- Optionally, in the Status field, select a status from the drop-down list. You can also view or add a note.
- To add a note, select Add Note and type your note. The note is displayed in the list of notes on the page.
- To edit a note, select Edit from the row actions list for the note that you want to update, modify the note on the Edit Note page, and select Save.
- To delete a note, select Delete from the row actions list for the note that you want to delete and select Confirm in the Confirmation Message pop-up window.
- To locate a note in the list of notes, enter the text for which you want to search in the Find box and select the field — Created by, Updated by, or Note — in which you want to search for this text.
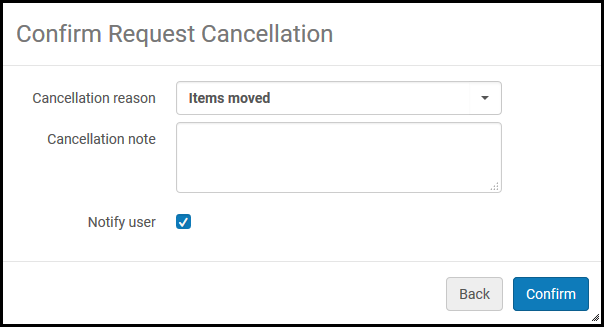
- Cancel request – The Confirm Request Cancellation page appears.
 Confirm Request Cancellation Page
- In the Cancellation reason field, select a reason for cancellation from the drop-down list. To customize cancellation reasons, contact Ex Libris Support.
- In the Cancellation note field, add a note on the cancellation as needed.
- Select the Notify User check box to have a notification of the cancellation sent to the user.
- Select Confirm.
- Change to Electronic Digitization – Change the request from being a request to digitize a physical resource to a request to digitize an electronic resource. Can be changed only when there is an electronic item in the inventory that can fulfill the request.
- Change to Physical Digitization – Change the request from being a request to digitize an electronic resource to a request to digitize a physical resource. Can be changed only when there is a physical item in the inventory that can fulfill the request.
- View it – The UResolver Screen (Alma Link Resolver) page appears, displaying resources for the item. This option appears only if the item is configured for electronic digitization.
Attaching Digitized Items to Be Sent to a Patron
Attach documents to be sent to the requesting patron on the Attachments page. The Attachments page is visible when you select Attach Documents from the row actions for an item on the In Process Items page.
- To add an attachment, select Browse in the File name field and select a file. Add a URL and/or note, if required, and select Add Attachment. The attachment appears in the list of attachments in the Attachments tab.
- To edit an attachment, select Edit from the row actions list for the attachment that you want to update, modify the File name, URL, and Notes fields as required, and select Save Attachment.
- To delete an attachment, select Delete from the row actions list for the attachment that you want to delete and select Confirm in the Confirmation Message pop-up window.
- To download a file, select Download from the row actions list for the file that you want to download, specify the folder to which you want to save the file, and select OK.
- Click Refresh to see the upload status of your file.
- Click Done to complete the digitization process.
If the digitization request required approval then the notification emails described below are sent only once request has been approved.
- If the delivery method is Attach Documents - Attachment, the patron receives the digital file as an email attachment. An example of the Ful Digitization Notification Item letter follows.
Notification Item Letter for Digital File
- If the delivery method is Attach Documents - Link, the patron receives a link to download the file in an email. Using this method will decrease the size of the email, and easily enable managing more digital resources in a single request. An example of the Document Delivery Notification Letter follows.
 Notification Letter - Document Link
The library administrator must configure the email to include only the relevant login option for your institution (local/LDAP, SAML or CAS).
When selecting in the relevant select here link, the patron will first be required to log in using the standard Alma/Primo credentials. (New for May 2026) To configure the login page, see Configuration of Digital Shipping. After a successful login, the patron will gain access to the digitized files that are stored in the document storage folder. Note that access will be limited to the number of times configured in the digitization and copyright rule, and the files will be automatically removed from the storage after the configured number of days. This value is defined in the document_delivery_cleanup_days parameter. See Configuring Other Settings.
- If the delivery method is Digital Inventory (representation), the digital file is made available in the repository under the same title (items attached to the same bib record) as the physical item, and can then be requested by a patron.
For link digitization requests, the file size limit is 1000 MB, and for attachment digitization requests, the file size limit is 25 MB. A message appears if the limit of the total digital file size has been reached. Additional email related constraints may be relevant if the digitized material is sent as an email attachment.