Getit
This page describes how to work with Getit including configuring the order of locations in Primo search results, filtering the library list for availability in Primo, configuring holding display labels, etc.
For links to all the main fulfillment documentation pages see Fulfillment.
Configuring the Order of Locations in Primo Search Results
To configure the order of Primo search results, you must have one of the following roles:
-
General System Administrator
-
Fulfillment Administrator
Alma determines the display priority of locations primarily by availability. Holdings with the greatest number of available items appear first. In addition, Alma enables you to give preference to locations that match the IP address of the patron’s IP address. These locations include the AVA $$P field. For more information, see the following topic: Discovery in Collaborative Networks.
The use of the AVA field is not necessary for Primo VE environments, but the configuration of sorting and priority in Alma is the same for both Primo and Primo VE. In addition, Primo VE can override Alma's custom sorting configuration. For more information, see Configuring the Get It Service for Primo VE.
Alternatively, you can configure your own display order of locations, based on the considerations of your institution. When displaying a list of locations in the GetIt tab, if the record has multiple holdings, they are listed in the order that has been defined by the institution. Where the institutional priorities are not defined or are not relevant, alphabetical sorting is used.
By default, holdings locations appear on the first page in Primo Get It based on one or more of the following criteria:
-
According to the holdings’ locations and their proximity to the patron, according to the library IP address. The locations in the libraries closest to the patron appear at the top of the holdings list. If these criteria are used, it takes priority over the holdings' availability.
-
According to the holdings’ availability, in the order (by default):
- In temporary locations
- In permanent locations
- In remote locations
You can select a different order on the Locations Ordering Profile page (Configuration Menu > Fulfillment > Discovery Interface Display Logic > Locations Ordering Profile):

You can configure this ordering at the institution level only. Select the required institution from the Configuring filter on the Fulfillment Configuration page.
-
In the Use Alphabetical Sorting Only field, select Yes if you want to sort the holdings in Primo Get It alphabetically by the external name of the location, which is passed to Primo in the AVA $$c subfield during RTA. The alphabetical sorting logic is hard-coded.
When this field is set to Yes, all other ordering fields on this page are disabled.
-
In the Use "IP best location” sorting field, select Yes to configure the display of holdings by best location, which is determined by the location's priority in the AVA $$p subfield during RTA. IP addresses must be defined for the libraries. No indicates that holdings are displayed by availability and that for the display of holdings locations, IP addresses do not need to be defined.
IP addresses can be configured:
- On the library level (see Managing IP Definitions for a Library)
- On the campus level (see Editing a Campus)
-
In the Prefer remote storage field, select Yes to increase the priority of remote storage items when viewing results in Primo Get It, publishing to Primo, or the Primo RTA.
- To define custom sorting:
-
In the Use Custom Sorting field, select Yes and then select the Set Custom Libraries Order link.
When this field is set to Yes, all other location ordering fields are removed from this page.
-
On the Custom Libraries Order page that opens, select Add Library.
-
In the dialog that opens, indicate the order for each desired library. Enter numeric values, where 1 is the library that appears first in the list of locations in the Get It tab.
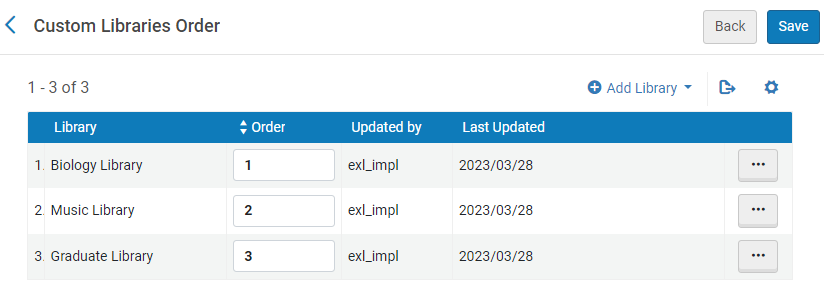 Custom Library Order
 -
The priority of each location within the library can also be determined by configuring the Discovery Priority attribute of a location (Configuration Menu > General > Locations > Physical Locations) when the selected configuration scope is a library. All Display first locations of the same library are sorted before other locations of the same library, and all Regular display locations of the same library are sorted before Display last locations of the same library. Locations within the same Discovery Priority are sorted by availability. For more details, see Configuring Physical Locations.
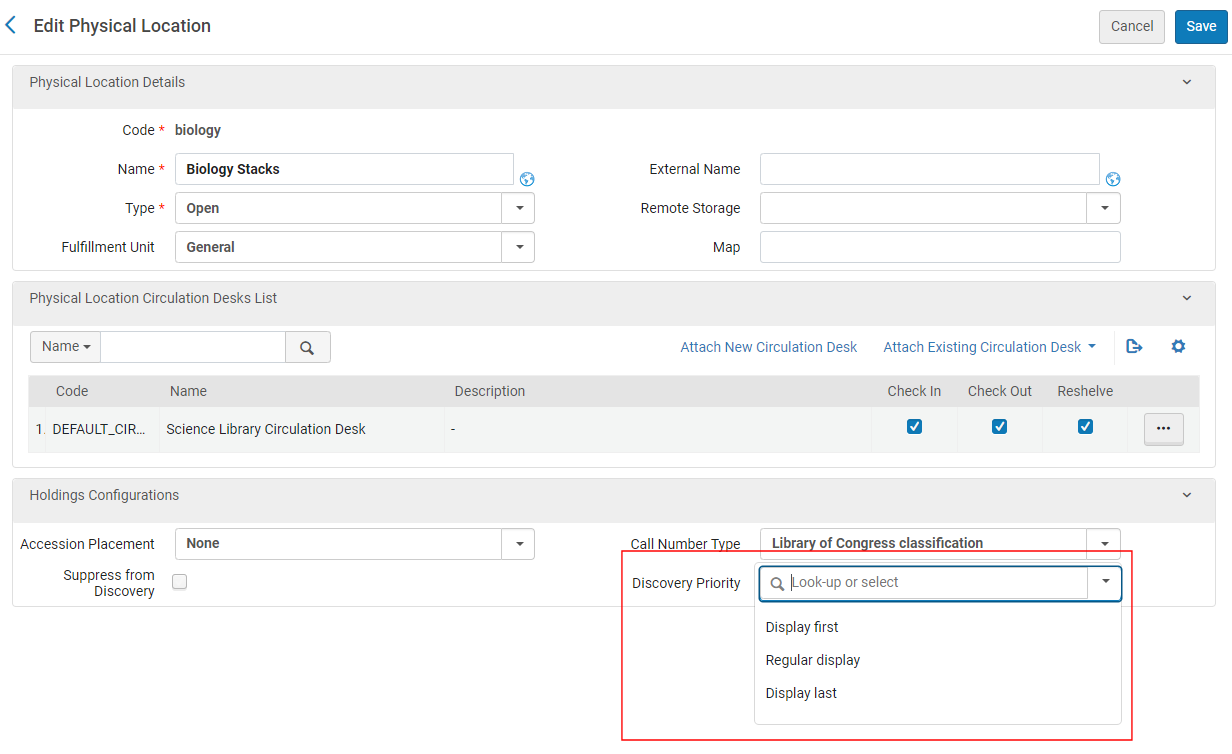 Edit Physical Location's Discovery Profile
-
-
Select Save.
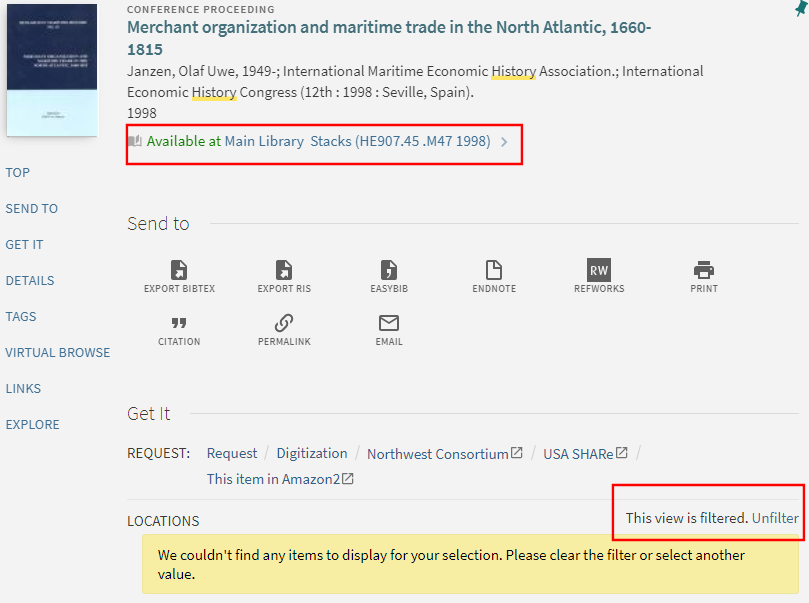
Filtering the Library List for Availability in Primo
-
This section applies only to Alma-Primo environments. If you are working with Primo VE, see Configuring the Location Filter List for Get It.
-
This functionality is not applicable to Alma-Summon environments.
-
Open the Primo View Mapped into Alma Libraries page (Configuration Menu > Fulfillment > Discovery Interface Display Logic > Primo View to Libraries).
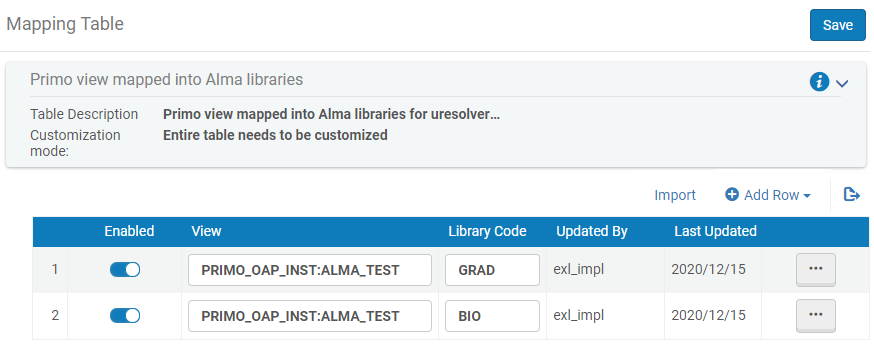 Primo VE View Mapped into Alma Libraries Mapping Table
 -
Add a library to the list:
-
Select Add Row to open the dialog box.
-
Specify the following fields:
-
View – Specify the Primo/Primo VE view code.
-
Library Code – Specify an Alma library code. To find library names and codes, see Adding/Editing Institution Libraries.
-
-
Select Add Row in the dialog box to save the library to the default list.
-
-
When you are done adding libraries, select Save or Customize (first time only) to save your changes to the list.
Configuring Holdings Display Labels
For Primo VE environments, see Configuring Holdings Display Fields for Primo VE.
- General System Administrator
- Fulfillment Administrator
- Enable/disable the display of holdings fields.
- Specify the order in which holdings fields appear in Get It.
- Customize and translate the display labels for each of the holdings fields.
- Add a new display field.
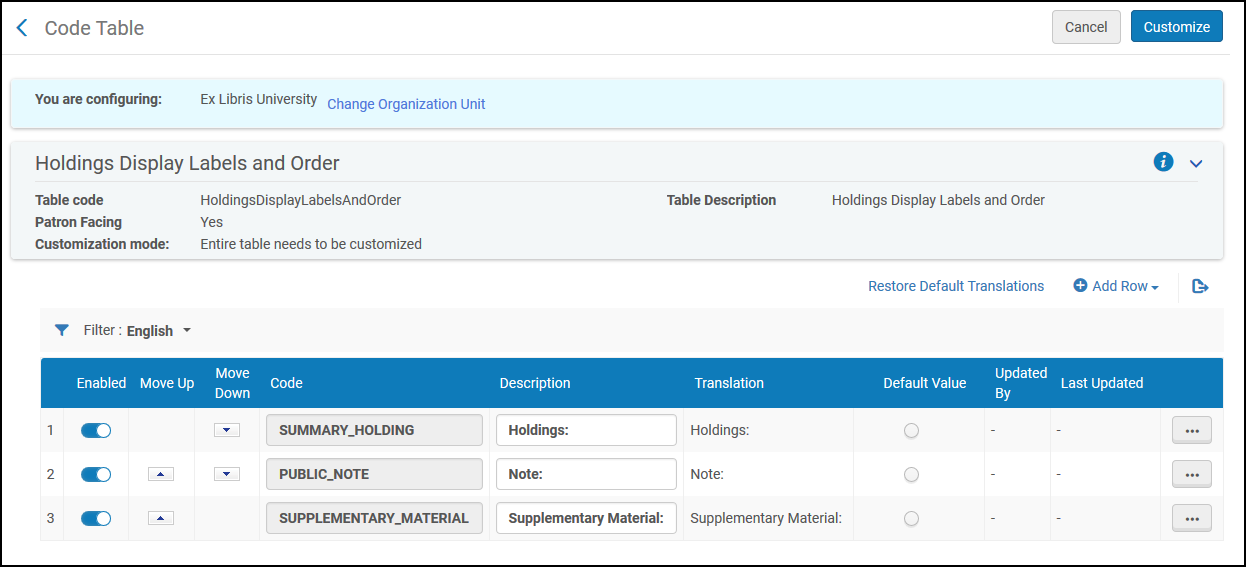
- Add a row for the display label, including the code, the description, and whether the code is the default value. Select Add Row.
- From the Filter drop-down, select the language for which you will enter a translation value.
- In the Translation field of the label, enter the value that will appear in the translation.
- If there are additional languages that will use a translation value, select the next language from the Filter drop-down and repeat step 3.
- Select Save.
Configuring Primo Holdings Display
For Primo VE environments, see Configuring Holdings Display Fields for Primo VE.
- General System Administrator
- Fulfillment Administrator
To access this page, you must first set the uresolver_enable_getit_holding_configuration customer parameter to true.
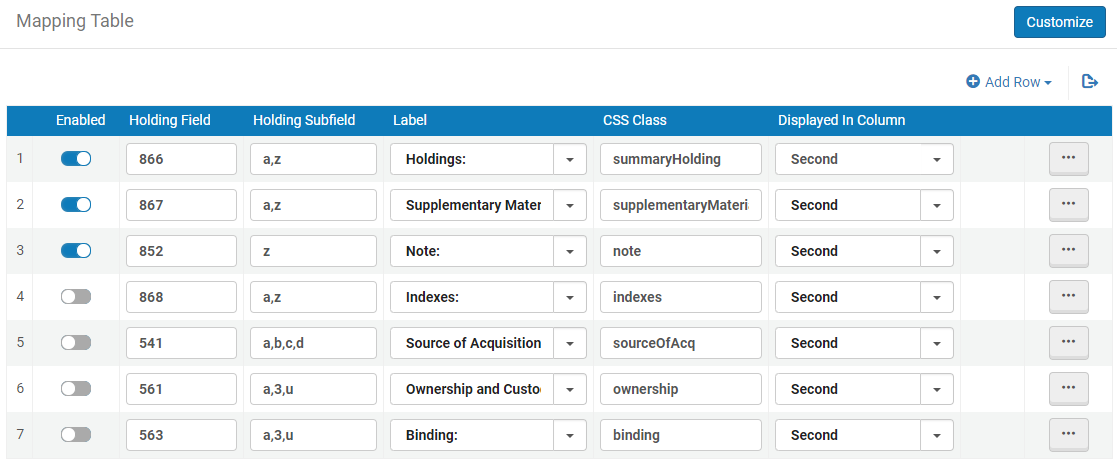
- Edit the Primo Customized Holding mapping table (Configuration Menu > Fulfillment > Discovery Interface Display Logic > Holdings Display Customization).
-
Select Add Row.
-
Specify the following fields in the Add Row dialog box:
-
Holding Field – The MARC holdings field that you want to map to Primo.
-
Holding Subfield – The specific subfields of the holdings field that you want to map. If you want to specify more than one subfield, separate them with a comma.
-
Label – Select the display field to which you want to map the holdings field/subfield. The following display fields are supported in Primo: Holdings, Supplementary Material, Note, Indexes, Source of Acquisition, Ownership of Custodial History, and Binding.
-
CSS Class – The CSS class defined in the CSS for your Primo view's skin. For more information, see Branding the Delivery Tabs.
-
Displayed in Column – Specify the first or second display column.
-
-
Select Add Row to save the row and to return to the mapping table.
-
Make sure that the new row is enabled.
- If this is the first customization of this table, select Customize. Otherwise, select Save.
Display Logic Rules
Display Logic Rules can be used to configure Getit services such as Hold, Booking, and Resource Sharing. For more information, see Configuring Display Logic Rules.
Configuring Service Labels in the Discovery Interface
Service Labels for Getit can be configured. For more information, see Configuring Service Labels in the Discovery Interface.
Using Standard Identifiers
- ISSN
- E-ISSN
- ISBN
- E-ISBN
- LCCN
- CODEN
- OCLC Unique Number
- Other System Number

