Working with Collections
Overview
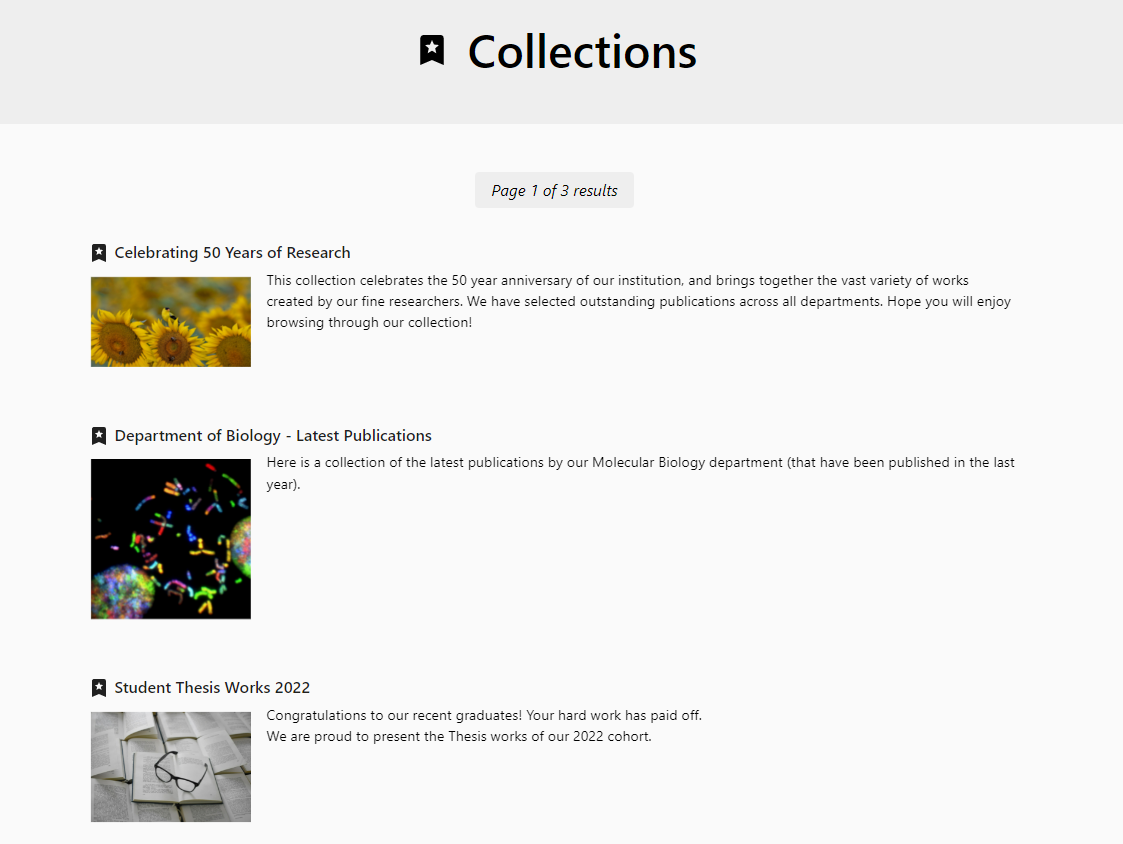
A collection is a group of assets related to a specific topic that can be displayed in the portal, together with an image if desired.
Watch the How to Add Collections of Assets to Your Portal video (4:11).
Adding Collections
Collections are based on groups of assets. Before you can create a collection, you must create a set of assets to define it, as described in Managing Search Queries and Sets. Collections work with both logical and itemized sets. Once you have created the set, you can add a collection for the set, and enable it in order to make it visible on the portal.
A collection can be linked to one or more organizational units. When it is, if the organizational unit has a Homepage tab containing a Unit's Collections section (see Configuring the Research Portal), the collection appears in that section.
The Assign Entities To Collections job needs to be enabled in order for the collections to work (Configuration > General > Research Jobs Configuration). This job runs every six hours. For additional information about managing jobs, see Viewing Scheduled Jobs.
- Create a logical or itemized set to define the assets in the collection (see Managing Search Queries and Sets).
- Go to Admin > Collection Configuration.
- Select Add Collection.
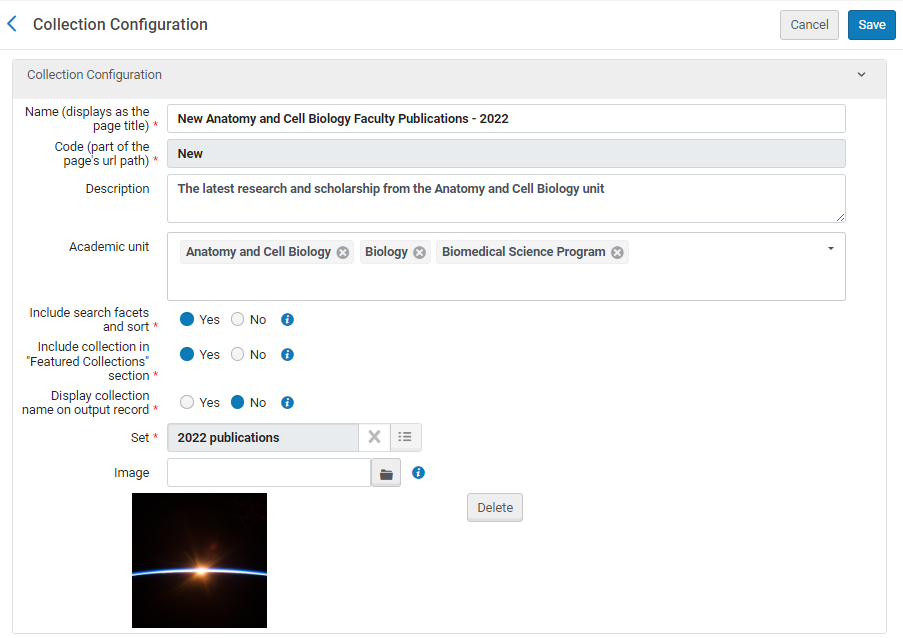
- Enter the collection Name (required field).
- Enter the collection Code (required field). The code cannot include blank spaces or special characters. The code entered here is included in the URL path of the collection in the portal.
- Optionally, enter a Description. In the portal, this description appears below the name of the collection.
- Under Academic unit, select one or more organizational units with which to associate the collection. Note that the selections are individual, not hierarchic; if a selected unit has sub-units, the sub-units are not automatically selected. Depending on the system settings and the settings of the selected organizational units, the collection may appear in the Homepage tabs of the selected units; see Configuring the Research Portal.
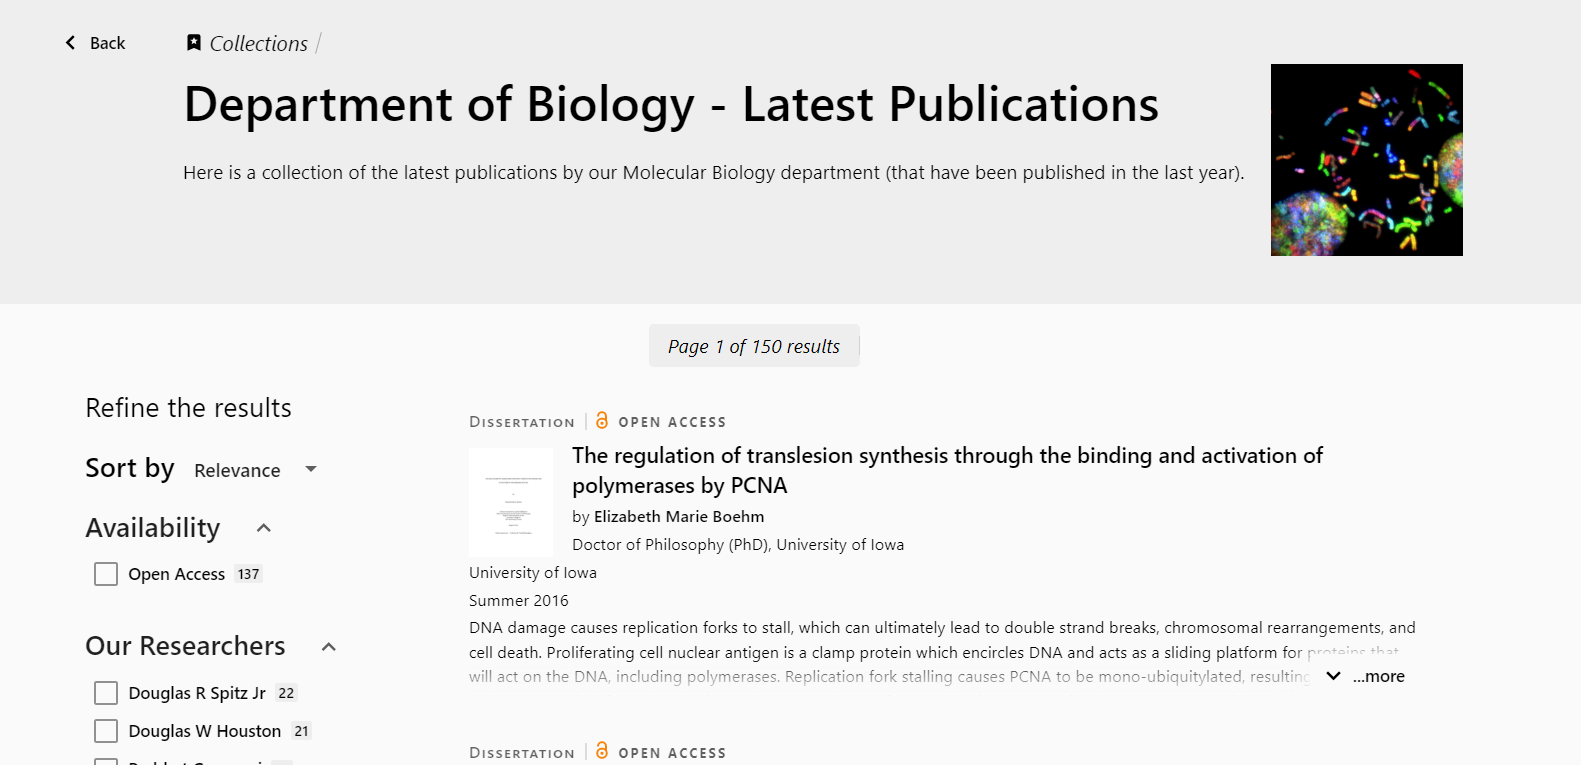
- Under Include search facets and sort, select whether to include the search facets panel in the Collection page in the portal (the left panel in the illustration above). No is selected by default.
- To include the collection in the Featured Collections section of the Collections browsing page, select the Include collection in "Featured Collections" section option (see Highlighting Collections on the Collections Browsing Page, below). When this option is selected, if the Featured Collections section is enabled in the portal homepage, the collection will also appear there (see Featuring Collections on the Portal Homepage, below).
- Under Display collection name on output record, select whether to display the collection name on the output record (see Displaying the Collection Name on the Output Record, below). The default here is No.
- Select the Set on which the collection will be based.
The selection cannot be changed once the collection is saved, although the set content can be modified. If you want to use a different set, you must create a new collection.
- Optionally, under Image, select an image to display for the collection on the portal. The image will be cropped to landscape orientation. You can use any image of a common image-file type, such as JPEG or PNG. The file cannot be larger than 1GB in size.
- Select Save. The collection is saved, and disabled. Once it is enabled (see Actions that can be Performed on a Collection, below), and the Assign Entities To Collections job runs, the collection appears in research hub searches and in the portal.
Actions that can be Performed on a Collection
- Enable/disable a collection by selecting the toggle in the Enabled column.
- Drag and drop to change the order of collections.
- From the Actions menu you can:
- Edit – Edit the collection
- View – View the collection
- URL – Get a copy of the URL for the collection on the portal
- Delete – Delete the collection. Note that the collection will be deleted after the next job is run.
Translating the Collection Labels
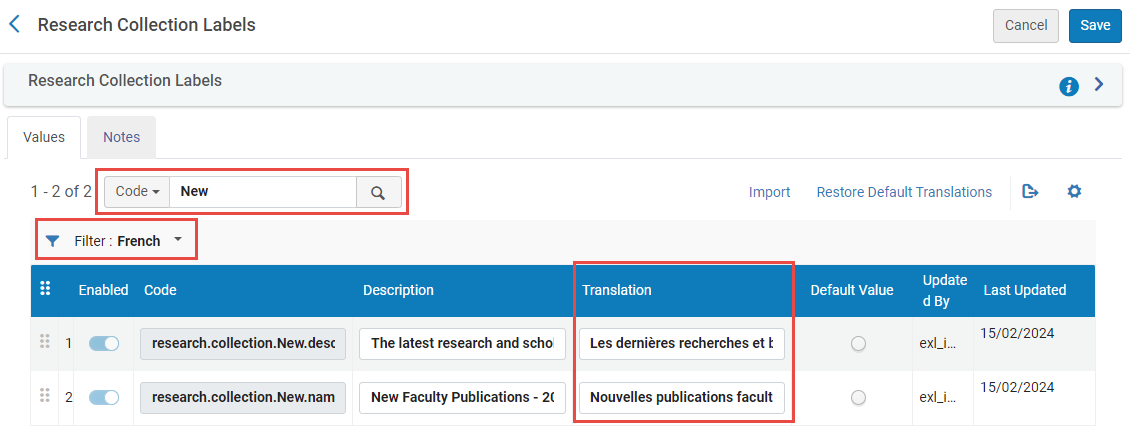
If your system has a multilingual interface, after you create a collection, you can configure its title and description for each language in the Research Collection Labels table (Configuration menu > Portal & Profiles > General settings > Labels). Use the Filter to select the language whose labels you want to translate, and then modify the text in the Translation column for that language.
Tip: To find the labels for a particular collection, in the Search field, select Code, and then search for the name of the collection (e.g., "New" in the illustration below).
For additional information about configuring translations in code tables, see The Research Hub Interface.
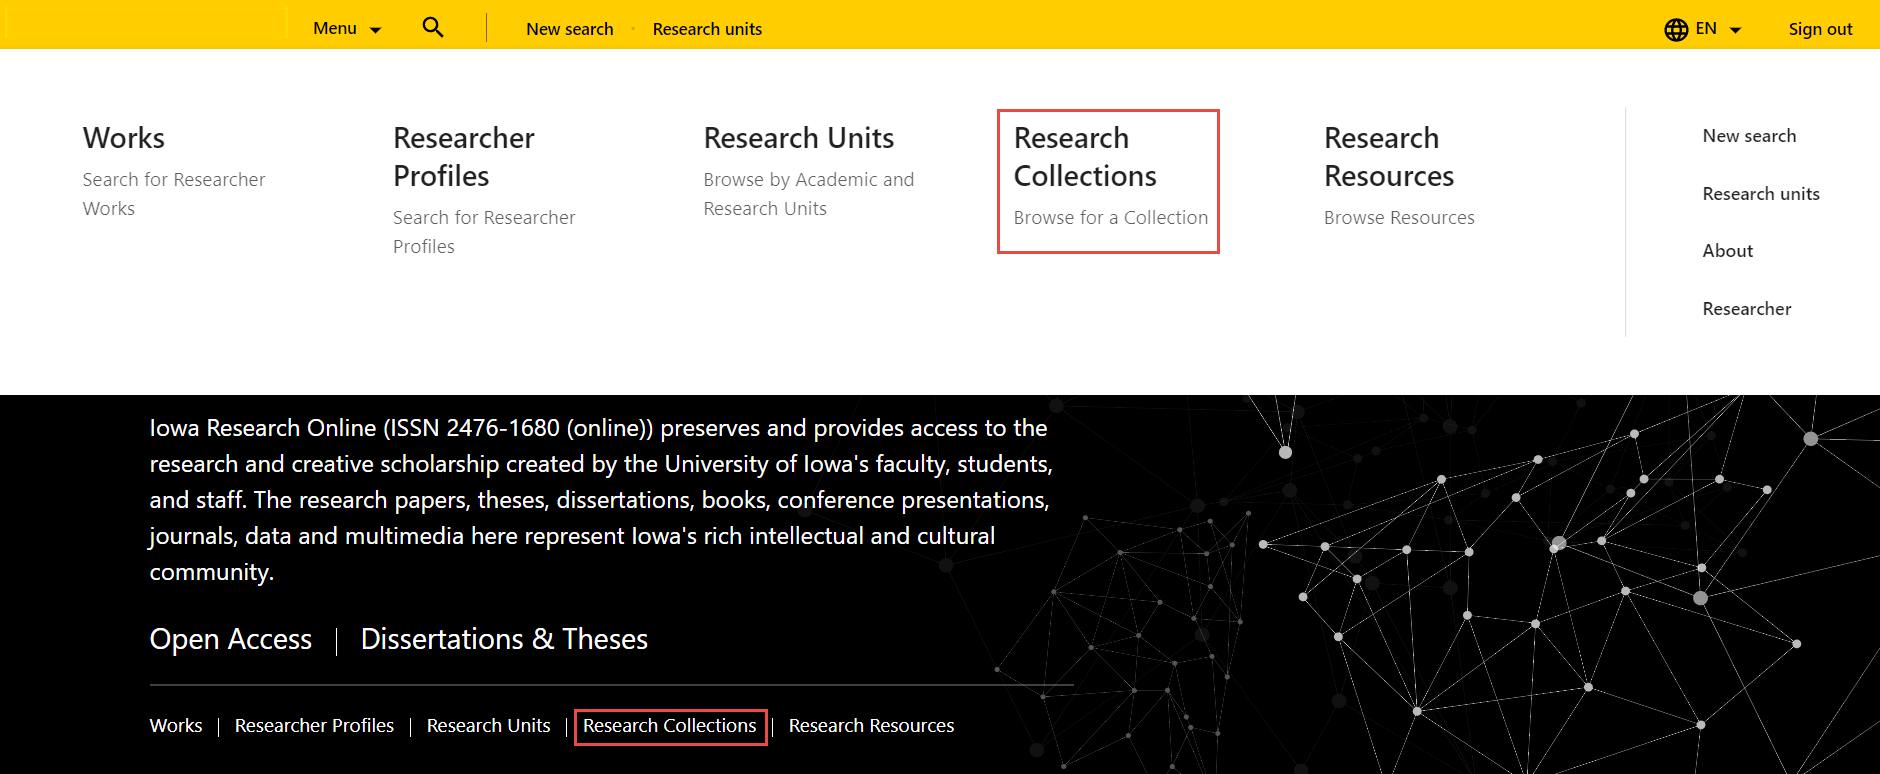
Browsing Collections
In order to display Collections in the portal menu, the Collections entity needs to be enabled in the header. See Configuring the Research Portal for more details.
Highlighting Collections on the Collections Browsing Page
You can add collections to the Featured collections section of the Collections browsing page. To do so, in the collection's configuration, select the Include collection in "Featured Collections" section option (see Adding Collections, above).
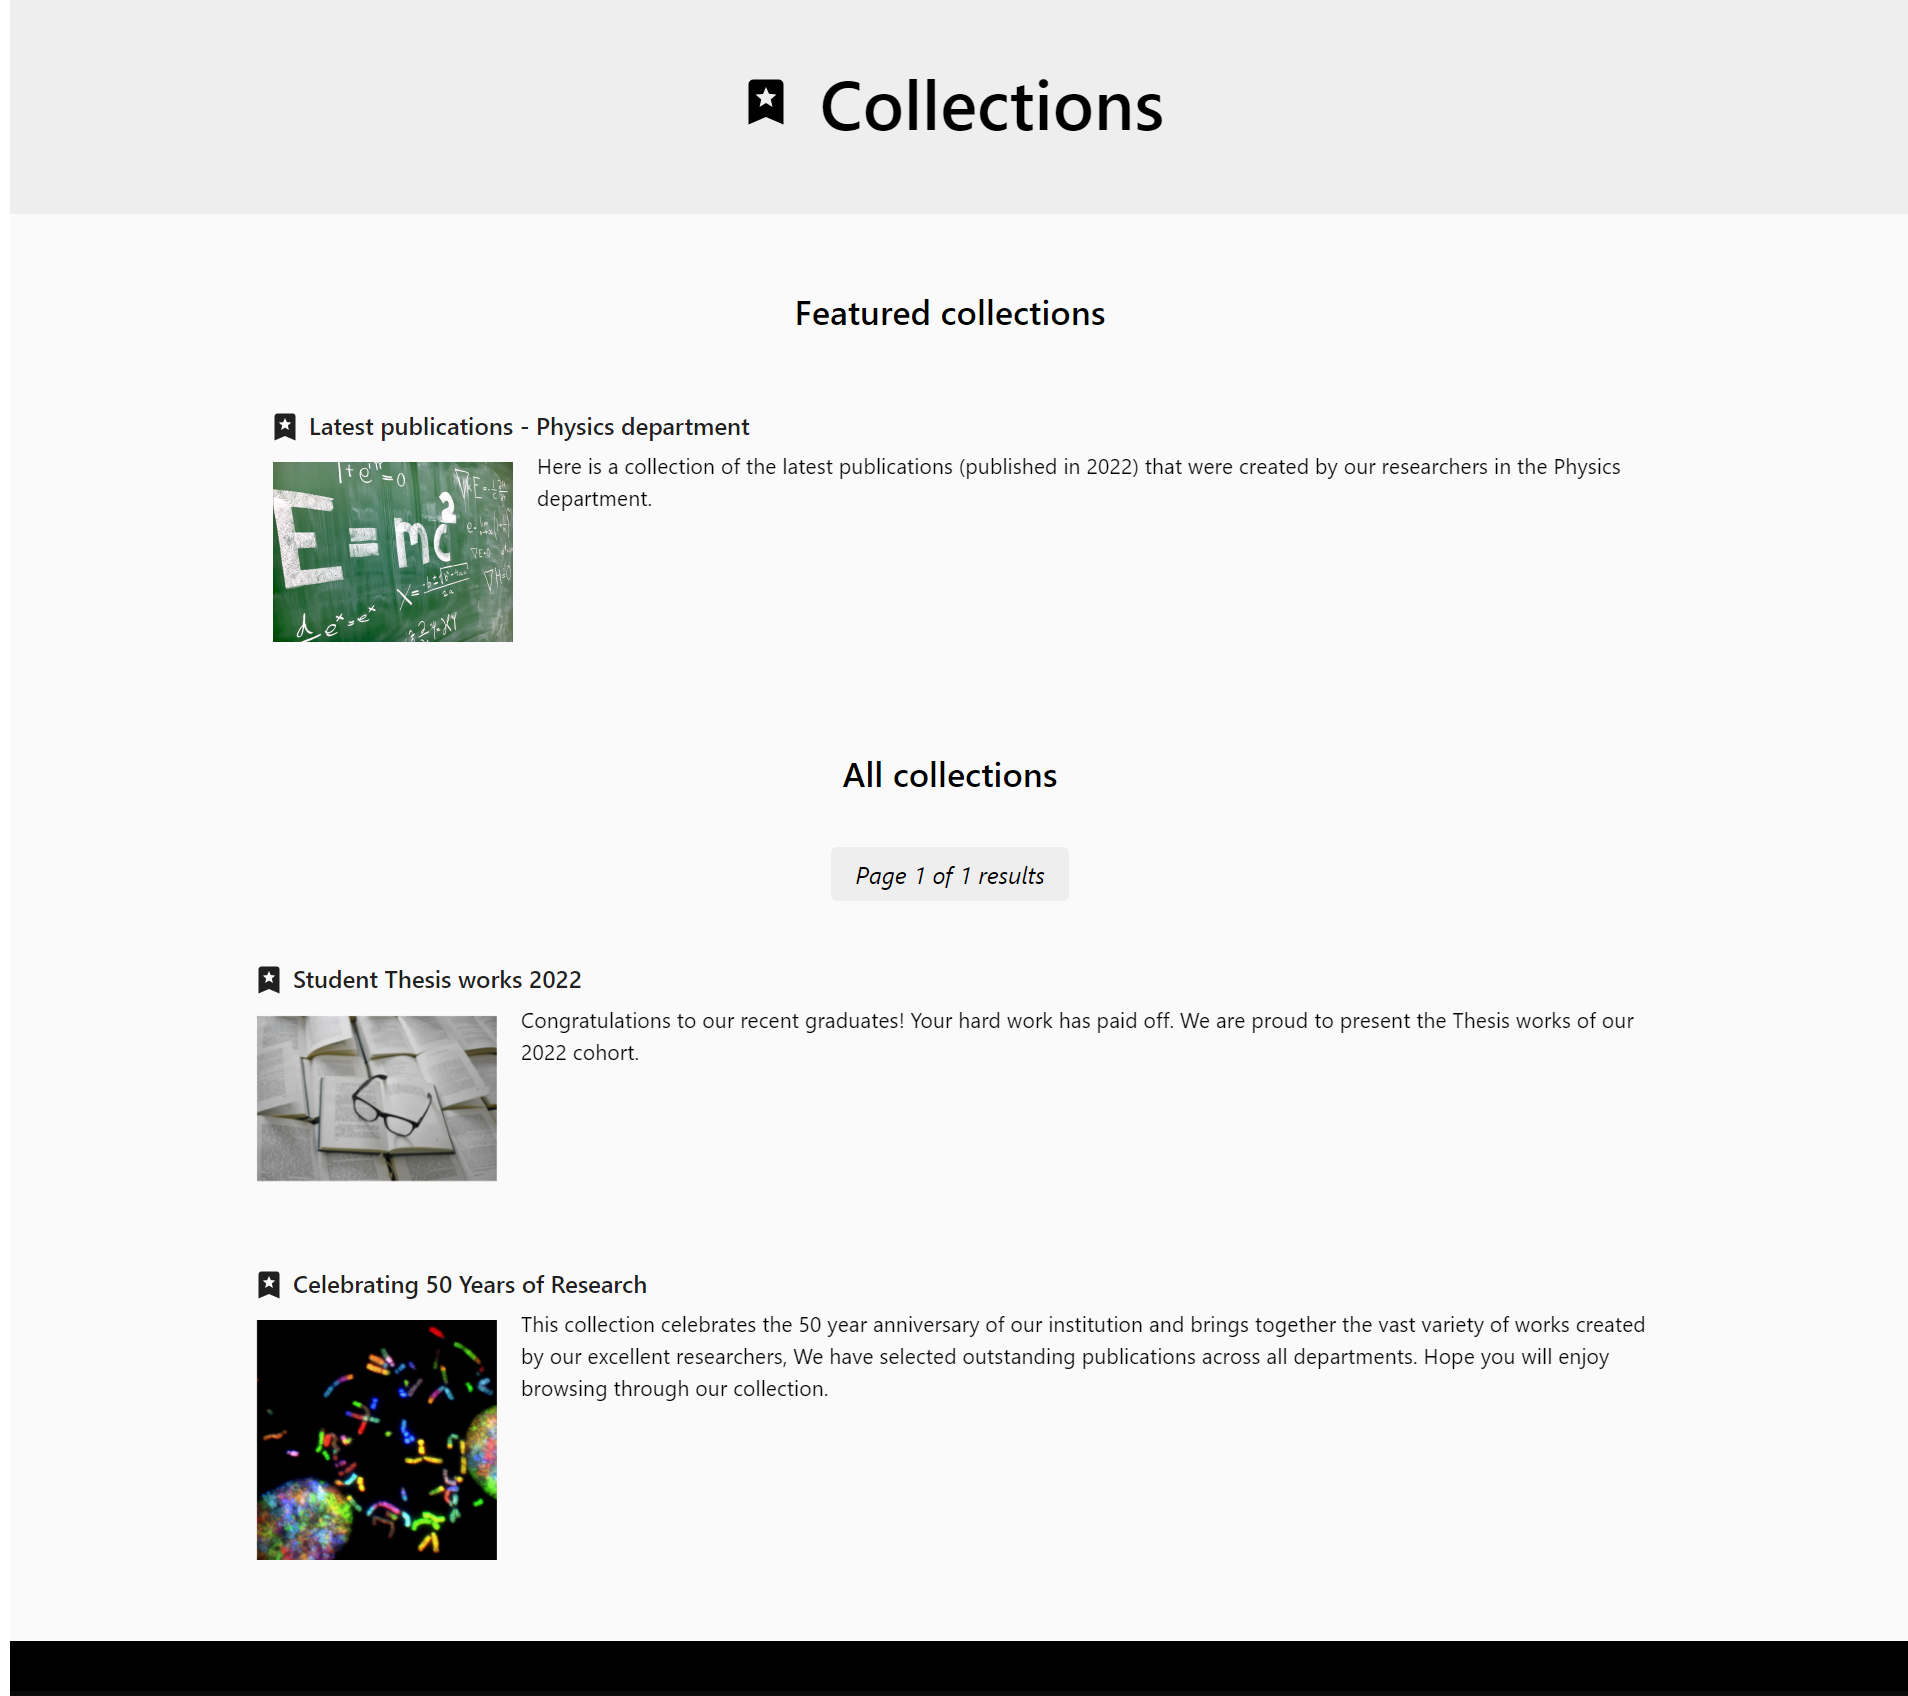
Featuring Collections on the Portal Homepage
Depending on the portal's homepage configuration, a Featured collections section may be included in the portal homepage. (For information about enabling this feature, see Homepage Configuration.) When this section is included in the portal homepage, collections for which the Include collection in "Featured Collections" section option is selected (see Adding Collections, above) appear in this section of the homepage as well as in the Featured collections section of the Collections browsing page.
The Browse more collections link takes the user to the Collections browsing page. The text of this link can be modified in the Research Portal table (Configuration menu > Portal & Profiles > General Settings > Labels > Research Portal).

Displaying the Collection Name on the Output Record
In order to display the collection name on the full page of an output record, select the Display collection name on output record option, as described in Adding Collections. More than one collection can be displayed for an asset.