
PREPACKAGED REPORTS: Installing 64-bit ODBC Drivers
- Product: Voyager
- Product Version: All
- Relevant for Installation Type: Dedicated-Direct, Local, TotalCare
Description
Customers wishing to use Prepackaged Reports in Microsoft Access must install ODBC drivers in order to connect to the Voyager Database. Ex Libris recommends that customers continue to use the older 32-bit ODBC drivers with a 32-bit version of Microsoft Access. For customers who must use a 64-bit version of Microsoft Access, there are 64-bit ODBC drivers available, but these do not work correctly with non-Latin characters and diacritical markings. In order to install the 64-bit ODBC drivers, please follow the instructions below.
Resolution
Install the ODBC Drivers
1. Make sure that you are logged into your Windows machine as an Administrator. Retrieve the Zip archive containing the Windows installer for the 64-bit Oracle 19c clients. The version Ex Libris provides is called OracleClient19cx64.zip. Contact Voyager Support for a link to download the zip file.
If you have ever had ODBC drivers connected to Voyager on this machine, you will need to remove the ODBC Drivers and any System DSNs in the ODBC Data Source Administrator. Instructions for removing the old drivers can be found here.
2. Create a directory for the installation of the Oracle clients if one does not already exist. In this example, it is called C:\orainst .
3. Move the OracleClient19cx64.zip into the directory you created in step 2. Right click on the file and choose ‘Extract All.’ Make sure the directory it creates is within this installation directory, and click ‘Extract.’
4. When the extract is complete, open the OracleClientcx64 directory and then the client directory. Launch the program entitled ‘setup.exe.’
5. Windows will probably raise security warnings indicating that this software is downloaded from the internet. For any such warnings that arise, choose the option to allow or proceed with the installation.
6. After a time, the Oracle Database Client 19c Installer should open. This process is relatively brief on most newer machines, but it can take several minutes on slower computers.
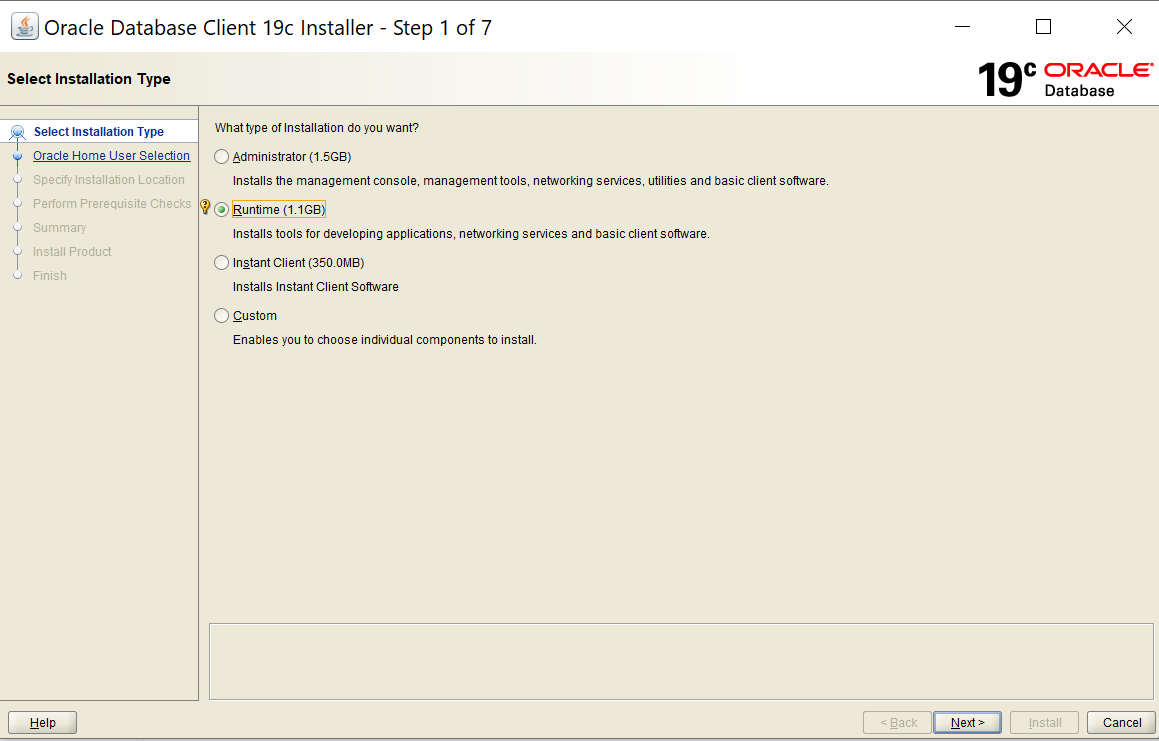
7. When the installer opens, ‘Select Installation Type,’ choose ‘Runtime,’ as in the screenshot below. Click ‘Next.’
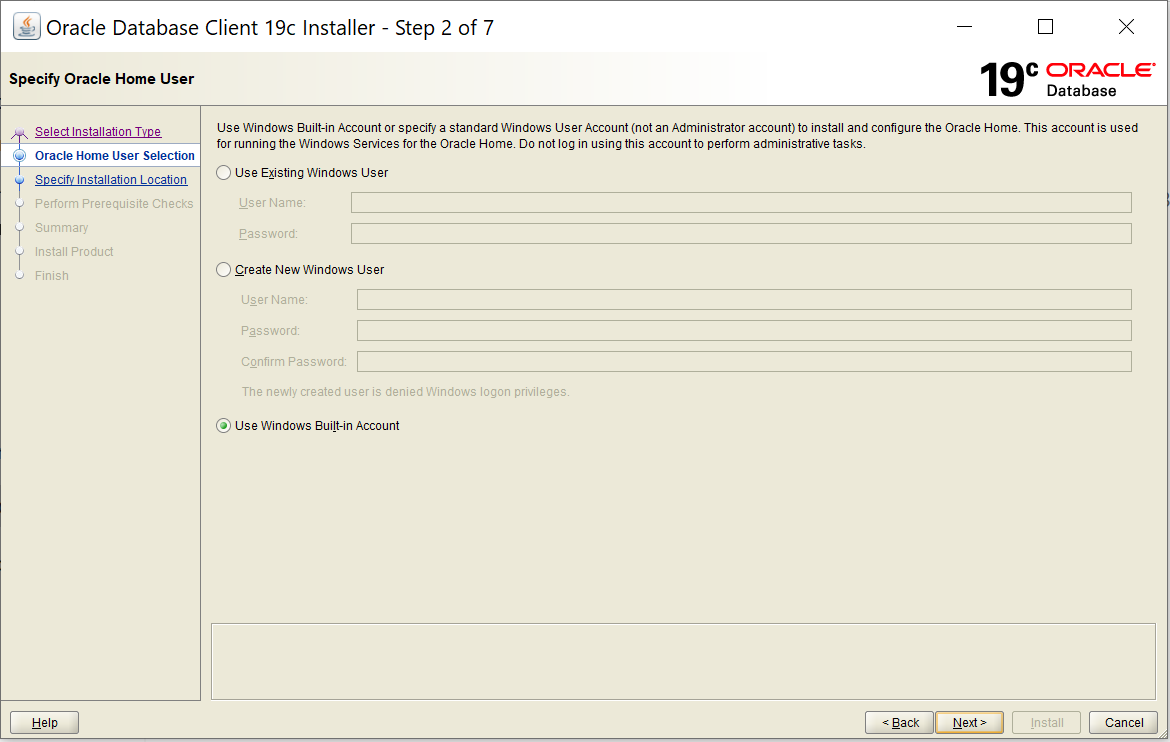
8. Choose ‘Use Windows Built-in Account.’ Click ‘Next.’
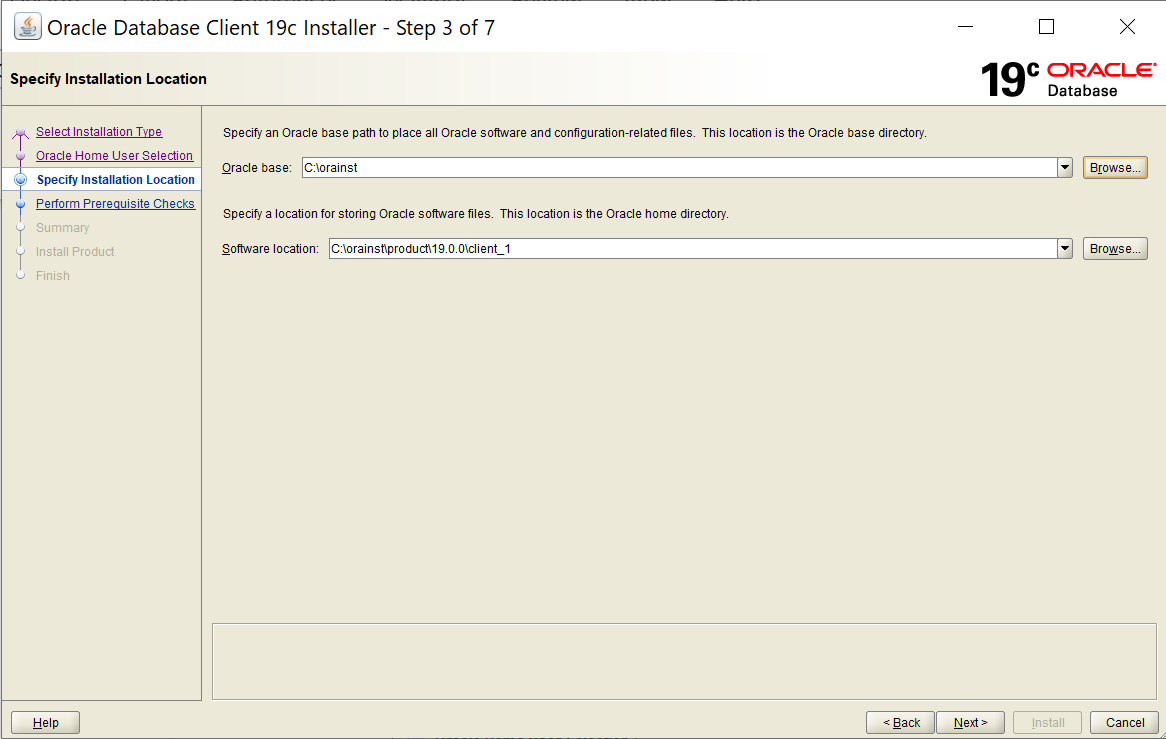
9. Make sure that the Oracle base directory is set to the directory you created in the previous step. This will probably not be the default that the installer automatically populates in this field, so make sure that it is set correctly. The Software installation directory should be in a subdirectory of this directory. It will usually be set to the correct default which in our example is C:\orainst\product\19.0.0\client_1. The number in the client directory might be something other than ‘1,’ which will not cause any problems. Click ‘Next.’
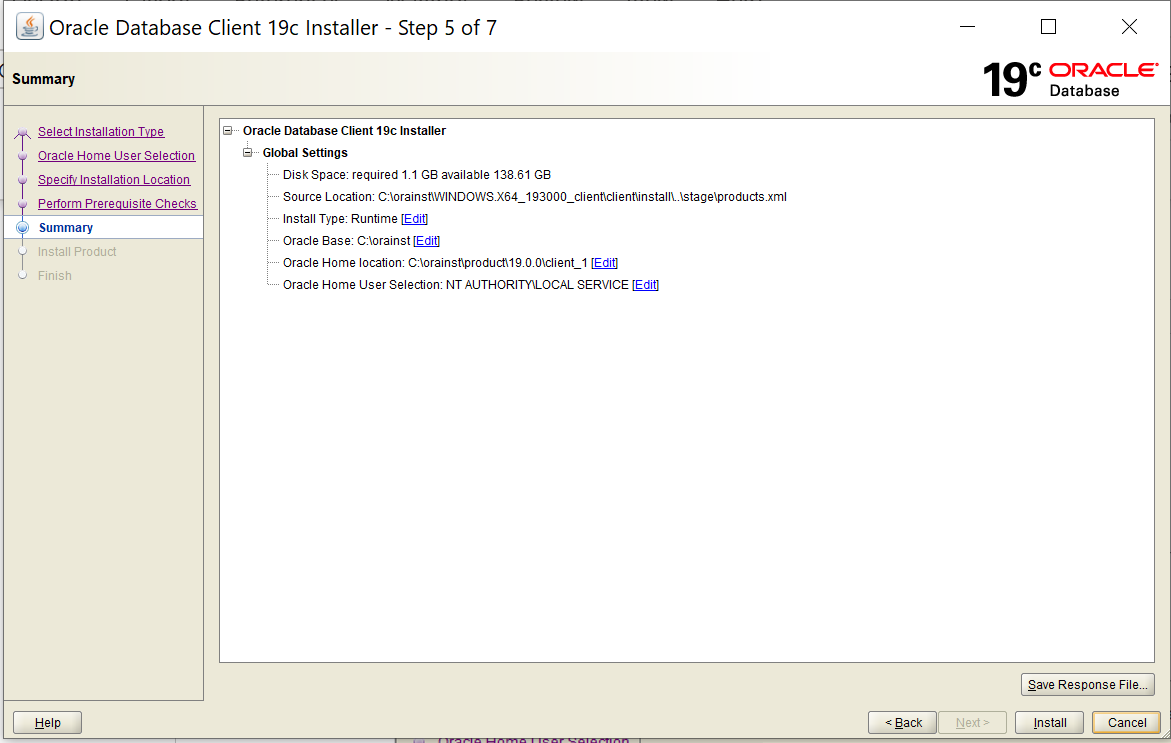
10. The installer will perform prerequisite checks and show you a summary of the settings it will use to install the Oracle client. You may choose to save this summary using the ‘Save Response File’ button. Review the summary and make sure these settings are correct. Click ‘Install.’
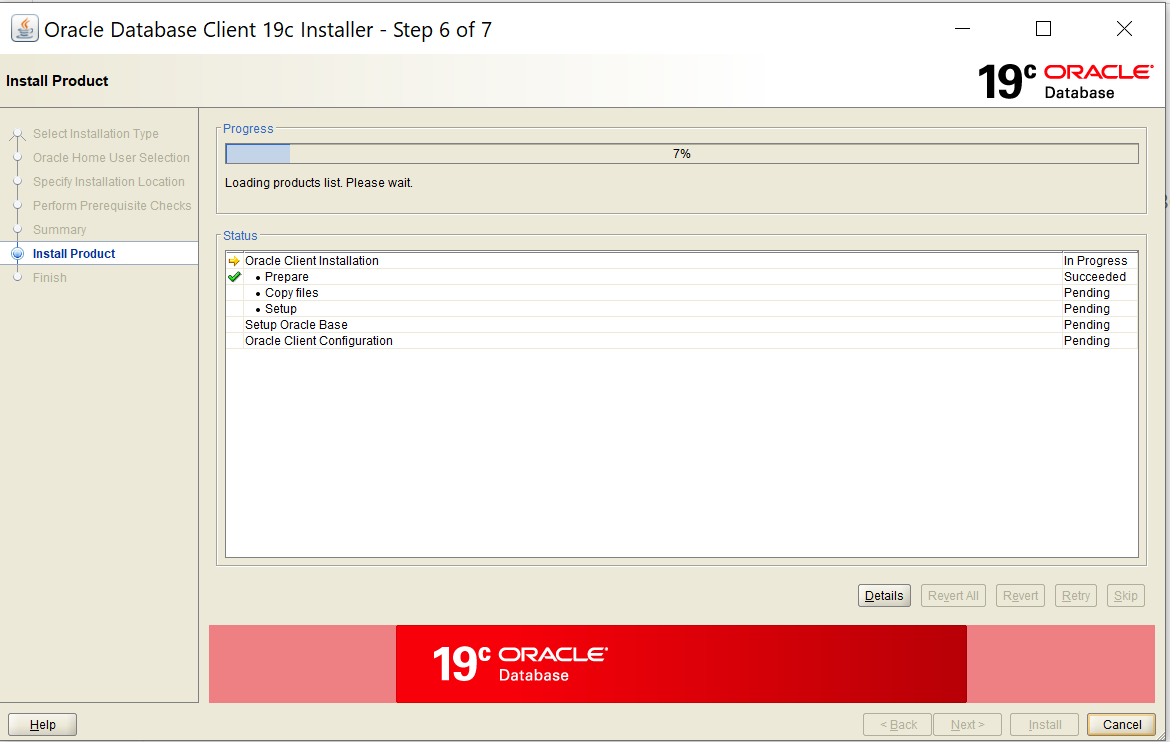
11. The installer will install the Oracle client software. This process can take several minutes.
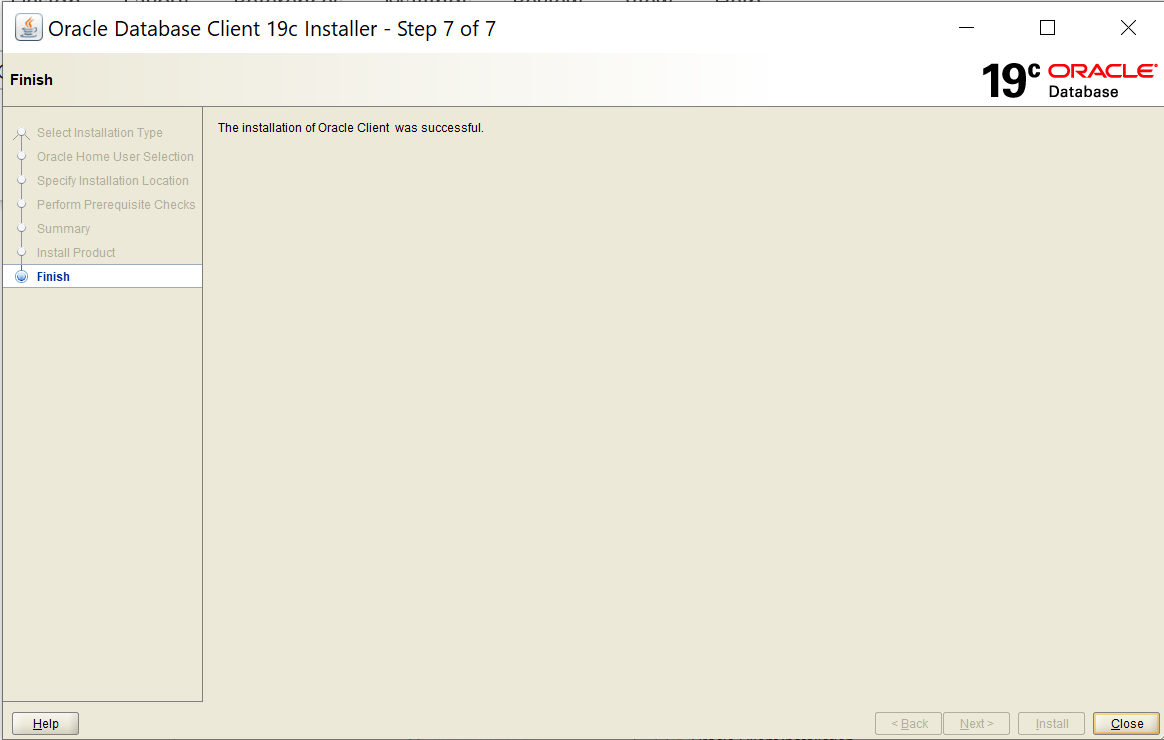
12. When the installation is complete, the installer will indicate a successful installation. Click ‘Close.’
Configure the ODBC Connection
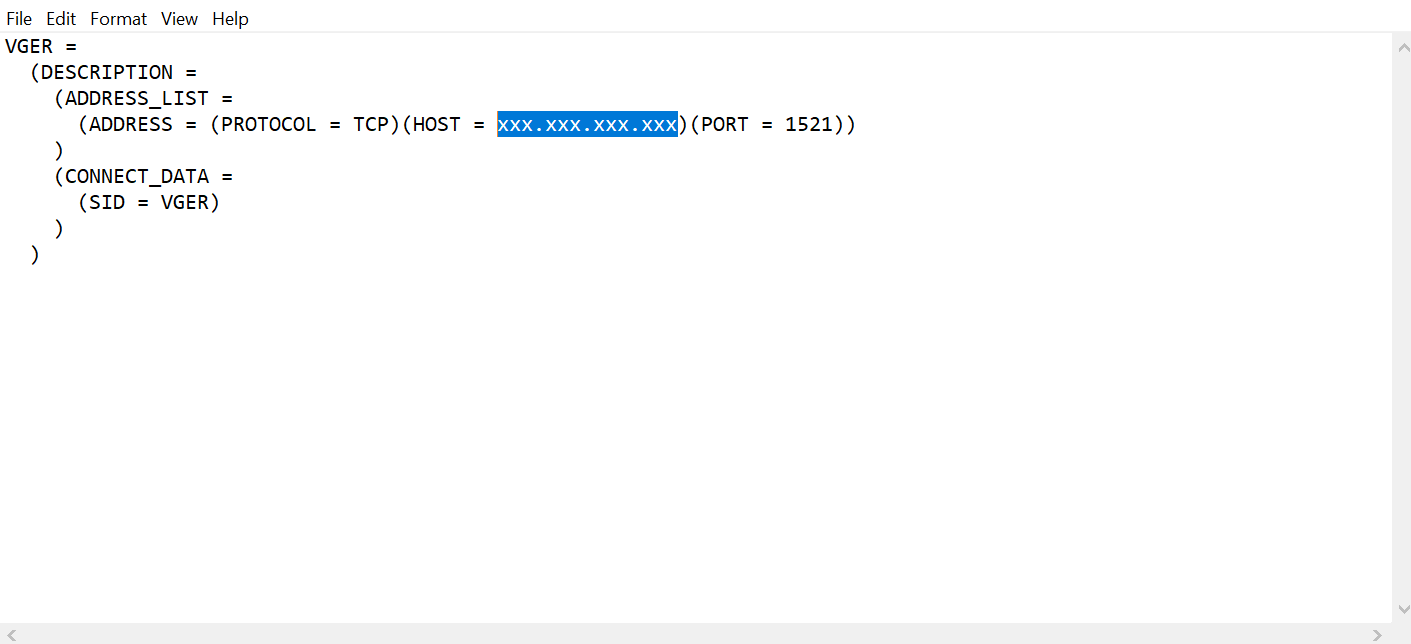
13. Download tnsnames.ora from the Ex Libris Knowledge Center https://knowledge.exlibrisgroup.com/@api/deki/files/43152/tnsnames.ora?revision=1
14. Save this file to the network/admin subdirectory of the directory where the Oracle client was installed. In our example it is C:\orainst\product\19.0.0\client_1\network\admin.
15. Open this file in a text editor and enter your server’s IP address in the HOST parameter.
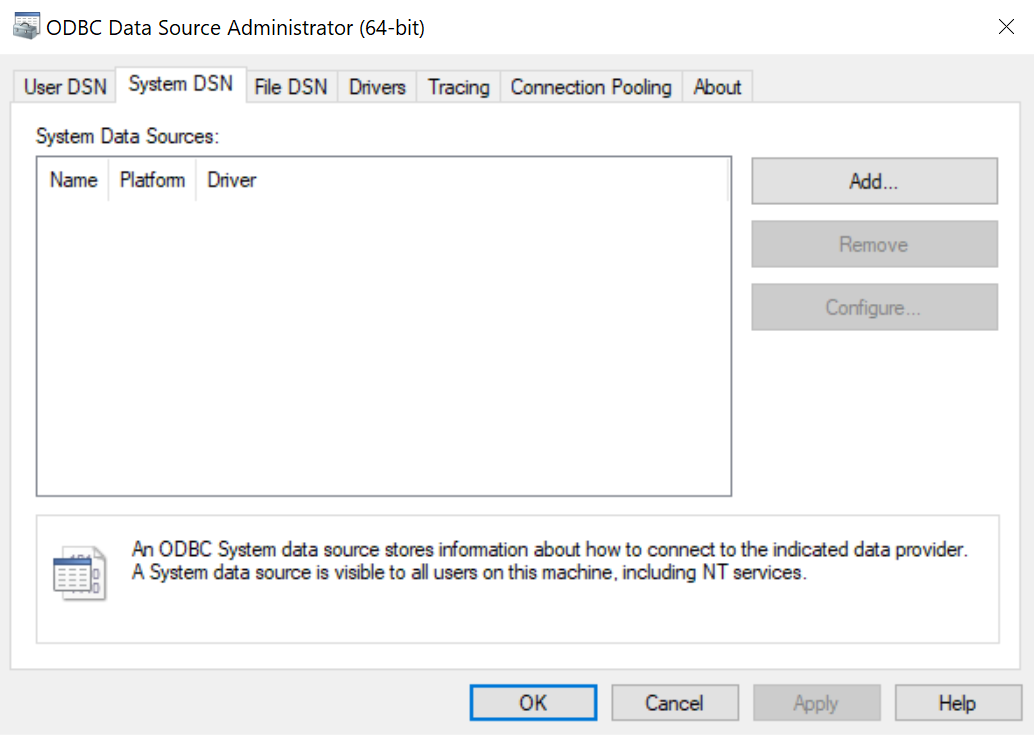
16. Open the ODBC Data Source Administrator (64-bit). The easiest way to find this program is to type ‘ODBC’ in your Windows search utility. It will return two results. Make sure that you choose the 64-bit one.
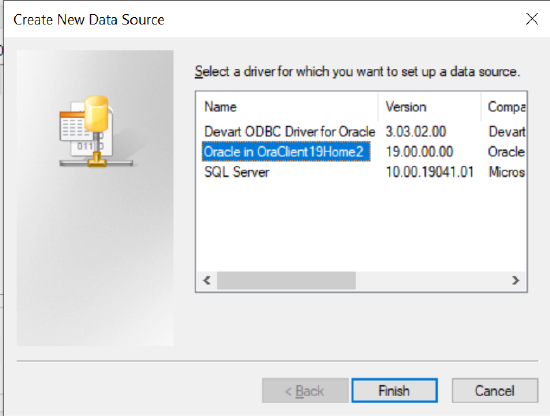
17. Select the "System DSN" tab and select "Add."
18. Select the driver "Oracle in OraClient19HomeX" where ‘X’ will be a number assigned to the driver by the installer, depending on whether there are other Oracle installations on this system. Click ‘Finish.’
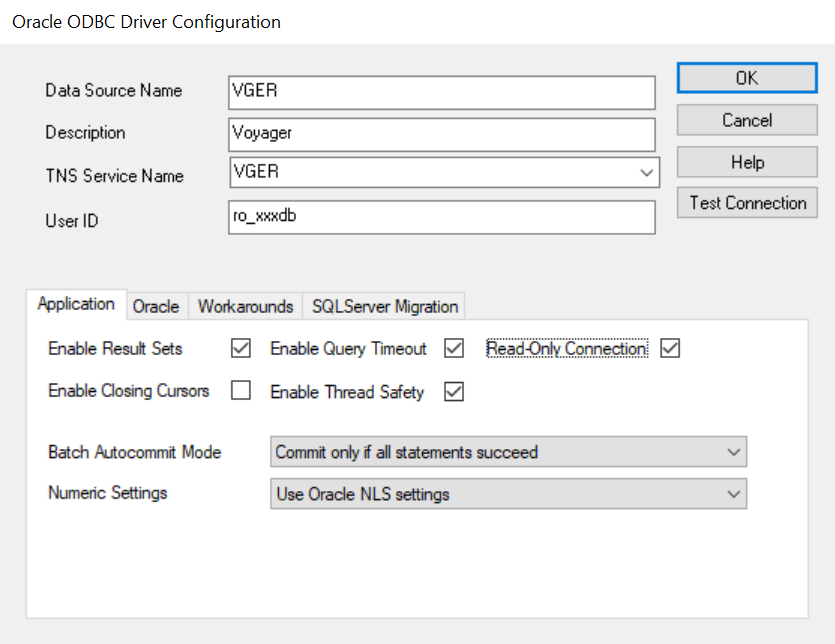
19. Enter the following values:
Data Source Name: VGER
Description: Voyager
Username: ro_xxxdb (Replace 'xxxdb' with the database name of the voyager instance)
Server: VGER
Make sure the ‘Read-Only Connection’ box is checked.
Click 'OK' to save this connection.
Connect Access Reports to the ODBC Connection
20. Open Reports.mdb from C:\Voyager\Access Reports\
(Make sure the Reports.MDB file that you are using is for the correct version of Voyager you are running)
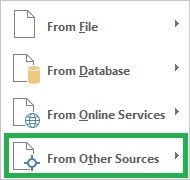
21. Select "External Data" from the MS-Access Ribbon, select "New Data Source", then select "From Other Sources" and select "ODBC Database."


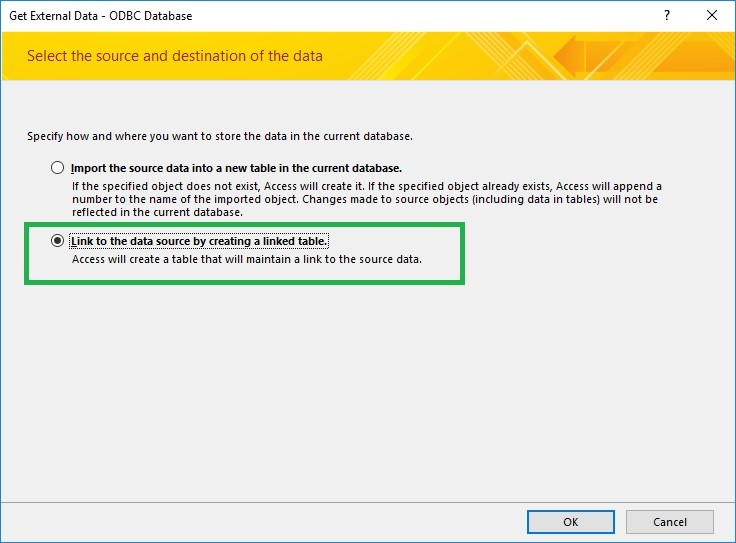
22. Select "Link to the data source by creating a linked table."
23. Select the "Machine Data Source" tab.
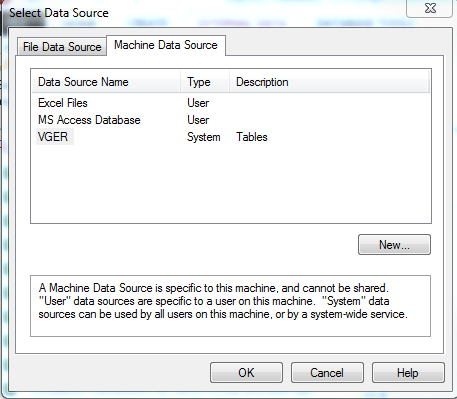
24. Select "VGER" and click "OK."
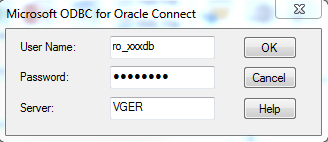
25. Enter the following values and click "OK":
User Name: ro_xxxdb (Replace 'xxxdb' with the db name of the voyager instance)
Password: ro_xxxdb
Server: VGER
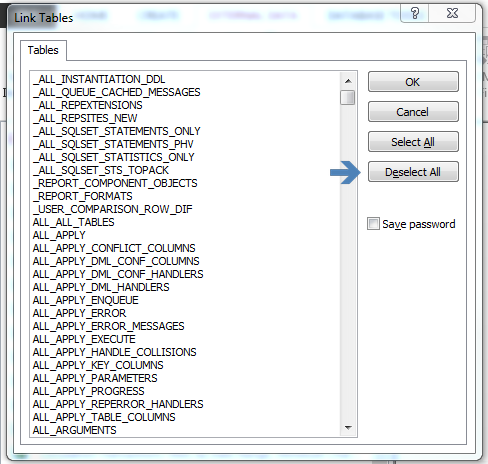
26. Click "Deselect All" (this can take a minute or so), and then click "OK." You can also check the "Save password" box.
27. Locate the navigation pane on the left hand side of the screen in MS-Access. At the top of the navigation pane select the drop down menu, and change the selection to "Forms".
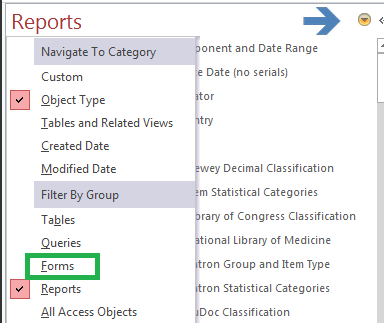
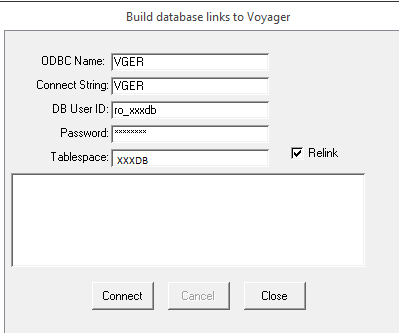
28. Open "Build Database Links to Voyager" form.
29. Enter the following values and select "Connect." (Replace 'XXXDB' with the db name of the Voyager instance):
ODBC Name: VGER
Connect String: VGER
DB User ID: ro_xxxdb
Password: ro_xxxdb
Tablespace: XXXDB (typically you will want to use ALL CAPS for the Tablespace name)
If you get errors, double-check your credentials are correct and enter ALL CAPS for the Tablespace name, then re-try this step.
30. When successful, results indicating that links are being built successfully will appear as below. Be patient, this process can take 30 minutes or longer to complete successfully.

When successfully completed, the "Cancel" button will be grayed out (inactive), and the "Connect" and "Close" buttons will be active. Select "Close". You are done.
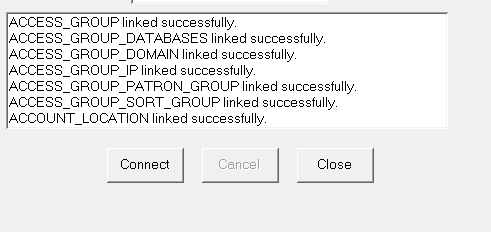
If failures occur, double-check the configuration and permission of tnsnames.ora, and the configuration of the DSN. For further assistance open a support case with Voyager support.
Additional Information
In your query results if some fields are displaying as: "Error(12001)", see: How to resolve Error 12001 when running query in Prepackaged Reports?
- Article last edited: 14-May-2021