Managing Borrowing Requests
For more information on resource sharing including locating items for resource sharing, working with resource sharing partners, working with borrowing and lending requests and contributing to the resource sharing directory, see Resource Sharing.
- Fulfillment Services Operator (in the scope of a resource sharing library)
- Fulfillment Services Manager (in the scope of a resource sharing library)
Finding Requests that Require Handling
You can use the facets filtering system, the sort feature, and the secondary search to help you find the tasks you need to work with. Secondary search is a special feature of the Resource Sharing task lists. In addition, you can open the Borrowing Requests page from one of the predefined filters in the Task Lists option of the persistent menu.
Filtering Borrowing Requests Using Facets
You can filter the list of borrowing requests using the facets on the left side of the page. The facets include:
-
Labels – Labels that are attached to requests
-
Active Partner –The active partner in a request rota
-
Activity Status – Active or Completed (You can remove a specific status from the display of Active records in the task list by enabling the row in the Borrowing Requests Inactive Filters - see Configuring Borrowing Request Inactive Filters.)
-
Status – Status of the borrowing request
The following statuses indicate that the final step in the request is completed. Requests in these statuses may be removed.
-
Canceled by partner
-
Canceled by patron
-
Canceled by staff
-
Digitally received by library
-
Expired
-
Request completed - This is the final status before removal, and may be manually set. If the request is for an ISO partner, there must be a reply from the partner before the status will switch to Request completed.
The following are non-final (in-process) statuses of the request process:
-
Conditional – Appears only when Conditional is enabled in the borrowing workflow profile. See Adding Workflow Profiles.
-
Created borrowing request
-
Damaged communicated – Appears only when Damaged communicated is enabled in the borrowing workflow profile. See Adding Workflow Profiles.
-
Declared lost by partner
-
Exported to third party
-
Externally obtained
-
Lender check in
-
Loaned item to patron
-
Locate failed
-
Locate in process
-
Lost communicated – Appears only when Lost communicated is enabled in the borrowing workflow profile. See Adding Workflow Profiles.
-
Mediated patron renewal
-
Overdue request
-
Pending approval
-
Physically received by library
-
Ready to be sent
-
Recalled by partner
-
Received – not for loan
-
Rejected by partner
-
Renew request not accepted
-
Renew requested
-
Renewed by partner
-
Report damaged item to partner – Same meaning as Damaged communicated.
-
Report lost item to partner – Same meaning as Lost communicated.
-
Request accepted
-
Request sent to partner
-
Returned by patron
-
Returned item to partner
-
Shipped digitally
-
Shipped physically
-
Waiting for cancel response
-
Will supply
-
-
Creation Date – Date on which the request was created. Possible values are:
-
Today – Requests created on the current date
-
2-3 days ago – Requests created two or three days before the current date (excluding today and yesterday)
-
4-7 days ago – Requests created 4-7 days before the current date (in other words, excluding the above three options)
-
8-30 days ago – Requests created between 8 days and a month before the current date (in other words, excluding the above four options)
-
Older – Requests created more than one month before the current date
-
-
Update Date – Date on which the request was updated. Possible values are the same as those for the Creation Date facet.
-
Requested Format – The format of the requested item. Options are: Digital, Physical, and Physical non-returnable
-
Supplied Format – The format in which the requested item was supplied. Options are: Digital, Physical, Physical non-returnable and Undefined
-
Due Date – The date by which the item must be delivered. Possible values are the same as those for the Creation Date facet.
-
Last Interest Date – The date after which the requester has indicated that they are no longer interested in the item
-
Need Patron Information – Requests for which mandatory information has not been supplied by the patron
-
General Messages – Requests which contain general messages of Type = Received. You can dismiss and activate general messages from the request's General Messages tab (see Sending a General Message With a Resource Sharing Request).
-
Owning Library – The library which owns the requested resource
-
Notes from Partner – The requests with notes from the lending institution
-
Pickup Location – Libraries, reading rooms, and personal delivery are all included in the facet
-
Level of Service – The level of service assigned to the request
-
User Group – The user group of the requester
-
Assignee – The staff person to whom the request is assigned (including "Unassigned")
-
Event Name – Status that is attached to the request by broker systems (such as BLDSS) that support request updates with Alma
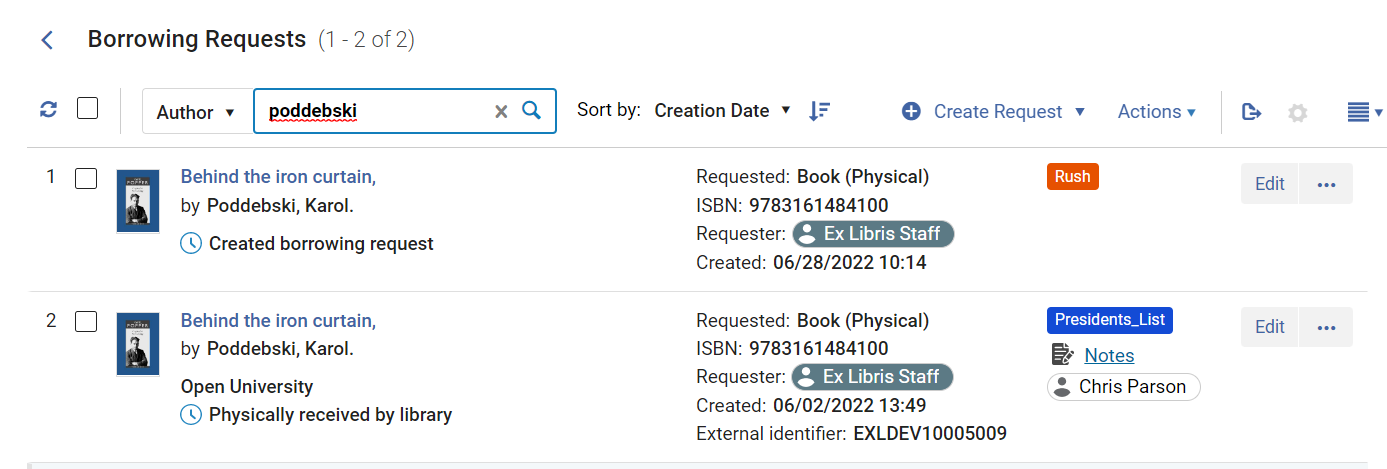
Secondary Search
The secondary-search feature allows you to search the current request list for requests that meet certain criteria. For example, you could search for a particular author's name in order to find all the requests in the list related to books by that author, and hide all the other requests in the list.
Unlike the primary search feature, which is always available in the persistent search box (see Searching in Alma), the secondary search does not cancel previously selected facets.
- At the top of the request list, in the secondary-search controls, in the dropdown list, select the field to search by.
- In the text box, enter the text for which you want to search.
- Press Enter or select
 . The search is performed; the request list is updated as required so that only those requests that meet the search requirements appear in it.
- In the secondary-search controls, select the x.
Predefined Task-List Filters
You can select any of the following tasks in the Tasks List (![]() ) in the persistent menu (see Tasks in the Task List) to open the Borrowing Requests page with a preset filter:
) in the persistent menu (see Tasks in the Task List) to open the Borrowing Requests page with a preset filter:
- Borrowing requests - New - with no partner
- Borrowing requests - Overdue
- Borrowing requests canceled by partner
- Borrowing requests recalled
- Borrowing requests returned by patron
- Borrowing requests with active general messages
- Borrowing requests with active notes
Viewing the Parameters of a Request
You can view the complete request form of an existing borrowing request. Depending on its status, you may also be able to edit the request. To view the form, select View or Edit (whichever appears). The form opens in a sliding panel. For additional information, see Editing a Borrowing Request.
View appears if the request status is one of the following:
- Returned item to partner
- Request completed - The request was either delivered or canceled before it reached the hold shelf.
- Shipped digitally
- Canceled by partner
- Cancel requested
Otherwise, Edit appears.
Workflow Actions
Performing an Action
You can perform actions on individual borrowing requests from the More actions menu of the request. The available options depend on the type of request and its status.
- Optionally configure the parameter check_patron_duplicate_borrowing_requests; see Configuring Other Settings.
- Select the action you want to perform on the selected requests, as described in the following table:
Resource Sharing Borrowing Request Page Links
Link Description Assign to Assign a task to a user (see Managing Task Assignments below). Cancel Cancel the request. Appears only when: - The request is still active
- The request does not have a status of Loan
- The request has not been shipped
- No partner exists or the configured active partner supports the Cancel feature
When canceling a request, the request’s status becomes Canceled by staff.You can also delete requests in Primo, on the My Account tab. When doing so, the borrowing request’s status becomes Canceled. If an item is on the hold shelf when canceled in Primo:- The hold request is canceled
- The item moves to the expired hold shelf
- The request is marked as Completed
For details on the Primo My Account tab, see My Account.When a request is canceled, a message is sent to the patron. The letter is Ful Cancel Request Letter (email) or Cancel Request Letter (SMS). To configure the message, see Configuring Alma Letters.Check Out to Patron Marks that the patron received a physical non-returnable item and completes the request. Conditional Reply When an ISO message is sent from the lender, the borrowing request changes to Conditional status, and the Date for Reply field is displayed. When selecting this action, a window is displayed to select Yes or No in response to the condition specified by the lender. If the response is Yes, the request status changes to Sent and Date for Reply field is cleared. If the response is No, the status changes to Rejected by Partner and continues to the next partner in the rota. Damaged Send an email or message to the lender and set the status to Damaged communicated. Appears only:
- For email (email is sent) or ISO partners (message is sent).
- When the request is received by the library (and not as 'Physical non-returnable') and has not yet been returned to the partner
- When Damaged communicated is enabled in the borrowing workflow profile. See Adding Workflow Profiles.
Duplicate Create a new request based on the existing one. You can then modify the request as required on the Resource Sharing Borrowing Request page. For details on the displayed fields on this page, see the Resource Information Fields table in Adding a New Book or Journal Article and Request Attribute Field table in Creating a Borrowing Request.When duplicating a Resource Sharing Borrowing request, the values in the following fields are copied to the new request:- Title
- ISSN, ISBN (Metadata fields)
- Author
- Requester
- Owner
- Request Status
- Requested Format
- Delivery Location
- Request Note
Edit Shipping Cost This allows the user to update the shipping cost without opening the Details pane or the full edit form for the borrowing request. The option is also available for completed requests. Externally Obtained Sends a request using the GetItNow service. See Sending a Request for a CCC GetItNow Resource. General Message Send a general message with a borrowing request to a lender (see Sending a General Message With a Resource Sharing Request). Locate Resource Manually activates the Borrowing Locate process. This action only appears if the request has an assigned partner or rota. See Borrowing Locate Process. Lost Send a message or email to the lender and set the status to Lost communicated. Appears only: - For email (email is sent) or ISO partners (message is sent).
- When the request is received by the library (and not as 'Physical non-returnable') and has not yet been returned to the partner.
- When Lost communicated is enabled in the borrowing workflow profile. See Adding Workflow Profiles.
(New for May) If the rs_use_tou_for_lost_item parameter is enabled (Configuration > Fulfillment > Other Settings) fines and fees will be added to the patron, based on the loan terms of use. See Managing Lost Loans for more information.
You can create a purchase request with the information in the borrowing request. If the borrowing request is inactive, you are taken directly to a purchase request form. If the borrowing request is active, a window is displayed to select whether to cancel the borrowing request or keep the borrowing request active alongside the purchase request.The purchase request's requester field is populated as follows:- If the resource sharing request is canceled, the field is populated with the requester from the original borrowing resource sharing request.
- If the resource sharing request is inactive or kept active, the requester field is populated with the logged in user's ID.
Reactivate Request Reactivate borrowing request will appear when:
- The Operator has the Reactivate privilege in the scope of the owner of the request.
- If an active partner exists, it should have the Reactivated step in the Borrowing workflow.
- Status is one of: CANCELLED, REQUEST_COMPLETED, CANCELLED_BY_PATRON ,CANCEL_REQUESTED, REJECTED, EXPORT_TO_THIRD_PARTY.
Select this option to reactivate a completed peer to peer resource sharing request. A temporary item is recreated using the previous barcode with the process status set to In resource sharing. The library and location of the item are set to the same values as when the item was initially created. If the item is not yet on loan, a hold request is reinitiated.
When reactivating, two options appear on the confirmation window: Reactivate loan and Send general message. If no loan is initiated, the request status is Request Reactivated. The request's original external ID is maintained.
Recalculate Rota Assignment To attach a rota to a request based on configured rota assignment rules, select the Recalculate Rota Assignment link to attach the rota to the request according to the configured rules (see Configuring Rota Assignment Rules). This process also performs a locate process automatically if the Automatically activate locate profile option is selected for this resource sharing library (see Configuring Parameters of a Resource Sharing Library). Release assign Remove the assignment of the task and leave it unassigned (see Managing Task Assignments) below. Remove and Recalculate Rota Assignment Remove all partners, recalculate, and create a new rota in one action.
If request was already sent to a partner and you select this option, the partner is not removed from the rota and it remains the active partner. Only the rest of the rota is removed.
Recall Recall shipped items when a local hold request is placed for that resource. The recall function is applicable to both ISO and email partners. You can configure which loans are recalled first if the requested resource has both copies that were shipped to a remote borrower and copies loaned to local patrons. The parameter that controls this choice, rs_prefer_recall_method, defaults to False (see Configuring Other Settings). Changing it to True recalls the shipped item first, rather than the locally loaned copy.Recalls are supported if the borrowing workflow profile includes the Recall item action (see Configuring Workflow Profiles). In that case, borrowing requests display a new action, Recall.For more information about the recalling resource sharing requests, see the Resource Sharing Request Recalls video (7:33 mins).Receive Select a receiving format and enter a temporary barcode to enable receiving the resource (see Resource Sharing Partners). If the generate_resource_sharing_temp_barcode configuration setting is set to true, the temporary barcode is displayed automatically (see Configuring Other Settings). See Receiving Items.Reject Mark a request rejected by the lending institution as Rejected (see Rejecting a Borrowing Request). Reject is only visible if the workflow option Reject is enabled. When rejecting a lending request you must enter a reason. The reasons are transferred to the borrowing library so a common set of reasons is used. The list can be found here. Remove Remove the request. Appears only when the request’s status is one of the following: - Returned item to partner
- Request completed - The request was either delivered or canceled before it reached the hold shelf.
- Shipped digitally
- Canceled by partner
- Cancel requested
Renew Renew a resource sharing borrowing request. A dialog box appears, where you enter a due date for the request and an optional note in the Internal note and/or Note to partner fields. For details on these fields, see step 3 in Rejecting a Borrowing Request. The request status is changed to Renewed by Partner. For more information, see Managing Borrowing Renewals. This option appears when Staff renewal is selected for lending requests in the Resource Sharing Lending Workflow Profile (see Configuring Workflow Profiles).If the request is renewed, a message is sent to the patron and a renewal fee may be charged. The letter is Ful Borrowing Info Letter. To configure the message, see Configuring Alma Letters. A resource sharing renew fee is set as part of a fulfillment policy; see Adding Fulfillment PoliciesFor more information about requesting renewal of a borrowing request, see the ISO ILL: Request Renewal video (10:06 mins).Request Renew Renew a resource sharing borrowing request under the following conditions:
- A Resource Sharing Lending Workflow Profile exists with Staff Renewal enabled.
- The partner is not part of a fulfillment network.
- The item has arrived.
- The item has not been returned.
A dialog box appears, where you enter a due date for the request and an optional note which displays in the Notes tab page of the request.
If the Resource Sharing Lending Workflow Profile has the Renewal Response and Staff Renewal options selected, the request status is changed to Renew Requested. For details on workflow profiles, see Configuring Workflow Profiles.If the request is renewed, a message is sent to the patron and a renewal fee may be charged. The letter is Ful Borrowing Info Letter. To configure the message, see Configuring Alma Letters. A resource sharing renew fee is set as part of a fulfillment policy; see Adding Fulfillment Policies.If Renewal Response was not selected for the workflow profile, the request is automatically renewed after selecting the Request renew link; the request's status is Renewed by partner, and the Renew link does not appear.This option appears for requests with a Received status.Resend Patron Email For digital requests with document delivery, the email may be resent may be resent to the patron. For Rapid ILL document deliveries, after a request is completed, Alma enables you to request a new copy of the original request in case it was not properly received. This action reopens the request on the borrower's side for RapidILL requests once the request is complete.
This action can only be used once. See Resupplying a Request for more information.
Return Appears when the request is received by the library (and not as 'Physical non-returnable') and has not yet been returned to the partner. If the borrowing Workflow Profile for the partner includes the Lender check in option, the request status is changed to Returned item to partner (see Configuring Workflow Profiles). The Resource Sharing Return Slip Letter is printed when returning a borrowing item to the lender. For more information, see Configuring Alma Letters.For more information about the returning items to the lender, see the ISO ILL: Lender Checked-in Message video (8:35 mins).Send Appears only when an ARTEmail or ISO partner is configured. Opens the Resource Sharing Borrowing Parameters page, where you configure details to be sent to the partner (see Sending a Borrowing Request). The parameters displayed are those selected for the partner during the partner configuration process (see Resource Sharing Requests). Send Query to Patron Display the query types configured on the Patron Query Types Code Table page (see Configuring Patron Query Types). The Email Message dialog box appears, enabling you to select the email template you want to use for the query. The dialog box also contains a Note to Patron field for a free text note to be included on the Query to Patron letter (QueryToPatronLetter). If there is only one template type of Query to Patron, the dialog box will appear with just the Note to Patron field available for input. For additional information on this option, see Sending a Query to the Patron, below. For details on system behavior when selecting this option, see Configuring Patron Queries.Status Query Request a status update from the borrowing institution. This is only applicable to ISO partners.The returned lender ISO status is recorded in a note. Each ISO status corresponds to the following Alma request statuses:
- Not supplied - Rejected the borrower request, Locate failed, Expired
- Pending - Created lending request, Being processed, Will Supply, Non expiring
- In Process - Staff renewal, Renewal response
- Cancel Pending - Cancel reply
- Canceled - Canceled
- Shipped - Shipped Physically, Shipped Digitally
- Received - Received by partner
- Renew Pending - Renew requested, Patron renewal
- Overdue - Overdue request
- Returned - Returned by partner
- Checked In - Lender check in, Request Completed
- Recall - Recalled item
- Lost - Lost
- Unknown - Damaged, all other
View Local Resources Opens a local search for resources matching the requested item. If the resource is found locally, you can add a local hold-request on the matching local resource. To do so: - In the search results, in the item's listing, select More actions (
.png?revision=1) ) > Request. The Create Request page opens in the sliding panel.
) > Request. The Create Request page opens in the sliding panel. - Select Submit. The local hold-request is created.
View Network Resources Opens a Network Zone search for resources matching the requested item. If a query cannot automatically be created (for example, the locate by field OCLC does not exist in the request), a query will run with a single condition of Tag Suppressed equals false. See Adding Network Partners to Resource Sharing Rota.
Changing the Statuses of Requests
As a borrowing request is processed, its status automatically changes accordingly. You can also change its status manually, as required. Furthermore, you can change the status of multiple requests in a single action.
When the status of a request is changed from Report lost item to partner or Report damaged item to partner to Completed, the temporary item is removed and the loan is closed.
- On the Borrowing Requests page (Fulfillment > Resource Sharing > Borrowing Requests), select the checkboxes of the requests you want to manage. The Actions options become available.
-
Select Change Status. A Change Status box opens.
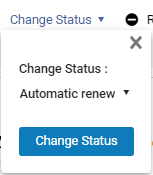
- Select the dropdown list of statuses. (That is, select Automatic renew, the first option in this list.)
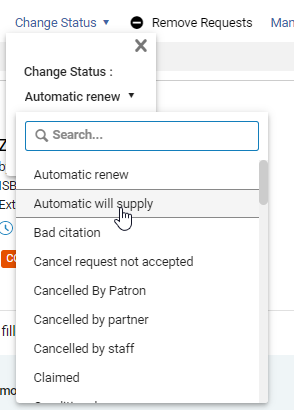
- Select the required status. The dropdown list closes, and your selection is displayed.
- Select Change Status. The statuses of the selected requests are changed.
Removing Requests
Completed borrowing requests can be removed from the task list. When they are, they can only be viewed in analytics.
Requests that are not Completed cannot be removed.
- On the Borrowing Requests page (Fulfillment > Resource Sharing > Borrowing Requests), select the checkboxes of the requests you want to remove. The Actions options become available.
- Select Remove Requests. The requests are removed.
Managing Labels
Labels can be attached to, or removed from, individual requests or multiple selected requests; see New Layout 2022.
Managing Task Assignment
- On the Borrowing Requests page (Fulfillment > Resource Sharing > Borrowing Requests), select Assign for the relevant task. The Assign To dialog box opens.
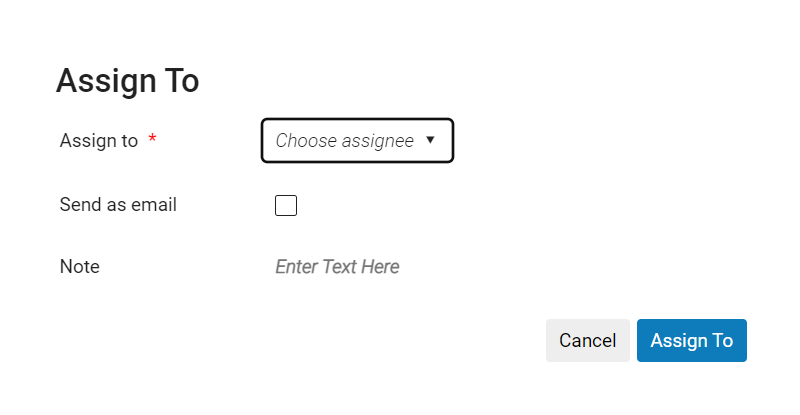 Assign To Dialog Box
 - From the Assign to drop-down list, select an operator.
The list of operators includes only those users who have the Fulfillment Services Operator role.
- Select the Send as e-mail check box to notify the operator of the new assignment.
- In the Note field, enter notes, as needed. The field is limited to 1,000 characters.
- Select Assign To. The request is assigned to the selected user.
- On the Borrowing Requests page (Fulfillment > Resource Sharing > Borrowing Requests), select Release assign for the relevant task. The assignment is removed, and the task becomes unassigned.
Sending a Query to the Patron
When the Query Template Is Preselected
- Select Send query to patron. An Email Message dialog box appears.
-
If you are using patron-query templates, and Edit if Single is set to true, when you select Send query to patron, the Email Message dialog box below opens. The Subject field contains the External Identifier of the request (if one exists). The Body field contains text relating to the requested resource.
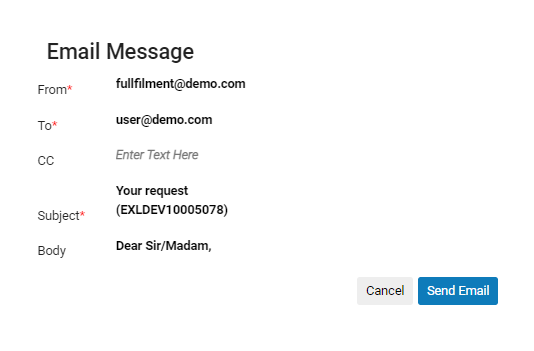 Email Message dialog box when using patron-query templatesSelect any field to modify it, as needed. The Body field expands when you select it, as necessary. Note that the Body field may contain text that should be modified before the message is sent, for example Query to patron: [ please enter your query here ].
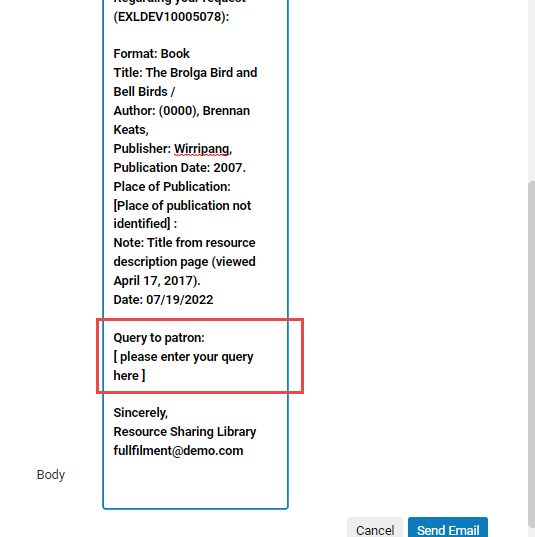 Body field selected (and scrolled down) in the Email Message dialog boxWhen you have finished editing the message, select Send Email to send the message to the patron.
 - If you are using patron-query templates, and Edit if Single is set to false, when you select Send query to patron, the query is sent immediately.
- If you are using patron-query types, when you select Send query to patron, the query is sent immediately.
When the Query Template Must Be Selected
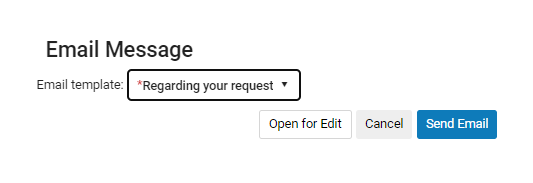
If there are multiple patron-query templates or types for the current context, you must choose the template/type to use. Depending on your system settings, you may or may not be able to edit the body of the message.
- Select Send query to patron. An Email Message dialog box appears.
- Under Email template, select the template you want to use.
- Do one of the following:
- If your system uses patron-query templates, if you want to edit the contents of the message before sending it, select Open for Edit. The message opens for editing (see above). Edit the message as required.
Email Message dialog box when patron-query templates are in use and the template has been selected - If your system uses patron-query types, if you want to add a note to the message, under Note to patron, select Enter Text Here, and then enter the note you want to add.
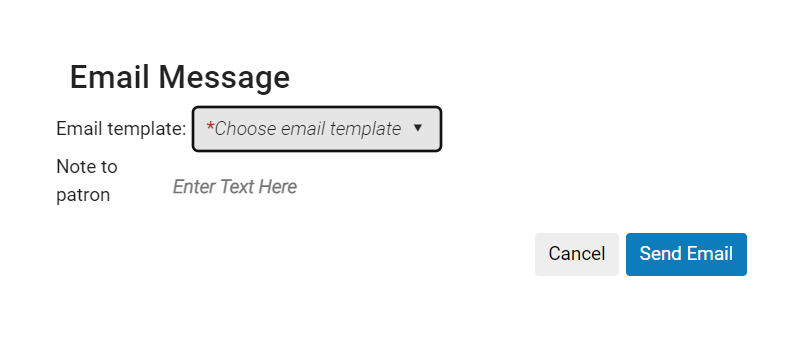
Email Message dialog box when patron-query types are in use
- If your system uses patron-query templates, if you want to edit the contents of the message before sending it, select Open for Edit. The message opens for editing (see above). Edit the message as required.
- Select Send Email. The message is sent.
Sending a General Message With a Borrowing Request

- The borrowing request is an ISO, email or NCIP-P2P request.
- The borrowing request has already been sent
- On the Borrowing Requests page (Fulfillment > Resource Sharing > Borrowing Requests), locate an ISO, email or NCIP-P2P request.
- From the More actions menu, select General Message . The General Message dialog box appears.
 General Message Dialog Box
 - In the Message field, enter a message
- Select Send. The message is sent to the lender. The request is limited to 1,000 characters.
Viewing Borrowing Request Actions
- In the Borrowing Requests page (Fulfillment > Resource Sharing > Borrowing Requests), select Edit or View for a request (whichever is available). The Resource Sharing Borrowing Request page displays.
- Select the History tab. The History tab displays the list of actions performed on the borrowing request. Select Full view mode to display all records for the request. Select Brief to display only those enabled in the configuration page Brief Audit Fields (see Configuring Brief Audit Fields).
History Tab
- The Operator column appears only for managers and administrators. See Configuring Users' Ability to View Operator Details.
Rejecting a Borrowing Request
- On the Borrowing Requests page (Fulfillment > Resource Sharing > Borrowing Requests), in the More actions menu of the request, select Reject. The Reject Request dialog box opens.
 Reject Request dialog box
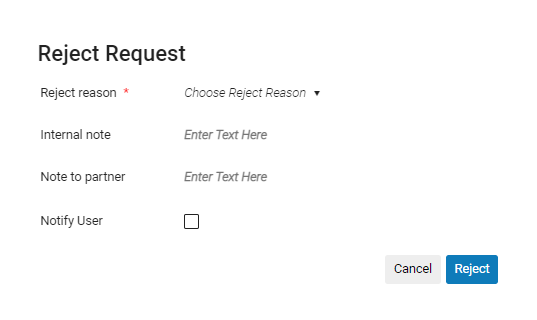
 - In the Reject reason field, select a reason for the rejection.
- Optionally, add a note in either or both of the following fields: This note appears in the following format: <Name of partner><Note text>. The fields are limited to 1,000 characters.
- Internal note: A note that appears only on the borrowing side. These notes appear in the Notes tab but do not appear on the History tab, and are not sent to the peer partner. An example of such a note is: "This lender has historically been difficult to deal with."
- Note to partner: A note that is sent to the partner. These notes appear in both the Notes tab and the History tab. An example of such a note is: "Thank you for your help. Please let us know when the book returns from the bindery."
- Optionally, select Notify user to send a notification to the requesting patron informing them of the rejection.
- Select Reject. The request's citation status changes to Rejected the borrower request, and the Reject reason and Reject note are displayed in the Notes tab of the request.
To see the Notes, History, and Rota tabs, in the Borrowing Requests page (Fulfillment > Resource Sharing > Borrowing Requests), select Edit or View for the request (whichever is available). The full request form – the Resource Sharing Borrowing Request page – opens in a sliding panel.
Resupplying a Request (New for August)
If there is a problem with a request that has been digitally supplied via Rapid ILL, you can request a new copy from the lender.
This action can only be used once.
-
In the Borrowing Requests page, from the actions menu select Resupply Request.
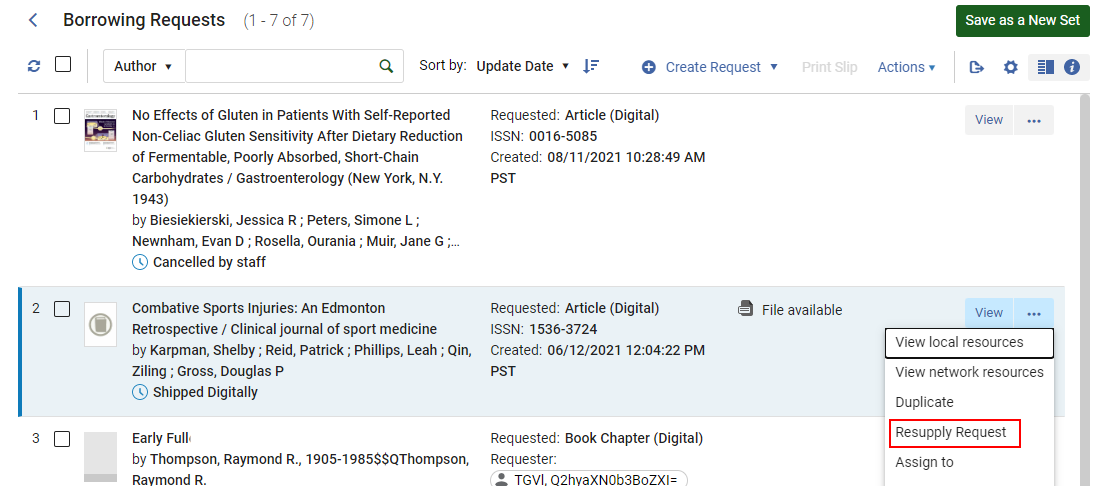 Resupply request action
 - Enter a Reason for resupplying the request.
 Resupply Request Reason
 -
The status updates to Request sent to partner.

-
The lender then receives an alert and a note to resupply the request.

See also Resupply Request.
Converting a Borrowing Request (New for August)
You can convert a request type placed by a user by using the Convert Request Type action from the available actions for the request. This action is available for the following statuses:
- Request created
- Ready to send
- Locate failed
- Rejected
- Resubmit
- Expired
- Recalled
- Pending approval
- Reject
- Bad citation
- Local holding
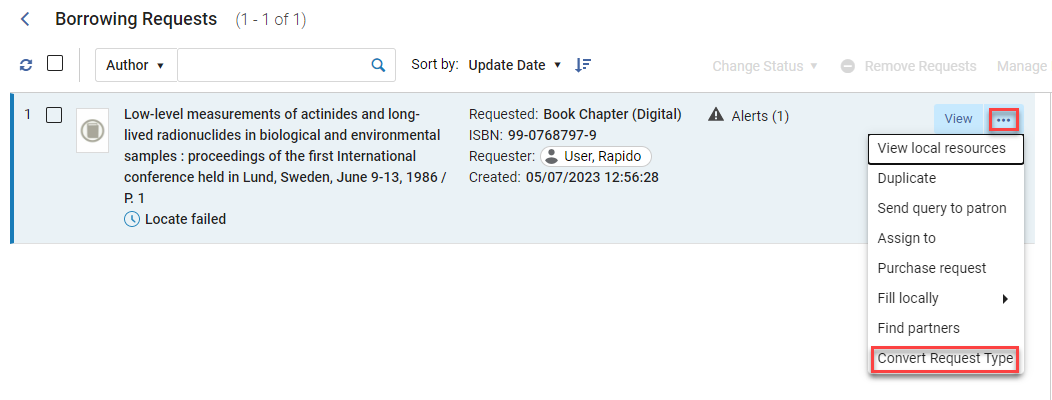
Once this action is selected, you can select the type of request to convert to and add the required information (such as pages or chapter numbers when converting to a book chapter).

Once converted, the Request type change is logged in the History and the lending request partner is recalculated.
Additionally, when converting a request type, the Owner and Requested Pickup Location fields are editable.
If the Owner only contains one option, the field is not editable.
Managing an Overdue Borrowed Resource
Printing Slips in Bulk
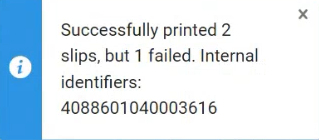
The Print Slip bulk action enables the library staff to reprint received or returned slips in bulk. When multiple borrowing requests are selected, selecting Print Slip reprints all the slips.
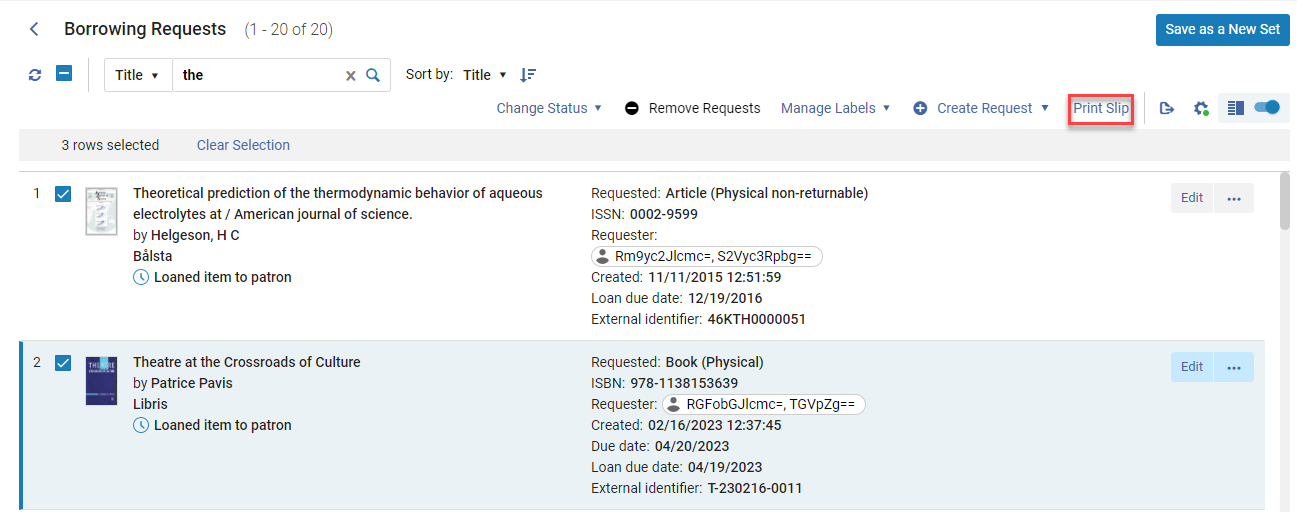
For requests that were not received, no print slip is printed. For requests that were received but not yet returned, the Resource Sharing Receive Slip Letter is printed. For requests that were returned, the Resource Sharing Return Slip Letter is printed. When multiple items are selected, all slips that were received/returned are printed and a message appears indicating which slips were printed successfully and which slips could not be printed.