
Configuring Libraries
This page describes how to configure libraries for fulfillment including services between libraries in an institution, transit time rules, resource sharing, etc.
For links to all the main fulfillment documentation pages see Fulfillment.
Configuring Fulfillment Services Between Libraries Within an Institution
- General System Administrator
- Fulfillment Administrator
- Adding Organizational Unit Relationships (see Adding Organizational Unit Relationships)
- Editing Organizational Unit Relationships (select Edit from the row actions list)
- Deleting Organizational Unit Relationships (select Delete from the row actions list)
Adding Library Relationships
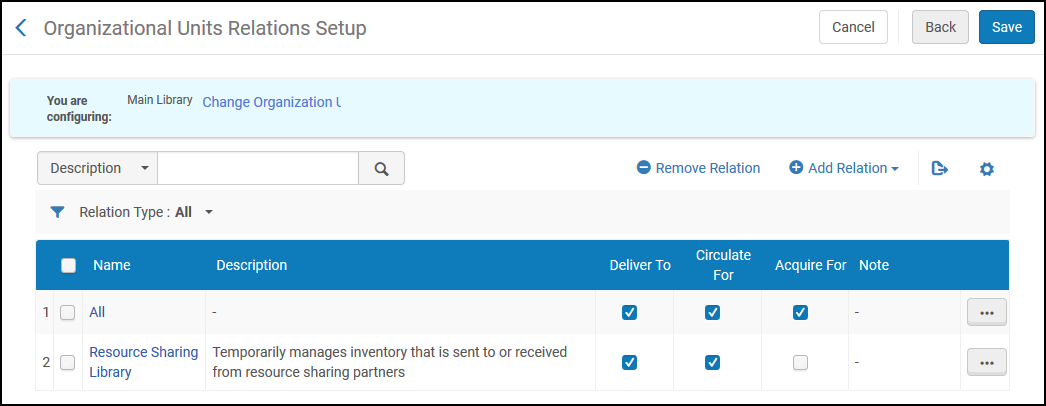
- On the Organizational Units Relationships Setup page (Configuration Menu > General > Libraries > Relationships), select Add Relation. The Add Library Relationship dialog box appears.
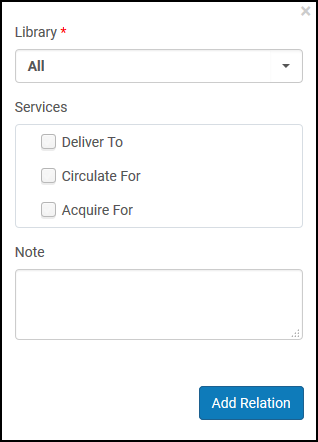 Add Library Relationship Dialog BoxIf you select ALL in the Library dropdown list when creating the relationship, this selection only applies at the time the relationship is created.
 - From the Library drop-down list, select which library or libraries will receive services from the library that you are configuring.
- Select the services that the library you are configuring can provide to the library selected above:
- Acquire for (available on both the library and institution levels) – The library that you are configuring is able to acquire items for the specified library. This means that you can create a PO Line with the library that you are configuring as PO Line Owner, and the ordered items can be for the specified library.
- Circulate for (available on the library level only) – The library that you are configuring is able to check in and check out items for the specified library. If this option is not chosen and a loan or return is attempted by a different library, a block on the action may be applied. For more information on block preferences, see Configuring Block Preferences.
- Deliver to (available on the library level only) – The library that you are configuring is able to deliver requested items to the specified library.
- Supply from (available on the library level only) – The library that you are configuring is able to supply items to the resource sharing library. The libraries for which you configure a Supply from relationship display in the Availability information for lending requests on the Resource Sharing Lending Requests Task List page (see Managing Resource Sharing Lending Requests), and on the Manage Resource Options page when managing fulfillment options for a request (see Managing Fulfillment Options).
Selecting All for any of these service options indicates that the library/institution being configured can provide the service for all libraries or receive the service from all libraries in the institution. If All is selected for a service but an individual library has a different value, the library’s selection will take precedence. - Select Add and Close to close the dialog box. The relationship you defined is listed under Library Relationships on the Organizational Units Relationships Setup page.
Configuring Transit Time Rules
- General System Administrator
- Fulfillment Administrator
- Adding a transit-time rule (see Adding a Transit Time Rule)
- Editing a transit-time rule (select Edit from the row actions list)
- Deleting a transit-time rule (select Delete from the row actions list)
- Editing the default transit-time rule (select Edit from the row actions list for the default rule)
- Enabling or disabling the transit-time rule
- Moving transit-time rules up or down in order of preference. The order of the rules within the list of rules is significant because Alma applies the first (enabled) rule whose input parameters are satisfied.
- Calculating the ETA for a Resource (see Calculating the Estimated Time of Arrival For a Resource)
Adding a Transit Time Rule
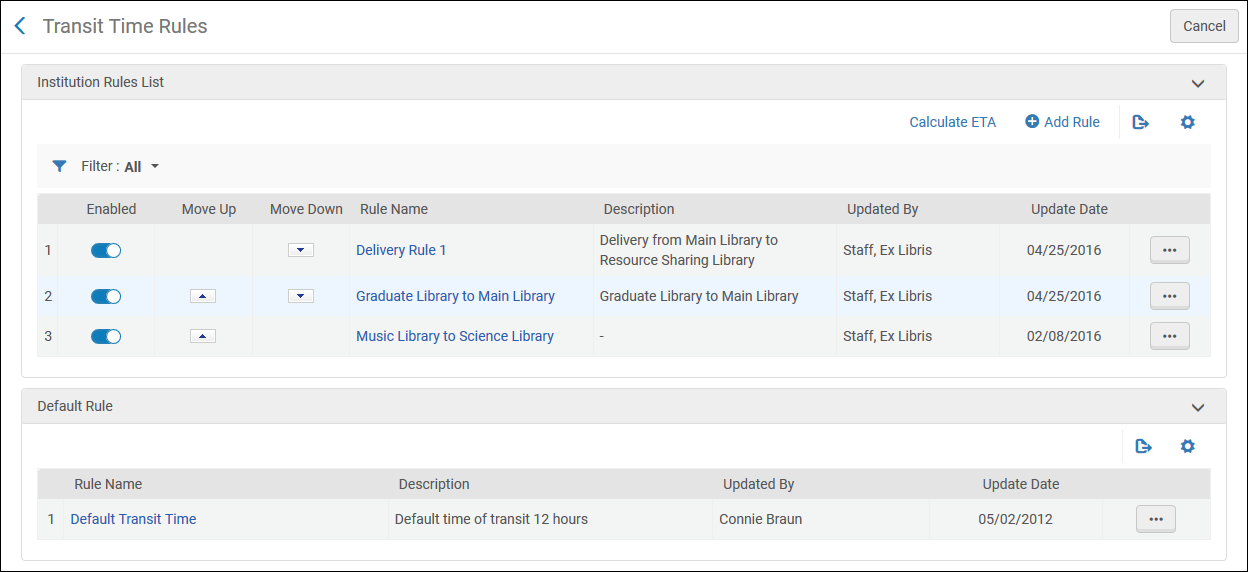
- On the Transit Time Rules page (Configuration Menu > Fulfillment > Library Management > Transit Time), select Add Rule. The Transit Time Rules Editor page appears.
If you want to create a copy of an existing transit-time rule, select Duplicate from the row actions menu. Once you have copied the rule, you can modify it as needed.
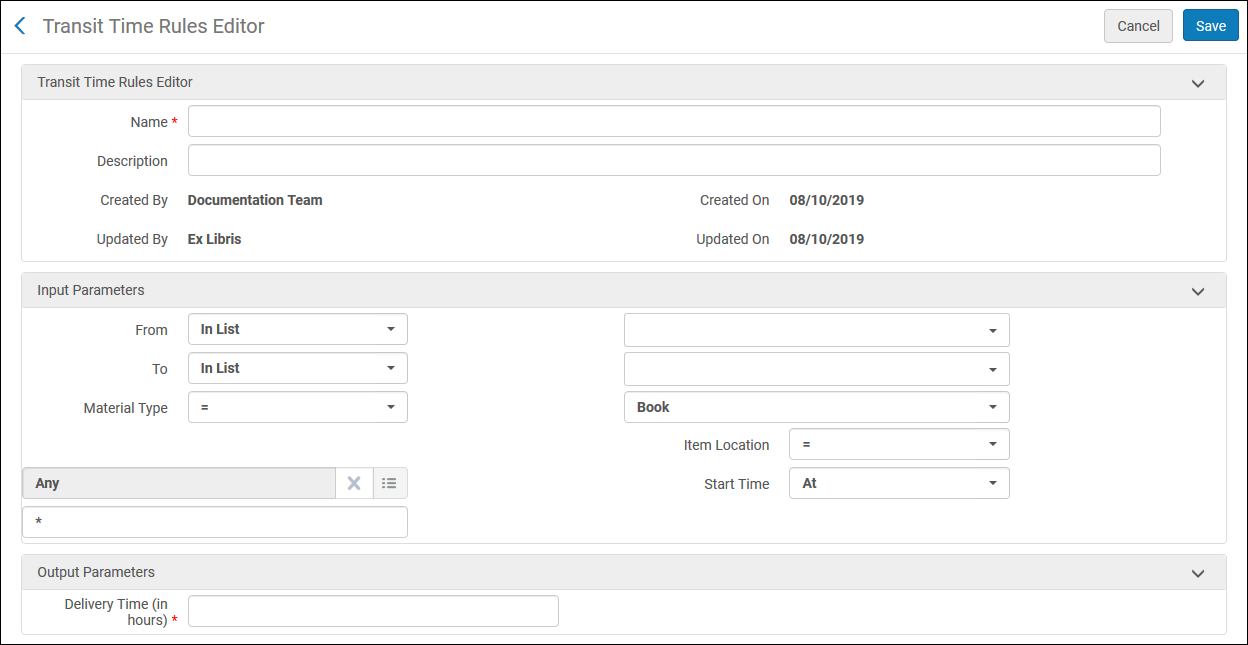 Transit Time Rules Editor Page
 - In the Transit Times Rules Editor section, specify a name (required) and description (optional) for the new rule.
- In the Input Parameters section, specify an operator and enter values for the following parameters:
- From – The source organization unit—that is, the library or institution from which the item will be transferred.
You can add several source organization units to be included in the rule by pressing Ctrl on your keyboard while selecting the relevant values.
- To – The destination—that is, the library to which the item will be delivered. The To drop-down list includes only those libraries that have a Deliver to relationship with the source location. For details on fulfillment relationships, see Configuring Fulfillment Relationships.
You can add several destinations to be included in the rule by pressing Ctrl on your keyboard while selecting the relevant values.
- Material type – Select the type of item that is to be delivered.
- Item location – Select the physical location inside the source location from which the item will be transferred.
- Start time – Enter the time of day at which items are dispatched from the source location to the specified destination. For example, if it takes longer to move around items in the morning than in the afternoon then you can have a rule with ‘Start Time After 12:00’ and another with ‘Start Time Before 12:00’.
Unlike an item that has been scanned in and therefore has a known hour at which it has been put in transit, there is no known scan-in time that the system can use to calculate the closest item for fulfilling a request. Therefore, when the system calculates the closest copy that can be used to fulfill a request (see Pickup at Shelf) it uses a rule with no start time, i.e. the Start Time is set to ‘At *’.
- From – The source organization unit—that is, the library or institution from which the item will be transferred.
- In the Output Parameters section:
- Delivery time (in hours) - time that it will take to deliver the item when the specified input parameters are fulfilled.
- Use for Hold Request Pickup Calculation - select this checkbox for the item to be considered for a request on a different campus. The checkbox is displayed only when the From and To library fields are configured and the Material Type field is Any. By default, the checkbox is not selected.
When a hold request is created and the resource to fulfill the request is not available in the selected pickup location, Alma matches resources to the request using additional parameters, as follows:
- Alma attempts to locate resources belonging to another library on the same campus as the pickup location.
- If no resources are found on the same campus, multiple resources exist in different locations on the campus, or no campuses have been defined, Alma checks the Transit Time Rules. If a rule exists for this resource and the Use for Hold Request Pickup Calculation checkbox is selected, Alma chooses this resource.
- If multiple resources have a transit-time rule, then the resource with the shortest transit time is selected.
From and To libraries are the only input parameters in the transit-time rule that are considered for the location calculation.
- Select Save. The rule you defined is listed at the bottom of the list of rules on the Transit Times Rules page.
Calculating the Estimated Time of Arrival For a Resource
- On the Transit Time Rules page (Configuration Menu > Fulfillment > Library Management > Transit Time), select Calculate ETA. The Calculate ETA page appears.
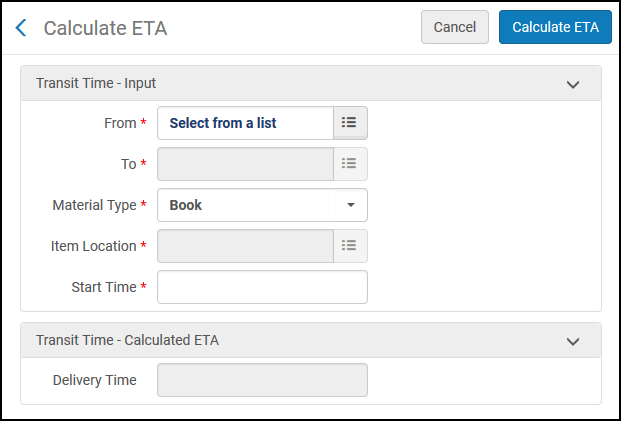 Calculate ETA Page
 - In the Transit Time - Input section, enter the input parameters for the calculation. See step 3 in Adding a Transit Time Rule for details on the input parameters.
- Select Calculate ETA. The calculated ETA is displayed in the Delivery time field.
Configuring Reshelve-Without-Transit Rules
- General System Administrator
- Fulfillment Administrator
- Adding a reshelve-without-transit rule (see Adding a Reshelve-Without-Transit Rule)
- Editing a reshelve-without-transit rule (select Edit from the row actions list)
- Deleting a reshelve-without-transit rule (select Delete from the row actions list)
- Editing the default reshelve-without-transit rule (select Edit from the row actions list for the default rule)
- Enabling or disabling a reshelve-without-transit rule
- Moving reshelve-without-transit rules up or down in order of preference. The order of the rules within the list of rules is significant because Alma applies the first (enabled) rule whose input parameters are satisfied.
Adding a Reshelve-Without-Transit Rule
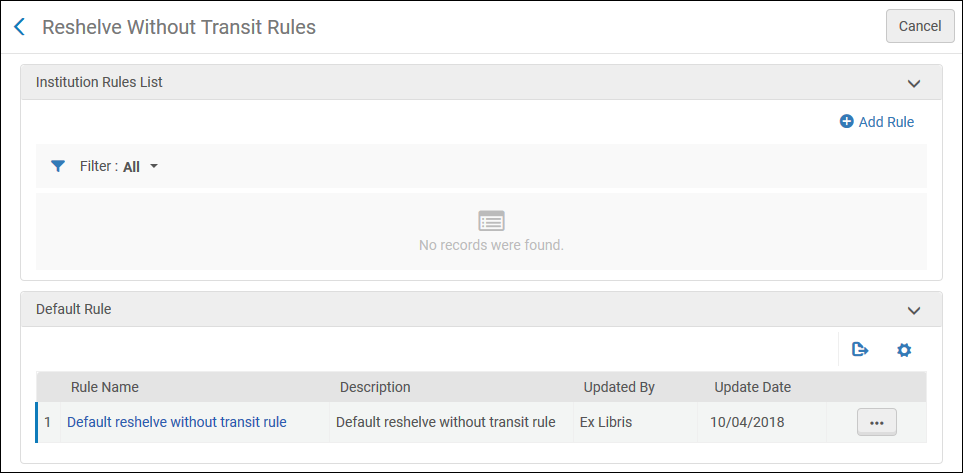
- On the Transit Time Rules page (Configuration Menu > Fulfillment > Library Management > Reshelve Without Transit Rules), select Add Rule. The Reshelve Without Transit Rules Editor page appears.
If you want to create a copy of an existing reshelve-without-transit rule, select Duplicate from the row actions menu. Once you have copied the rule, you can modify it as needed.
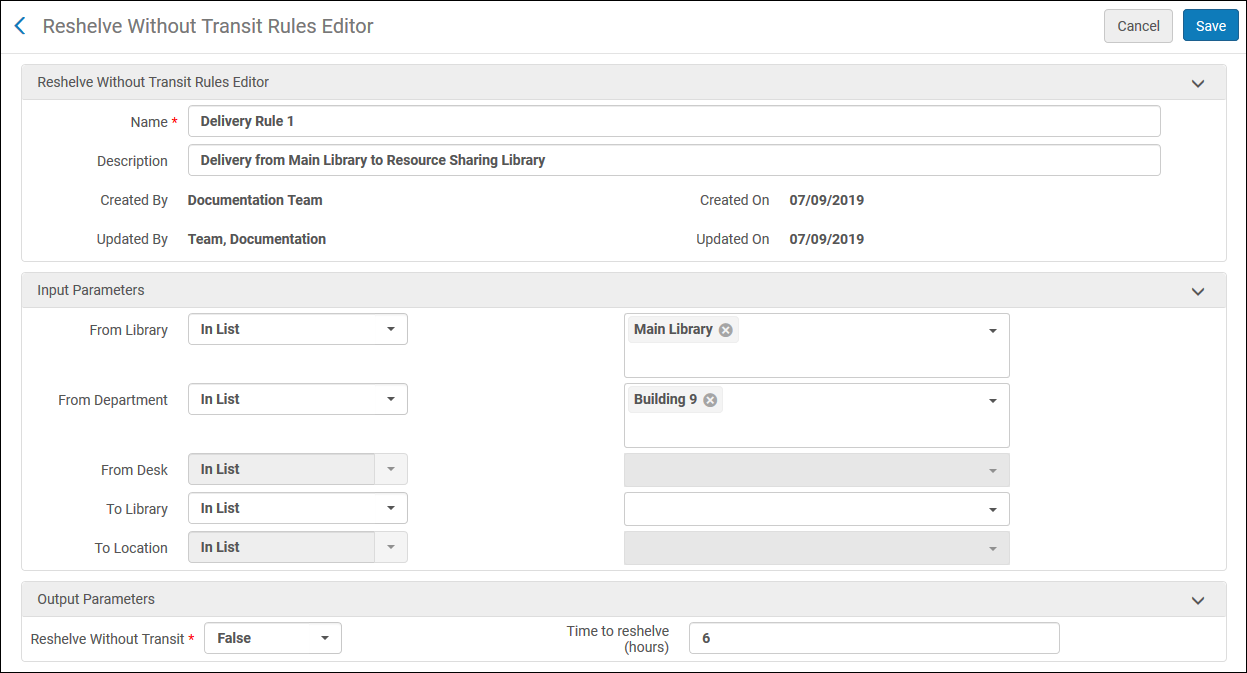 Reshelve Without Transit Rules Editor Page
 -
In the Reshelve Without Transit Rules Editor section, specify a name (required) and description (optional) for the new rule.
-
In the Input Parameters section, specify an operator and enter values for the following parameters. For all of the input parameters, multiple selections may be chosen:
-
From Library – The source—that is, the library from which the item is sent. Select the operator (In List or Not In List) and one or more libraries of this institution.
-
From Department - Select the operator (In List or Not In List) and the department. If one library is selected in From Library, all departments within that library are displayed. If no libraries are selected in From Library, all departments in the institution are displayed. If two or more libraries are selected in From Library, the field is disabled and no departments can be chosen.
-
From Desk - Select the operator (In List or Not In List) and the desk. If one library is selected in From Library, all circulation desks within that library are displayed. If two or more libraries are selected in From Library, the field is disabled and no desks can be chosen.
-
To Library – The destination—that is, the library to which the item is delivered. Select the operator (In List or Not In List) and one or more libraries of this institution.
-
To Location – This field is disabled by default. If a single library is selected in the To Library field, select the operator (In List or Not In List) and one or more locations of the selected library.
-
-
In the Output Parameters section, specify the following parameters:
-
Reshelve Without Transit – Select True to set the rule to reshelve an item without transit when the specified input parameters are fulfilled. Select False for all items to reshelve with transit.
-
Time to reshelve (hours) – Specify the period of time in hours (or portions of hours, such as 10.5) that is allotted to place an item back on the shelf after it has been returned. During this time, Alma and Primo will indicate to patrons and librarians that the status of the item is available and awaiting reshelving. When this period of time expires, the status will show that the item is in place on the shelf.
Watch the Reshelving Items Time video (2:07 min).
-
- Select Save. The rule you defined is listed at the bottom of the list of rules on the Reshelve Without Transit Rules page.
When an item is scanned in to a location other than its owning library, Alma checks these rules. If there is no transit relation between the current location of the item and its destination, the item is set to In Transit. Otherwise, it is set to Item In Place.
Configuring Parameters of a Resource Sharing Library
- General System Administrator
Configuring SIP2 Bin Rules
- General System Administrator
- Fulfillment Administrator
- Adding a SIP2 bin configuration rule (see Adding a SIP2 Bin Configuration Rule)
- Editing a SIP2 bin configuration rule (select Edit from the row actions list)
- Deleting a SIP2 bin configuration rule (select Delete from the row actions list)
- Enabling or disabling the SIP2 bin configuration rule
Adding a SIP2 Bin Configuration Rule
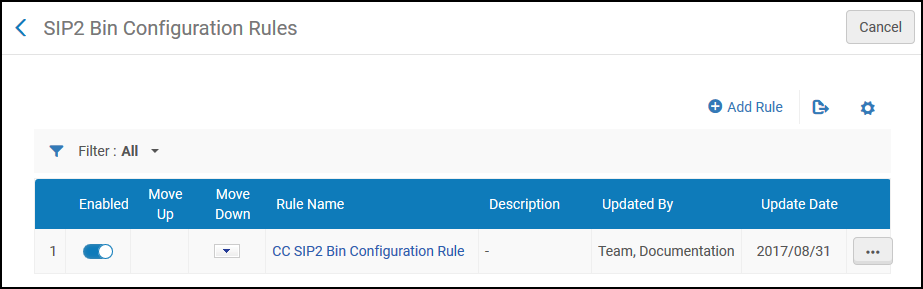
- On the SIP2 Bin Configuration Rules page (Configuration Menu > Fulfillment > Library Management > SIP2 Bin Configuration), select Add Rule. The SIP2 Bin Configuration page appears.
If you want to create a copy of a SIP2 bin configuration rule, select Duplicate from the row actions list. Once you have copied the rule, you can modify it as needed.
- In the upper Input Parameters section, enter a name and description of the SIP2 Bin Configuration rule.
- In the lower Input Parameters section, specify the components of the input parameter (Name, Operator, and Value). A set of input parameters may look like this: Destination Library=ArtLibrary.
The available Name field values (that is, the criteria which determine when the SIP2 Bin Configuration rule is to take effect) and their respective values are described in the following table:
SIP2 Bin Configuration Rule – Input Parameter Values Name Value Destination library The libraries in the institution. For details on adding a library, see Configuring the Institution and Its Libraries. Destination circulation desk The circulation desk. For details on configuring circulation desks, see Configuring Circulation Desks. Destination service units The departments within the institution, such as work-order departments and digitization departments. For details on configuring work order departments, see Configuring Work Order Departments. From call number The call number from which you specify the rule to take effect when the item’s call number is numerically greater than the indicated value. Is requested Indicates if the resource has been requested (Yes or No). Lexicographical From call number The call number from which you specify the rule to take effect when the item’s call number is lexicographically (in other words, alphabetically) greater than the indicated value. For example, 2 > 10 > 1 in lexicographic order. Lexicographical To call number The call number from which you specify the rule to take effect when the item’s call number is lexicographically (in other words, alphabetically) less than the indicated value. For example, 1 < 10 < 2 in lexicographic order. Reshelf item location The library within the institution where you want to reshelve the item. For details on adding a library, see Configuring Libraries. Self check circulation desk The circulation desk where you want to perform the self check. For details on associating a self-check machine with a circulation desk, see Self-Check Machines. To call number The call number from which you specify the rule to take effect when the item’s call number is numerically less than the indicated value. - Select Add Parameter. The set of input parameters is added to the list of parameters for the SIP2 Bin Configuration rule.
- Repeat the previous two steps to add all of the required parameters for the rule.
All the input parameters must be fulfilled for the rule to be applied.
- In the Output Parameters section, enter a bin number – the number of the bin in which the self-check machine is to place the item. Ensure that the number here matches the number of a bin configured on the SIP2 machine.
- Select Save to store the new rule. The rule displays on the SIP2 Bin Configuration Rules page.
- If you have defined more than one rule, use the Move Up and Move Down arrows to set the order of the rules. The order of the rules is important, as the system will apply the first (and only the first) appropriate, enabled rule.