
Adding Representations
To manage digital resources, you must have the following roles:
- Digital Inventory Operator
- Digital Inventory Operator Extended (required for delete operations)
- Collection Inventory Operator (required when adding a new digital representation)
Adding a Representation
The Collection Inventory Operator role is required when adding a new digital representation. The page can be accessed with the Digital Inventory Operator, but the mandatory Collection field does not appear, so anyone trying to submit the form receives an error message. For more information on collections, see Managing Collections.
This procedure is relevant when the staff wishes to add digital content to the inventory. When adding digital content on behalf of a patron, see Staff-Mediated Deposit. The patron can also add content using a dedicated interface, subject to staff approval; see Patron Deposits.
To add a representation to an existing title:
- Search for a digital title and select Add Representation from the row actions, or select the Representations link and select Add Representation.
You can also add a representation to an existing title from the Representation Details Page (Resources > Create Inventory > Add Digital Representation) by selecting Existing, searching for a title, and selecting a collection).The following appears:If a form is associated with the collection, the fields configured in the form appear and not necessarily the ones described below. (For more information about forms, see Working with Forms.)
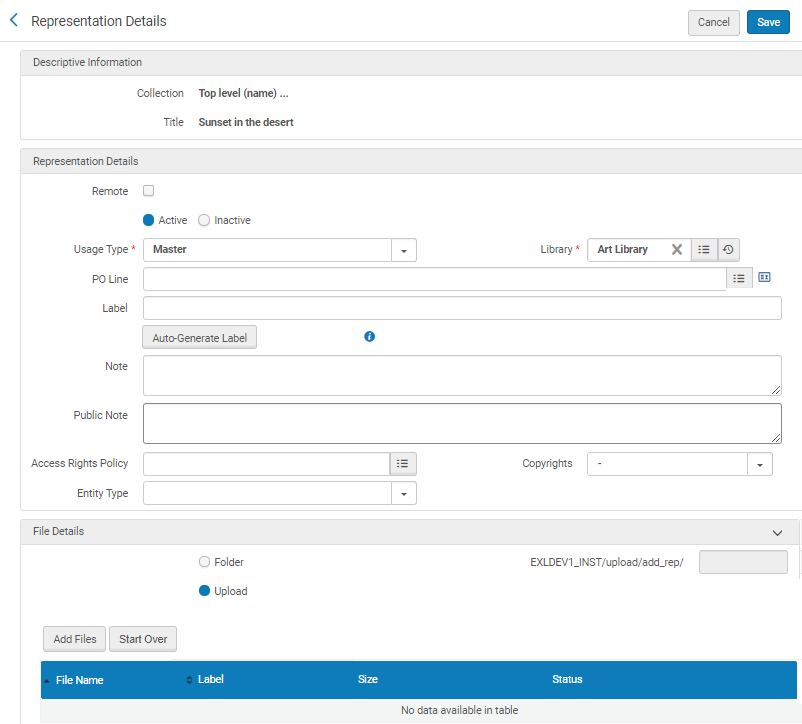 Representation Details - Existing Title
 - Fill in the fields for the Representation Details section according to the following table:
Representation Details Field Descriptions Field Description Representation Details Remote Clear the check box to add a representation maintained in Alma. Active / Inactive Select Active or Inactive to determine if the representation is discoverable. If you set the representation to Inactive, if there are no other active representations on the bibliographic record, a pop-up appears asking if you want to suppress the record. Usage Type (mandatory) Select the usage type. Options are Primary, Modified Primary, Derivative, and Auxiliary. (The primary is the original copy, modified primary is a version that is changed from the primary but without any data loss, the derivative is, for example, a copy with a lower resolution, and auxiliary is a representation that is supplementary to the main representation, for example, a table of contents). Auxiliary usage type is digital inventory that provides additional metadata-level information for a title, such as a scanned title page or a table of contents. This inventory is not indexed in Primo as digital available. Default display logic rules configuration hides the representation delivery service for such inventory. To enable Quick Access, ensure you have no rules hiding this service at Configuration > Fulfillment > Discovery Interface Display Logic > Display Logic Rules.
Auxiliary usage type inventory is not considered by Alma when automatically creating thumbnails from file representations. To create a thumbnail for an Auxiliary resource, either remove the Auxiliary usage type from the representation or select a thumbnail image from file.Library (mandatory) Select the owning library associated with the representation. Note that only libraries that are available according to your permissions appear. PO Line Select a Digital PO Line with which to associate the representation by selecting from the list or entering a PO line manually. Only Digital PO line types can be associated with representations. Only PO lines created in the same library as the representation are available. You Select the More Details icon  to view the purchase order line details. For more information, see Manually Creating a PO Line.
Label The label of a representation is its precise description, which appears as part of the availability information. Enter a label for the representation. This label appears in the repository search results when selecting View It, which are sorted alphabetically according to this label.When editing the representation, you can auto-generate the label. See Editing Representation Metadata and Content.Auto Generate Label Select to automatically generate a label for the representation based on a template. For more information, see Configuring Representation Label Templates for General Representations. Note Enter a note for the representation. This is an internal note. Public Note Enter a public note for the representation. This note appears when selecting View It. Access Rights Policy Select an access rights policy to apply to the representation. If you want to configure this representation for long-term digital loans, select an access rights policy that is configured for long-term digital loans. If you do so, an icon appears:  . For more information, see Long-Term Digital Loans.
Copyrights Select the copyrights statement that you want to associate with the representation The copyright statement configured here takes precedence over any configured through access rights.Number of Concurrent Users This field only appears if you selected an access rights policy that is configured for long-term digital loans.Enter the number of patrons that can access the digital representation concurrently. This would generally be the number of physical copies that the digital version replaces. Entering 0 prevents any access to the resource. For more information, see Long-Term Digital Loans.Entity Type Select an entity type for support of a partial representation. When editing the representation, additional fields are available, depending on the entity type you selected. - Select the files you want to upload with one of the following options:
- Folder – Enter the S3 location, that is, the folder under EXLDEV1_INST/upload/add_rep/ where the files are located. (Do not enter the file names themselves). For information on uploading a file to S3, see the Developer's Network.
- Upload – Drag and drop the files that you want to upload to Alma or select Add Files and select the files.
- Select Save.
The representation is added to the existing bibliographic record.
- Open the Representation Details Page (Resources > Create Inventory > Add Digital Representation). The following appears:
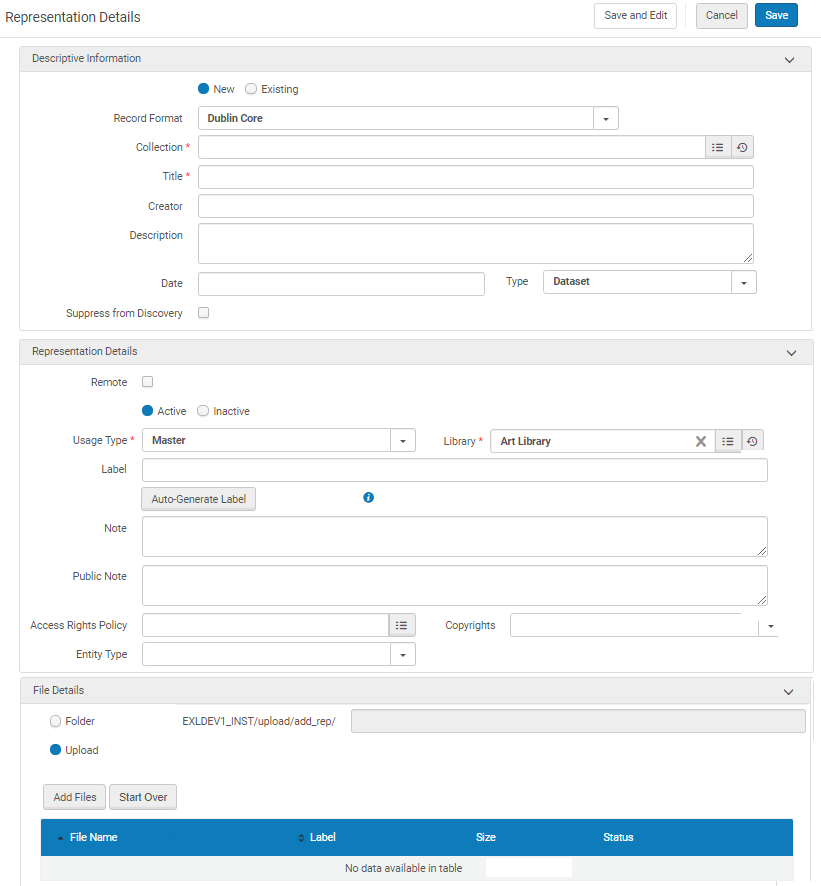 Representation Details – New
 - Enter the information for the title under the Descriptive Information section. This quick cataloging form enables you to enter basic metadata fields for the bibliographic record and then focus on creating digital inventory.
- Enter the representation details.
- Select the files you want to upload with one of the following options:
- Folder – Enter the S3 location where the files are located. (For information on uploading a file to S3, see the Developer's Network.)
- Upload – Drag and drop the files that you want to upload to Alma or select Add Files and select the files.
- Select Save.
A new record is created and the representation is added to it.
To add a single remote digital representation:
You can add bulk remote digital representations using an import profile. For more information, see Import Profile Types.
- Select Resources > Add Digital Representation. The Representation Details page appears.
- Fill in the Descriptive information and Representation Details sections as described above.
- Select the Remote Representation check box. The Remote Representation Details section appears.
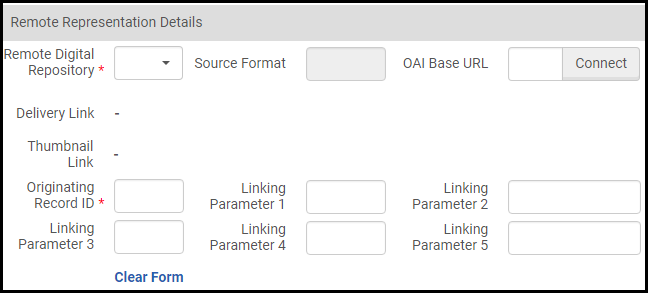 Remote Representation Details
 - In the Remote Digital Repository field, select the remote digital repository where the digital representation is located. (For more information, see Managing Remote Digital Repositories.)
- The Source Format field displays the format of the metadata records that the remote repository instance supports for importing.
- In the OAI Base URL field, enter the OAI provider's URL. If you configured a default OAI Base URL, it appears here. (For more information, see General Information Tab (Wizard Step 1)).
- Select Connect. Alma checks which metadata prefixes and record identifiers are available.
- Select the Record Identifier of the digital representation.
- Select the appropriate Metadata Prefix. If you have configured a default metadata prefix, it appears here. (For more information, see General Information Tab (Wizard Step 1)).
- Select Open Test Page to test the digital representation creation flow. (For more information, see Testing OAI Import Protocol Flow.)
- Select Done.
The digital remote representation appears when selecting View It from the item in the repository.
To remove digital representations in bulk:
To remove digital representations in bulk from bibliographic records, create a set of the bibliographical records and run the Withdraw Digital Representations job on the set. You can configure the job to remove bibliographic records that would remain without inventory after the job is run. For more information, see Withdraw Digital Representations.