
Managing Collections
Introduction
- Collection Inventory Operator – Create and edit sub-collections and move sub-collections between parent collections.
- Collection Inventory Operator Extended together with Collection Inventory Operator – Create, edit, and delete top level collections and promote a sub-collection to be a top-level collection. Create, edit, and delete sub-collection and move sub-collections between parent collections.
- Digital Inventory Operator – Add/remove titles to/from a collection and move a title between collections.
Working with Collections
- Add top-level collections
- Create, edit, or delete sub-collections
- Add thumbnails to collections
- Add items, sets, and remote digital objects to collections
- Integrate collection assignment with import profiles
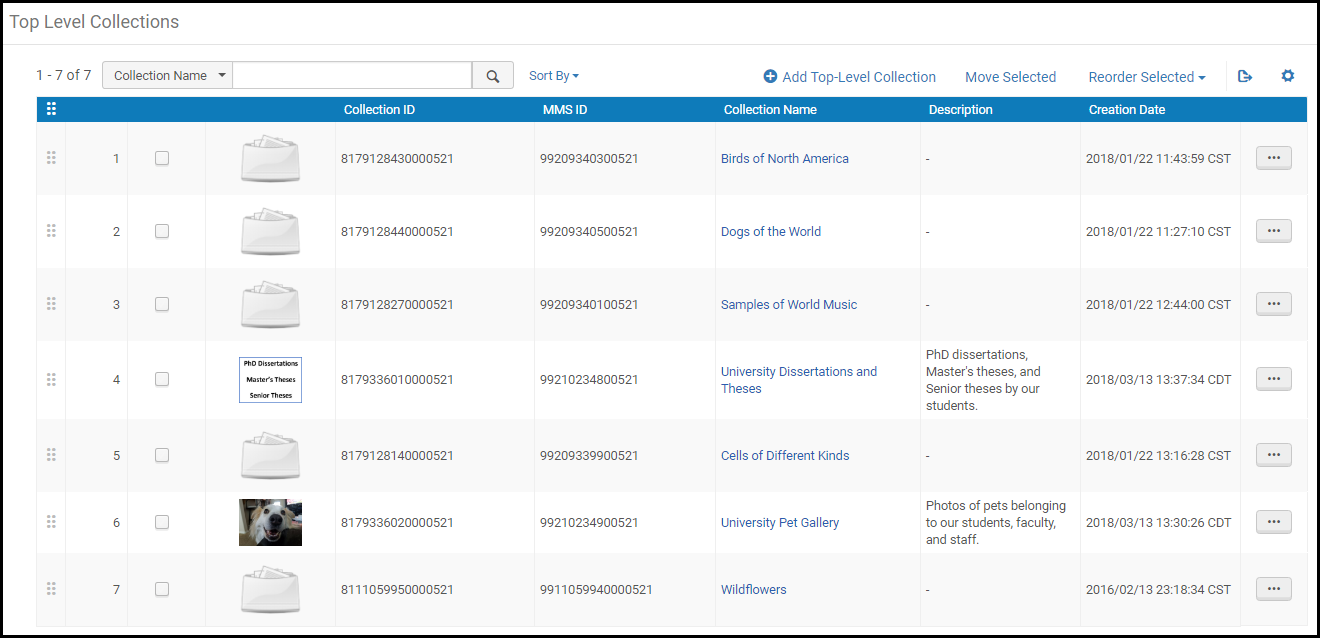
Sorting / Reordering Top-Level Collections
In general, top-level collections appear in the order in which they are added to Alma. For display in Alma and Primo/Primo VE, you can either customize the order or select a pre-defined sort (Creation Date or Name). In addition, you can specify the sort direction (either ascending or descending) of the collections:
From Primo's / Primo VE's Collection Lobby, users cannot specify the sort order of top-level collections and will use the sort order configured in Alma only.
-
Open the Top Level Collections page (Resources > Manage Inventory > Manage Collections).
-
Use one of the following methods to move the collections to their desired order:
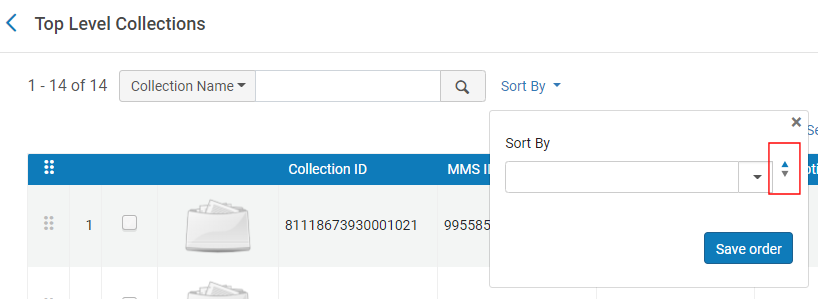
- In the Sort By pane, select one of the following predefined sort routines: Creation Date or Name. As you make the selection, the collections are reordered but are not saved unless you select Save order.
- Select one or more collections and then select an option in the Reorder Selected drop-down pane to move the selected items before or after your selection.
- Drag and drop items to the desired position in the list.
-
In the Sort By pane, select the sort direction (ascending or descending) and then select Save order. Saving a blank sort routine displays the top-level collections as they appear in the list.
Downloading Collection Information to a File
Alma allows you to create an EAD (Encoded Archival Description) file that contains all collection hierarchy information, including the collection members—for example, the titles assigned to each of the collections in the tree. The total number of collection members must be below 100,000. If this number is exceeded, the EAD download file is not generated.
-
Select Download EAD from the row actions list for a top-level collection,
-
View the collection (View from the row actions list) and select Download EAD in the General Details area.
During the download of the collection information, Alma might get stuck or log out before the status bar reaches 100%. The reason for this is that the EAD file format outputs the collections first, and then outputs the titles that belong to the collections. Therefore, the job might seem to get stuck at a mark before 100% - at this stage, it works on outputting the titles for the collections. For large collections with a big collection tree and many titles assigned to the sub-collections, XML generation can take several minutes, and in some cases a second attempt might be necessary to download the EAD successfully.
Viewing a Collection or Sub-Collection in Read-Only Mode
Alma allows you to view a collection / sub-collection's configuration without entering the Collection Resource Editor.
-
For a top-level collection, select View from the row actions list for the collection.
-
For a sub-collection, after opening the top-level collection, select View for the collection on the parent's page.
Adding a Top Level Collection
- On the Top Level Collections page, select Add Top-Level Collection. The Add New Collection page appears.
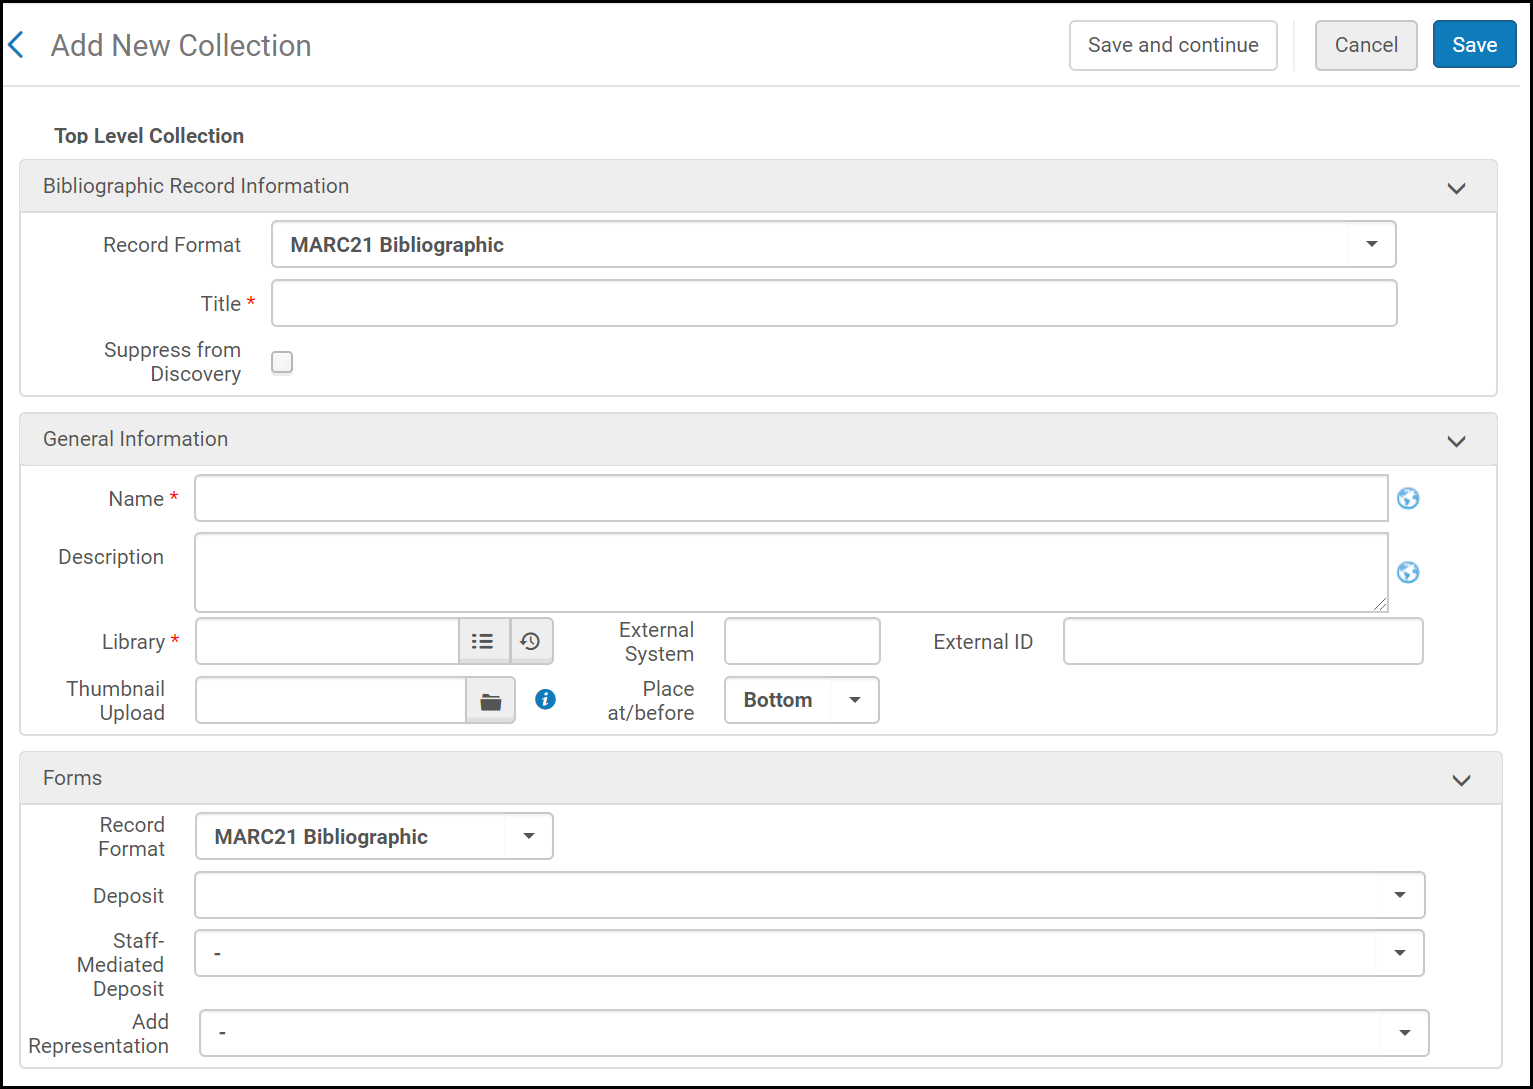 Add New Collection
 - Enter required and optional fields on the form.
Add New Collection Fields Field Description Record Format The record format of the collection record. This field appears only if your system supports multiple record formats. Contact Ex Libris support to enable this feature.Title Corresponds to 245 $a - Title. Required. This title appears in the Alma search results. This title does not have to be unique, but it is recommended that is be the same as the Collection Name.Suppress from Discovery Select to suppress the collection from discovery. You unsuppress an existing collection from the New Metadata Editor at Record Actions > Suppress from Discovery. See MD Editor Menu and Toolbar Options for more information.Name Internal name for the collection (rather than the bibliographic record name). Required. This name appears when published to Primo and in other locations. Non-text characters such as emojis are not supported. This name must be unique among all top-level collections.Description A description of the collection. Non-text characters such as emojis are not supported. Library The library where the collection is stored (select from drop-down options). Required. Only libraries that are available according to your permissions appear.External System When the collection is created automatically by the import job (OAI set), this is the name of the external system External ID When the collection is created automatically by the import job (OAI set), this is the ID of the collection assigned by the remote system. Additionally, users can store IDs in this field to be used later in the published metadata, and Primo can use it during discovery. Logical Collection Select to create a collection of titles from a logical set. For more information, see Adding a Logical Collection. Thumbnail Upload Select a thumbnail image for the collection and its associated bibliographic record. Thumbnails defined and managed on the Discovery tab override this image only in the Collection Lobby and the Collection's page in Primo and Primo VE. For more details, see Managing Images for the Collections Lobby. The image must be in jpg, png, or gif format and have a maximum size of 100K. Standard thumbnail dimensions are 165 x 165 pixels. Smaller and larger thumbnail dimensions are acceptable, however, may affect image resolution.Change to default thumbnail
Select this checkbox to revert to the default thumbnail for the collection's bibliographic record.
Place at / before Select to have the collection placed at the top, bottom, or before an existing collection or sub-collection in the list, where Place at relates to the options of placing the collection at the "Top" or "Bottom" of the list, while Place before places the collection before the one selected in the drop-down list. Forms Forms consists of a template of fields to be used when creating digital representations. For more information, see Working with Forms. Record Format The record format of the titles for which you want to use the form. Deposit Select a form to be used for patron deposits to this collection. Staff Mediated Deposit Select a form to be used for staff-mediated deposits to this collection. Add Representation Select a form to be used for adding representations to this collection. - Select Save to save your work and move on to another task, or Save and continue to save the collection and open the Collection Resource Editor page, where you can enter further information for the new collection.
You can also add collections by importing an encoded archival description (EAD) file using the Collections import profile. For more information, see Managing Import Profiles.
Editing a Collection
- If the collection is a top-level collection, select Edit from the row actions list for the collection on the Top Level Collections page. The Collection Resource Editor page appears.
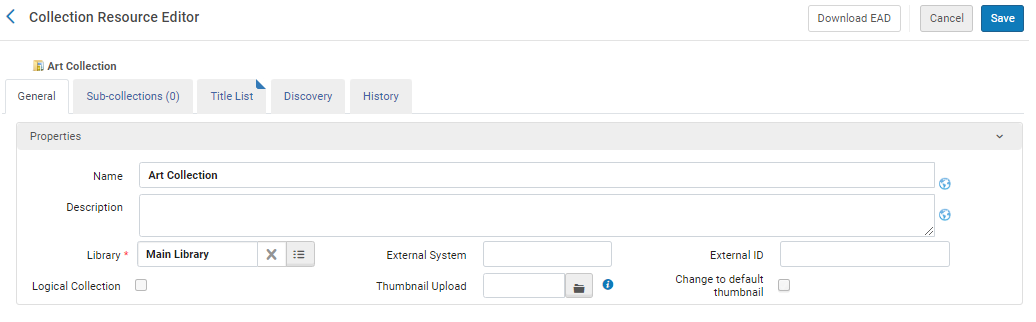 Collection Resource EditorThe Logical Collection checkbox is only displayed in new collections created after the August 2023 release.For a sub-collection, after opening the top-level collection for editing, select Edit from the row actions list for the collection on the parent's page. You can edit a collection's information in the General Information section. To delete the current thumbnail, select the Use default thumbnail check box. To upload a new thumbnail, select the relevant thumbnail image in the Thumbnail upload field. For additional information on the fields of this page, see Adding a Top Level Collection.The following Forms section appears at the bottom of the page:
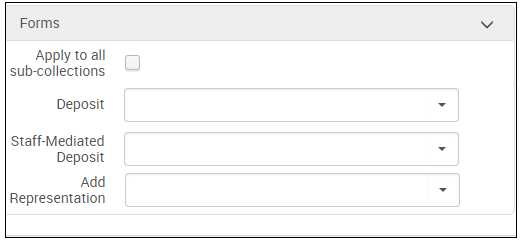 Forms SectionSelect a form for Deposits, Staff Mediated Deposits, or Add Representations. The fields of the form appear when adding a representation to a bibliographic record in the collection. Select Apply to all sub-collections to have the form appear when adding a representation to a bibliographic record in a subcollection. For more information about forms, see Working with Forms.
 - When you are done, select:
- Save to save your work and return to the list of collections or
- Save and Continue to save your work and remain on the Collection Resource Editor page.
Adding a Sub-Collection
- Edit a collection (see above) and on the Sub-collections tab select Add Sub-collection. The Add New Collection page appears.
- Enter the required fields as described in Adding a Top Level Collection and select Save or Save and Continue.
Moving Collections and Sub-Collections
You cannot move sub-collections to collections in different libraries.
-
- For top-level collections: from the Top Level Collections Page, select the collections you want to move and select Move Selected.
- For sub-collections: Edit a collection (see above) and on the Sub-collections tabs select the check boxes next to one or more sub-collections and select Move Selected.
The repository search (for collections only) appears. - Search for the target collection, select it, and select Select. The collection or sub-collection is moved to the selected collection.
Sorting / Reordering Sub-Collections
In general, collections/sub-collections appear in the order in which they are added to a collection in Alma. For display in Alma and Primo/Primo VE, you can either customize the order or select a pre-defined sort (Creation Date or Name). In addition, you can specify the sort direction (either ascending or descending):
On the collection/sub-collection's page in Primo/Primo VE, the Relevance sort option uses Alma's default/custom order, and the Title sort option sorts by collection name. If the default sort in Alma is by Name, both the Relevance and Title options in Primo/Primo VE sort by collection name.
-
Edit a collection / sub-collection with the Collection Resource Editor.
-
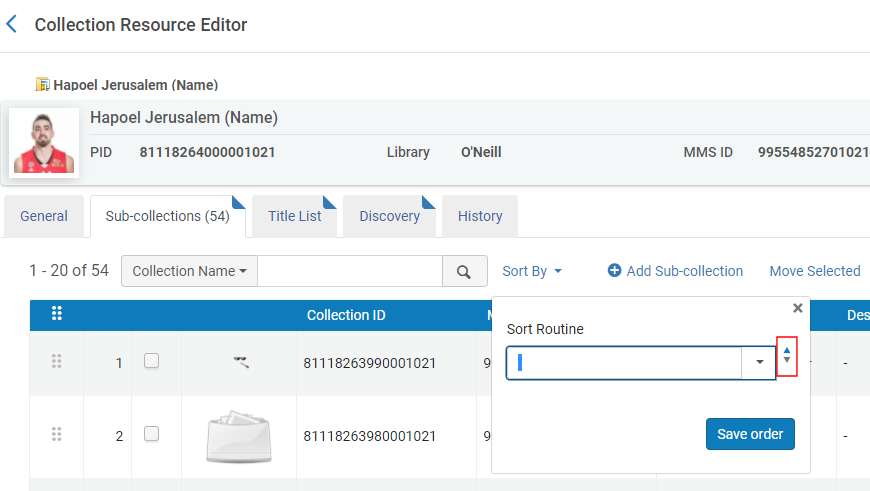
On the Sub-collections tab, use one of the following methods to move the collections to their desired order:
- In the Sort By pane, select one of the following predefined sort routines: Creation Date or Name. As you make the selection, the collections are reordered but are not saved unless you select Save order.
- Select one or more collections and then select an option in the Reorder Selected drop-down pane to move the selected items before or after your selection.
- Drag and drop items to the desired position in the list.
-
In the Sort By pane, select the sort direction (ascending or descending) and then select Save order. Saving a blank sort routine displays the top-level collections as they appear in the list.
-
Select Save.
Deleting Collections
Managing Titles for Itemized Collections
Titles are managed on the Title List tab.
- To add individual titles:
- Select Add Title. The repository search (for all titles only) appears.
- Search for titles and select the desired titles.
- Select Add Titles and select Confirm in the confirmation dialog box. The titles are added to the collection.
Member institutions can add titles to their local collections from the Institution Zone as well as the Network Zone from Search Results list > Add to Collection and from Collection Resource Editor > Add Title. - To add titles by itemized set:
- Select Add Titles from Set. The Manage Sets page appears. (For information on creating itemized sets, see Managing Search Queries and Sets.)
- Select the set to add.
- Select Add Titles, and select Confirm in the confirmation dialog box
- To remove individual titles, select the check boxes beside the titles to remove and select Remove Selected. Alternately, select Remove from the row actions list beside a title.
Select Confirm in the confirmation dialog box.You can remove a title from a collection only if it does not contain digital inventory or if it is assigned to more than one collection. This is to ensure that all digital inventory is managed by a collection.
- To remove all items, select Remove All and select Confirm in the confirmation dialog box.
- To move titles to another collection:
- Select the check boxes beside the titles to move and select Move Selected. Alternately, select Move from the row actions list beside a title. The repository search (for collections only) appears.
- Search for the target collection and select it.
- Select Select. The titles are added to the target collection.
- You can also edit or view a title using the row actions list.
Configuring the Display of Collections
From the Discovery tab on the Collection Resource Editor page, you can configure the default sorting for titles and manage images for the collections lobby in Primo.
In addition, you can configure the display of the top title of the collection page, for instance, "Naismith Memorial Basketball Hall of Fame" using Primo Back Office with the following code table: default.nui.colldiscovery.lobby.toptitle > COLLECTIONS. For more information, see Collection Discovery Configuration and Labels.
Configuring the Default Sorting for Titles in Collections
The Discovery tab in the Collection Resource Editor allows you to set the default sort for a collection's items in Primo / Primo VE.

The sort options that appear in the Sort items by drop-down list in Primo and Primo VE are configured on the following pages:
-
For Primo VE, use the Brief Results tab on the View Configuration page (Configuration Menu > Discovery > Configure Views). For more information, see Defining a View.
-
For Primo, use the Brief Results tile in the View Wizard (Primo Home > Ongoing Configuration Wizards > Views Wizard). For more information, see Views Wizard.

-
Open a collection / sub-collection in the Collection Resource Editor.
-
Select the Discovery tab.
-
Select a sort option from the Sort Titles By drop-down list.
If no sort option is specified, Primo / Primo VE uses the first item in the list as the default sort.
For Primo only, the supported sort options are defined with the Collection Title Sorting Routine mapping table (Configuration Menu > Fulfillment > Discovery Interface Display Logic > Collection Title Sorting Routine). For more information, see Configuring the Collection Title Sorting Routine.
-
Select Save.
Managing Images for the Collections Lobby
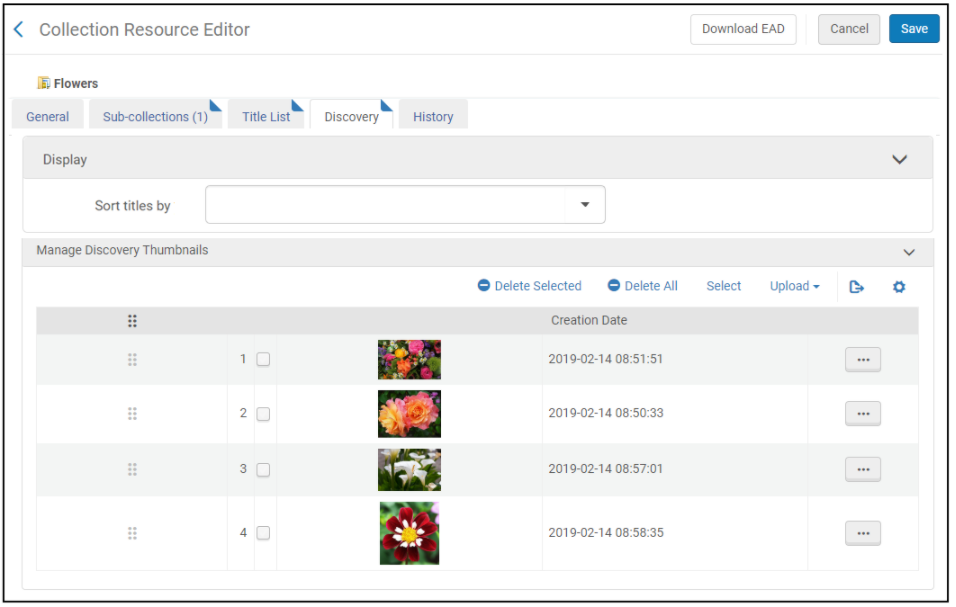
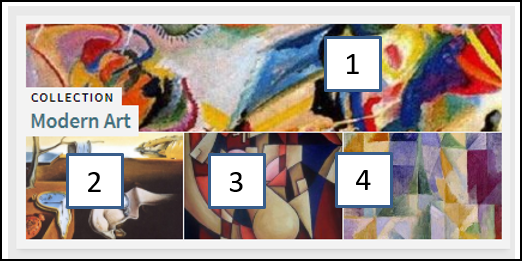
From the Manage Discovery Thumbnails section, you can define up to 20 images that can display in each collection's and sub-collection's tile on the Collection Discovery page and in the banner on each collection's page. Of the images defined for the collection, the system will display a maximum of four images in the collection's tile.
For more information about collection discovery, see Configuring Collection Discovery for Primo VE or Configuring Collection Discovery for Primo.
-
Select the Discovery tab. The following appears:
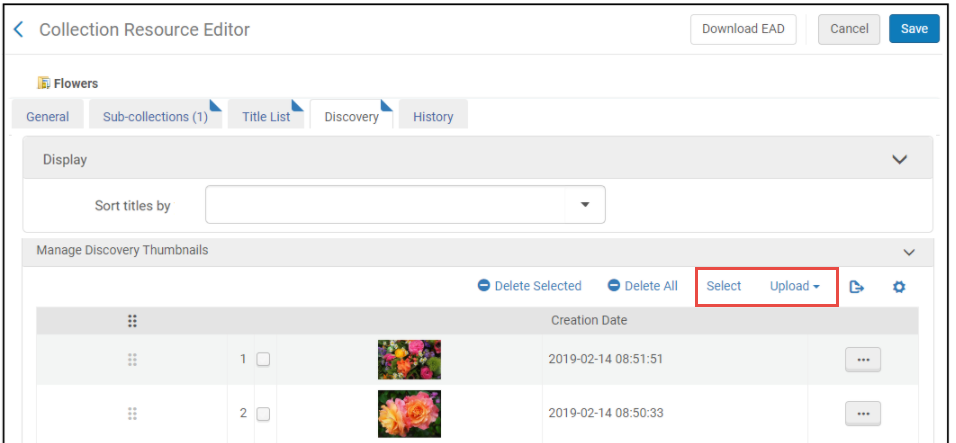 Collection Resource Editor - Manage Discovery Thumbnails
 -
Use the following options to add images to the Manage Discovery Thumbnails list:
-
Select Select if you want to search for image files that are attached to the collection and display them in the collection's tile.
-
Select Upload if you want to browse for local image files and display them in the collection's tile.
-
You can define up to 20 images, but the system will display a maximum of four images in the collection's tile, starting from the top of the Manage Discovery Thumbnails list.
-
The system uses the first image in the Manage Discovery Thumbnails list for the banner on the collection's page.
-
Image files must be in .jpg, .jpeg, or .png format, with a maximum size of 500 KB.
-
-
Select Save.
-
Select View in Discovery to see how the collection's tile and banner appear in Primo VE.
Adding a Logical Collection
You can assign titles to collections automatically based on a logical query instead of adding them manually. To create a logical collection, select the Logical Collection checkbox when adding a collection. For a video tutorial of this process, see: Logical Collections with Automatic Title Assignment.
To add titles from a logical set to the collection:
- Edit the logical collection, and select the Titles List tab. The following appears:
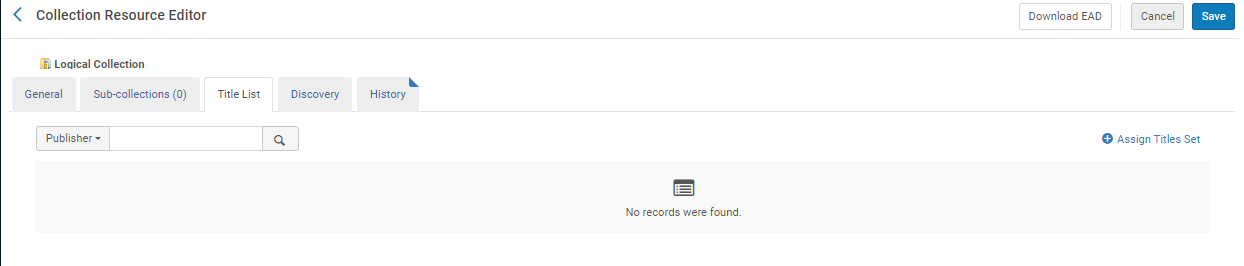 Titles Tab of Logical Collection
 - Select Assign Titles Set. The list of sets appears.
- Select a logical set and select Add Set Titles.
Only title sets can be used. This includes Digital Titles, Physical Titles, and Electronic Titles sets. However, Electronic portfolios and Physical items are not included.
- Select Update Collection From Set. The Update Collection from Set job runs and the titles of the set appear in the tab.
-
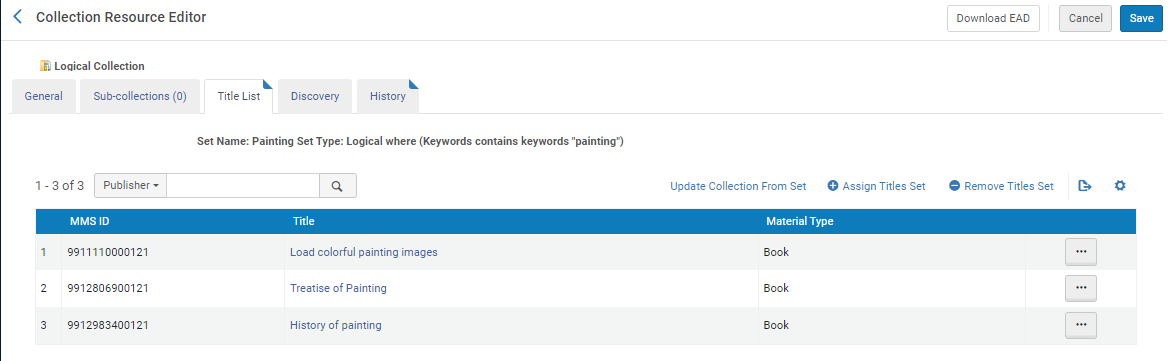 Logical Collection with Titles
 - Click Save.
To remove the set from the collection, select Remove Titles Set.
- The Synchronize All Logical Collections job is a daily job that updates all logical collections according to their set queries and reindexes the database to make the collection searchable. For more information, see Synchronize All Logical Collections Job and Synchronize All Logical Collections.
- You can manually update a set of collections if you do not want to wait for the scheduled Synchronize All Logical Collections job to run by running the Update Logical Collections from Set job. For more information, see Update Logical Collections from Set.
Changing the Collection Type of a Collection
You can change the collection type of a collection from logical to fixed-list and from fixed-list to logical. You can do this by selecting or clearing the Logical Collection checkbox when editing a collection. When a logical collection is changed to a fixed-list, the titles in the collection are changed to a fixed-list and are not updated. When a fixed-list collection is changed to a logical collection, you must add a logical set to the collection. A job updates the titles of the collection according to the set.
Viewing Collection Management History
To view a history of actions performed on a collection, select the History tab.
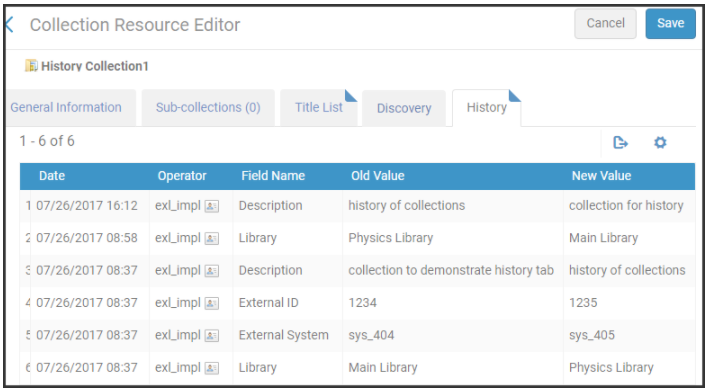
- Adding titles to collections are not included in the History tab.
- For collections in the repository at the time of the release (September 2017), an additional change is needed in order to display the change in the history tab.
- The Operator column appears only for managers and administrators. See Configuring Users' Ability to View Operator Details.