
Configuring Deposits
This page describes how to configure deposits in Esploro. For information on working with deposits see here. For information on configuring research assets (once the deposit has been approved it becomes an asset) see Configuring Asset Details. For information on configuring the various parts of the research information hub see here.
Configuring Opening Message for Researcher Deposits
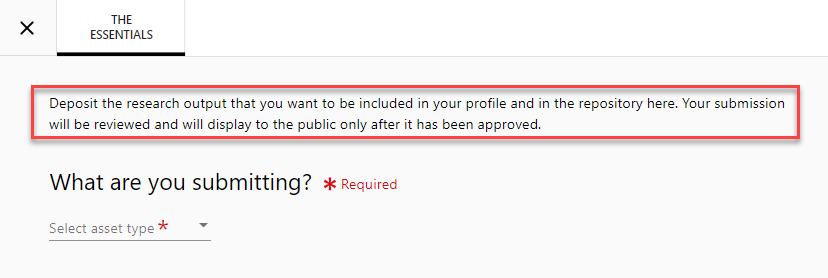
You can customize the introductory text at the top of The Essentials tab for asset deposits. Some HTML tags such as links are supported.
This is done by updating the Researcher Deposit General Framework label (see here).
Configuring Research Deposit Return Reasons
You can configure the options available when returning a research deposit on the Research Deposit Return Reason (Configuration Menu > Repository > Deposits > Deposit Return Reasons) code table. For more information on code tables, see Code Tables.

You can add, edit, or delete reasons on this page.
Configuring Esploro Deposit Policies
You can configure the deposit policies of deposited assets – the Terms and Conditions that researchers must accept when they deposit an asset in Esploro. This is the text that opens when the researcher selects the Terms and conditions link in the text below:

Alternative versions of the Terms and Conditions can be defined for use with each of the following asset categories:
- Publications
- Datasets
- Default (used for all other non-ETD categories)
- ETD doctoral
- ETD graduate
- Default ETD (used for all ETD categories)
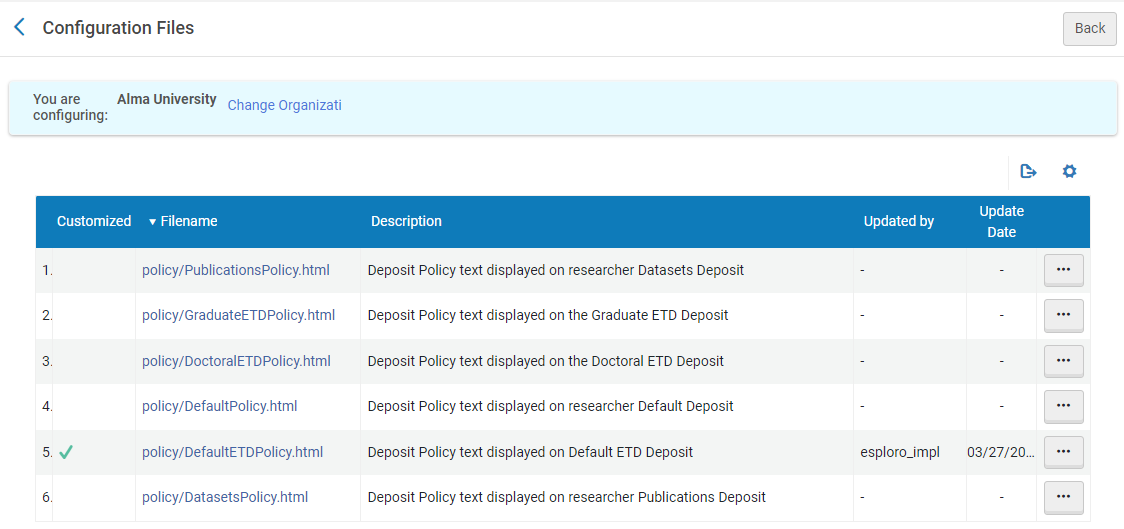
The deposit-policy settings for each asset category are configured in the Deposit Policy Configuration mapping table (Configuration Menu > Repository > Deposits > Deposit Policy Configuration). A default text is predefined for each asset category, and can be viewed or modified in the Deposit Policy Text page (Configuration Menu > Repository > Deposits > Deposit Policy Text). Alternatively, you can customize the text for a category by specifying a link to a URL at which the terms of use can be viewed. For information about working with mapping tables, see Mapping Tables.
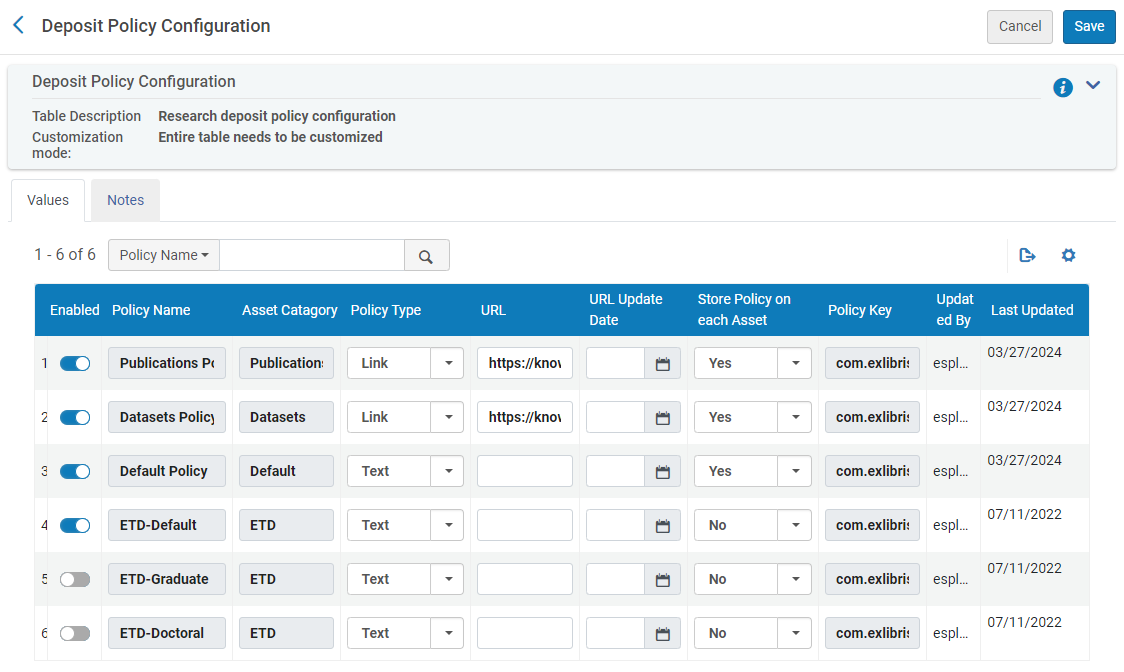
- In the Deposit Policy Configuration mapping table, for each category:
- Enable or disable the policy. When enabled, the Terms and Conditions of the asset category are taken from the source specified under Policy Type. When disabled, the default policy is used for that asset category (Default for non-ETD categories; Default ETD for ETD categories).
- Under Policy Type, select the source from which the Terms and Conditions should be opened when the researcher selects the Terms and conditions link in the portal asset-deposit form (see above). Select Text if the text of the policy should be taken from the Deposit Policy Text page (see below), or Link if you want to specify a URL at which the researcher can see the policy.
- If you selected Link for the Policy Type, under URL, enter the URL. Then, under URL Update Date, select the date of the most recent update of the text at that location.
- If you selected Text for the Policy Type, under Store Policy on Each Asset, select Yes to store the entire text of the policy with each asset for which the policy is accepted. This ensures that, when the policy text changes, there is a record of exactly which text was accepted. If you select No, only the name of the policy is stored. (If you selected Link for the Policy Type, this value is automatically set to Yes.)
- When you are done, select Save.
- If you selected Text for any policy type in the Deposit Policy Configuration mapping table, modify the current text on the Deposit Policy Text page, as required. (A default text is predefined for each policy type.) To do so, for each relevant policy category, select the Customize row action. A page similar to the following appears:
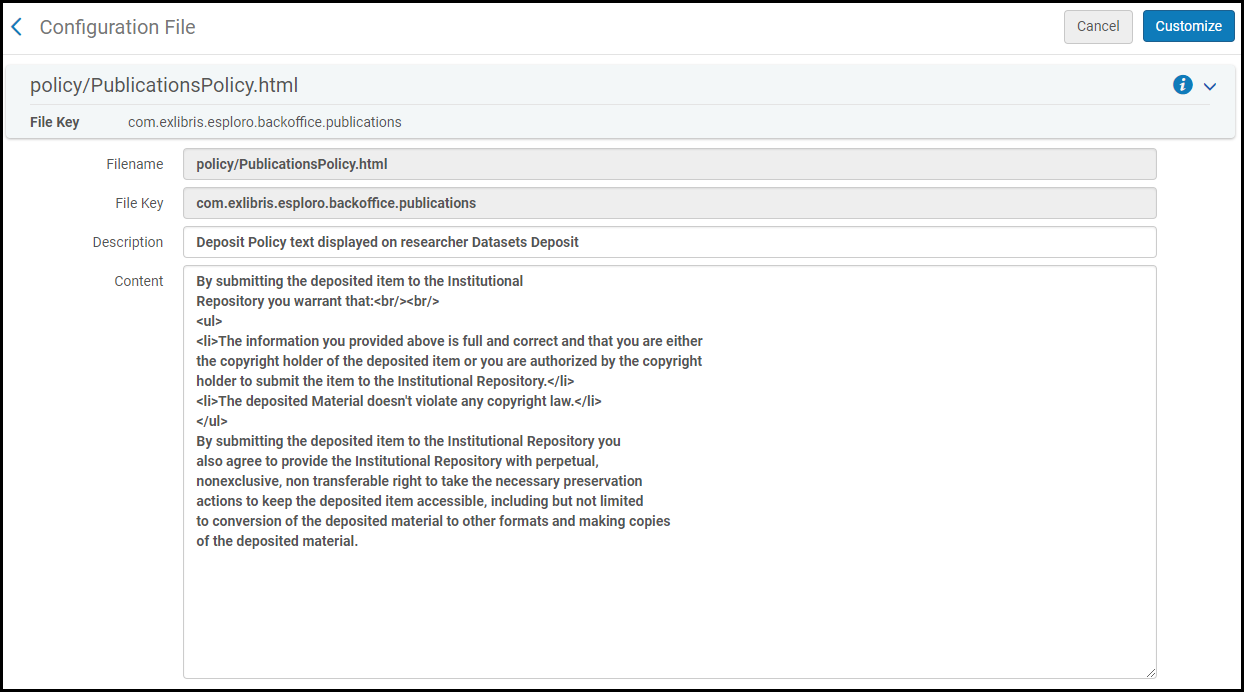 Customize Deposit Policy Text Page
 - Edit the text as required. Note that the field supports HTML tags.
- When you are done, select Customize. The changes are saved.
After you customize a text on the Deposit Policy Text page, additional row actions enable you to restore or view the original default text for the policy.