

Configuring Central Index and Proxy Settings for Primo VE
Introduction
Enabling the Central Index
-
If you have not already done so, register your institution on the Central Index and Proxy set-up page (Configuration Menu > Discovery > Other > Central Index and proxy set-up). For more details, see Registering Institutions for Central Discovery Index.
 Central Index and Proxy Set-Up Page
 -
After you receive an approval email (which can take up to several days), re-edit the page and specify the following fields:
CDI Configuration Fields Field Description Registration: Enter the CDI Key that you received in your Central Index registration email. If you have not registered with the Central Index service, select Register to Central Discovery Index and follow the registration instructions. This field is required.After you save your CDI Key and Customer ID, the View my Profile link replaces the Registration link, enabling you to modify your customer and contact details, unsubscribe institutions, and configure your client applications. For more information, see My Profile for CDI.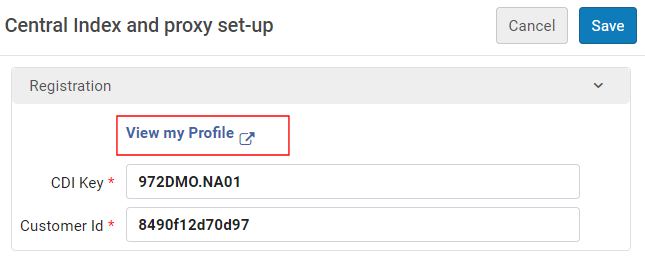 View my Profile LinkCustomer IDEnter the customer ID that you received in your Central Index approval email. This field is required.
Search Configurations: Newspaper search
When selected, this option enables the Newspaper Search feature for the entire institution. Once enabled, you can configure various options for each view. For more information, see Configuring Discovery Views for Primo VE.
Use Proxy: CDI ProxyIf you want to enable off-campus users to access full text services at different vendor sites, you must select a resolver proxy profile from the drop-down list.If you have not cot configured a proxy, select Proxy Configuration. For more details on configuring a proxy, see Resolver Proxies.Use proxy for CDI linksSelect this checkbox if you want to use the selected proxy for direct links in CDI records.Use proxy only if the user is off-campusSelect this checkbox if you want to use the selected proxy when the user is off-campus only.Users are considered off-campus if they are not signed-in and not within the defined IP range for the institution. For more details, see Configuring IP Ranges for a Library.Do not proxy Open Access recordsSelect this checkbox if you do not want to use the selected proxy for open access records (including Quicklinks).Featured Newspapers: Add New Featured Newspaper
The Featured Newspapers functionality enables you to define featured categories from which users can search to find newspapers that you want to make more prominent. These categories appear in the Newspaper Search box and in the Featured Newspaper section on the Newspaper Search page.
To add a featured category, select Add New Featured Newspaper and specify the following fields in the dialog box to create a category of newspaper articles to display in the Featured Newspapers section on the Newspaper Search page:
-
Code – Specify the code name for the category's description. The display label for the description is defined with the Newspapers Search code table.
-
Name – Specify the code name for the category. The display label for the category is defined with the Newspapers Search code table.
-
ISSN – Specify the ISSN of the newspaper. You can specify a maximum of five ISSNs per category by separating them with a semicolon. For example: 0362
-4331;1085-6706. -
Description – An optional description to internally document the category.
You can define a maximum of five categories per view (including disabled categories).
Provider preference order for CDI linking:
You do not need to add precedence for all providers, but the providers in this list have precedence over providers that are not included in this list.
Add new provider
This section allows you to configure which providers are given preference when displaying links from CDI in View It. These preferences are used in the following situations:
-
When only a single link is returned from CDI, regardless of the setting of the Display All Links from CDI option.
-
When the Display All Links from CDI option is enabled and multiple links are returned from CDI.
The linking preferences apply to both general Link in Record links and Quicklinks and All links. This configuration is passed to CDI and is used when returning search results from CDI. For more information regarding link priority, see CDI and Linking to Electronic Full Text.
To add providers to the preference list:- Select Add new provider to open the configuration dialog box.
-
In the Provider Name field, select the provider to which you want to give precedence. This drop-down includes all CDI providers that have Provider Coverage set to Yes in the CDI Collection List.
-
Select either Add to bottom or Add to top to indicate whether the selected provider has more or less precedence than other providers that you add to the list.
-
Select the arrow in the Move Up/Move Down columns to adjust the new provider's precedence.
-
Repeat the above steps for additional providers.
-
-
Select Save.
Enabling the Central Index for Environments with Distributed Access to Electronic Resources
In Alma, electronic resources can be managed at the campus/library level. If there are significant differences between campuses/libraries in terms of electronic resource subscriptions, you should create a separate view and a Central Index (CDI) profile for each campus/library defined for your institution. This ensures that the availability of full text is relative to each campus/library.
The system uses the default CDI profile if the view that the patron is using is not affiliated with a library/campus.
For details on how to configure distributed access environments, see the following documents:
-
On the Central Index and Proxy set-up page (Configuration Menu > Discovery > Other > Central Index and proxy set-up), select Add Library or Add Campus to open the Add Library dialog box or the Add Campus dialog box, respectively.
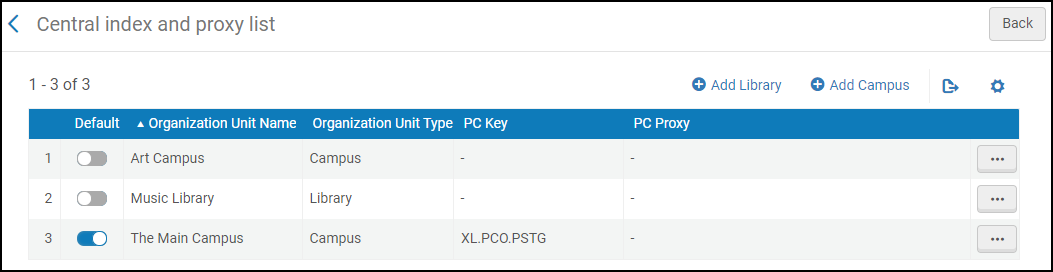 Add Campus Dialog Box
 -
Select the library/campus for which you want to create a separate CDI profile. The library/campus must be defined before you can create a separate CDI profile for it.
 Add Campus Dialog Box
 -
Select Add and Close to return to the Central Index and Proxy List page.
-
Edit the new CDI profile. Refer to the CDI Configuration Fields table to fill in the fields.
Each CDI profile must be configured with its own CDI Key to enable separate holdings files to be maintained for each campus.
-
Save your changes to the profile.
-
After you have added a CDI profile for each library/campus, select a default CDI profile by enabling its Default slider on the Central Index and Proxy List page.
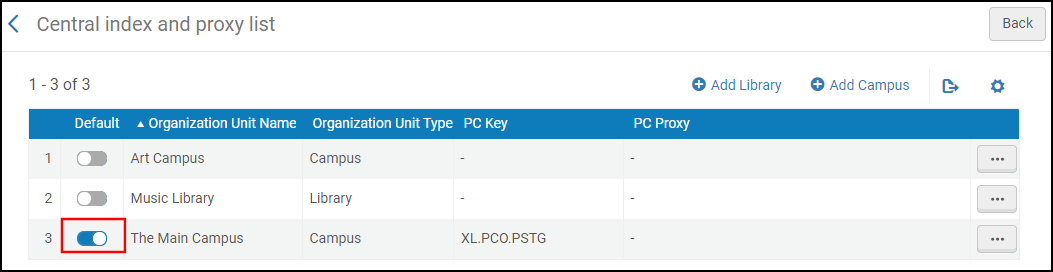 Setting the Default CDI Profile
The system uses the default CDI profile if the view that the patron is using is not affiliated with a library/campus. You can define only one default for an institution. For example:
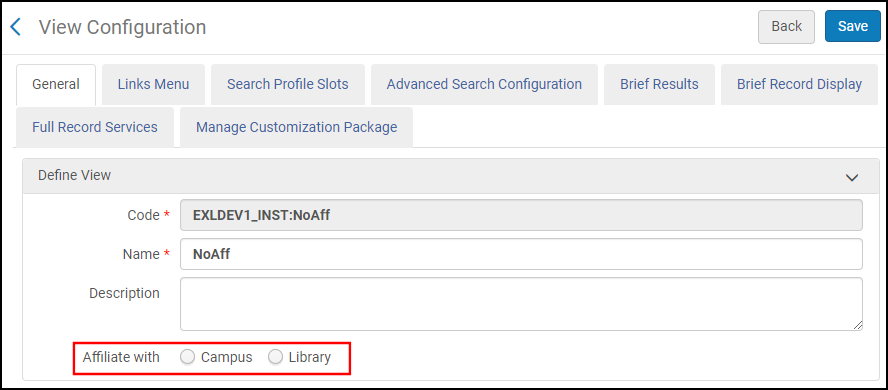 View Configured with No Affiliation
Configuring a View to Search the Central Index
After you configure the Central Index, your view must have a slot that includes the Central Index search scope. Out-of-the-box, the CentralIndex search profile includes only the Central Index search scope.
-
Configure all search profiles that include the Central Index search scope:
-
Open the Search Profiles page (Configuration Menu > Discovery > Search Configuration > Search Profiles), and select the Search Profiles tab. For more details, see Configuring Search Profiles for Primo VE.
 Search Profiles Page
 -
Edit each search Profile row that includes the Central Index scope to open the Define a Custom Search Profile page. Out-of-the-box, the CentralIndex and MyInst_and_Cl search profiles include the Central Index scope.
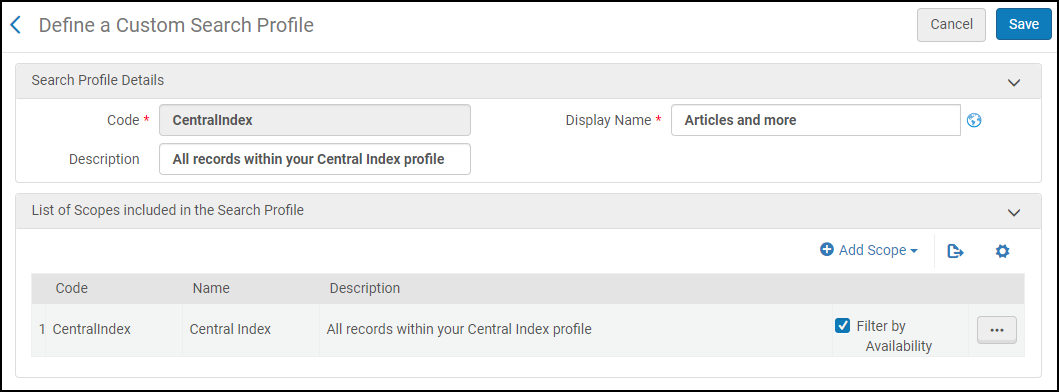 Define a Custom Search Profile Page
 -
Select the Filter by Availability checkbox if you want to display only CDI records that have full text. Otherwise, the system will display all matching CDI records.
-
If the search profile blends the Central Index search scope and a local/other search scope, see Boosting Records in Blended Search Profiles to configure its boost settings.
-
Select Save to save your changes to the Define a Custom Search Profile page.
-
-
Configure your view to use a search profile that includes the Central Index search scope.
-
Open the View List page (Configuration Menu > Discovery > Display Configuration > Configure Views). For more information, see Configuring Discovery Views for Primo VE.
-
Edit your view, and then select the Search Profile Slots tab.
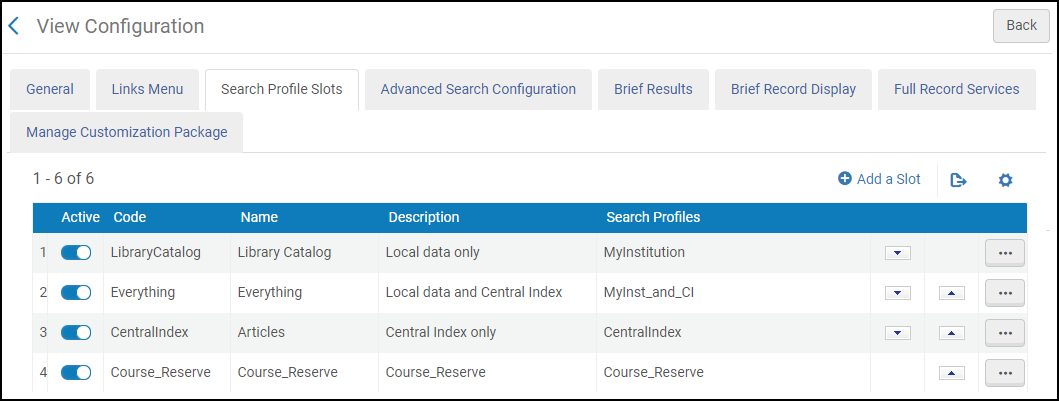 View Configuration Page - Search Profile Slot Tab
 -
Edit an existing slot or select Add a Slot to create a slot to which you want to include the Central Index search scope. Out-of-the-box, the Central Index search scope is enabled in the Everything and CentralIndex slots.
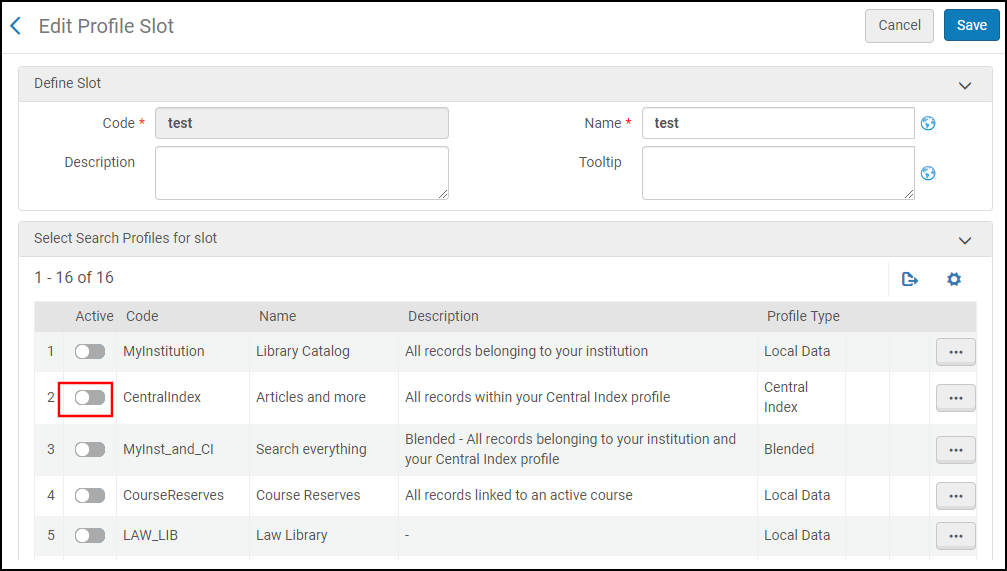 Edit Profile Slot Page
 -
From the list of search profiles, activate a search profile that contains the Central Index scope.
-
Select Save to save your changes and return to the Search Profile Slots tab.
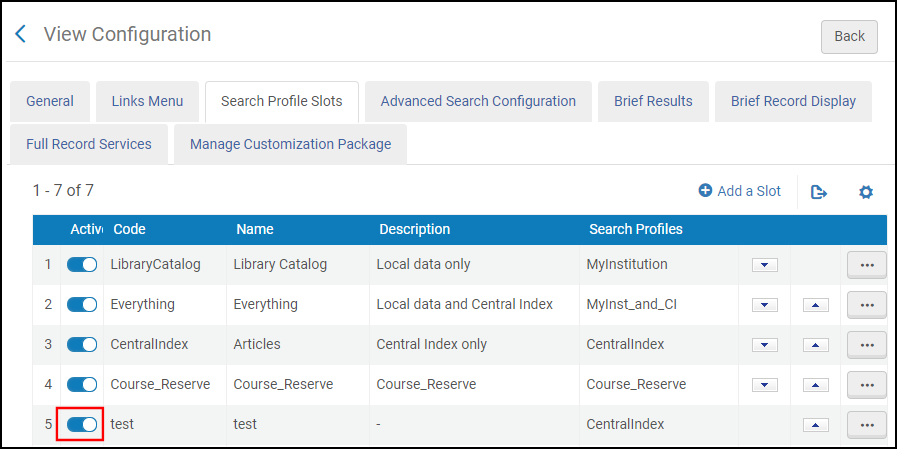 Activate Profile Slot
 -
Activate the profile slot.
-