RSS Publishing
- General System Administrator
- Repository Administrator
- Catalog Administrator
New RSS Feed Workflow
- Create a physical items set (see Saving and Reusing Search Queries) to identify the set of records within which you expect to locate your list of new books. You will need this set name when configuring the RSS publishing profile.
Only logical sets can be used with the RSS Profile. Itemized sets will not be listed when running the profile.
- Create the RSS discovery URL (see Creating the RSS Discovery URL).
- After you have identified all the parts and created the RSS discovery URL that you need to use for your new book list process, enter the URL in rss_discovery_url (see Configuring Other Settings).
- Create an RSS publishing profile that includes a definition of new that is between 90 and 2 days ago (see the Max number of days ago and Min number of days ago settings described in Configuring an RSS Publishing Profile below).
- Create the RSS feed URL (see Creating the RSS Feed URL)
- Optionally, confirm that new books have been added/received to your database (within the set that you saved above).
- Confirm that the RSS publishing profile successfully completed processing on the Monitor Jobs page (see Viewing Completed Jobs).
- Use the RSS feed URL to view the new book list by entering the URL into a browser and viewing the results in Primo. See Viewing Scheduled Jobs.
Configuring an RSS Publishing Profile
- Open Resources > Publishing > Publishing Profiles.
- Select Add Profile and select the RSS option. The Publishing Profile Details page appears to a blank RSS profile.
- Configure the RSS publishing profile using the table below.
RSS Publishing Profile Field Description Profile Details Profile name The unique name of this RSS feed publishing profile. Used to identify the profile on the list of Publishing Profiles page. Profile description More information about the profile that appears on the Publishing Profiles page. Status - Active (yellow check mark), meaning it is in use or can be used, or
- Inactive (clear check mark), meaning it is unable to be used at present.
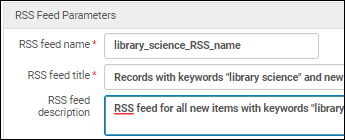
Scheduling When you want to run this publishing profile. Email Notifications Which users and email addresses receive email notifications when an RSS job completes. Select to open the Email Notifications for Scheduled Jobs page. Select whether to send the notifications for successful jobs and/or jobs that contain errors. RSS Feed Parameters RSS feed name The name used to generate the link to the feed. Do not use spaces in the name. Language A drop-down list from the languages code table. The default is empty. Once a value is selected, it becomes the default on subsequent uses of the profile. RSS feed title The name of the profile in the Publishing Profiles list. This also appears in the RSS feed results.RSS feed description A description of the profile that appears in the Publishing Profiles list. This also appears in the RSS feed results.Display Location Name Whether to include the full location name in the output or only the location code. Select this checkbox to publish RSS feeds using RSS 2.0 XML.
Select Population Set name The set of physical items to which the RSS action is applied. Max number of days ago The maximum number of days past to look for new items for the feed. New is determined by the item’s Receiving date identified on the Physical Item Editor page. The default number of days is 60. This number cannot exceed 90.Min number of days ago The minimum number of days past to look for new items. The default is 2, and two days is the minimum to ensure synchronization with the Primo. This number cannot exceed the Max number of days ago. - Select Save. The Publishing Profile list page appears with the new RSS feed publishing profile listed.
Creating the RSS Discovery URL
- Primo_domain – Specify the domain that you use for Primo's UI.
- view_code – Specify your view's code in Primo VE. For more details, see Configuring Discovery Views for Primo VE.
- search_slot – Specify the code for the search profile slot in the view. For more details, see Configuring Search Profile Slots.
- scope_code – Specify the code of the scope to which you want to search. For more details, see Configuring Search Profiles for Primo VE.
- Primo_domain – Specify the domain that you use for Primo's UI.
- institution_code – Specify Primo's institution code, which is defined with the Institution Wizard in the Primo Back Office. For more details, see Institution Wizard.
- view_code – Specify Primo's view code, which is defined with the Views Wizard in the Primo Back Office. For more details, see Configuring Primo Views.
- tab_code – Specify the view's tab code, which is defined with the Views Wizard in the Primo Back Office. For more details, see Configuring View Tabs. If not specified, the system uses the view's default.
- scope_name – Specify the name of the scope to which you want to search, which is defined with the Views Wizard in the Primo Back Office. For more details, see Configuring Search Scopes. If not specified, the system uses the view's default.
- source_code – Specify the source code, which is defined with the Data Sources page in the Primo Back Office (see Configuring the Data Source). If your institution is a member of a collaborative network, leave this value blank.
Creating the RSS Feed URL
- Alma_domain – Specify your Alma domain (see Your Alma Domain Names).
- institution_code – Specify the code that is assigned to your institution in Alma.
- RSS_feed_name – Specify the name of the RSS feed, which is defined in the RSS publishing profile:

The Publishing RSS Feed Job
- The Publishing filter on the Monitor Jobs page (see Viewing Running Jobs and Viewing Completed Jobs)
- OR Select History from the row actions list for the RSS profile on the Publishing Profile page.
For completed jobs, select Report from the row actions list to open the Job Report page.
The job report looks as the below:

Counters displayed in the job report:
- New records (P) - Number of records that actually published with the logical set criteria (Receiving date).
- Filtered records - Not relevant here, ignore this counter.
In addition to the files created as a result of the Publishing RSS Feed job, Alma generates a summary link (displayed on the Job Report page) for each RSS job in the following format: http://<Alma domain>/rep/getFile?institution_code=<Alma Institution Code>&file=<RSS feed name>&type=RSS. This is the same URL format described in Creating the RSS Feed URL.
To View RSS Feed Results and Subscribe
The examples below were taken using Internet Explorer. In other browsers the results look slightly different. Ex Libris is not responsible for various browsers capabilities to subscribe to a RSS feed.
- Select the link provided on the Job Report page, or copy/paste the RSS feed URL that you created in the section Creating the RSS Feed URL into a browser.
Either method opens a page similar in format to the below that contains a list of items matching the date span criteria that you provided in the publishing profile. This is your new books list.

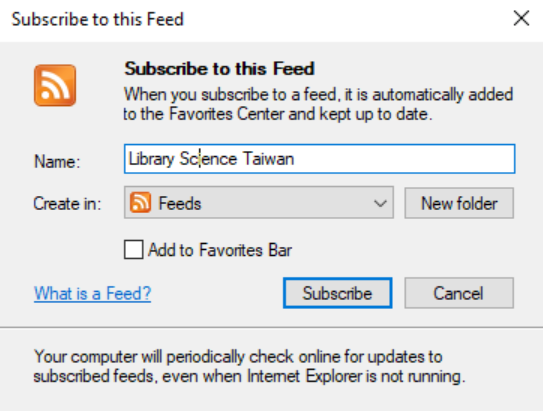
- Select "Subscribe to this feed" and fill in the details.

A message opens the confirms that you have successfully subscribed.

- Select "View my feeds" to view the results. Your new RSS feed results list opens.

- To view an item that is on your RSS feed results list, select the link for one of the records in the list. The item opens in your discovery tool/Primo.
Format of Published Data
This is an example of the XML file structure:
<rss xmlns:atom="http://www.w3.org/2005/Atom" version="2.0">
<rss>
<channel>
<link></link>
<description></description>
<language></language>
<item>
<title></title>
<link></link>
<author></author>
<description>
<language></language>
<format></format>
<mattype></mattype>
<pubDate></pubDate>
<arrivalDate></arrivalDate>
</item>
</channel>
</rss>
If no physical items meet the publish criteria (according to the logical set definitions or according to the "Max number of days ago" and "Min number of days ago" defined in the Publishing Profile), the XML page built as a result of the publishing will be empty. This is an example of such an empty page:


