
Working with Researchers
This page describes how to create and manage individual researcher records in Esploro. For information about customizing researcher-record settings, see Configuring Researcher Details. For information on managing users in Esploro, see Managing Users. For information about adding a researcher to the Featured Researchers section of the homepage, see Configuring the Research Portal.
- Researcher Manager
Your institution's affiliated researchers must first be registered as Platform users before an affiliated researcher record can be created for them. See Managing Users for more information.
Affiliated researcher information is stored as an extension to the user record.
Ex Libris helps you upload your first set of affiliated researchers, and helps you to configure Esploro to keep your users up to date using the Users integration profile. For more information about this profile, see Student Information System. You can also manage researchers manually, as described below. For information on the Author Matching report, see Reports and Notifications for the Smart Harvesting Framework.
You can add non-affiliated researchers when you are adding or editing an asset (see Adding and Working with Research Deposits). Esploro also adds non-affiliated researchers when uploading assets to your institution during migration.
Searching for Researchers
To find researchers and researcher proxies using the persistent search, see Searching in Esploro.
You can filter the list of researchers according to the following:
- Account:
- Internal – A user managed entirely within Esploro.
- External – Users imported from and managed by an external system. The core user details are managed in the external system but can be viewed in Esploro.
- Internal with external authentication users – Users created and managed in Esploro (as internal) but have external authentication such as LDAP.
- Status:
- All
- Active and not expired
- Not active or expired
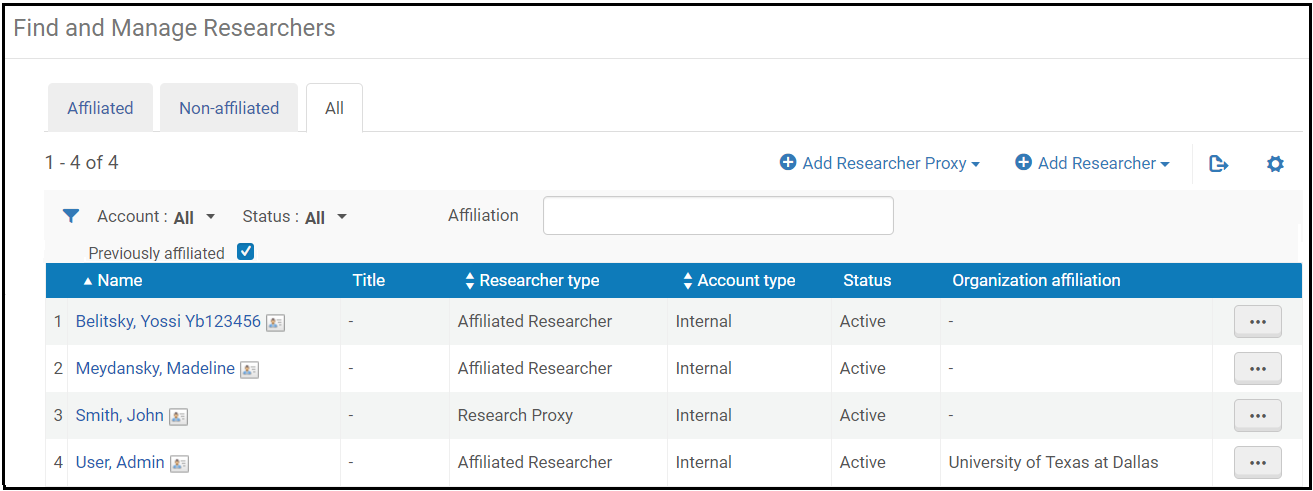
Use the persistent search, as well as the Affiliated/Non-affiliated tabs, Previously Affiliated checkbox, filters, and Affiliation secondary search to filter the list of researchers.
Adding Researchers
- Ensure that the researcher already has a user.
- On the Find and Manage Researchers page (Researchers > Researchers > Manage Researchers), select Add Researcher and enter or select the user associated with the researcher in the dialog box. Note that you cannot add a non-affiliated researcher on this page. That can only be done when adding or editing an asset.

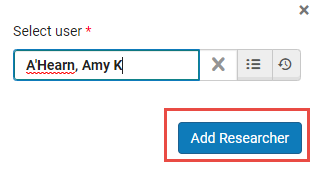
- In the Select user box you can type a name in the Look-up field or select from the list of users.
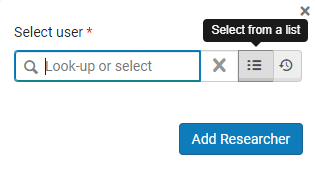
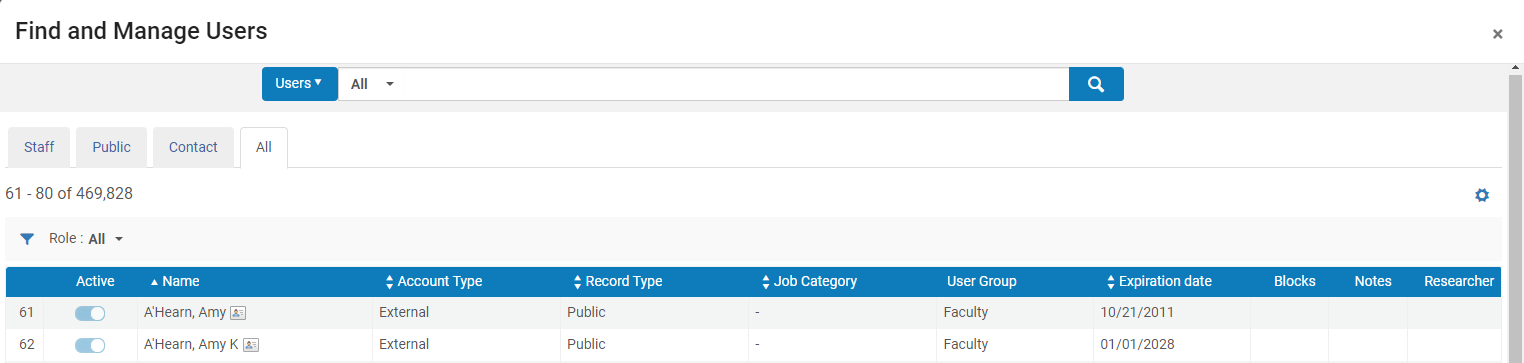
- Clicking Select from a list takes you to the Find and Manage Users page where you can select the user from the list.
- After adding a user, select Add Researcher.
- The Researcher Details page appears. The Researcher Profile tab on this page is pre-filled with information. Most of the user information is copied from the user record.
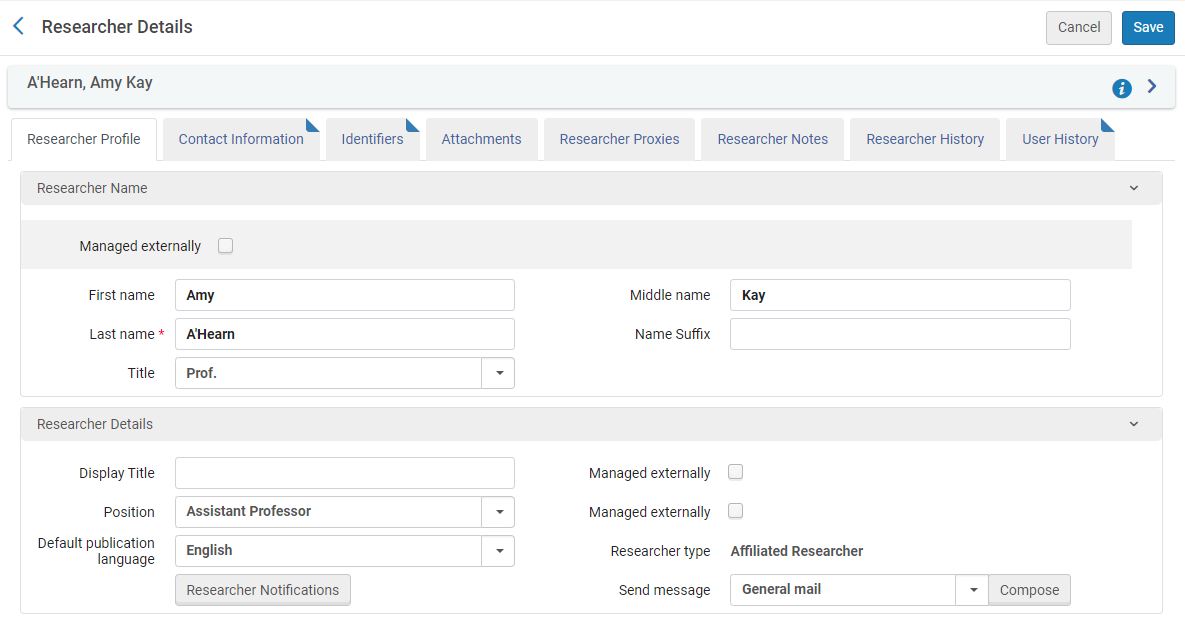
- Enter the following additional information:
Many of the fields on the Researcher Details page have a Managed externally checkbox. When this is selected, the researcher loader updates the fields automatically, and the fields can also be modified via API. When it is cleared, both the loader and APIs are prevented from updating the fields, and changes can only be made manually, by staff. See Running Manual Jobs.
Researcher Profile Fields Field Description Values Researcher Name First name The researcher's first name. Last name The researcher's last name. Title The researcher's title. Middle Name The researcher's middle name. Name Suffix The user's name suffix, if any. Researcher Details Display Title The researcher's title for display purposes. When data is entered into this field, the value is used for the title on the Researcher page, instead of the researcher's position and first affiliation. The title is also displayed when choosing the View Public Profile row action. Position Researcher position at the institution. To configure this list, see Configuring Researcher Positions. Select a value from the drop-down list. Researcher Type Whether this user is affiliated or nonaffiliated, or a proxy for another user. When adding an affiliated researcher, this is Affiliated Researcher. Send message Select a mail type and click Compose to open a dialog box where you can send a message to the researcher. Default Publication Language This value is used to pre-fill the Language field when the researcher submits a deposit or when an administrator submits a deposit on the researcher's behalf. Your administrator can set the default value for this field for all new researchers (Configuration > Researchers > Default Researcher Settings, under Other Settings). If a global default is not set, the default is taken from the Preferred language field. Previously Affiliated Select to indicate that the researcher was previously affiliated with the institution (but not currently). This researcher type is indicated on the Find and Manage Researchers page. The public profile of the researcher is displayed on the Researcher Portal. Researcher Notifications Select this button to configure the researcher's notification settings. Select or clear the check boxes next to each notification that you want to enable or disable for the researcher. An administrator can set the default values for these fields for all new researchers; see Configuring Researcher Details.
Researchers can also set these settings from their private Profiles; see Managing Researcher Profiles.
These settings can also be set from the user record; see Managing Users.
These include notifications such as Mediated Deposit Approved, Send Asset to ORCID, etc. Researcher Settings Has an Active Public Profile Whether this researcher appears in the Researcher Portal. See Profile Activation Status.
For a video showing how to enable a researcher to make their Profile public see here.
- Yes (default)
- No
Include in Smart Harvesting Whether to include this researcher when performing automatic capture. - Yes (default)
- No
Skip automatic approvals in Smart Harvesting Select Yes for this option if assets that are matched to this researcher by Smart Harvesting should never be automatically confirmed, even when they meet the general requirements for automatic approval. This is useful for researchers for whom matches are problematic for some reason – for example, if you have two researchers with the same name who work in the same department or research domain, the algorithm cannot easily distinguish between them. This option allows you to configure Esploro to automatically approve author-researcher matches in general – for example, when the match is identified as Very Strong – but disable the functionality for specific researchers. - Yes
- No (default)
Enable Automatic Request for Author Match Approval Whether Esploro should automatically request that this researcher approve tentative Smart Harvesting matches. When this is turned on, Esploro automatically does the equivalent of an administrator selecting Request researcher approval from the list actions of a match that appears in the Author Matching Approval Task List (see Author Matching Approval Task List). - Yes
- No (default)
Last Smart Harvesting Date The value of this field determines the point in time from which assets will be brought in. For the first (retrospective) run, this field is empty. For ongoing runs this is updated automatically. Has Access to the Researcher Profile Whether this researcher can use (log into) the Researcher Profile. - Yes (default)
- No
Update ORCID Profile Whether to update the ORCID profile for this researcher, when pushing assets to ORCID. See also the Update Set of Researchers job in the Manual Jobs table. You can configure the system to ignore this flag - see ORCID Integration. - Yes (default)
- No
Current/Previous Internal and External Organization Affiliations – Select one or more current or previous, internal or external research organizations with which the researcher is affiliated, the date started, the relevant position, and title. For information about managing the lists of organizations, see Configuring the Organization.
After adding current affiliation, you can set an end date for the affiliation. To do so, from the row actions of the affiliation, select Edit, and then, in the Date ended field, select the end date. Current affiliations whose end date has arrived are automatically converted into previous affiliations.
Research Topics and Keywords Research topics Select one or more predefined research topics to associate with the researcher. Keywords If any of your topics is not predefined (Research topics), enter a comma-separated list of topics here. Area of Interest – Enter one or more areas of interest. Name variants – Name variants are used by Smart Harvesting and the Author matching algorithm. It is important to only add variants that differ from the researcher's main name that he or she is known to use in publications. For example, if the researcher's name is Frederick G. Smith:
- Add the nickname Fred Smith only if he publishes as Fred Smith.
- Do not add Frederick Smith even if he publishes without the initial because this does not add any new information. Esploro already checks for the name without the middle initial.
For more detailed information see Researcher Name and Name Variants.
Public and Academic Engagement – Engagement types are used to indicate various types of engagements in which a researcher is available to take part, such as whether the researcher is designated as an expert in a particular field, or is available to give media interviews. You can select up to five engagement types for the researcher, and set an (optional) expiration date for each of them.
Expiration dates are indexed and mapped to analytics, but they do not affect the display in either the hub or the portal. That is, even if the expiration date of an engagement type has passed, the engagement type still appears in the Researcher Details or in the researcher's profile in the portal.
For information about configuring researcher engagement types, see Configuring Researcher Engagement Types.
Engagement types can be displayed in the researcher's profile in the portal. Admins can choose whether they can be seen by the public, only by signed-in users, or only in the private profile. These settings can be configured in the Researcher Profile Management table found at Configuration Menu > Portal & Profiles > Researcher Profiles > Researcher Profile Privacy Display Settings, in the Display Overview section, under Engagements. For information about configuring the settings in this table, see Configuring Researcher Profiles.
Admins can also choose which engagement types are visible in researcher profiles; see Configuring Researcher Details.
Researchers can also choose to hide engagement types that are otherwise available for display in their profiles; see Managing Researcher Profiles.
Engagement types are available as facets in the portal, so end-users can filter a list of researchers based on these settings.
Researcher Website URLs – Enter one or more websites associated with the researcher. For each website, select the type: CV, Home Page, Lab, Profile, Publication page, Unknown. You can also add an optional title and description. The website order can be rearranged by dragging the URL rows in the Researcher Website URLs list to reorder them as you want them to appear on the Researcher Profile page. Education – Enter one or more rows related to the researcher's education, including studies title (field of study), institution, certificate (degree), from and to dates of study, and any additional details. Associations – Enter one or more rows indicating other associations with external research organizations. Honors – Enter one or more rows related to the researcher's honors, including title, external research organization, and time period. Languages Language Enter a comma-separated list of the researcher's languages. Public Profile URL Identifier Click Regenerate to regenerate the researcher's URL identifier based on the researcher's new name.
When you change any part of the researcher's name in the Researcher Name section, and move the focus away from the changed field, a message will appear notifying you that you must regenerate the URL identifier if you want it to reflect the name change.File Select a picture to appear on the research profile of the researcher. - On the Contact Information tab, enter addresses, phone numbers, or email addresses for the researcher. Initial information on this tab is copied from the user record.
- On the Identifiers tab, enter additional identifiers for the researcher. Initial information on this tab is copied from the user record. For each identifier, select the type, enter a value, and add an optional note. Ex Libris creates and configures the types when setting up your institution. To configure user identifiers in Esploro, see Managing User Identifiers. User identifiers that are highly relevant for researchers include ORCID, ISNI, Scopus ID, ResearchID, arXiv ID, eRA ID, Pubmed author ID, Pivot ID, and Google Scholar ID.
Any type of identifier can be included in the Researchers load except Primary ID. To mark an identifier you are adding manually to the researcher as managed by Esploro, select the Add as a researcher ID flag on the Researcher Identifiers list. This selection will cause it to be updated when the Researcher loader is run with the Researchers Only option. When configuring your Researchers loader in Researchers Only mode, be sure to select the Identifiers you will be managing from the list of Identifiers that is displayed. Identifiers that are selected will be updated by the loader when it is set to update the researcher data and not the user data. - On the Attachments tab, you can add attachments related to the researcher or see emails related to Esploro that were sent to this researcher. See Attachments Tab.
- On the Researcher Proxies tab:
- In the Add Proxy section, enter other researchers that can submit assets on behalf of this user.
- In the Add As Proxy for section, enter other researchers for which this user can submit assets on their behalf.
- On the Researcher Notes tab, add notes about the researcher, as required; see Researcher Notes, below.
- On the Researcher History and User History tabs, you can view a record of changes that were made in the past to this researcher's researcher and user records, respectively.
Entries in the user history may be deleted by the Alma job User audit purge with retention (see Managing Users in the Alma Knowledge Center). This job does not affect the researcher history.
- When you are done, select Save to save your changes.
- Ensure that the proxy already has a user.
- On the Find and Manage Researchers page, select Add Researcher Proxy and enter or select the user associated with the researcher in the dialog box.
- Select Add Researcher Proxy. The Researcher Details page appears. The Researcher Profile tab on this page is pre-selected. Most of the user information in the User Information area is copied from the user record.
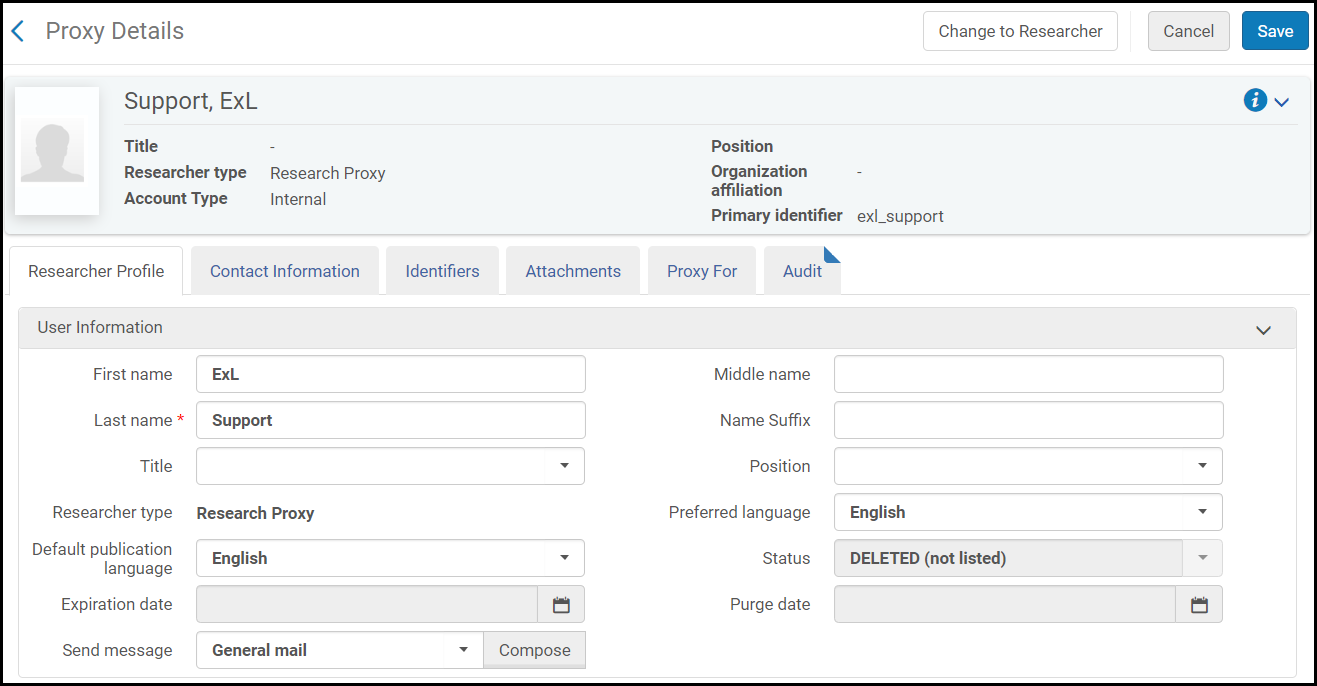 Proxy Details
 - Enter the following additional information:
Researcher Proxy Profile Fields Field Description Values User Information Name Suffix The user's name suffix, if any. Position Researcher position at the institution. To configure this list, see Configuring Researcher Positions. Select a value from the drop-down list. Researcher Type Whether this user is affiliated or nonaffiliated, or a proxy for another user. When adding a researcher proxy this is Research Proxy. Default Publication Language This value is used to pre-fill the Language field when the researcher submits a deposit or when an administrator submits a despot on the researcher's behalf. Your administrator can set the default value for this field for all new users; see Configuring Default Researcher Settings. If a global default is not set, the default is taken from the Preferred language field. - See the procedure for adding a researcher (above) regarding the other tabs.
- When you are done, select Save to save your changes.
Researcher Names and Name Variants
Researcher names are a critical element in author-researcher matching.
The researcher’s name that is loaded to Esploro (from the more general Platform Users loader or API) is often the researcher’s legal name. He or she may publish under a somewhat different name – for example without the middle name or with an initial. Some researchers publish using different versions of their name or may change their name over time.
Below are guidelines for optimally adding researcher names for the Author Matching algorithm.
- Include as much of the researcher’s name as possible. It is preferred to use the various parts of the name (First, Middle, Last, Suffix). For example, "Jerome David Salinger" should have "Jerome" under first name, "David" under middle name, and "Salinger" under last name.
- Add variant names only if is different from the main researcher’s name keeping in mind that there is no need to add variant names for initials. This is something the algorithm will handle itself. For example, the researcher “Jerome David Salinger” there is no need to add “J.D. Salinger” or “J. Salinger”. However, if the researcher also published as Jerry Salinger add this as a variant name.
- Add a variant if the researcher changed his or her name over the course of their career.
- For example, if the researcher "Jennifer Doudna” changed her last name to "Cate", and now publishes under the new name (which is not always the case), have one of the last names as her main one, and one as a variant.
- If researcher "Jennifer Doudna" only added last name "Cate” to her last name, and now publishes as "Jennifer Doudna-Cate", add only the double name as a new name variant. Do not add Jennifer Cate as a variant.
- Which name should be the main one and which the variant? It is recommended that the name under which more publications have been made is entered as the main one.
- In the case of a double-barreled last name that has always been the researcher's last name (and not changed at some point in their career), just include the name as it is. For example, John Maynard Smith should not be added as "John Smith" and "John Maynard.”
- In the case of a double-barreled middle name – enter the middle name with all the parts. For example, if the middle name is “Sara Lee” – enter “Sara Lee” as the middle name.
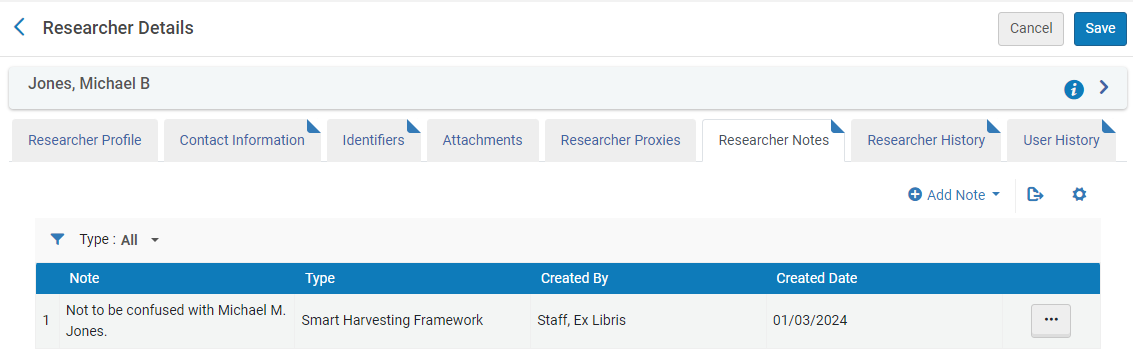
Researcher Notes
The Researcher Notes tab in the researcher record can be used to add any notes that are relevant to the researcher. Note that it is not the same as the Notes tab of the user record; see Managing Users. By default, the following note types are defined:
- General Note
- Smart Harvesting Framework
- Assessment Notes
- Other
All types of researcher notes are displayed and managed in the Researcher Notes tab of the researcher record. In addition, when you select the User Information icon (![]() ) in either the Find and Manage Researchers page (Researchers > Manage Researchers) or in the Asset Details page under Creators and Contributors (opens when you select Edit for an asset that appears in the Research Assets page), the notes may appear in the pop-up that opens: the first one hundred characters of each of the newest three notes are displayed in the pop-up.
) in either the Find and Manage Researchers page (Researchers > Manage Researchers) or in the Asset Details page under Creators and Contributors (opens when you select Edit for an asset that appears in the Research Assets page), the notes may appear in the pop-up that opens: the first one hundred characters of each of the newest three notes are displayed in the pop-up.
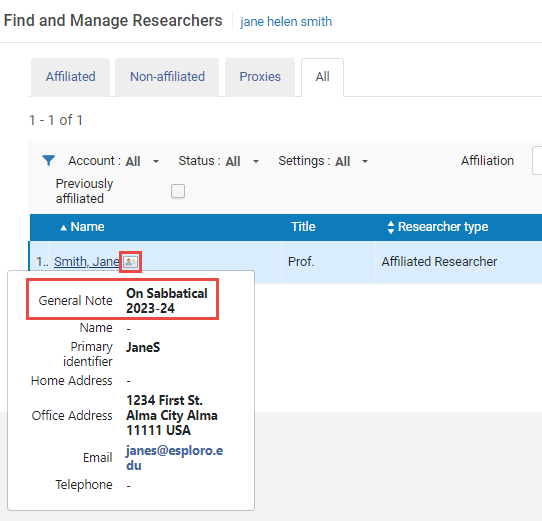
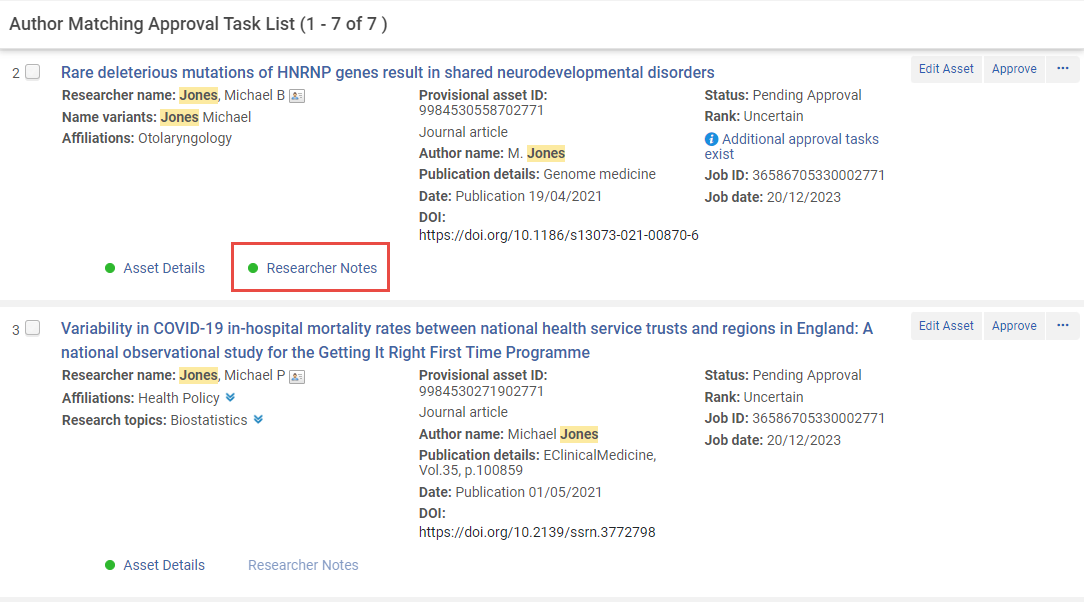
Smart Harvesting Framework notes can also be viewed and edited in the Author Matching Approval Task List when an asset is tentatively linked to a researcher whose record includes researcher notes.
You can also add additional types of researcher notes, and hide default types, if you wish; see Managing Researcher Note Types, below.
Adding Researcher Notes
- In the Researcher Details page, in the Researcher Notes tab, select Add Note. A dialog box opens.
- Under Note, enter the text of the note.
- Under Type, select the type of note.
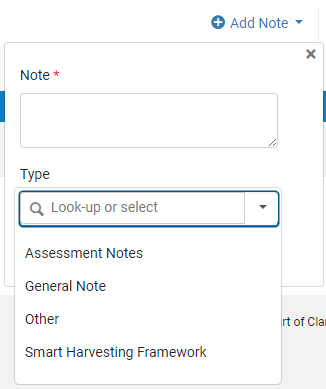
- To add the note and then add an additional note, select Add. To add the note and then close the dialog box, select Add and close. When you select Add and close, the note is added to the record and appears in the Researcher Notes tab.
Smart Harvesting Framework Researcher Notes
The Smart Harvesting Framework type is intended for researcher notes that are relevant to the Smart Harvesting Framework process. For example, you may want to note that a researcher with a similar name and the same research domain is at another institution.
Notes of type Smart Harvesting Framework can be viewed and edited in the Author Matching Task list (see Author Matching Approval Task List) as well as in the Researcher Notes tab of the researcher record. For author-matching approval tasks whose associated researcher has researcher notes in their record, the Researcher Notes drawer of the task is available. Select the drawer to open it and view the notes.
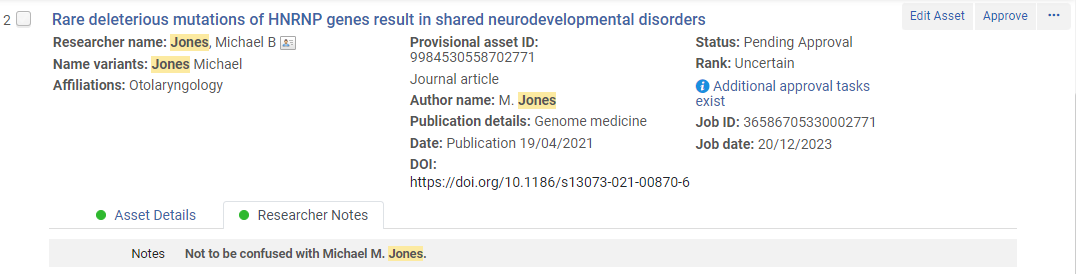
Researcher notes can also be added, edited, or deleted from the Author Matching task list.
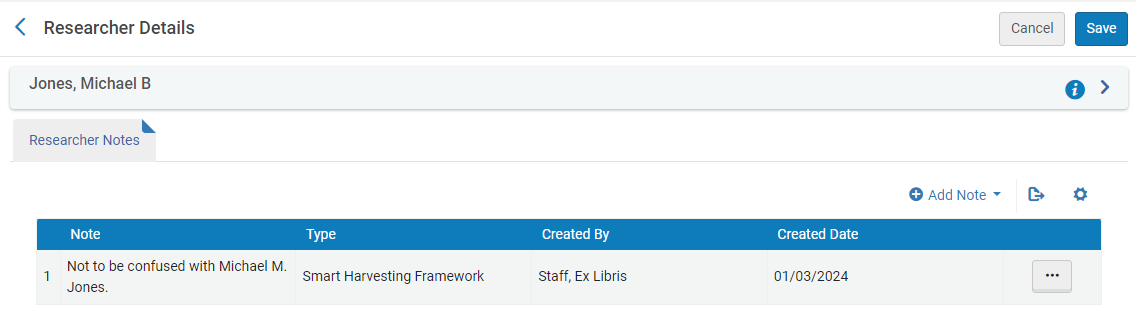
- In the More Actions menu, select Manage Researcher Notes. The Researcher Details page opens, with the Researcher Notes tab open. (This is the only tab of the Researcher Details page that can be accessed from tasks in this task list, and only Smart Harvesting Framework notes can be managed in it.)
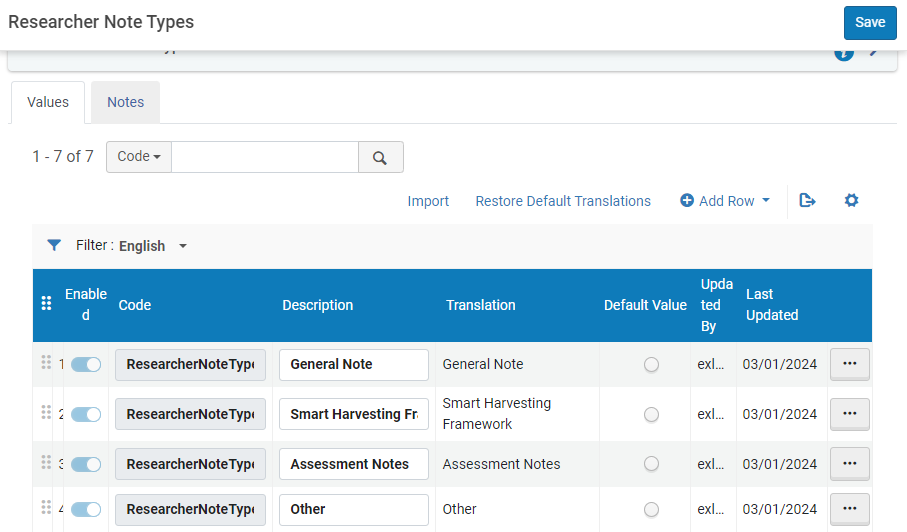
Managing Researcher Note Types
By default, the following note types are defined:
- General Note
- Smart Harvesting Framework
- Assessment Notes
- Other
Researcher-note types can be added, reordered, renamed, activated, or deactivated in the Researcher Note Types code table (Configuration Menu > Researchers > Researchers > Researcher Note Types).
Editing Researchers
- Navigate to Researchers > Researchers > Manage Researchers.
- Select Edit in the row actions list.
- When editing a researcher proxy, you can select Change to Researcher and select Confirm in the confirmation dialog box to change the proxy to a researcher.
- When editing the researcher, a complete audit trail is recorded for changes that are made through the Repository.
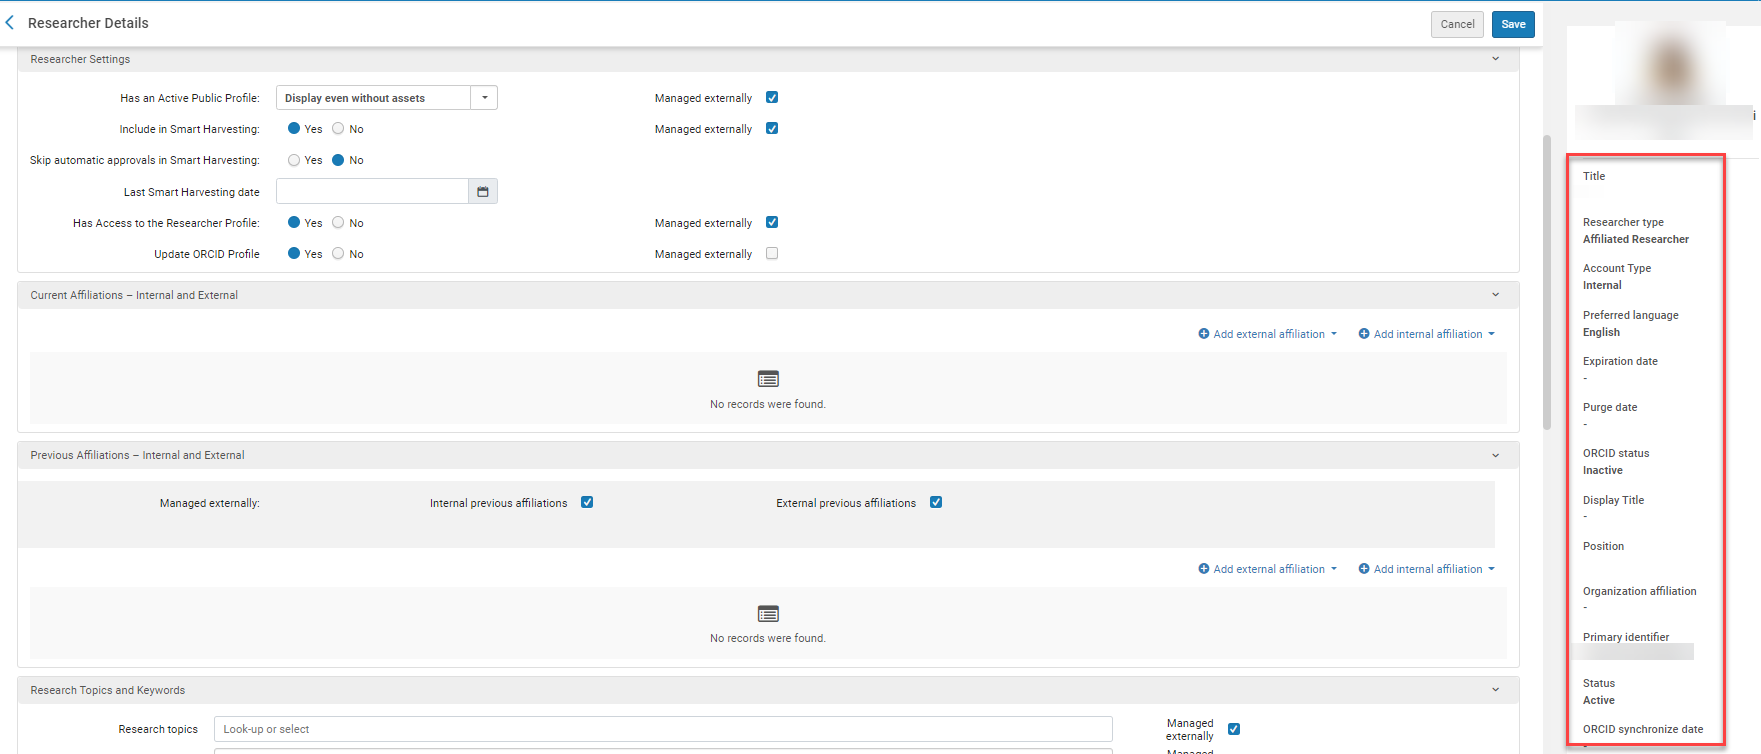
Viewing Researcher Details
Navigate to Researchers > Researchers > Manage Researchers and select the Researcher Information icon (see Researcher Information Icon).
![]()
In the Researcher Details page (select the Researcher Name or select Edit from the row actions menu), you can view researcher details in the right hand pane.
Viewing a Researcher's Assets
Navigate to Researchers > Researchers > Manage Researchers and select View assets in the row actions list. The results appear in the Research Assets page (see Managing Research Assets).
The list will not include assets that are still drafts or provisional assets from Smart harvesting that have not yet been approved. Assets imported via Smart Harvesting are approved when the first author match is approved. This means that the list can include assets that are approved even if they have authors whose match is pending approval. In this case, the system displays "There are unapproved author matches" for those assets. If the match for the active researcher is still pending approval for an asset, the system displays " Author-researcher match not approved".
Viewing the Researcher's Public Profile
As you make changes to a researcher's profile, you may want to view how these changes will appear to the public. With the View public profile row action, you can view what the public sees based on the content of the researcher's profile in Manage Researchers (Research > Researchers > Manage Researchers).
Moving Assets and Grants to Another Researcher
You can move a non-affiliated researcher's assets and grants to another researcher. When this feature is used to move assets to an affiliated researcher, the affiliations of the target researcher are automatically updated in the asset records.
If the original researcher's account has an ORCID token associated with it, the ORCID token is moved to the target researcher along with the assets and grants.
- Navigate to Researchers > Researchers > Manage Researchers.
- Select Move all assets and grants in the row actions list. The Move All Assets and Grants pane appears.
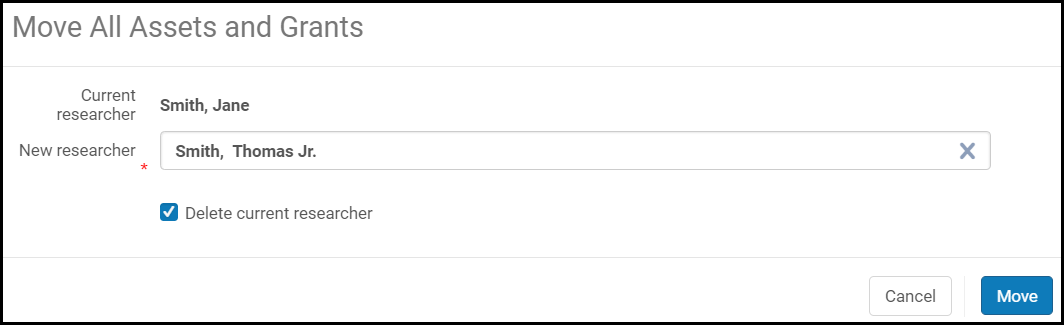 Move All Assets and Grants Page
 - Select the researcher to which to move the selected researcher's assets and grants.
- Optionally select whether to delete the selected (original) researcher.
- Select Move and select Confirm in the confirmation dialog box. The assets and grants are moved, and (if selected) the original researcher is deleted. In addition to moving all assets and grants, Esploro will move metadata fields in addition to moving the researcher’s related entities, if the corresponding fields in the target researcher record are empty. Lists of values are handled in a group. The copied information will be tagged as “Managed Internally.” This is relevant to the manual “Move all assets and grants” action from the Manage Researcher page and to the Bulk Merge Duplicate Researchers job.
The following metadata elements are copied (if they are not present in the target Researcher record): Current affiliations, Previous affiliations, Research topics, Keywords, Area of interest, Name variants, Education, Associations, and Honors.
Updating Researchers in Bulk
Two methods are currently available for updating researcher data and settings in bulk:
- Update Set of Researchers job
- CSV Researcher Loader Cloud App
Using the Update Set of Researchers Job
Users with the Researcher Manager role can run bulk updates for a set of researchers with the following options:
- Updating flags on the researcher for granting access or showing the researcher profile
- Controlling the letter (mail) settings of the researcher
- Adding or removing research topics and keywords
- Changing the affiliation status of the researcher
- Closing the researcher's current affiliations by changing their end dates to the current date
- Changing the last Smart Harvesting date of the researcher
To run an update, from the Run a Job page (Admin > Run a Job), select the Update Set of Researchers job on the Run a Job page. It is listed under type Researchers.

For a video showing how to update researchers in bulk see here.
Using the CSV Researcher Loader Cloud App
A Cloud App, CSV Researcher Loader, simplifies the processes of adding new researchers and of updating existing researchers from a CSV file. This efficiency tool allows the operator to add and update researchers' data quickly and easily from within the hub. It makes use of the API, but the operator does not have to know anything about the API in order to use it. Using the Cloud App, you create a profile that specifies which fields are being updated via the CSV file, so your CSV file need only contain the researchers' IDs and the values of the fields specified in the profile. You can create multiple profiles, and save them for reuse. To use the app, you select the profile, upload the CSV file containing the data, and run the app.
Once the app is installed and activated, you can open it by selecting the ![]() icon to open the Cloud App Center menu, and then selecting CSV Researcher Loader. For more information about using this app, see CSV Researcher Loader Cloud App. For general information about working with Cloud Apps, see Configuring Cloud Apps.
icon to open the Cloud App Center menu, and then selecting CSV Researcher Loader. For more information about using this app, see CSV Researcher Loader Cloud App. For general information about working with Cloud Apps, see Configuring Cloud Apps.
![]()
Checking for and Merging of Duplicate Researchers
Duplicate researchers can be created by the various ingest flows. This can happen due to problematic data and incorrect matching by the Author Matching algorithm. For information on checking and bulk merging of duplicate researchers, see Reports and Notifications for the Smart Harvesting Framework - Ex Libris Knowledge Center (exlibrisgroup.com).
Deleting Researchers
- Navigate to Researchers > Researchers > Manage Researchers.
- Select Delete in the row actions list. Note that you cannot delete a researcher associated with an asset or grant.
Deleting Redundant Unaffiliated Researchers as a Scheduled Job
Unaffiliated authors may become redundant when they are dissociated from any Esploro entities (such as assets). By default, Esploro deletes redundant unaffiliated researcher records that do not have assets, on a scheduled basis, using the Delete Non-Affiliated Researchers job. The job does not delete researcher records that were added using the non-affiliated researchers loader. To deactivate the job, please contact ExLibris.
Additional References
- Video: Working with Researchers in Esploro
- Video: How to Customize Researcher Profiles
- Video: How to Manage Researcher Proxies - Ex Libris Knowledge Center (exlibrisgroup.com)
- Video: How to Update Researchers in Bulk
- Configuring Researcher Profiles
- Managing Users
- Working with the Esploro Research Hub
- Author Matching Report