
Managing Users
This page describes how to work with user records in Esploro. For information about managing user roles in Esploro, see Managing User Roles. For information about managing researcher records, see Working with Researchers.
- User Manager
- User Administrator
- When searching for Email or Identifiers, you must enter the entire string; a partial match is not performed.
- Role - see Managing User Roles.
- Account - see Account Type in the following table.
- Status - see Status in the following table.
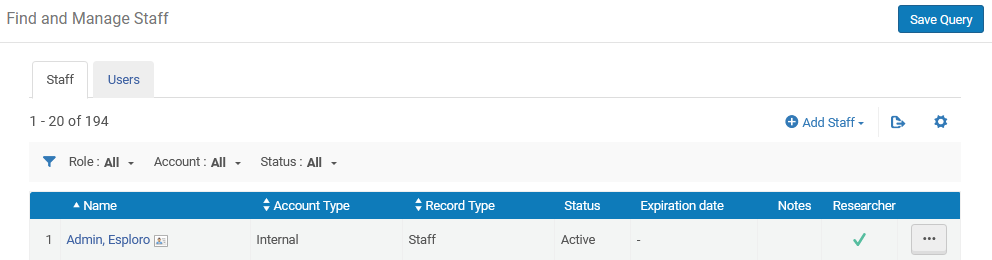
| Column Name | Description |
|---|---|
| Name | The name of the user. Select this link to open the User Details page (see Editing Users). |
| Account Type |
|
| Record Type | The type of user. See Adding Users for more information about this field.
|
| Status |
The user status:
For internal users, who are authenticated by Esploro, this is a manual setting not tied to the expiration date. For more information about authentication, see Expiration Date below. |
| Notes | Whether there are any notes about the user. |
| Researcher | Indicates whether the user is a researcher or not. |
- Add Users - Add staff and users.
- Edit Users - This action is typically required immediately after adding a new user.
- Delete Users - Only the User Manager or User Administrator Roles can delete users.
- Deactivating users - Select Deactivate in the row actions list and select Confirm in the confirmation dialog box. The user is deactivated.
- Activating users - Select Activate in the row actions list and select Confirm in the confirmation dialog box. The user is activated.
Adding Users
- External users are synchronized with Esploro using the User integration profile.
- All primary and additional identifiers must be unique for users.
- On the Find and Manage Staff page (Admin > Users and Staff Management > Manage Staff and Users), select Add User.
The Quick User Management page appears.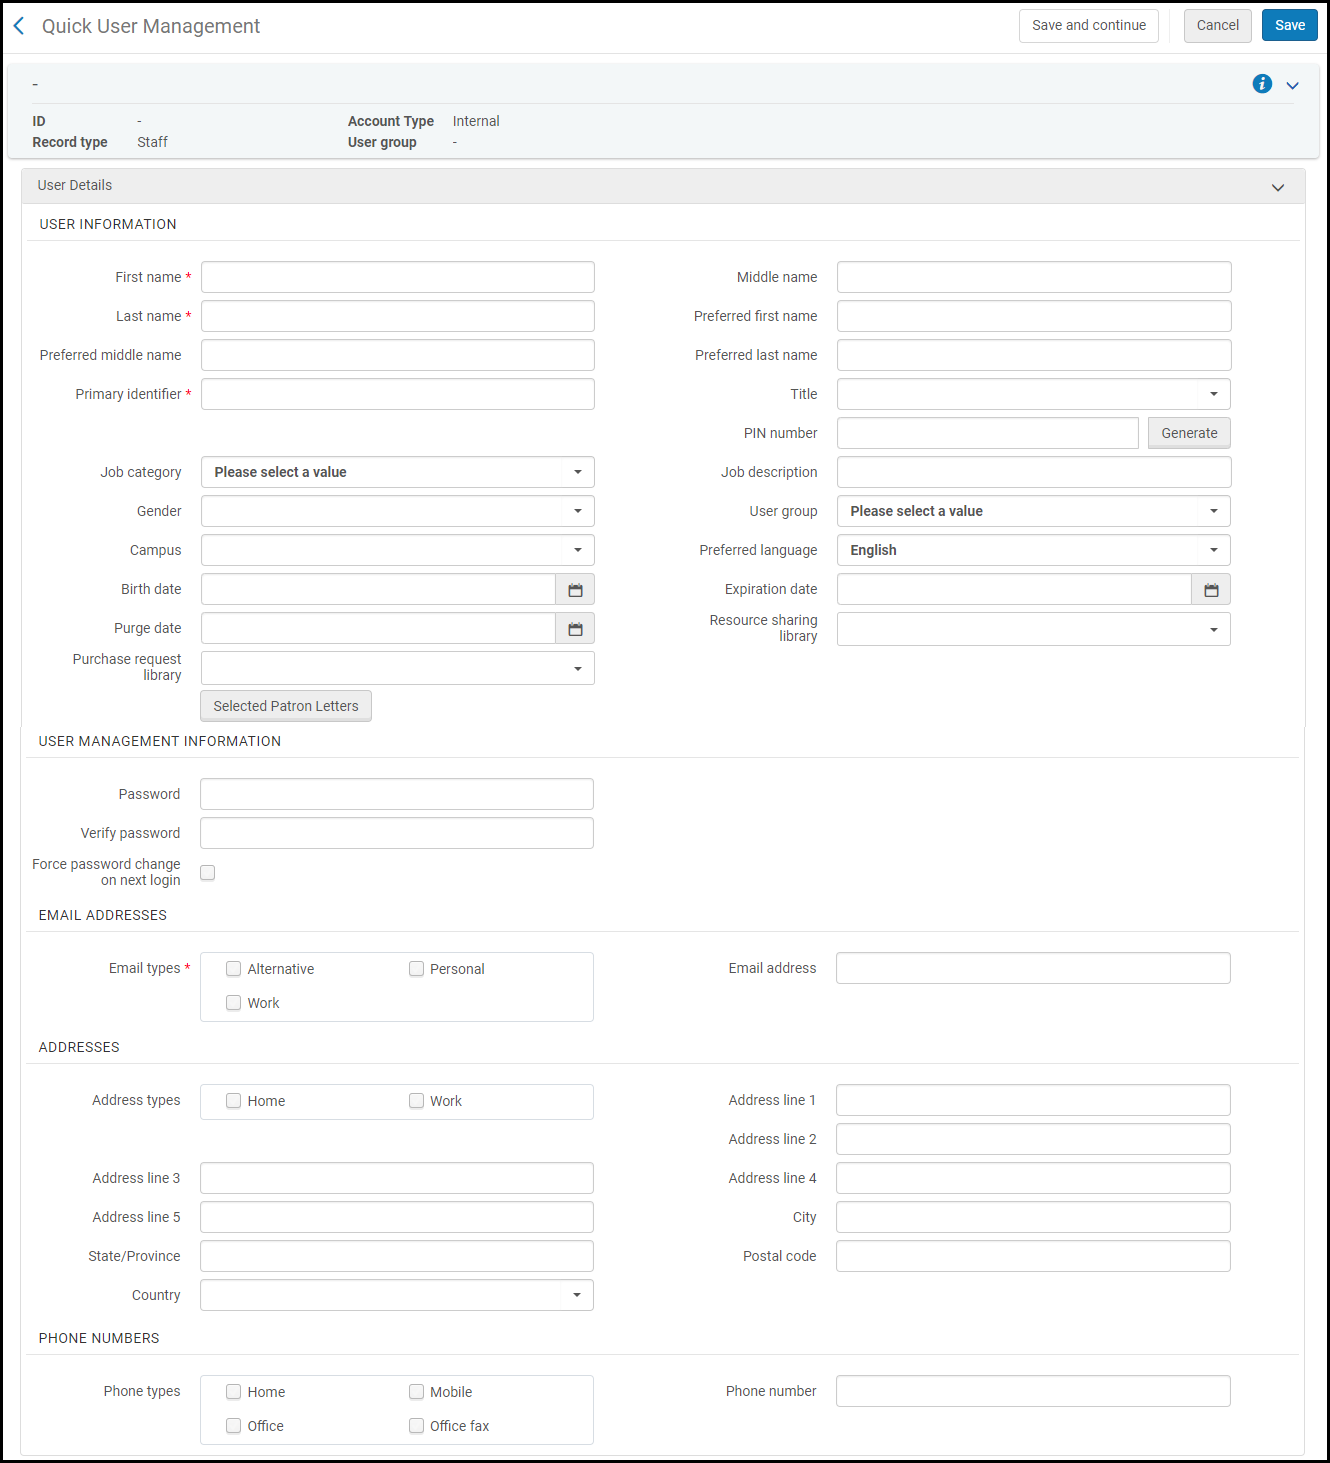 Quick User Management Page
 - Enter the following information. The fields marked as mandatory in the following table are by default; an administrator can configure which fields are mandatory.
Quick User Management Page Fields Section Field Description User Information To configure how user names appear in Esploro, see Configuring the Display of User's NamesFirst / middle / last name First and last names are mandatory. Preferred first / middle / last names Preferred names replace the main first/middle/last names in all places that the name appears within Esploro. A search for name finds both the regular and preferred entries. For example, a search for the last name finds both the Last name and Preferred last name values. They are both indexed under last name.
For information about using preferred names in system notifications and letters, see Working with Names in System Notifications and Letters.
The preferred name fields are editable by internal users similar to the other name fields. For external users, the preferred name fields are updated by the SIS system and can be manually updated. For more information, see the SIS details provided in the Ex Libris Developer Network.
If one preferred name field is entered but not the others, whatever value is in the main name fields are automatically populated in the other preferred name fields. So, for instance, if Preferred First Name is entered, the values of Middle Name and Last Name are filled into their corresponding preferred name field. If the main name and preferred names match exactly, an update from SIS or API updates the name in both fields.
Primary identifier (mandatory) The primary user ID. The ID must be unique within the institution. For details on identifiers, see Working with User Identifiers.
You may be required to enter a primary identifier in a particular format. See the parameter primary_identifier_regex in Additional Settings.Title A user title. These can be configured by an administrator; see Configuring User Titles. PIN number A four-digit number which serves as a password for the user to log on to the self-check machine (SIP2); see Configuring SIP2 Bin Configuration. Manually enter a number or select Generate to generate a PIN number. The PIN number is sent in the PIN Number Generation Letter. PIN number generation is available only if the pin_number_method parameter is enabled and set to fourDigit. For information, see Configuring Other Settings.Website URL The user's website, if any.
Preferred language The language for email correspondences. For email correspondences to be sent in the selected language, the language must be enabled in the Institution Languages Mapping Table. For details, see Configuring Institution Languages. Status (edit only) The user's status, active or inactive. Status date (edit only, read-only) The date of the last status change for the user. Birth date The user's birth date. Expiration date The estimated date when the user is expected to leave the institution. For more information, see Expiration Date. Purge date The date on which the user will be purged. See Purging Users. Selected Patron Letters Select this button to configure the user's researcher notification settings. Select or clear the checkboxes next to each notification that you want to enable or disable for the user. An administrator can set the default values for these fields for all new users; see Configuring Researcher Details.
Researchers can also set these settings from their private Profiles; see Managing Researcher Profiles.
These settings can also be set from the researcher record; see Working with Researchers.
User Identifier (this section appears if Identifier 1 is selected as a mandatory field for this record type)
(Edit Only)Identifier Type (mandatory) Select the user identifier type. Value (mandatory) The user identifier. The following fields that appear on the Quick User Management page when adding a user appear in the Contact Information tab when editing a user. Email Addresses Email types (mandatory) You must enter an email address. Select an email address type: - Alternative (staff/public only)
- CC Address
- Personal
- Work
- School (public only)
Email address (mandatory) The user's email address. You may be required to enter an email address in a particular format. See the parameter email_regex in Configuring Other Settings. Addresses Address types Select a mailing address type: - Home
- Work
- Alternative (public only)
- School (public only)
- Street address - You may be required to enter a street address in a particular format. See the parameters address_lineX_regex in Configuring Other Settings.
- City
- State/Province
- Postal code - You may be required to enter a postal code in a particular format. See the parameters postal_code_regex in Configuring Other Settings.
- Country
- Note
- Start Date
- End Date
- Preferred Address
Phone numbers Phone types Select a phone number type: - Home
- Mobile
- Office
- Claim fax (contact only)
- Claim phone (contact only)
- Order fax (contact only)
- Payment fax (contact only)
- Payment phone (contact only)
- Returns fax (contact only)
- Returns phone (contact only)
- Office fax (staff/public only)
Phone number The user's phone number. You may be required to enter a phone number in a particular format. See the parameter phone_regex in Configuring Other Settings. - Select one of the following options: In either case, continue configuring user details as described in each of the following topics.
- Select Save. The new user is saved and you return to the Find and Manage Staff page.
Or - Select Save and Continue. The user is saved and you continue with editing the user. See Editing Users.
If you add a user that has the same first name, last name, and birth date as an existing user, a warning message appears. - Select Save. The new user is saved and you return to the Find and Manage Staff page.
Editing Users
- For internal users, you can edit all user record fields.
- External users are maintained in an external system, such as SIS (Student Information System). For external users:
- You can edit only certain fields in the General Information tab of the User Details page.
- You can add contact information in the Contact Information tab, but cannot edit information there.
- To edit users in bulk, see Editing/Messaging Users in Bulk.
- On the Find and Manage Staff page, select Edit in the row actions list or select the user’s name. The User Details page appears.
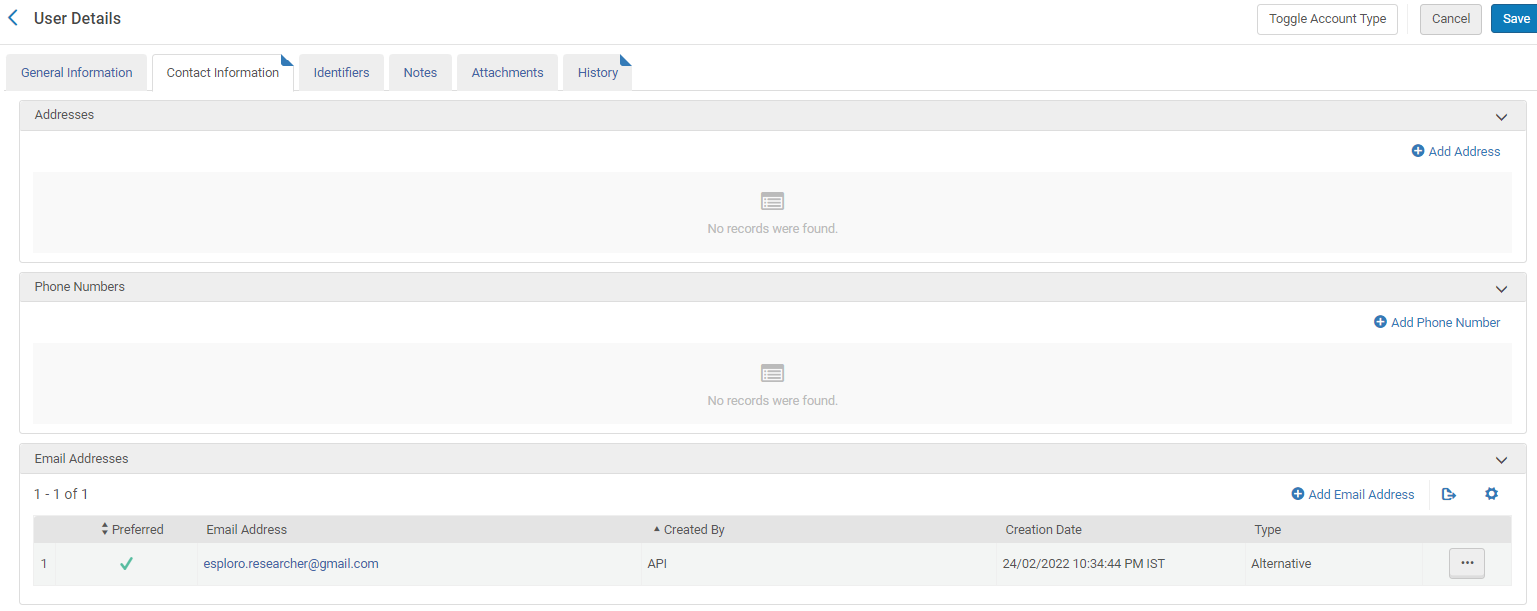 User Details Page
 - To change an internal user to an external user (and vice versa), select Toggle Account Type.
When toggling an account from internal to external, the owner is set to SIS_temp. This is a code that is used to mark the next user synchronization job to update the record.
- Edit the required information in the General Information tab. For information about most of the fields on this page, see Adding Users.
- Website URL - The user's website.
- Status - Whether the user is Active or Inactive.
- Status date - The date on which the user was registered or the date of the user's last status change.
- Send Message - Select the type of message you'd like to send.
The options you can choose are:
- General - This sends a general message. Select Compose to open the E-mail Message pop-up window, where you can configure an email to send to the user with any questions, issues, or notifications. Fill in the fields and select Send E-Mail to send the message. (To configure the default From: address of this email, see the parameters disable_from_address and from_address in Configuring Other Settings. To send emails to users in bulk see Editing/Messaging Users in Bulk.)
- Social Login Mail - This sends a letter containing information to activate login to Esploro with a social network. This option appears if an integration profile is defined for a social network. The letter used is the Social Login Invite Letter. For more information on this integration profile, see Configuring Integration Profiles.
- Selected Patron Letters - List of automated user letters that can be sent by the system. From here you can enable/disable letters for this user. For enabling/disabling letters for all user users, see Configuring Esploro Letters.
- User Management Information - Fill in the password information.
- User Roles - Select the relevant role/s for this user (see Managing User Roles)
The following additional fields/options appear when editing a user:
- Edit the information in the following tabs:
- Contact Information – See Managing User Contact Information.
- Identifiers – See Managing User Identifiers.
- Notes – See Managing User Notes.
- Attachments – See Managing User Attachments.
- History - See Viewing Changes to the User Record.
- To edit the user picture, see Managing User Pictures.
- If the user is locked, you can unlock the user: select Unlock. Note that this cannot be undone. Contact the Support team for more information.
- Select Save. All changes are saved, and you return to the Find and Manage Staff page.
Managing User Contact Information
- Integration profiles require one of the following phone/email types (for informational purposes only): Error handling and General. For information on configuring job email notifications, see Configuring Email Notifications for Scheduled Jobs.
- In the Contact Information tab of the User Details page (Admin > Users and Staff Management > Manage Staff and Users; select Edit in the row actions list), select Add Address, Add Phone Number, or Add Email Address. The relevant dialog box opens.
- Enter the contact details, as required.
Note that you can set the address, phone number, and email address as preferred in this step, as shown below:
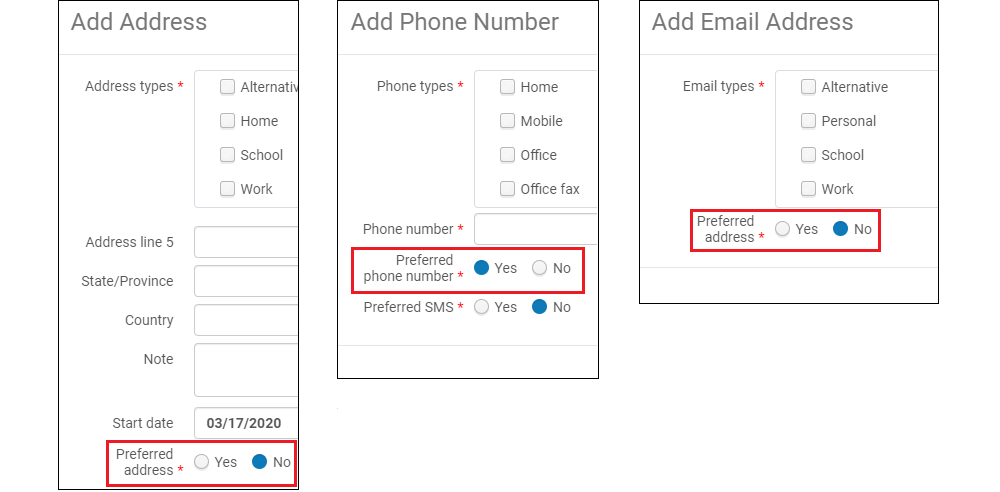 Setting Preferred Address, Phone Number, and Email AddressNote that the Start date and End date are for informational purposes only. The Start date is the date from which the address is relevant and the End date is the date after which the address is no longer relevant.When working with an external user, the Add as an external check box appears. Select this option to add the contact information as external data which is overwritten during SIS synchronization. If you do not select this check box, the contact information is added as internal data and is not overwritten during SIS synchronization. For more information, see https://developers.exlibrisgroup.com/alma/integrations/user-management/sis.
 - Save the details to the Contact Information tab as follows:
- Select Add to save the details and add additional entries.
- Select Add and Close to save the address details and exit the dialog box.
Managing User Identifiers (Tab)

- Identifier Type - The type of identifier. Ex Libris creates and configures the types when setting up your institution. In addition to social media options, other options include barcode and institution ID (the ID assigned to the user from an SIS; see Student Information Systems). This list may be different for staff and public users.
- Value - The value of the identifier for this user. Selecting Generate will set the value according to the settings in ID Generation Policy (Configuration > General > ID Generation Policy).
- Note - An optional note.
- All primary and additional identifiers must be unique for users, including for the same user.
- When working with an external user, the Add as an external check box appears. Select to add the identifier as external data which is overwritten during SIS synchronization. If you do not select this option, the identifier is added as internal data and is not overwritten during SIS synchronization (unless the same value is later sent by the SIS, in which case the identifier is marked as external). For more information, see https://developers.exlibrisgroup.com/alma/integrations/user-management/sis.
- The Esploro setup can define that some identifiers must be unique across the institution in order for the user to be able to log in to Esploro.
If this was defined for the institution, then for example, a user will not be allowed to have a UNIVERSITY ID which is the same as another user's ORCID. - When a user is changed from internal to external, all internal identifiers become external.
Managing User Notes
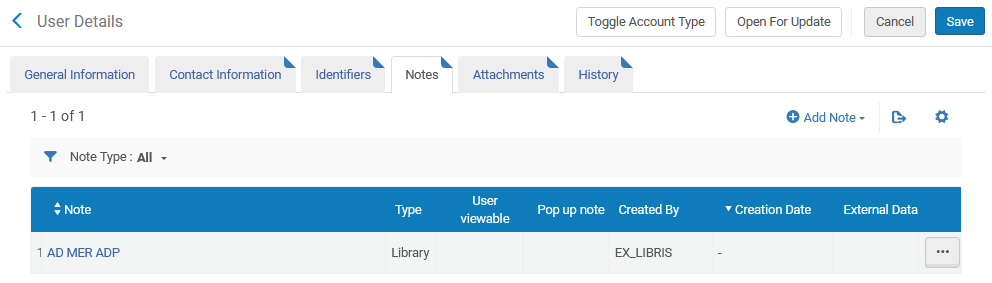
- In the Notes tab, select Add Note. The Add Note dialog box appears.
- Enter the text for the note in the Note field.
- In Type, select a note type. The types of notes are for informational purposes only and do not serve a functional purpose in Esploro. The list of note types is standard across all institutions.
- Select User viewable to enable the indicated user to view the note.
- The Pop up note may be empty or not, but in either case it does not display in Esploro.
When working with an external user, the Add as an external check box appears. Select this option to add the note as external data which is overwritten during SIS synchronization. If you do not select this option, the note is added as internal data and is not overwritten during SIS synchronization.
- Save the note:
- Select Add to save the note details and add additional notes.
- Select Add and Close to save note details and close the Add Note dialog box.
Managing User Attachments
Viewing Changes to the User Record
Managing User Pictures
- photo_server_url - The URL to the location (directory) containing user pictures. The URL may use HTTP or HTTPS. In order to use HTTPS, the certificate may not be self-signed and must be signed by a known certificate authority (the list of supported certificates can be found here). The URL must end with a forward slash (/). For example, http://institution.edu/pictures/ .
- photo_identifier_type - The user identifier to use as the user picture file name. Possible values are: USERNAME (the primary ID) or a code in the User Identifier Types code table (see Viewing User Identifiers).
- photo_suffix - The suffix to use for the user picture file suffix. For example, png .
- Upload user pictures to the directory defined in photo_server_url with the name <user identifier>.<photo_suffix>, for example 12345.png.
- Ensure that each user has an identifier that matches the user picture file name. See Managing User Identifiers.
Deleting Users
- They do not have any locked bibliographic records.
- They do not have any assigned import profiles.
- They are not currently working in the MD Editor.
- The user record is not currently locked by a running job.
- They have associated assets or grants.
- On the Find and Manage Staff page (Admin > Users and Staff Management > Manage Staff and Users), select Delete in the row actions list for the user you want to delete. A confirmation dialog boxes appears.
- If the user can be deleted, select Confirm. The user is deleted.
- If the user cannot be deleted, a message such as the following appears.
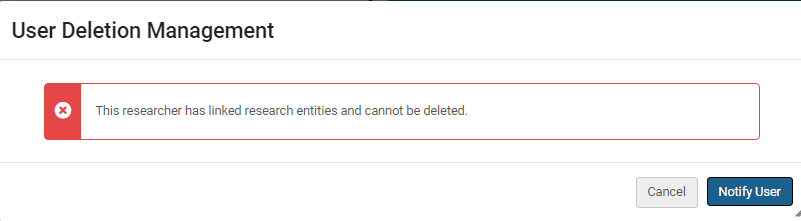 User Deletion Management Dialog Box
If a researcher exists for a user, that user cannot be deleted, unless the researcher has not assets or grants.