
Configuring Esploro Letters
Overview
- Configuration Manager
- General System Administrator
For enabling and disabling letters in Esploro see here.
For setting retention time periods on Esploro letters see here.
For customizing the look and feel and the content of letters in Esploro see here.
To watch a video showing the basics of configuring letters in Esploro, see How to Configure Letters.
Enabling and Disabling Letters in Esploro
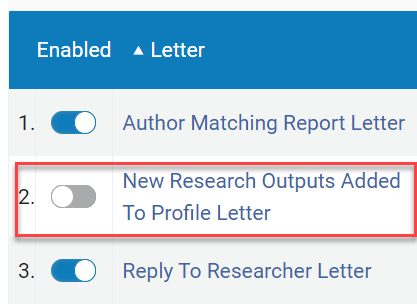
You can enable/disable letters in Esploro in the Letters Configuration page (Configuration Menu > General > Letters Configuration). Use the Enabled toggle to switch on/off the letter. Esploro does not send disabled letters. Attempting to send a disabled letter may result in an error notification when the letter is triggered.
If you are working in a sandbox environment or a pre-”Go Live” production environment, add the letter administrators’ email addresses to the allowed email list (see Configuring Allowed Emails).
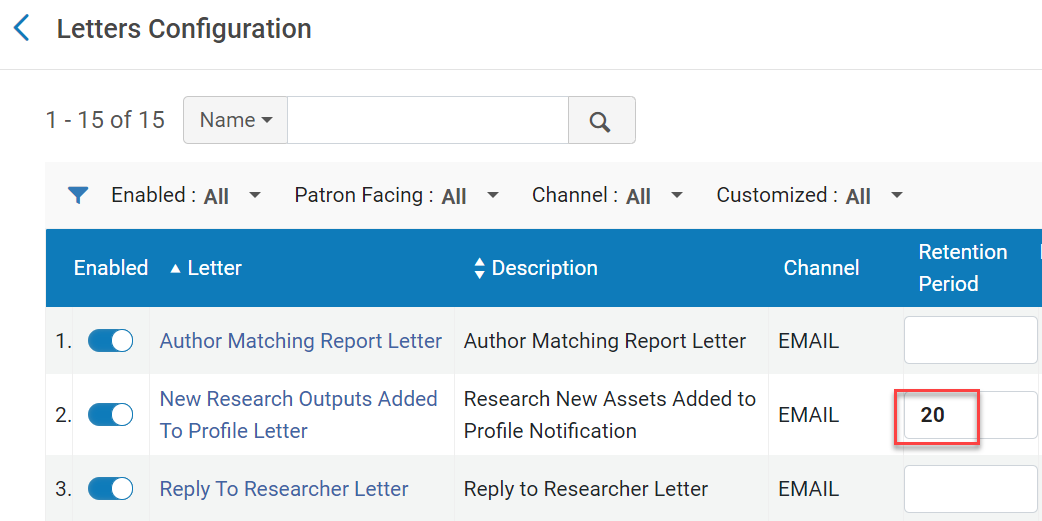
Setting Time Period of Letter Retention in the System

Customizing Letters
This section provides an overview of configuring letters in Esploro. For a visual overview of how to configure letters in Esploro, see Configuring Letters in Esploro.
The following can be used to customize letters:
- Labels (fields in the letter such as subject, name, etc.). See Configuring Labels to Update the Fields in the Letter.
- Template (formatting and content in the body of the letter). See Customizing Templates to Update the Letter Formatting and Content.
- Components (reusable components across letters such as header, footer, etc.). See Components Configuration for Letters.
Configuring Labels to Update the Fields in the Letter
Each letter contains a set of labels to describe the fields in the letter, such as subject, letter name, etc.

The labels are provided in multiple languages.
- Navigate to Configuration > General > Letters Configuration.
- On the row actions menu for the relevant letter select Edit.
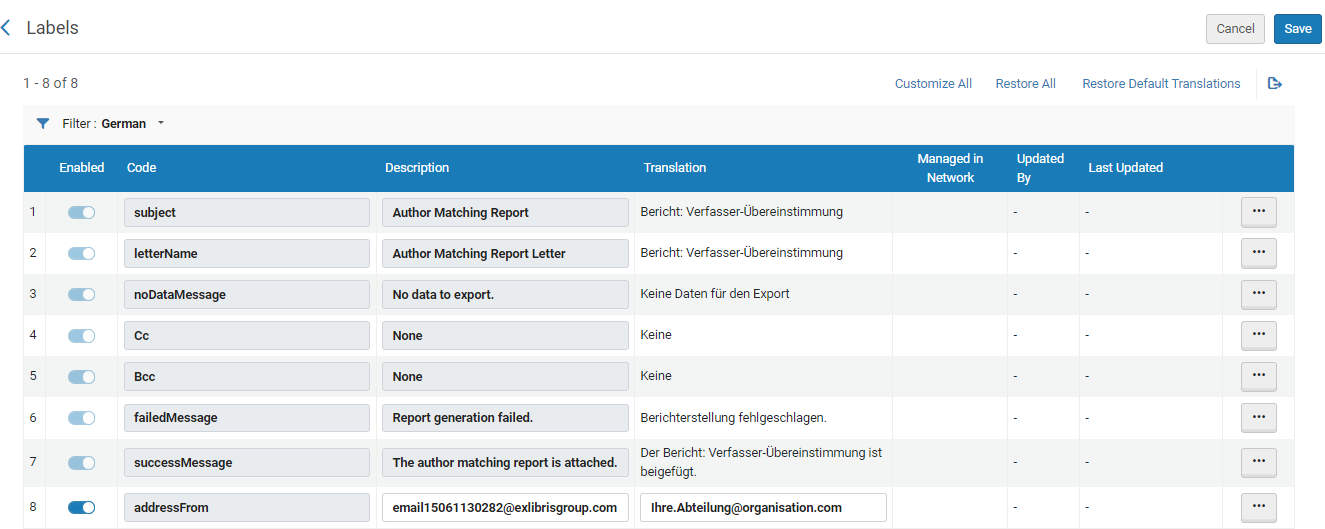
- Select the Labels button.
.png?revision=1)
- Select Customize from the row actions menu. You can update the following:
- Enabled — Use this toggle to activate/deactivate the label for usage in the letter.
- Description — Update the label description that displays on the letter.
Note that using HTML tags in the Description field is not supported.
- Translation — If another language is enabled in Esploro and it is selected in the Filter drop down, you can edit the translation.
- Restore — If the line was modified, the Enabled and Description fields are restored to their default.
- Restore Translation — If another language is enabled in Esploro and its Translation label was modified, the field is restored to the default.
- Select Customize All to edit all rows.
- Select Restore All to restore all rows to their default.
- Select Restore Default Translations to restore all translations.
- When done, select Save.
- You can view the changes in the letter preview pane.
Customizing Templates to Update the Letter Formatting and Content
The content in the body of the letter is updated by editing the template. The template (XSL style sheet) is used to format the letter and determine which fields and text appear in the letter. You can configure the template to customize how labels and data appear in the letters. In addition, you can use XSL conditional statements to make decisions about what appears in a letter, and even whether the letter is sent.
- Navigate to Configuration > General > Letters Configuration.
- On the row actions menu for the relevant letter select Edit.
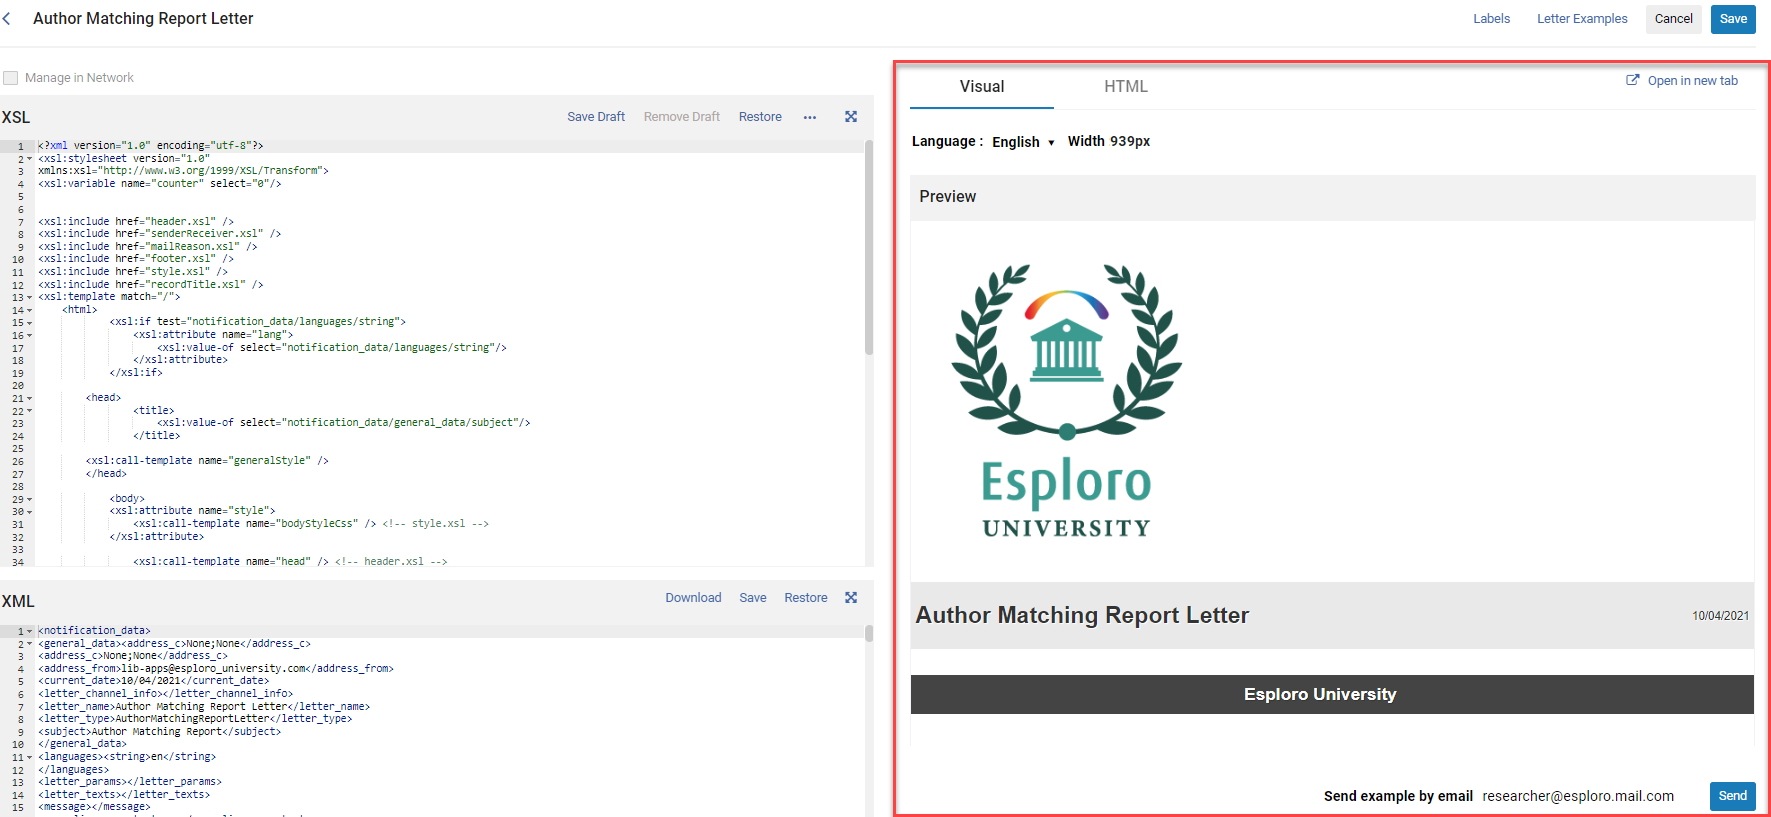
- The XSL and XML information appear to the left of the letter.
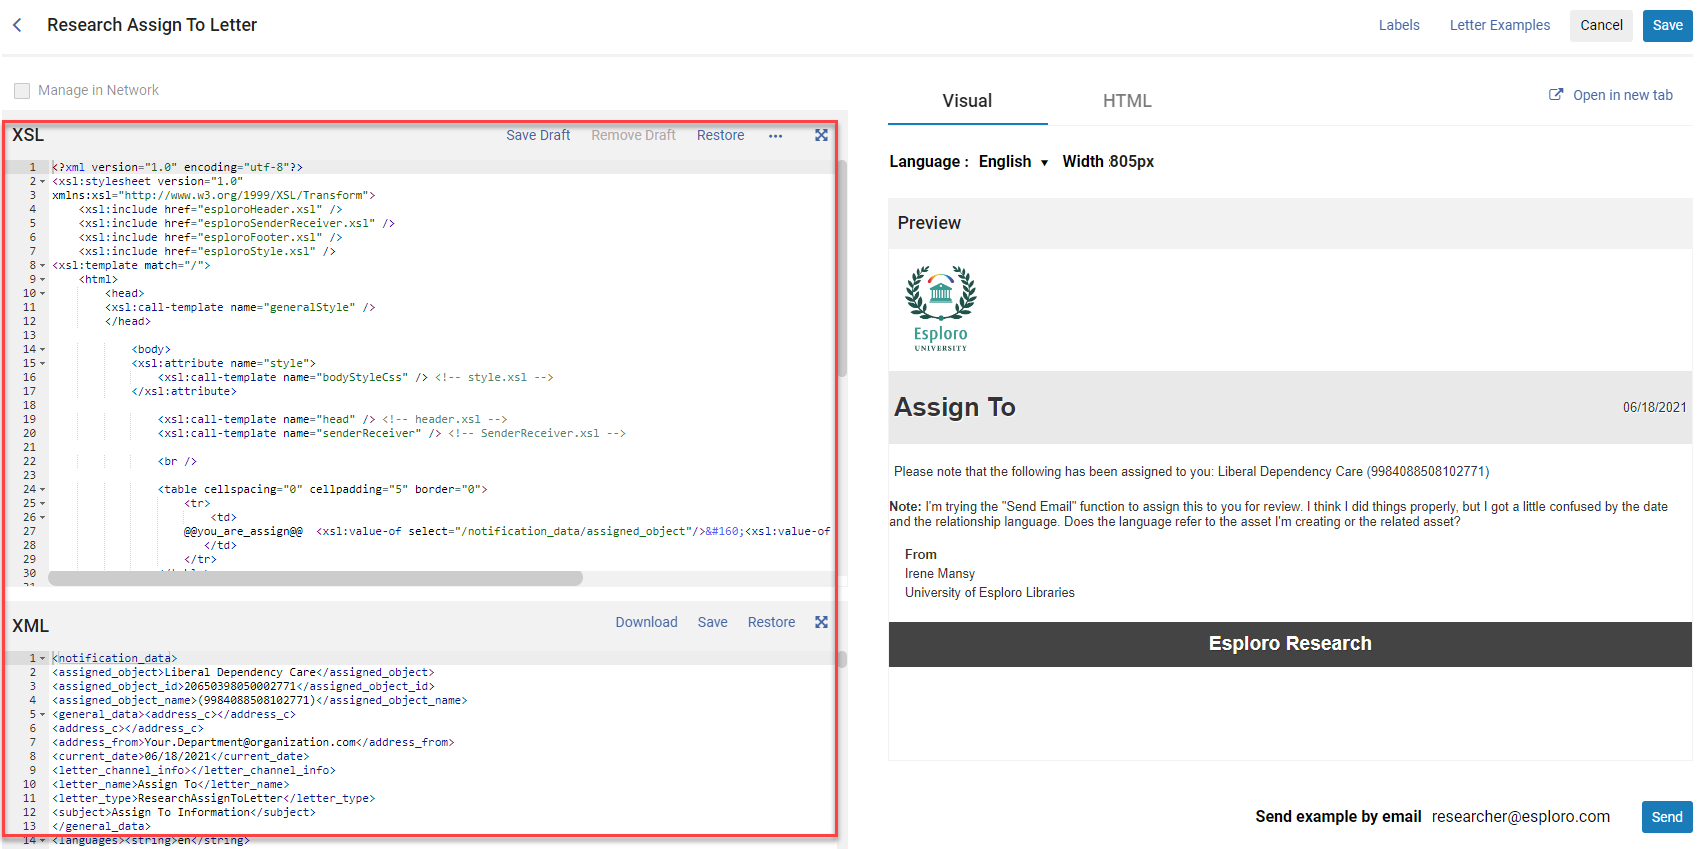
- To the right of the XML/XSL panes is a preview pane of the actual letter output.
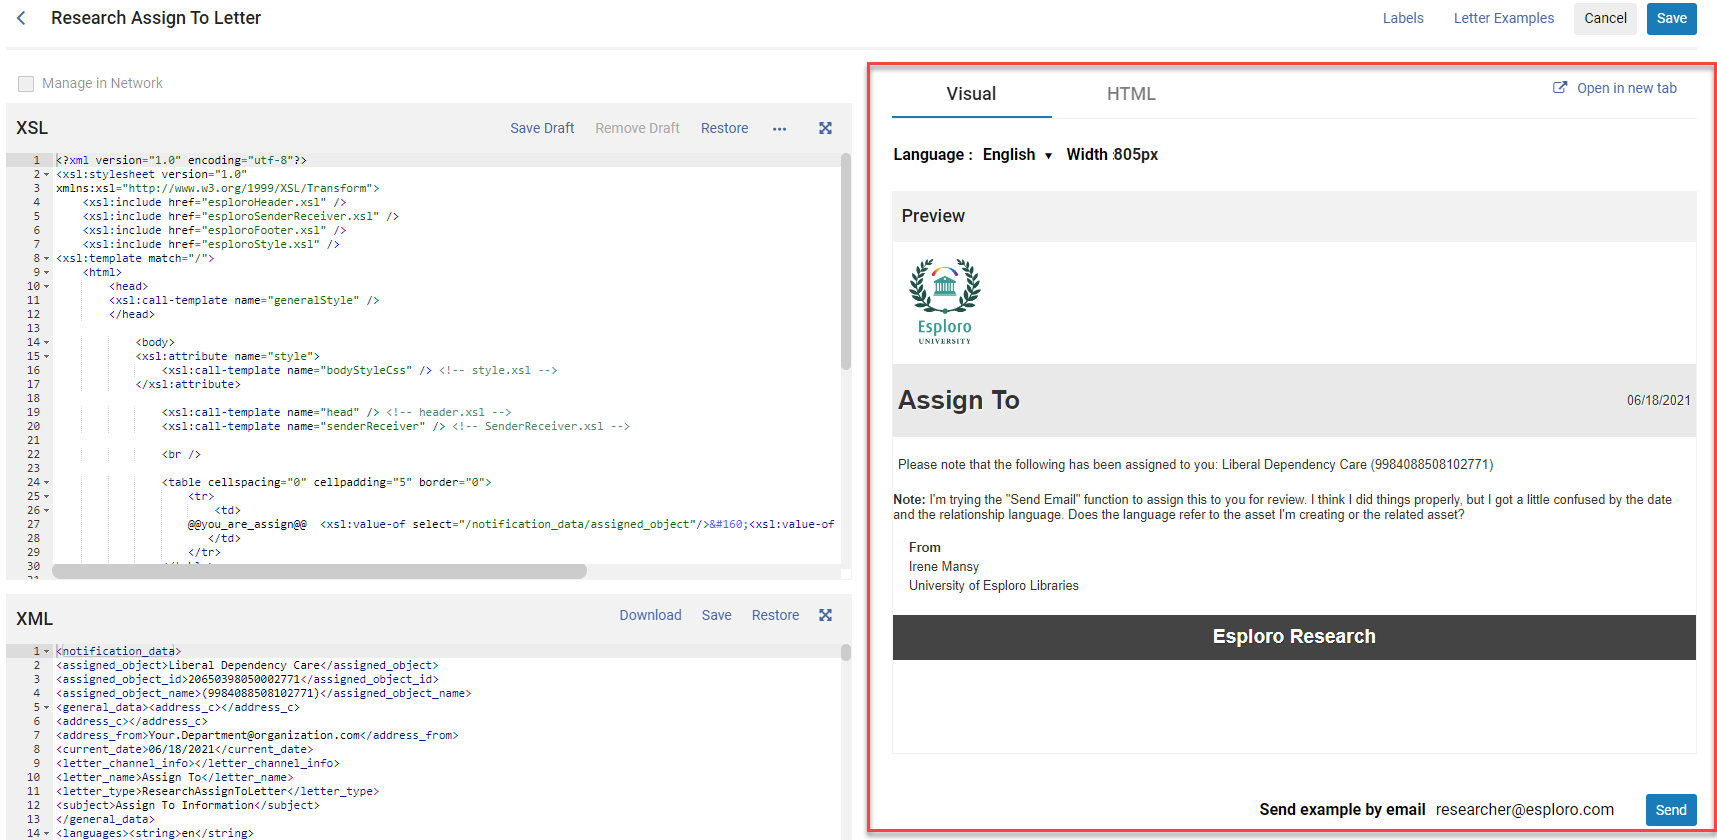
Changes in the XSL/XML are immediately reflected in the preview pane.
Errors that are detected while editing the XSL/XML are marked with a red X on the relevant line.
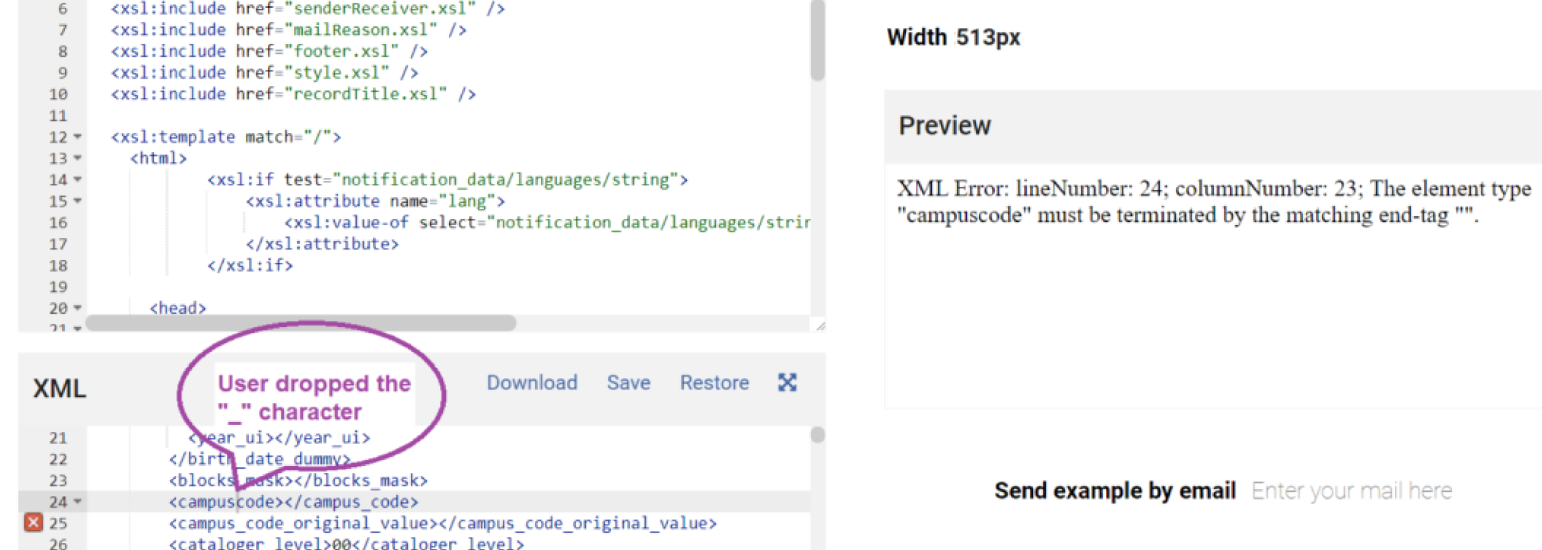 The editor also marks the XSL segments in color and implements auto-completion. Ctrl+f can be used to find items within the editor.
Due to technical limitations, there might be a gap between the error line number reported on the XSL/XML and the line number reported on the Preview pane.
- You can use Ctrl+Shift+f to implement Prettyprint (convert and present the XSL source code with line breaks and indentations to make the code easier to read).
- You can maximize the XML/XSL windows using the full-screen icon.

- Update the labels associated with the letter (see Configuring Labels). Changes to the labels display in the preview pane.
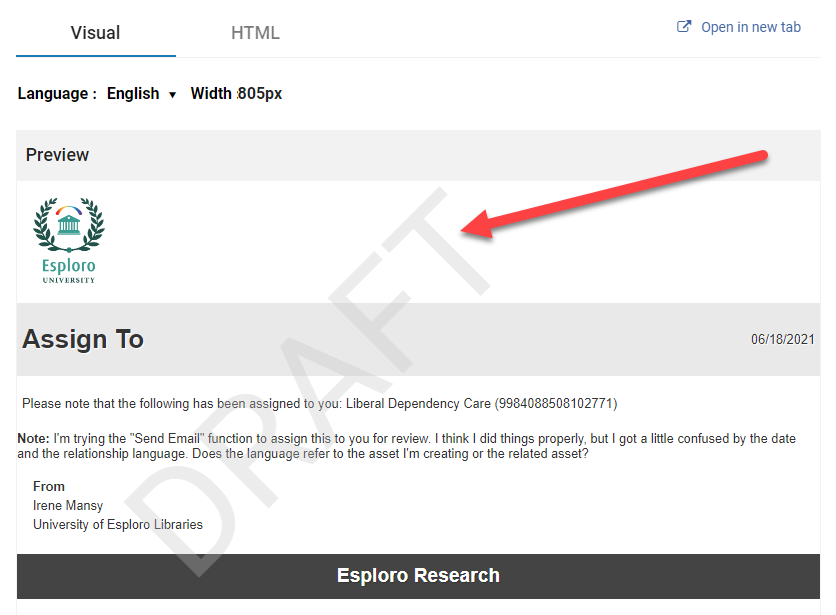
- Select Open in new tab to open the preview in a separate browser tab and edit the HTML using accessibility plugins.
- Select Visual or HTML to toggle between a visual and HTML view.
- Select another language in the Language drop down to view the letter in a different language. The languages that appear depend on the settings configured in Esploro (see Configuring Institution Languages).
- Update the Width to visualize the output as it will be displayed in narrow screens or printers. Use px to configure the width in pixels, for example 500px.
- Reusable components display in the preview pane (see Reusing Components Across Letters).
- Select Save Draft to save your customizations as a draft. Changes done in the draft will not be applied to the real letter. Select Remove Draft to erase the draft and display the last saved XSL. Select Restore to restore the XSL to its original state.

Note that while a draft is active, the Edit Draft and Remove Draft options are available in the row actions menu for the letter.

The draft watermark displays in the preview pane.
- Select Save to apply the changes to the real letter. This removes the draft (if one exists for this letter). Note that after saving, the letter remains in the preview window. To return to the full list of letters, select Cancel.
- To send an example by email, add an address to the Send example by email field and select Send.

- You can view examples of letters by selecting Letter Examples. In the Letter Examples page you can add examples of letters that were sent by Esploro and upload new examples. See Updating and Previewing Example Letters for Testing.
If you use a tag to refer to an outside location such as a template or URL (for example, <xsl:include href="http://{$PathToWeb}/html/xsl/head.xsl">) and the outside source changes, refresh the XSL (by re-saving it) for the new information to be included in the letter.
XSL Code Examples
- If the following snippet follows the address line in the esploroSenderReceiver.xsl file, you can ensure that the user’s phone number is included in all the letters that use this template.
<tr>
<td><xsl:value-of select="notification_data/user_for_printing/phone"/></td>
</tr> - To remove an element from a letter, find the element to be removed. Add comment indicators on either side of the line, such as, <!--<th>@@description@@</th>-->.
<th>@@title@@</th>
<!--<th>@@description@@</th>-->
<th>@@author@@</th>The output table displays without the description column. -
Use the substring and string-length functions to output the last four digits of a code:
<b>Last 4 digits of phone:*****
<xsl:value-of select="substring (notification_data/owner/user_phone_list/user_phone/phone,string-length(notification_data/owner/user_phone_list/user_phone/phone) - 3)"/></b> -
Use a conditional clause as follows:
<xsl:if test="notification_data/asset_id !='-1'">
<tr> <td>
@@assetId@@ <xsl:value-of select="notification_data/asset_id" /> </td> </tr>
</xsl:if>
Using Example Letters for Testing
-
Navigate to Configuration > General > Letters Configuration.
- Select Edit in the row actions menu for the relevant letter.
- Select the Letter Examples button.

- There is always one default letter that appears, but you can add more examples as described below.

The letter that is selected in the Default Preview column is the one that displays in the preview pane when editing a letter.
We recommend using the example XML for letters rather than the default XML. You can view the XML examples in the Example column in the Letters tables (see Letter List).
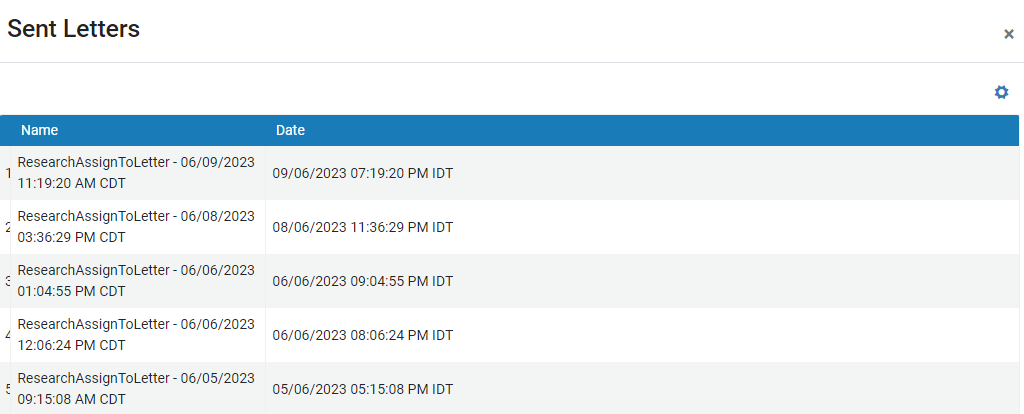
- In the Letter Examples page, select the Add from system letters button.

-
The Sent Letters page appears, showing up to 10 of the most recent XMLs from the last 7 days.
- Select the letter to add.
- The selected letter appears in the Letter Examples page.
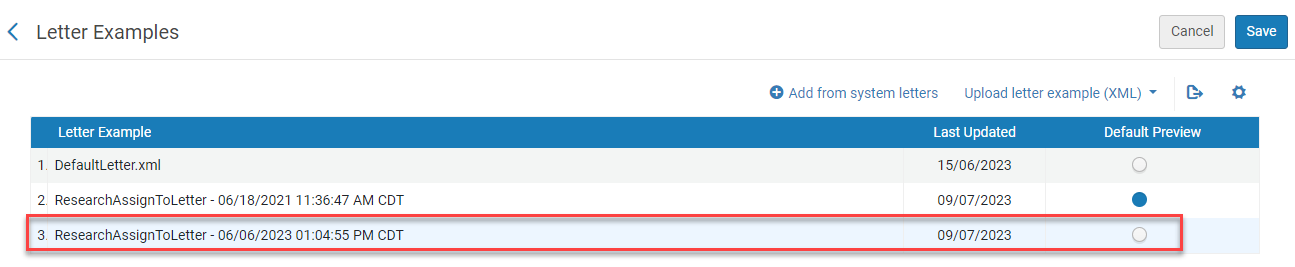
The added letter is not marked for default preview unless you select it in the Default Preview column.
- In the Letters Configuration page, for the relevant letter select Edit in the row actions menu.
- In the XML pane, select the Download button.

- Edit the file in an XML editor to make any relevant changes.
- In the Letter Examples page select the Upload letter example (XML) button.

- Browse to and select the XM file and select Upload.
- The added letter is not marked for default preview unless you select it in the Default Preview column.
These examples are subject to the retention policy of the institution. The XML files saved in the system will be retained for seven days and will be removed by the weekly cleanup job. The XML examples added to the XML list from the system are persistent and will not be cleaned by the weekly job. Any identifying information should be removed from these examples.
Reusing Components Across Letters
You can reuse components such as headers and footers across letters. See Reusing Components Across Letters.
Configuring Outgoing Email
- From: - Appears in the user's mail reader and determines the reply to address (if no other reply to address is specified).
- EnvelopeFrom - Used internally by mail relay servers to determine the origin of the message, in the case where the letter is returned as the result of an error. This field appears as From (without the colon :) at the very top of the email packet when you look at the packet source, but does not normally appear in the user's mail reader.
Replies to emails go to the email header From: field.
The Bcc label is used to send a blind copy of the letter to the relevant institution's email address. It is only available for end user facing letters. You can customize the email addresses (or URL) to which the Contact Us and My Account links are directed by configuring the email_my_account and email_contact_us parameters; see Configuring Other Settings.
- On the Integration Profile List page (Configuration Menu > Integration Profiles), select Add Integration Profile. Esploro allows you to define only one mail handling integration profile. If there is already a mail handling integration profile, select Edit in the row actions list to edit the profile.
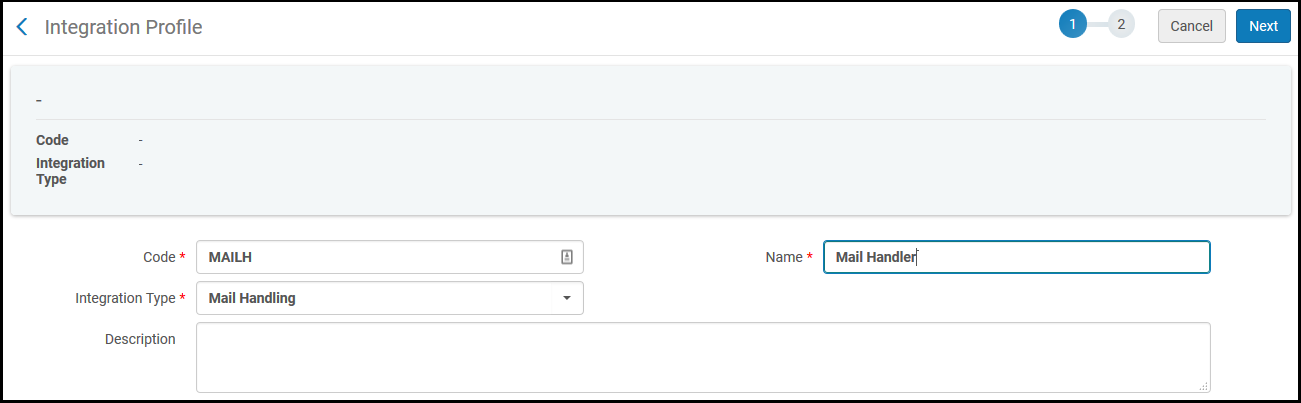 Mail Handling Integration Profile Page 1
 - Enter a unique code and name for the profile.
- In the Integration Type field, select Mail Handling.
- Select Next. The second page of the wizard appears.
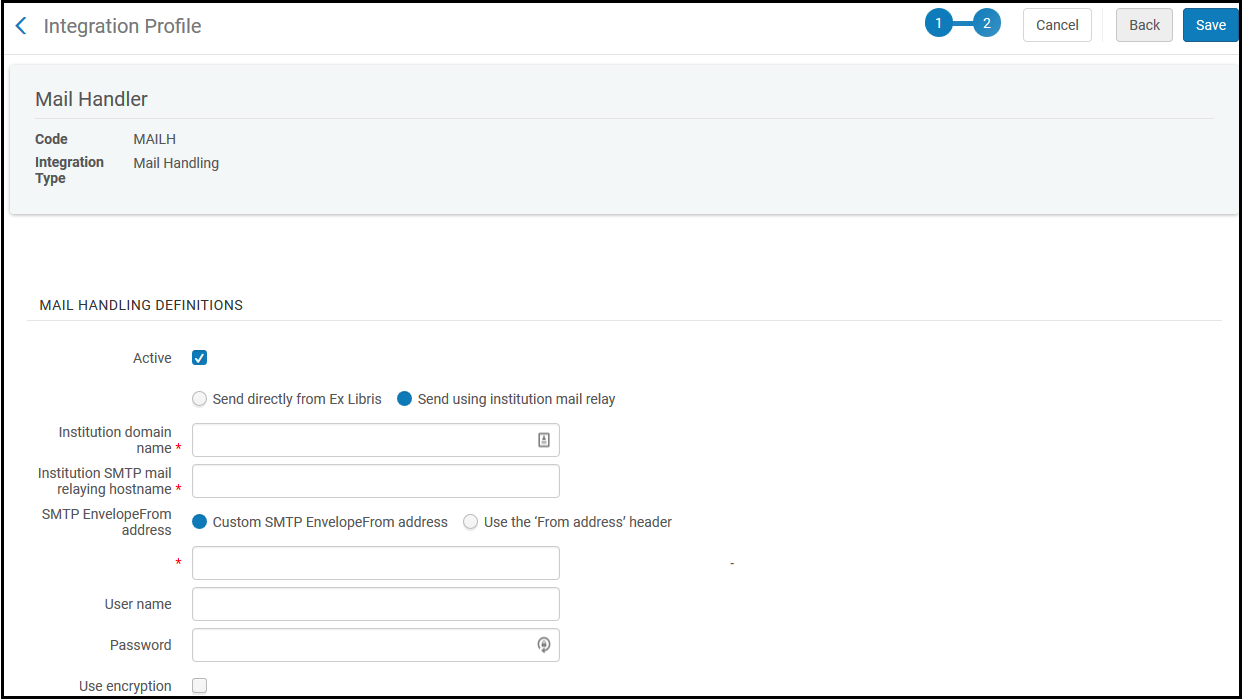 Mail Handling Integration Profile Page 2
 -
To continue to use Esploro's mail server:
-
Select Send directly from Ex Libris (selected by default).
-
Enter a valid email address for EnvelopeFrom.
-
-
To use your institution's mail relay server:
-
Select Send using institution mail relay. Several additional fields appear.
-
Enter the institution domain name. After you do this, the domain name appears after the SMTP EnvelopeFrom address field as @<domain name>. The domain name can contain up to 63 lower case alphanumeric characters, dashes -, and periods followed by a period and a two to six character lower case alphabetic top-level domain.
-
Enter the institution SMTP mail relay host name. The host name can contain lower case alphanumeric characters as well as any of the characters - ! # $ % & ' * + / = ? ^ _ ` { | } or ~ and a period.
-
Custom SMTP EnvelopeFrom address is selected by default. Enter a username of the address in the unlabeled field below this option. This sets EnvelopeFrom to <username>@<domain name>. The username can contain the same characters as the SMTP mail relay host name.
If you want, instead, that the EnvelopeFrom of each email outgoing from the institution mail relay be the same as the From: address of that email message, select Use the 'From address' header.
-
If the mail relay requires a username and password to accept email from Esploro, enter the username and password. These can be any ASCII characters.
-
If the mail relay requires encryption, select Use encryption.
Encryption port is set to 587 for you.
-
- Select Save.
Letter List
- Download the relevant example below.
- Upload it from the Letter Examples tab (see Testing Letter Examples and Viewing the Source XML).
- Select Preview from the row actions menu.
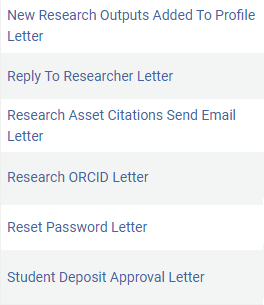
Letters for Researchers
The letters listed below can be sent by Esploro to researchers.
Some of these letters are used to send notifications to researchers for which they can opt in or out; see Configuring Researcher Details.
| Letter Name | Letter Description | Examples |
|---|---|---|
| New Research Outputs Added to Profile Letter |
This letter is sent to researchers notifying them of new assets that have been added to their Profiles. The letter includes all assets added via Smart Harvesting but also mediated and researcher deposits, i.e. it is a summary. The letter lists up to 10 approved researcher deposits and up to 10 assets added via Smart Harvesting or mediated deposits. All assets must be approved and enabled in order to display in the researcher Profile. For Smart Harvesting and Smart Expansion, the NEW ASSETS ADDED TO RESEARCHER PROFILE NOTIFICATION job must be active. The letter is sent by a scheduled job that runs weekly. When you want to start sending the letter, contact Ex Libris implementation or support (if you moved to support). You can also run the job manually (Configuration > General > Research Jobs Configuration). |
Research Assets Added To Profile Letter Example.xml |
| Reply_To_Researcher_Letter |
Reply to Researcher Letter. |
|
| Research Deposit Action Letter |
This letter is sent to researchers to inform them of a status change to a deposit they have made. It is sent, for example, when they submit a deposit to the repository or when a repository manager has approved their deposit. The following actions performed by an administrator in a deposited or approved asset trigger this email:
For information about these administrator actions, see Adding and Working with Research Deposits. For information about these notifications, see Configuring Researcher Details. For information about researchers' deposit-submission process, see Adding Output to a Profile. This letter must be enabled in order for emails to be sent via the Contact Researcher and the Reply options in the Communications tab of the Asset Details page (see Adding and Working with Research Deposits). |
Research Deposit Action Letter Example.xml |
| Researcher Approval Notification Letter |
Lists all the assets that were found by Smart Harvesting for the researcher to approve or reject. This is sent when selecting Researcher request approval (Repository > Author Matching Approval Task List). |
Researcher Approval Notification Letter Example.xml |
| Researcher Asset Page Send Email Letter |
Letter which is sent manually from the asset form in the Research Portal. For information about configuring the From address and the Subject line of the email, see Configuring the Research Portal. |
Researcher Asset Page Send Email Letter Example.xml |
| Researcher Assets Usage Statistics Letter |
It is sent to affiliated researchers with outputs that have been either viewed or downloaded in the past month. This is sent after the Research usage statistics email job has completed, or after running the job manually (Configuration > General > Research Jobs Configuration). For more information, see Viewing Scheduled Jobs. Researchers can opt in or out of this letter - see Configuring Researcher Details for details. |
Researcher Assets Usage Statistics Letter Example.xml |
| Researcher Url Identifier Notify Letter |
This letter is sent to affiliated researchers with active Profiles to notify them that their URL_identifier has been updated and their webpage URL has changed. This is sent after the URL identifier has been updated (see URL Identifier in Adding Researchers). Researchers can opt in or out of this letter - see Configuring Researcher Details for details. |
Researcher URL Identifier Notify Letter Example.xml |
| Research ORCID Letter |
Notify researchers that their assets synched with ORCID. This is sent after the Update researcher's ORCID job has completed (see Update ORCID Profile in Adding Researchers). Researchers can opt in or out of this letter - see Configuring Researcher Details for details. See ORCID in Esploro for information on working with ORCID in Esploro. |
|
| Reset Password Letter |
Generated when the researcher retrieves their password in the Profile. |
Reset Password Example.xml |
| Researcher General Notification Letter | Used by the Researcher General Notification job to send an ad hoc notification to a set of researchers; see Running Manual Jobs on Defined Sets. |
Letters for Administrators
The following table lists the letters available in Esploro for administrators.
| Letter Name | Letter Description | Examples |
|---|---|---|
| Author Matching Report Letter |
Email sent when the Author Matching job completes. It contains an attachment with the report. The letter is sent to the user configured in the page at Researchers > Author Matching Report / Update Approved Matches. |
Author Matching Report Letter Example.xml |
| Research Asset Citations Send Email Letter |
Email sent when choosing to “Export Citations” from a search results page. |
Research Asset Citations Letter Example.xml |
| Research Assign To Letter |
Letter sent to an admin once an asset is assigned to them by someone else. This requires the Send E-mail checkbox (Repository > Manage Asset Deposits > Assign to) to be enabled. |
Assign To Letter Example.xml |
| Researcher APC Request Send Email Letter |
This email is generated when errors occur for submitted APC requests. The letter is only used when the APC request is turned on (see APC Integration). The recipient of the email is the email address that is configured in the Oable APC mapping table in the Email for error messages Integration field. The content of the email is the API submission to Oable and the API response that is received from Oable. |
Researcher APC Email Letter Example.xml |
Letters for Students
The following table lists the letters available in Esploro for students.
| Letter Name | Letter Description | Examples |
|---|---|---|
| Researcher ETD Usage Statistics Letter |
It is sent to ETD authors with an output that has been either viewed or downloaded in the past month. This is sent after the Research usage statistics email job has completed, or after running the job manually (Configuration > General > Research Jobs Configuration).For more information, see Viewing Scheduled Jobs. You can opt in/out of this letter - see Configuring Researcher Notices Opt-In Letters for details. |
Researcher ETD Usage Statistics Letter Example.xml |
| Student Deposit Approval Letter |
Notify student depositor that their deposit was approved. |
Student Deposit Notification Letter Example.xml |
Additional References
- Configuring Allowed Emails
- Components/Templates to Reuse Across Letters (e.g., headers, footers, etc.)
- Ongoing Maintenance and Administration in Esploro
- Esploro Integration
- PPTX Presentation: Letter Configuration in Alma (visualizes the main concepts in Alma which are basically the same as for Esploro)