
360 Link: Administration Console -- Non-Sidebar Pages Branding Options
- Product: 360 Link
How can I customize the 360 Link results page that displays when full text is not available at my library?
While many libraries choose to display the Sidebar Helper frame when full text is available, the 360 Link results page is still relevant to the 360 Link user experience for these libraries because 1) the 360 Link results page displays when full text is not available, and 2) libraries also have an option to provide a link to a full results page from the Sidebar Helper frame. Using the Non-Sidebar Pages Branding Options page provides the opportunity to do things like provide HTML code for branding your 360 Link results page, and choose various options such as setting default values for collapsing or expanding elements of the page.
Access the Non-Sidebar Pages Branding Options page by clicking on the Link 2.0 tab in the 360 Link Administration Console:

Branding and Appearance
360 Link offers tremendous flexibility in branding and customizing results pages. Branding options range from simple header and footer branding and changing of link colors to the ability to enter complex coding to override default settings. Most text on the 360 Link results pages can be customized using the Custom Text settings in the administration console.
If the 360 Link user experience on a mobile device is an important consideration for your library, and the HTML customization you provide does not have a mobile-friendly responsive design, the Mobile Settings page in the administration console provides a solution by offering you separate header and footer HTML that will automatically replace the main branding options for users on small screens.
To begin customizing your branding options, click Edit in the upper-right corner of the page. Changes to the branding of your 360 Link pages will not be visible to users until the Daily Profile Data Refresh has completed; see below for information about previewing your changes.
NOTE: If you are editing or replacing code, we recommend saving a copy of your existing code outside of the administration console in case you want to revert back to the code after you have saved changes.
HTML Fields
The first three fields within Branding and Appearance are for entering HTML for the 360 Link page header and footer:
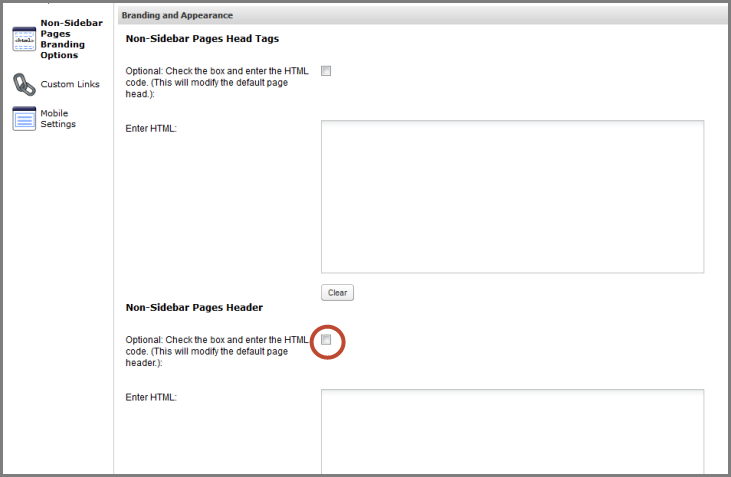
- Non-Sidebar Pages Head Tags
- Non-Sidebar Pages Header
- Non-Sidebar Pages Footer
- If your library currently uses legacy 360 Link and the Branding Options and Advanced Options pages in the administration console contain Header and Page Head code, you can copy and paste, however it is important to preview your changes because HTML customization in legacy 360 Link often times involved code needed in order to override limitations of those pages. Pasting such code into the enhanced 360 Link can have a negative impact given the increased flexibility and fresh design principles inherent in the new user interface. You may wish to take this as an opportunity to update your branding.
Some additional notes about entering HTML for your header and footer:
- Images: ProQuest does not host your images on our servers. For proper display, please include fully qualified image URLs in the HTML you enter. For example, use <img src="http://www.yourlibrary.edu/images/logo.jpg" /> instead of <img src="/images/logo.jpg" />.
- Responsive CSS: If you enter code that does not include responsive CSS, consider the Mobile Settings page in the administration console as it offers separate header and footer HTML for users on small screens.
- Reference External JavaScript: You can reference a JavaScript file either by doing so in the HTML fields on this admin page, or by using the Reference External JavaScript section of the Link Activation and Configuration page.
Click Save when finished, or click Clear to remove all HTML from the field. Changes will not be visible to users until the Daily Profile Data Refresh has completed; to see how your changes will look without having to wait, click Preview.
- See 360 Link: Previewing Changes You Make in the New Interface for additional information about previewing changes.
- For more information about the daily profile data refresh:
- Note that if you have edited or replaced code and you want that code to continue displaying to your users after the daily profile data refresh, remember to update the HTML field with the copy of your existing code that you saved outside of the administration console.
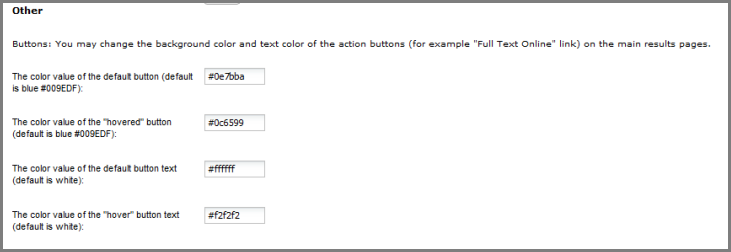
Button and Hyperlink Colors
Colors can be customized for:
- Button background color (default is blue)
- Button background color when you mouse over it (default is dark blue)
- Button text color (default is white)
- Button text color when you mouse over it (default is light gray)
Non-Sidebar Page Options
Choose to display citations in APA Extended style:

Or display the default, multiple line formatting:
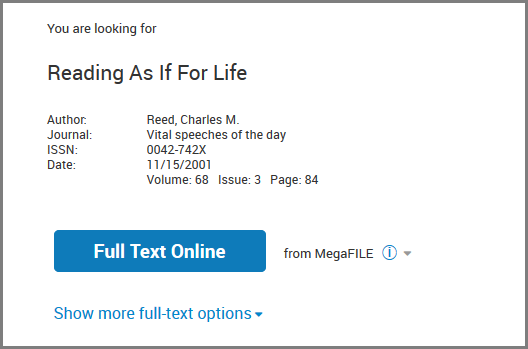
Expand "more full-text options" section by default.
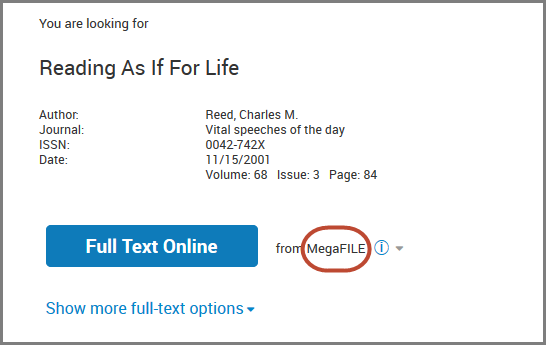
When full text is available in multiple resources, the default setting is to display all resources only when the user clicks the Show more full-text options link:
Select the checkbox to automatically display all resources:
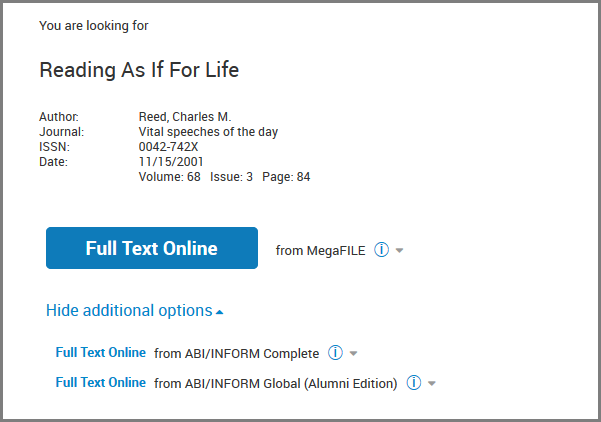
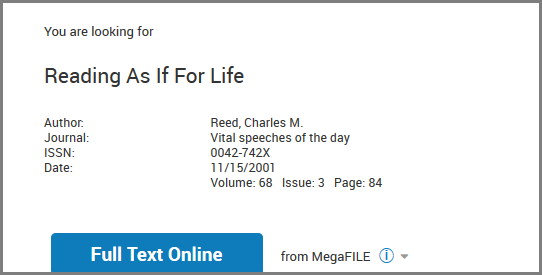
When full text is available the database name is displayed as text only:
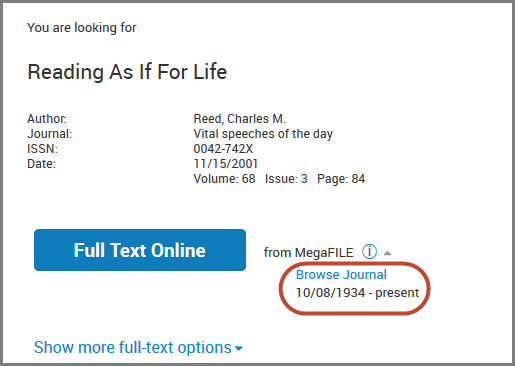
Expand additional resource information by default.
The default setting is to display the database name with an option on the right side of the database name to click and view more details such the journal-level link and coverage dates (see screenshot above).
Selecting the checkbox will display the additional resource information automatically:
If your library has created custom links, those that display in the Still Need Help? section towards the bottom of the page can display automatically, or only when the user clicks the Still Need Help link. By default the links display automatically.
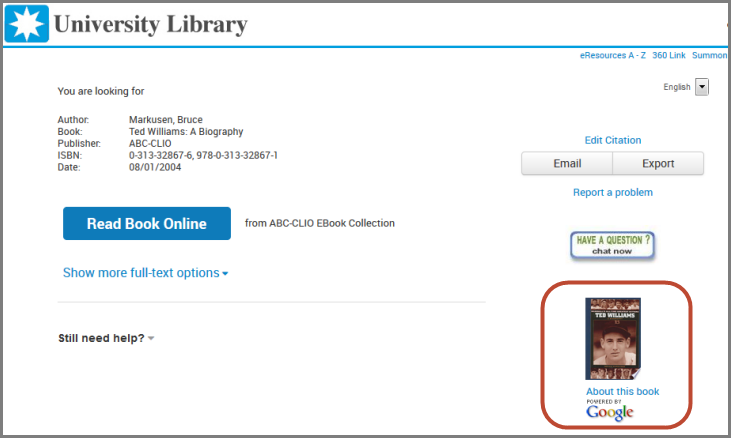
Display links to Google Books previews when links are available
Choose to display a Google Books "About this book" link when available. If your library activates Syndetics Solutions cover images in addition to Google Book previews, the Google Book previews will take precedence.
Google Books "About this book" image and link:
- Date Created: 12-Feb-2015
- Last Edited Date: 24-Jul-2015
- Old Article Number: 12197